RSS

Blog posts of '2025' 'December'

Nilou Guide: The Definitive Build & Analysis

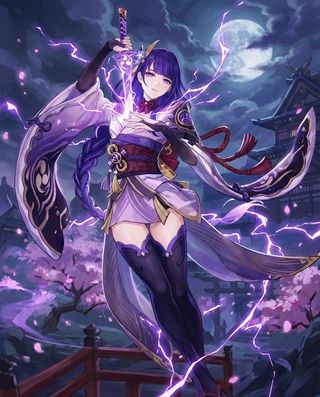
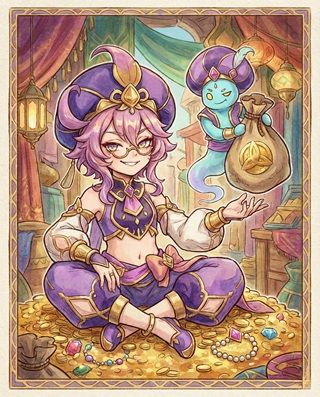
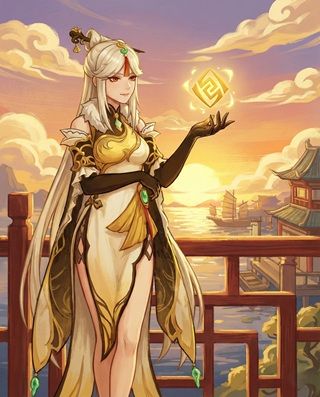
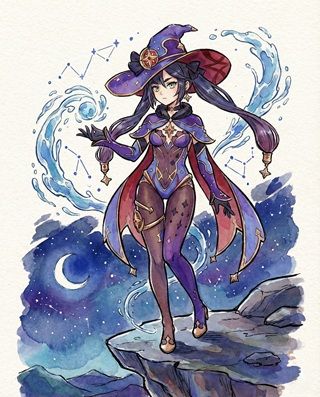
Nilou, the Star of the Zubayr Theater

Nilou Genshin Impact Character Art
Rarity (5-Star)
Element Hydro
Weapon Sword
Best Role Bloom Enabler / Tanky Support
Stat Priority HP% > EM > ER > Flat HP
Tier SS (In Bloom Teams)

Nilou is the Star of the Zubayr Theater and the architect of the "Bountiful Core" playstyle. By restricting your team to only Hydro and Dendro characters, she transforms standard Dendro Cores into rapid-detonating nukes that deal massive AoE damage. She is the queen of AoE content.


Pros

  • Unrivaled AoE damage with minimal investment.
  • Extremely tanky (Stacking HP makes her hard to kill).
  • Very F2P friendly (Works with Barbara/Collei/Dendro MC).
  • Bountiful Cores ignore enemy shields effectively.
  • Easy to play (Skill > Swap).

Cons

  • Strict Team Restriction: Passive fails if you bring anything other than Hydro/Dendro.
  • Self-Damage from cores requires a strong healer.
  • Poor performance in single-target scenarios (Bosses) without C2/Signature.
  • Weak against Cryo Shields.

Quick Guide (TL;DR)

If you don't have time for the math, here is the cheat sheet.

  • Best Artifact: 2pc Vourukasha + 2pc Tenacity (Max HP).
  • Alt Artifact: 4pc Flower of Paradise Lost (Only if Nilou owns the blooms, which is rare).
  • Best Weapon: Key of Khaj-Nisut (Signature - Massive HP & EM Buff).
  • F2P Weapon: Iron Sting (EM) or Fleuve Cendre Ferryman (ER).
  • Support Weapon: Sacrificial Sword (Skill Reset) or Favonius Sword.
  • Main Stats: SANDS: HP% | GOBLET: HP% | CIRCLET: HP%.
  • Talent Priority: Elemental Skill > Elemental Burst > Normal Attack (Ignore).
  • Top Team: Nilou + Nahida + Kokomi + Collei (Premium Bloom).
Pro Tip: E-E-E vs E-N-N:
• Use E-E-E (Whirling Steps) to create a water ring that follows you. This applies Hydro off-field. Best for Support Nilou.
• Use E-N-N (Sword Dance) to infuse attacks with Hydro. Only use this if you are driving on-field with Nilou (C6 or specific teams).

Need Primogems for Key of Khaj-Nisut?

Get Genesis Crystals at a discounted price with instant delivery.

Top Up Secure & Fast via GameCharge

Ascension & Talent Materials

Category Material Name Source
Ascension Padisarah Sumeru City / Vanarana
Boss Drop Perpetual Caliber Aeonblight Drake (Sumeru)
Talent Books Teachings of Praxis Steeple of Ignorance (Wed/Sat/Sun)
Common Mob Fungal Spores Fungi (Do NOT use Pyro/Electro on them to get Spores)

Talent Breakdown & Mechanics

Passive: Court of Dancing Petals

  • The Restriction: This passive ONLY activates if your party contains Hydro and Dendro characters, and NO other elements.
  • Bountiful Cores: Dendro Cores created by your team will turn into "Bountiful Cores."
    • Explode instantly (no wait time).
    • Larger Area of Effect (AoE).
    • Cannot be triggered by Electro/Pyro (Hyperbloom/Burgeon impossible).
  • Golden Chalice: Increases Bountiful Core DMG by 9% for every 1,000 HP Nilou has above 30,000 HP. Capped at 400% (requires ~74,444 HP).

Elemental Skill: Dance of Haftkarsvar

  • Pirouette: Enters the Pirouette state. The 3rd dance step determines the effect.
  • Whirling Steps (Skill x3): Creates a Tranquility Aura that follows the active character and applies Wet status to enemies. Use this for off-field Nilou.
  • Sword Dance (Attack x3): Unleashes a Luminous Illusion. Used for on-field DPS Nilou (C6).

Elemental Burst: Dance of Abzendegi: Distant Dreams

  • Cost: 70 Energy | Cooldown: 18s
  • The Nuke: Deals AoE Hydro DMG based on Max HP and applies a Lingering Aeon mark.
  • Application: Marks explode after a delay, dealing Hydro DMG again. Good for applying Hydro to large groups.

Talent Priority Order:

  1. Elemental Skill (Level 1+) - Only for personal damage (HP scaling is innate).
  2. Elemental Burst (Level 8) - Good nuke.
  3. Normal Attack (Level 1) - Ignore.

Stat Requirements & ER Thresholds

Your goal is 74,444 HP to max out her passive buff. Burst is secondary.

Team Context Role ER Requirement
Double Hydro (Standard) Off-Field 140% - 160%
Triple Hydro (Kokomi/Yelan) Off-Field 120% - 130%
Any No Burst (Pure E Bot) 0%

Substat Priority:

  1. HP% (Priority #1, #2, and #3)
  2. Flat HP
  3. Elemental Mastery (Sometimes she steals ownership of blooms)
  4. Energy Recharge (If you want to burst)

Best Artifacts Comparison

Set Name Role Reasoning
2pc Vourukasha / 2pc Tenacity BiS Provides +40% HP total. This is the absolute best setup to reach the 74,444 HP cap for maximum bloom damage.
4pc Flower of Paradise Lost Trigger Nilou Only useful if you run a team where Nilou herself triggers the blooms (e.g., 3 Hydro 1 Dendro). Rare and harder to build HP.
4pc Deepwood Memories Support If no one else in the team holds Deepwood, Nilou can carry it to shred Dendro RES, but she loses HP% from the 2pc sets.

Weapon Rankings

Weapon Type Performance Notes
Key of Khaj-Nisut HP% S+ Signature. Massive 86% HP. Converts HP to EM for the *entire team*. Essential for hitting the HP cap and buffing reactions.
Dockhand's Assistant HP% S (4-Star) The only 4-star HP sword. Provides decent HP and EM. Gacha only.
Sacrificial Sword ER% A (Utility) Resets skill cooldown, useful if you mess up the E-E-E rotation or need more particles.
Iron Sting / Xiphos EM B EM stat sticks. Better than nothing, but HP% is far more valuable.

Constellation Value

Nilou is fully functional at C0. C2 is her biggest team damage spike.

  • C1: Dance of the Waning Moon - (QoL) Enhances Luminous Illusion DMG by 65% and extends Tranquility Aura by 6s. Great for 100% Hydro uptime.
  • C2: The Starry Skies Their Flowers Rain - (Shred) Dealing Hydro DMG shreds Hydro RES by 35%. Dealing Bloom DMG shreds Dendro RES by 35%. Massive team DPS increase.
  • C6: Frostbreaker's Melody - (Main DPS) Converts HP to Crit Rate (Max 30%) and Crit DMG (Max 60%). Allows you to play On-Field DPS Nilou with Vape or Mono Hydro.

Verdict: C0 is enough for Bloom. C2 is the whale target.

Top Team Compositions

1. Premium Bloom

  • Hydro: Nilou
  • Hydro: Kokomi (Driver/Healer)
  • Dendro: Nahida
  • Dendro/Hydro: Collei / Baizhu / Yelan

Why it works: Kokomi drives the reaction while healing through the massive self-damage of Bountiful Cores. Nahida provides Dendro app and EM share.

2. F2P Bloom

  • Hydro: Nilou
  • Hydro: Barbara (Healer)
  • Dendro: Dendro Traveler
  • Dendro: Collei

Why it works: Uses all free characters. Barbara heals. Collei and DMC provide Dendro application. Still clears Abyss 12 easily due to high floor of Bloom damage.

Rotations & Combos

Standard Bloom Rotation:
Nilou E E E (Aura) > Nahida E Q > Collei E Q > Kokomi E -> Normal Attacks

Tip: You must complete the 3-step E dance with Nilou to activate the Bountiful Core passive for 30s. If you swap early, the passive does not activate.

Frequently Asked Questions

Can I run Kazuha/Venti?
No. Including Anemo breaks her passive, reverting Bountiful Cores to normal Dendro Cores, reducing damage and AoE significantly. You must stick to Hydro/Dendro only.

Do I need her signature weapon?
It is a huge upgrade (approx 20% team DPS increase) because HP swords are rare. However, the team is so strong at baseline that you can easily clear Abyss with Iron Sting or Favonius.

Data Source: KQM Standards. Last Updated: December 2025

Kokomi Guide: The Definitive Build & Analysis

Kokomi, the Divine Priestess of Watatsumi Island

Sangonomiya Kokomi Genshin Impact Character Art
Rarity (5-Star)
Element Hydro
Weapon Catalyst
Best Role Healer / Hydro Applicator
Stat Priority HP% > ER > EM (Bloom)
Tier SS (Bloom/Freeze Core)

Sangonomiya Kokomi is the Divine Priestess of Watatsumi Island and the queen of comfort. With her ability to heal while applying Hydro in a massive AoE, she anchors the strongest Freeze teams and is indispensable for Nilou Bloom teams. She trades critical hits for consistency and immortality.


Pros

  • Best off-field AoE Hydro application (Jellyfish).
  • Massive healing output (can facetank almost anything).
  • Perfect holder for Thrilling Tales (TTDS) and Tenacity.
  • Essential for Nilou Bloom teams (high Hydro app + healing).
  • Extremely easy to build (HP% gear, no Crit).

Cons

  • Cannot CRIT (-100% Crit Rate passive).
  • Jellyfish is stationary (can't move it like Fischl's Oz).
  • Energy hungry if played as solo Hydro off-field.
  • Burst must be used to refresh Jellyfish duration (timing is key).

Quick Guide (TL;DR)

If you don't have time for the math, here is the cheat sheet.

  • Best Artifact (Healer/Support): 4pc Tenacity of the Millelith (Freeze) or 4pc Ocean-Hued Clam (Driver).
  • Best Artifact (Bloom): 4pc Flower of Paradise Lost or 4pc Gilded Dreams (Full EM).
  • Best Weapon: Thrilling Tales (TTDS) (Support King).
  • F2P Weapon: Prototype Amber (Energy & Healing).
  • Bloom Weapon: Sacrificial Fragments (EM & Reset).
  • Main Stats (General): SANDS: HP% / ER | GOBLET: HP% / Hydro | CIRCLET: Healing Bonus.
  • Talent Priority: Elemental Skill > Elemental Burst > Normal Attack.
  • Top Team: Kokomi + Ayaka + Shenhe + Kazuha (Premium Freeze).
Pro Tip: Jellyfish Refresh: Kokomi's Elemental Skill has a 12s duration and 20s cooldown. However, using her Burst (Q) resets the duration of the *existing* Jellyfish on field. Cast Q right before the Jellyfish expires to maintain 100% uptime.

Need Primogems for Everlasting Moonglow?

Get Genesis Crystals at a discounted price with instant delivery.

Top Up Secure & Fast via GameCharge

Ascension & Talent Materials

Category Material Name Source
Ascension Sango Pearl Watatsumi Island (Inazuma)
Boss Drop Dew of Repudiation Hydro Hypostasis (Watatsumi)
Talent Books Teachings of Transience Violet Court (Mon/Thu/Sun)
Common Mob Spectral Core Specters (Inazuma)

Talent Breakdown & Mechanics

Elemental Skill: Kurage's Oath

  • Bake-Kurage: Summons a jellyfish that heals the active character and deals AoE Hydro DMG every 2 seconds.
  • Hydro Application: The jellyfish applies Hydro every tick (no ICD). This makes it the best off-field Hydro source for Freeze teams.
  • Particle Gen: Generates particles periodically (RNG based), which can be inconsistent.
  • Self-Wet: Applies Wet status to Kokomi only on cast. Unlike Barbara, she doesn't keep wetting you, making her safer against Cryo enemies.

Elemental Burst: Nereid's Ascension

  • Cost: 70 Energy | Cooldown: 18s | Duration: 10s
  • Ceremonial Garment: Increases Normal/Charged/Skill DMG based on Max HP.
  • Team Healing: Normal/Charged attacks heal the entire party.
  • Duration Reset: Casting Burst resets the duration of an active Jellyfish. This allows for 100% uptime if timed correctly.
  • Water Walking: Allows Kokomi to walk on water for the duration (Exploration gimmick).

Passive: Flawless Strategy

  • The Trade-off: Kokomi gains a 25% Healing Bonus, but her Crit Rate is decreased by 100%. This effectively means she cannot crit. Do not build Crit Rate/DMG on her.

Talent Priority Order:

  1. Elemental Skill (Level 10) - Healing and Off-field DMG.
  2. Elemental Burst (Level 9) - For On-field Driver mode.
  3. Normal Attack (Level 6) - Only if driving.

Stat Requirements & ER Thresholds

Kokomi needs ER to refresh her Jellyfish via Burst. If you miss the refresh, her value drops significantly.

Team Context Role ER Requirement
Freeze (Ayaka/Ganyu) Off-Field Support 200% - 220%
Taser / Mono Hydro On-Field Driver 160% - 180%
Nilou Bloom Reaction Trigger 160% (Sac Frags Helps)

Substat Priority (General):

  1. Energy Recharge (Priority #1 for Jellyfish uptime)
  2. HP% (Scaling)
  3. Flat HP
  4. Elemental Mastery (Bonus for reaction teams)

Best Artifacts Comparison

Set Name Role Reasoning
4pc Tenacity of the Millelith BiS Support Her Jellyfish hits every 2s, refreshing the 20% ATK buff perfectly. Best for Ayaka Freeze teams.
4pc Ocean-Hued Clam On-Field Driver Converts her massive healing into Physical DMG bubbles (30k pops). Best if she is attacking on-field or in teams that don't need ATK buffs (like Neuvillette).
4pc Flower of Paradise Lost Bloom Trigger Maximizes Bloom seed damage. Only use in Nilou teams where Kokomi builds full EM.

Weapon Rankings

Weapon Type Performance Notes
Thrilling Tales (TTDS) HP% S+ (Support) 3-Star Weapon. Grants 48% ATK to your DPS. HP substat helps healing. Best for Freeze teams.
Prototype Amber HP% S (F2P / Energy) Craftable. Refunds energy after burst (helps uptime) and heals the team. Best for Clam/Driver builds.
Everlasting Moonglow HP% A (Signature) Her signature weapon. Looks pretty, gives Healing Bonus and Energy. Not worth pulling over TTDS/Amber efficiency usually.
Sacrificial Fragments EM A (Bloom) High EM for Bloom teams. Allows you to reposition the Jellyfish if you mess up.

Constellation Value

Kokomi is fully complete at C0. Her constellations are generally for DPS increase or comfort.

  • C1: At Water's Edge - (Damage) Adds a swimming fish to her final Normal Attack string that deals 30% HP damage. Good for on-field driver damage, but requires completing the NA combo.
  • C4: The Moon Overlooks the Waters - (Energy) Restores energy and increases Attack Speed during Burst. Helps with ER requirements.
  • C6: Sango Isshin - (Damage Buff) Grants 40% Hydro DMG Bonus when healing allies >80% HP. Turns her into a potent Hydro DPS.

Verdict: C0 is perfect. Constellations are not recommended unless you main her on-field.

Top Team Compositions

1. Shinra Tensei (Premium Freeze)

  • Main DPS: Ayaka / Ganyu
  • Support: Shenhe / Rosaria
  • Anemo: Kazuha
  • Hydro: Kokomi (Tenacity + TTDS)

Why it works: Kokomi consolidates Healing and Hydro application. With Tenacity and TTDS, she gives Ayaka a massive 68% ATK buff. Her Hydro app is AoE, freezing entire groups.

2. Nilou Bloom

  • Core: Nilou
  • Driver: Kokomi (Full EM)
  • Dendro: Nahida
  • Flex: Collei / Dendro MC

Why it works: Kokomi has high HP, allowing her to tank Bountiful Core explosions. She applies Hydro fast enough to create cores constantly. In this team, she is built with EM to maximize reaction damage.

Rotations & Combos

Freeze Rotation (Jellyfish Refresh):
Kokomi E > Supports (Kazuha/Shenhe) > Kokomi Q (Refreshes E duration) > Ayaka Q

Tip: If using TTDS, make sure you swap directly from Kokomi to your Main DPS (Ayaka) to pass the ATK buff. Do not switch to Kazuha in between.

Frequently Asked Questions

Mona vs. Kokomi?
Mona offers higher burst damage (Omen buff) but no healing and shorter Hydro uptime. Kokomi offers 100% Hydro uptime, massive healing, and Tenacity buff. Kokomi is generally comfier and more consistent.

Why doesn't she Crit?
Her passive reduces Crit Rate by 100%. In exchange, she gets a Healing Bonus. Building Crit on her is mathematically possible but highly inefficient. Stick to HP and Healing Bonus.

Data Source: KQM Standards. Last Updated: December 2025

Yelan Guide: The Definitive Build & Analysis

Yelan, the enigmatic owner of the Yanshang Teahouse

Yelan Genshin Impact Character Art
Rarity (5-Star)
Element Hydro
Weapon Bow
Best Role Off-Field Sub-DPS
Stat Priority CRIT > HP% > ER
Tier SS+ (Universal Sub-DPS)

Yelan is a mysterious intelligence agent in Liyue. Often called "Hydro 5-Star Xingqiu," she trades defensive utility for significantly higher personal damage and a ramping DMG buff for the active character. Her HP scaling makes her tanky while dealing massive damage.


Pros

  • High off-field Hydro DMG (Exquisite Throw).
  • Ramping DMG% Buff for active character (up to 50%).
  • Excellent mobility with Elemental Skill (Speedrunning).
  • Flexible team slots (Double Hydro, Hyperbloom, Vape).
  • Scales purely on HP (Tanky and easy to build).

Cons

  • High Energy Recharge requirements at C0 (Solo Hydro).
  • Lower Hydro application than C6 Xingqiu (until C2).
  • Skill can get stuck on terrain occasionally.

Quick Guide (TL;DR)

If you don't have time for the math, here is the cheat sheet.

  • Best Artifact: 4pc Emblem of Severed Fate (Uncontested BiS).
  • Alt Artifact: 2pc HP% / 2pc Hydro DMG (Transition).
  • Best Weapon: Aqua Simulacra (Signature - Massive Crit DMG).
  • Alt Weapon: Elegy for the End (Support/Team Buff).
  • F2P Weapon: Favonius Warbow (Best for Energy consistency).
  • Main Stats: SANDS: HP% or ER | GOBLET: Hydro DMG | CIRCLET: CRIT.
  • Talent Priority: Elemental Burst > Elemental Skill > Normal Attack (Ignore).
  • Top Team: Yelan + Hu Tao + Xingqiu + Zhongli (Double Hydro Vape).
Pro Tip: "E-Q" vs "Q-E": Always try to catch your own particles. Cast Skill (E) and then immediately cast Burst (Q) if your ping allows, or Q then E. Catching particles is vital for uptime. In Double Hydro, funnel particles to whoever needs energy more.

Need Primogems for Aqua Simulacra?

Get Genesis Crystals at a discounted price with instant delivery.

Top Up Secure & Fast via GameCharge

Ascension & Talent Materials

Category Material Name Source
Ascension Starconch Liyue Beaches (Yaoguang Shoal)
Boss Drop Runic Fang Ruin Serpent (The Chasm)
Talent Books Teachings of Prosperity Taishan Mansion (Mon/Thu/Sun)
Common Mob Insignia Fatui Skirmishers / Agents

Talent Breakdown & Mechanics

Elemental Skill: Lingering Lifeline

  • Tap: Dashes forward.
  • Hold: Enters "Lifeline" sprint. Moves fast and marks enemies. Upon ending, deals Hydro DMG.
  • Breakthrough Barb: If she has 3 stacks (gained by hitting enemies with Skill), she fires a special charged shot instantly.
  • Utility: Best skill for overworld exploration speed. Generates 4 particles.

Elemental Burst: Depth-Clarion Dice

  • Cost: 70 Energy | Cooldown: 18s | Duration: 15s
  • Exquisite Throw: Summons a die that follows the active character. When the active character performs a Normal Attack (or Yelan's E hits), the die fires a coordinated Hydro attack.
  • Scaling: Damage scales purely on Max HP. ATK is useless.
  • Hydro Application: Fires 3 waves of Hydro. Good for single-target Vaporize (Hu Tao/Yoimiya).

Passive: Adapt With Ease

  • The Ramping Buff: While the Burst is active, the active character gains DMG Bonus that increases over time (1% to 50%).
  • Strategy: Use Yelan's Burst before switching to your Main DPS to start the ramp-up. It averages around ~30% DMG Bonus for your carry.

Talent Priority Order:

  1. Elemental Burst (Level 10) - Primary damage source.
  2. Elemental Skill (Level 8) - Good nuke damage.
  3. Normal Attack (Level 1) - Ignore unless C6.

Stat Requirements & ER Thresholds

Yelan's damage scales on HP, but if you don't have enough ER to burst, she is useless.

Team Context Constellation ER Requirement (Favonius) ER Requirement (Aqua)
Solo Hydro C0 210% - 240% 250%+
Double Hydro (Xingqiu) C0 160% - 180% 180% - 200%
Solo Hydro C1 160% - 180% 180% - 200%

Substat Priority:

  1. Energy Recharge (Until requirement met - critical)
  2. CRIT Rate / CRIT DMG (Target 70/160+)
  3. HP% (Increases all damage)
  4. Flat HP

Best Artifacts Comparison

Set Name Role Reasoning
4pc Emblem of Severed Fate BiS Converts Energy Recharge into Burst DMG. Since Yelan needs lots of ER, this set gives the highest damage return efficiently.
2pc HP / 2pc Hydro Transitional Good if you have god-tier substats. Mix and match Tenacity/Vourukasha (HP) with Heart of Depth/Nymph (Hydro).
4pc Noblesse Oblige Pure Support Use only if no one else in the team holds it. Yelan loses personal damage, but buffs team ATK.

Weapon Rankings

Weapon Type Performance Notes
Aqua Simulacra CRIT DMG S+ Signature. Massive 88% Crit DMG and HP boost. Increases DMG when enemies are close. Requires ER Sands in most teams.
Favonius Warbow ER% S (Comfort) The premier F2P option. High ER (61%) and white particles for the team. Often feels better than Aqua at C0 due to energy comfort.
Elegy for the End ER% S (Support) Best for reaction teams (Hu Tao/Cyno). Buffs team EM and ATK. Yelan loses personal damage but team damage increases.
The Stringless EM A (Damage) Passive increases Burst DMG significantly. Good for Vaporize nuke builds, but makes ER management very hard.

Constellation Value

Yelan is a complete unit at C0, but C1 and C2 solve her biggest issues.

  • C1: Enter the Plotters - (Energy) Adds 1 charge to Elemental Skill. Generates more particles and improves exploration speed. Reduces ER needs by ~30%.
  • C2: Taking All Comers - (Hydro App) Fires an extra water arrow every 1.8s dealing 14% Max HP. Increases Hydro application enough to solo sustain Hu Tao Vape (replacing Xingqiu).
  • C6: Winner Takes All - (Main DPS) After Burst, her first 5 Normal Attacks become special "Breakthrough Barbs" dealing massive damage. Turns Yelan into a front-loaded speedrun carry.

Verdict: C1 is great for QoL. C2 is the meta stopping point.

Top Team Compositions

1. Double Hydro (Hu Tao / Yoimiya)

  • Main DPS: Hu Tao / Yoimiya
  • Sub-DPS 1: Yelan
  • Sub-DPS 2: Xingqiu
  • Shield: Zhongli

Why it works: Hydro Resonance gives +25% HP, buffing both Yelan and Hu Tao. Xingqiu shreds Hydro RES for Yelan. Yelan buffs DMG for Hu Tao. Infinite Hydro application ensures every hit Vapes.

2. Hyperbloom (Alhaitham / Cyno)

  • Driver: Alhaitham / Nahida
  • Hydro: Yelan
  • Trigger: Kuki Shinobu (EM)
  • Flex: Baizhu / Zhongli

Why it works: Yelan provides Hydro for blooms and a ramping DMG buff for Alhaitham's spread damage. Her single-target hydro is sufficient for quickbloom teams.

Rotations & Combos

Standard Support Rotation:
Yelan E Q > N1 (Normal Attack to proc Burst/Favonius) > Swap

Tip: Always weave a Normal Attack (N1) between her Skill and Burst to trigger a wave of dice and potentially proc Favonius Warbow crits for extra energy.

Frequently Asked Questions

Yelan vs. Xingqiu?
Xingqiu offers defensive utility (damage reduction, interrupt resist) and slightly better Hydro application (C6). Yelan offers higher damage and buffs. Use Xingqiu if you die easily; use Yelan if you want bigger numbers.

Should I level Normal Attack?
No. Unless you are C6, her normal attack deals physical damage scaling on ATK, which is useless for her. Her Charged Shot (Breakthrough Barb) scales on HP but is rarely used in rotation.

Data Source: KQM Standards. Last Updated: December 2025

Neuvillette Guide: The Definitive Build & Analysis

Neuvillette, the Iudex of Fontaine

Neuvillette Genshin Impact Character Art
Rarity (5-Star)
Element Hydro
Weapon Catalyst
Best Role On-Field Hypercarry
Stat Priority HP > CRIT > ER
Tier SS+ (Top DPS)

Neuvillette is the Iudex of Fontaine and arguably the strongest damage dealer in the game. He obliterates enemies with his majestic "Equitable Judgment" charged attacks (a giant hydro laser) which drain his HP but deal massive area damage scaling purely off his Max HP.


Pros

  • Unrivaled AoE and single-target damage output.
  • Can move and levitate while attacking (Spin-to-Win).
  • Self-sustaining (heals himself massively).
  • Not reliant on Bennett or ATK buffers (Pure HP scaling).
  • Works in almost any team (Hypercarry, Bloom, Taser, Vape).

Cons

  • C0 has zero resistance to interruption (needs a shield).
  • C0 requires 3 different elemental reactions for max damage.
  • Charged Attack takes time to charge without Droplets.

Quick Guide (TL;DR)

If you don't have time for the math, here is the cheat sheet.

  • Best Artifact: 4pc Marechaussee Hunter (Uncontested BiS).
  • Alt Artifact: 4pc Heart of Depth or 2pc HP / 2pc Hydro.
  • Best Weapon: Tome of the Eternal Flow (Signature).
  • Alt Weapon: Sacrificial Jade (Battle Pass - Extremely strong).
  • F2P Weapon: Prototype Amber (Craftable - BiS F2P).
  • Main Stats: SANDS: HP% | GOBLET: Hydro DMG or HP% | CIRCLET: CRIT DMG.
  • Talent Priority: Normal Attack > Elemental Burst > Elemental Skill.
  • Top Team: Neuvillette + Furina + Kazuha + Baizhu/Zhongli.
Pro Tip: Spin-to-Win: While charging his laser beam, you can increase your mouse DPI (or camera sensitivity) to spin rapidly, hitting enemies in a 360-degree radius. This deals damage to everything around you instantly, though it's mostly for fun or clearing spread-out mobs.

Need Primogems for C1 Neuvillette?

Get Genesis Crystals at a discounted price with instant delivery.

Top Up Secure & Fast via GameCharge

Ascension & Talent Materials

Category Material Name Source
Ascension Lumitoile Liffey Region (Fontaine underwater)
Boss Drop Fontemer Unihorn Millennial Pearl Seahorse (Fontaine)
Talent Books Teachings of Equity Pale Forgotten Glory (Mon/Thu/Sun)
Common Mob Transoceanic Pearl Fontemer Aberrants (Crabs/Seahorses)

Talent Breakdown & Mechanics

Normal Attack: As Water Seeks Equilibrium

  • Charged Attack: Equitable Judgment: This is 95% of his kit. Charging up releases a massive Hydro beam.
  • Sourcewater Droplets: Charging the attack normally takes 4 seconds. However, if you absorb 3 Sourcewater Droplets (created by Skill/Burst), the charge becomes instant.
  • HP Mechanic: The beam drains his HP continuously (down to 50%). Absorbing Droplets heals him.

Elemental Skill: O Tears, I Shall Repay

  • Raging Waterfall: Deals AoE Hydro DMG based on Max HP.
  • Droplets: Generates 3 Sourcewater Droplets. Essential for one instant Charged Attack.
  • Spiritbreath Thorn: Deals aligned Pneuma damage periodically.

Elemental Burst: O Tides, I Have Returned

  • Cost: 70 Energy | Cooldown: 18s
  • The Wave: Unleashes a massive rupturing wave dealing AoE Hydro DMG based on Max HP.
  • Droplet Generator: Creates 6 Sourcewater Droplets. This allows for 2 consecutive instant Charged Attacks.

Passive: Heir to the Ancient Sea's Authority

  • Draconic Stacks: When a party member triggers a Hydro-related reaction (Vaporize, Electro-Charged, Bloom, Swirl, Crystallize), Neuvillette gains a stack of "Past Draconic Glories" for 30s.
  • The Multiplier:
    • 1 Stack: 110% CA Damage
    • 2 Stacks: 125% CA Damage
    • 3 Stacks: 160% CA Damage
  • Implication: At C0, you need 3 different elements (e.g., Hydro + Electro + Anemo + Dendro/Geo) to max this buff. At C1, you start with 1 stack, making team building much easier.

Talent Priority Order:

  1. Normal Attack (Level 10) - The Laser Beam scaling. Max this first.
  2. Elemental Burst (Level 8) - Droplet generation and damage.
  3. Elemental Skill (Level 8) - Droplet generation.

Stat Requirements & ER Thresholds

Neuvillette needs HP for damage and ER to ensure he has droplets from his Burst every rotation.

Team Context Weapon ER Requirement
Solo Hydro (No Furina) Tome / Jade 160% - 170%
Solo Hydro Prototype Amber 130% - 140%
Double Hydro (w/ Furina) Prototype Amber 100% - 110%

Substat Priority:

  1. HP% (Aim for 35k - 40k HP)
  2. CRIT DMG (Ascension + MH set gives tons of Rate)
  3. CRIT Rate (Cap at 64% due to MH set passive)
  4. Energy Recharge (Until requirement met)

Best Artifacts Comparison

Set Name Role Reasoning
4pc Marechaussee Hunter BiS Gives 15% Charged Attack DMG and 36% Crit Rate because he constantly drains/heals his own HP. It is mathematically far superior to any other set.
4pc Heart of Depth Alternative Solid option if you already have it farmed. Gives Hydro DMG and CA DMG bonus. About 10-15% worse than MH.
2pc HP / 2pc Hydro Transition Good for reaching stat thresholds while farming for MH.

Weapon Rankings

Weapon Type Performance Notes
Tome of the Eternal Flow CRIT DMG S+ Signature. 88% Crit DMG + HP + CA DMG Buff + Energy. The complete package.
Sacrificial Jade CRIT Rate S (R5) Battle Pass Weapon. At R5, it is extremely close to his signature (within 5-10%). Provides massive HP% and EM if off-field for 5s (perfect for rotation).
Prototype Amber HP% S (F2P God) Craftable. Provides HP%, heals the team, and refunds massive energy (18 energy at R5). Solves all ER issues and lets you run Furina comfortably. Better than most 5-star catalysts.
Lost Prayer CRIT Rate A Good stat stick, but the ATK base is useless for him. Movement speed is nice.

Constellation Value

Neuvillette at C0 is a complete monster, but C1 solves his only weakness.

  • C1: Venerable Institution - (Game Changer) Grants 1 stack of "Past Draconic Glories" automatically. Also grants huge Resistance to Interruption.
    Impact: Allows you to run Double Hydro (Neuvillette + Furina) without losing the 3rd stack multiplier, and removes the need for a shielder.
  • C2: Juridical Exhortation - (Damage) Each stack of Draconic Glories increases Crit DMG of Charged Attacks by 14% (Max 42%). Big damage stick.
  • C6: Wrathful Recompense - (Infinite Laser) Charged Attack duration increases by absorbing droplets mid-channel. He also fires currents that deal damage based on HP. Allows for infinite laser beaming.

Verdict: C1 is the best value constellation in the game for him.

Top Team Compositions

1. Premium Hypercarry (Neuv + Furina)

  • Main DPS: Neuvillette
  • Buffer: Furina
  • Anemo: Kazuha
  • Sustain: Baizhu / Zhongli / Charlotte

Why it works: Furina buffs Neuvillette's massive damage. Neuvillette's self-drain stacks Furina's Fanfare instantly. Kazuha swirls Hydro. Baizhu provides shielding (C1) or Healing (C0) and Dendro reactions.

2. F2P Hypercarry (C0 Friendly)

  • Main DPS: Neuvillette
  • Electro: Fischl
  • Anemo: Kazuha / Sucrose
  • Shield: Zhongli / Layla / Kirara

Why it works: At C0, you need 3 different reactions. Electro-Charged (Fischl) + Swirl (Kazuha) + Crystallize (Zhongli) grants full stacks. Shield is mandatory at C0 to prevent interruption.

Rotations & Combos

Standard Rotation:
Neuvillette E (Generate Drops) > Furina EQ > Kazuha E Q > Baizhu EQ > Neuvillette CA (Absorb) -> Q -> CA -> CA

Tip: Always use Neuvillette's E first. The droplets last 15s. By the time you finish your support rotation, the droplets will still be there for Neuvillette to absorb instantly.

Frequently Asked Questions

Do I need C1?
If you want to play with Furina comfortably? Yes. If you play the standard "Rainbow" team (Fischl/Zhongli/Kazuha)? No, C0 is perfectly fine.

Is Prototype Amber better than Lost Prayer?
Often, Yes. Prototype Amber solves all energy issues and heals the team (stacking Furina fanfare), which can result in smoother rotations and higher team DPS than a pure stat stick like Lost Prayer.

Data Source: KQM Standards. Last Updated: December 2025

Furina Guide: The Definitive Build & Analysis

Furina, the Hydro Archon

Furina Genshin Impact Character Art
Rarity (5-Star Archon)
Element Hydro
Weapon Sword
Best Role Universal Buffer / Sub-DPS
Stat Priority HP > CRIT > ER
Tier SS+ (Game Changer)

Furina (Focalors) is the Hydro Archon and the single most impactful unit in the current meta. She drains the entire team's HP to buff damage, demanding a team-wide healer but rewarding you with massive, universal damage bonuses and high personal off-field damage.


Pros

  • Universal DMG% Buff for the whole team.
  • High off-field Hydro DMG (Salon Solitaire).
  • Allows any DPS to use the Marechaussee Hunter set.
  • Toggleable Arkhe (Ousia/Pneuma) for exploration.
  • Can walk on water indefinitely.

Cons

  • Requires a Teamwide Healer (Jean, Baizhu, Charlotte, etc.).
  • Drains team HP to 50%, making you squishy.
  • Summons attack random targets (can be annoying).
  • High Energy Recharge requirements in solo Hydro.

Quick Guide (TL;DR)

If you don't have time for the math, here is the cheat sheet.

  • Best Artifact: 4pc Golden Troupe (Uncontested BiS).
  • Alt Artifact: 4pc Tenacity of the Millelith (If C2+ and support focused).
  • Best Weapon: Splendor of Tranquil Waters (Signature).
  • F2P Weapon: Fleuve Cendre Ferryman (Fishing Pipe) or Festering Desire.
  • Support Weapon: Favonius Sword (Team Battery - Highly Recommended).
  • Main Stats: SANDS: HP% or ER | GOBLET: HP% or Hydro | CIRCLET: CRIT Rate/DMG.
  • Talent Priority: Elemental Burst > Elemental Skill > Normal Attack (Ignore unless C6).
  • Top Team: Furina + Neuvillette + Kazuha + Baizhu (Hydro Hyper).
Pro Tip: HP Goblet vs. Hydro Goblet: At C0-C1, an HP% Goblet is usually better or equal to Hydro DMG, and much easier to farm. Only use Hydro DMG if you have amazing substats or are C2+.

Need Primogems for C2 Furina?

Get Genesis Crystals at a discounted price with instant delivery.

Top Up Secure & Fast via GameCharge

Ascension & Talent Materials

Category Material Name Source
Ascension Lakelight Lily Erinnyes Forest (Fontaine)
Boss Drop Water That Failed To Transcend Hydro Tulpa (Fontaine)
Talent Books Teachings of Justice Pale Forgotten Glory (Tue/Fri/Sun)
Common Mob Whopperflower Nectar Whopperflowers

Talent Breakdown & Mechanics

Elemental Skill: Salon Solitaire

  • Ousia (Default): Summons 3 Salon Members (Octopus, Seahorse, Crab). They deal Hydro DMG based on Furina's Max HP.
  • The Drain: When they attack, they drain HP from all party members (down to 50%). If a character has >50% HP, the Members deal 140% damage. This drain is essential for building stacks.
  • Pneuma (Charged Attack): Swaps to Pneuma mode. Summons the "Singer of Many Waters" which heals the active character but deals NO damage. Rarely used in combat except for emergencies.

Elemental Burst: Let the People Rejoice

  • Cost: 60 Energy | Cooldown: 15s | Duration: 18s
  • Fanfare Points: When team HP increases or decreases, Furina gains Fanfare.
  • The Buff: Each point of Fanfare increases Damage Bonus and Incoming Healing Bonus for the entire team. At max stacks (C0 = 300), this is a massive ~75% DMG buff to everyone.
  • Synergy: You need a healer (Jean/Baizhu) to restore the HP drained by her skill to generate Fanfare stacks rapidly.

Passive: Endless Waltz

  • Overhealing: If the active character is healed by someone other than Furina and overheals, Furina heals the party for 2% of their HP. This helps stack Fanfare faster.

Talent Priority Order:

  1. Elemental Burst (Level 10) - Improves the DMG% buff.
  2. Elemental Skill (Level 9) - Improves personal damage.
  3. Normal Attack (Level 1) - Ignore unless C6.

Stat Requirements & ER Thresholds

Furina is energy hungry. If she doesn't burst, she doesn't buff.

Team Context Weapon ER Requirement
Solo Hydro Signature / Crit Weapon 200% - 220%
Solo Hydro Favonius / Pipe 160% - 180%
Double Hydro (Neuvillette) Any 130% - 140%

Substat Priority:

  1. Energy Recharge (Until requirement met)
  2. CRIT Rate / CRIT DMG (Target 70/160+)
  3. HP% (Aim for 40k HP)
  4. Flat HP

Best Artifacts Comparison

Set Name Role Reasoning
4pc Golden Troupe BiS Increases Elemental Skill DMG by 70%. Furina's damage comes almost entirely from her Skill. This set is non-negotiable for personal damage.
4pc Tenacity of the Millelith C2+ Support If you have C2 (which gives massive HP), you can sacrifice some personal damage to buff team ATK. Her skill has 100% uptime.

Weapon Rankings

Weapon Type Performance Notes
Splendor of Tranquil Waters CRIT DMG S+ Signature. 88% Crit DMG + Skill DMG buffs. Best output, but requires careful ER management.
Festering Desire (R5) ER% S Event exclusive (1.2). The perfect 4-star weapon. Buffs Skill DMG and Crit Rate while solving ER.
Fleuve Cendre Ferryman (R5) ER% A+ (F2P) The "Pipe". Fishing reward. High Crit Rate for Skill + ER buff. Best accessible F2P option.
Favonius Sword ER% A (Support) If your team has high energy needs (e.g. Noelle/Eula), this is often better than damage weapons.

Constellation Value

Furina is complete at C0, but her constellations are some of the strongest in the game.

  • C1: "Love Is a Rebellious Bird" - (Instant Buff) Upon using Burst, instantly gain 150 Fanfare (37.5% DMG Bonus). Increases Fanfare cap by 100. Massive quality of life.
  • C2: "A Woman Adapts Like Duckweed" - (Broken) Fanfare gain is increased by 250%. Excess Fanfare increases Furina's HP by up to 140%. This maxes her buff instantly and makes her personal damage skyrocket.
  • C6: "Hear Me — Let Us Raise the Chalice of Love!" - (On-Field) Using Skill grants Hydro Infusion. Her attacks now heal the entire party (removing the need for a healer) OR drain HP for nuke damage. Combines all roles into one.

Verdict: C2 is the best stopping point for value. C6 breaks the game mechanics.

Top Team Compositions

1. Neuvillette Hyper

  • Main DPS: Neuvillette
  • Buffer: Furina
  • Anemo: Kazuha
  • Sustain: Baizhu / Zhongli / Charlotte

Why it works: Neuvillette drains and heals his own HP rapidly, stacking Fanfare instantly. Hydro Resonance boosts both their HP. It's the strongest duo in the game.

2. Quickbloom (Alhaitham/Cyno)

  • Main DPS: Alhaitham / Cyno
  • Hydro: Furina
  • Dendro: Nahida / Baizhu
  • Electro: Kuki Shinobu

Why it works: Furina's Hydro application is slow enough to maintain Quicken aura while generating blooms. Kuki heals the drain and triggers Hyperbloom.

Rotations & Combos

Standard Support Rotation:
Furina E Q > Healer (Jean/Baizhu) Burst > Supports > Main DPS

Tip: Always use Furina first. Her summons last 30s and her burst lasts 18s. You want the HP drain to start immediately so your healer can stack Fanfare right after.

Frequently Asked Questions

Can I use Bennett as the healer?
It's suboptimal but possible. Bennett only heals the active character up to 70%. This makes it harder to stack Fanfare compared to Jean/Charlotte/Mika who heal everyone to 100%.

Pneuma or Ousia?
Ousia (Black/Short Hair): Deals damage. Use this 99% of the time.
Pneuma (White/Long Hair): Heals active character. Use only in overworld if you have no food.

Data Source: KQM Standards. Last Updated: December 2025

Genshin Impact: Hydro & Electro Character Guide

Kachina Guide: The Definitive Build & Analysis

Kachina, the young warrior of the Nanatzcayan

Kachina Genshin Impact Character Art
Rarity (4-Star Free)
Element Geo
Weapon Polearm
Best Role Nightsoul Support / Sub-DPS
Stat Priority DEF > ER > CRIT
Tier A (Natlan Support)

Kachina is a young warrior of the Children of Echoes. She introduces the Nightsoul mechanic to the 4-star roster. Her "Turbo Twirly" drill allows her to climb cliffs with ease and deal off-field Geo damage, making her the perfect F2P support for Natlan characters via the new artifact set.


Pros

  • Free Unit (Given in Natlan Archon Quest).
  • Best user of "Scroll of the Hero of Cinder City" (40% Elemental DMG Buff).
  • Excellent exploration (Climbs walls without stamina).
  • Easy to build (DEF scaling).
  • Consistent off-field Geo application.

Cons

  • Low personal damage multipliers.
  • Construct (Turbo Twirly) can be destroyed by bosses.
  • Requires Natlan teammates for full potential (Nightsoul Burst).
  • Burst cost (70) is high for the value it provides.

Quick Guide (TL;DR)

If you don't have time for the math, here is the cheat sheet.

  • Best Artifact: 4pc Scroll of the Hero of Cinder City (Mandatory Support).
  • Alt Artifact: 4pc Husk of Opulent Dreams (Personal DMG).
  • Best Weapon: Favonius Lance (Team Battery).
  • F2P Weapon: Footprint of the Rainbow (Craftable DEF).
  • Main Stats: SANDS: DEF% or ER | GOBLET: Geo DMG or DEF% | CIRCLET: CRIT Rate (Favonius) or DEF%.
  • Talent Priority: Elemental Skill > Elemental Burst > Normal Attack.
  • Top Team: Kachina + Mualani + Xilonen + Emilie (Natlan Team).
Pro Tip: The "Scroll" Trigger: To activate the 40% Elemental DMG buff from the Scroll set, Kachina must trigger a reaction (Crystallize) while in the Nightsoul state. Use her Skill (E), wait for a Crystal to form/reaction to happen, THEN swap.

Need Primogems for C6 Kachina?

Get Genesis Crystals to pull on Natlan banners!

Top Up Secure & Fast via GameCharge

Ascension & Talent Materials

Category Material Name Source
Ascension Quenepa Berry Natlan (Tepeacac Rise)
Boss Drop Overripe Flamegranate Gluttonous Yumkasaur Mountain King (Natlan)
Talent Books Teachings of Conflict Blazing Ruins (Wed/Sat/Sun)
Common Mob Saurian Whistles Saurian Warriors

Talent Breakdown & Mechanics

Elemental Skill: Go, Go Turbo Twirly!

  • Nightsoul's Blessing: Enters the Nightsoul state (60 points). Summons "Turbo Twirly."
  • Mount Mode (Hold): Kachina rides the drill. Can climb walls and cliffs indefinitely (consumes Nightsoul points instead of stamina).
  • Combat Mode (Tap): Deploys Turbo Twirly as a construct. It slams the ground periodically, dealing AoE Geo DMG based on DEF.
  • Note: This is a Geo Construct. It can be destroyed.

Elemental Burst: Time to Get Serious!

  • Cost: 70 Energy | Cooldown: 18s
  • Turbo Drill Field: Creates a field that increases Turbo Twirly's attack AoE and movement speed.
  • Deployment: If Turbo Twirly isn't on field, it is summoned.

Passive: Mountain Echoes

  • Geo DMG Bonus: When a party member triggers a "Nightsoul Burst" (Natlan mechanic), Kachina gains 20% Geo DMG Bonus for 20s.

Talent Priority Order:

  1. Elemental Skill (Level 9) - Main damage source.
  2. Elemental Burst (Level 8) - Buffs the skill.
  3. Normal Attack (Level 1) - Ignore.

Stat Requirements & ER Thresholds

Kachina needs high DEF for damage and decent ER for burst uptime.

Team Context Weapon ER Requirement
Solo Geo (Support) Favonius Lance 180% - 200%
Double Geo (w/ Xilonen) Any 140% - 160%
Triple Geo (Mono) Any 110% - 130%

Substat Priority:

  1. DEF% (Damage Scaling)
  2. Energy Recharge (Until requirement met)
  3. CRIT Rate (For Favonius / Personal DMG)
  4. CRIT DMG (Personal DMG)

Best Artifacts Comparison

Set Name Role Reasoning
4pc Scroll of the Hero of Cinder City BiS Support Kachina can easily trigger Nightsoul Burst. This set gives 12% Elemental DMG to team, increasing to 40% after triggering a reaction in Nightsoul state. Unbeatable support.
4pc Husk of Opulent Dreams Personal DPS If you want Kachina to deal damage herself (e.g. Mono Geo), this gives max DEF/Geo stats.
4pc Golden Troupe Skill DMG Boosts Turbo Twirly damage by 70%. Good alternative if you don't need the team buff.

Weapon Rankings

Weapon Type Performance Notes
Favonius Lance ER% S+ (Support) Batteries herself and the team. Essential for ensuring smooth rotations for Mualani/Kinich.
Footprint of the Rainbow DEF% S (F2P) Natlan Craftable. High DEF stat and increases DEF after using Skill. Perfect F2P stat stick.
Engulfing Lightning ER% S Overkill on ER, but allows you to run DEF% Sands easily.

Constellation Value

Kachina is a complete support at C0, but C2 and C6 add significant value.

  • C1: Shards are Gems - (Energy) When picking up a shard, restores 3 Energy. Makes ER requirements lower.
  • C2: Never Leave Turbo Twirly Behind - (Nightsoul) When using Burst, regains 20 Nightsoul points. Essential for extended field time/climbing.
  • C6: This Time, I've Got To Win - (Shield Break) If the active character's shield breaks or is replaced, deals 200% DEF as AoE Geo DMG. Niche but strong burst.

Verdict: C0 is perfect for support. Don't chase cons unless you want more damage.

Top Team Compositions

1. Natlan Hypercarry Support

  • Main DPS: Mualani / Kinich
  • Support: Kachina (Scroll Set)
  • Sub-DPS: Emilie / Dehya
  • Healer/Flex: Bennett / Xilonen

Why it works: Kachina triggers Crystallize with her Skill while in Nightsoul state, activating the Scroll set's 40% DMG bonus for the Main DPS element. It's free damage.

2. Mono Geo

  • Main DPS: Noelle / Itto
  • Sub-DPS: Kachina
  • Buffer: Gorou
  • Flex: Chiori / Albedo

Why it works: Kachina counts as a Geo unit for Gorou's buffs. Her construct resonates. She deals decent off-field damage and batteries the team with Favonius.

Rotations & Combos

Scroll Support Rotation:
Main Element App > Kachina E (Trigger Crystallize) > Kachina Q > Swap to Main DPS

Tip: Ensure you see the Crystallize shard spawn before swapping off Kachina to guarantee the artifact buff activates.

Frequently Asked Questions

Is she better than Zhongli?
No. Zhongli offers a shield and universal shred. Kachina offers DMG Bonus (via set) and off-field damage. They do different things. Kachina is better for Mualani/Kinich specifically.

Why DEF%?
Her damage scales purely on DEF. ATK% does almost nothing for her.

Data Source: Version 5.0 Live Data. Last Updated: December 2025

Ningguang Guide: The Definitive Build & Analysis

Ningguang, the Tianquan of the Liyue Qixing

Ningguang Genshin Impact Character Art
Rarity (4-Star)
Element Geo
Weapon Catalyst
Best Role Burst DPS / Geo Battery
Stat Priority CRIT > ATK% > ER
Tier A (Burst Nuke) / B (Main DPS)

Ningguang is the Tianquan of the Liyue Qixing and a powerful Geo Catalyst user. She specializes in high single-target burst damage and can function as a strong battery for other Geo characters. Her ability to create a Jade Screen adds utility by blocking projectiles and buffing Geo DMG.


Pros

  • High burst damage with low energy cost (40).
  • Jade Screen blocks projectiles and buffs Geo DMG.
  • Excellent battery for Noelle/Itto/Navia.
  • Can hold Thrilling Tales of Dragon Slayers (TTDS) or Prototype Amber for support.
  • Strong single-target damage with Charged Attacks.

Cons

  • Low base ATK and HP for a 4-star.
  • Charged Attack stamina consumption can be an issue without C1/passive management.
  • Jade Screen breaks easily against bosses.
  • Slow Normal Attack animations.

Quick Guide (TL;DR)

If you don't have time for the math, here is the cheat sheet.

  • Best Artifact: 2pc Archaic Petra + 2pc ATK% (Balanced).
  • Alt Artifact: 4pc Noblesse Oblige (Support) or 4pc Nighttime Whispers (Personal DMG).
  • Best Weapon: Lost Prayer to the Sacred Winds (5⭐) or Memory of Dust.
  • F2P Weapon: The Widsith (4⭐ - RNG God) or Flowing Purity (Craftable).
  • Support Weapon: Thrilling Tales (TTDS) (ATK Buff) or Prototype Amber (Healer).
  • Main Stats: SANDS: ATK% | GOBLET: Geo DMG | CIRCLET: CRIT.
  • Talent Priority: Elemental Burst > Normal Attack > Elemental Skill.
  • Top Team: Ningguang + Zhongli + Bennett + Xiangling (Geo Pyro).
Pro Tip: Walk through the Screen! After casting her Jade Screen (E), walk through it with your main DPS (even if it's Ningguang herself) to gain a 12% Geo DMG Bonus for 10s.

Need C6 Ningguang?

Get Genesis Crystals to pull on banners or buy her from Paimon's Shop (March/September)!

Top Up Secure & Fast via GameCharge

Ascension & Talent Materials

Category Material Name Source
Ascension Glaze Lily Liyue Harbor / Qingce Village
Boss Drop Basalt Pillar Geo Hypostasis (Liyue)
Talent Books Teachings of Prosperity Taishan Mansion (Mon/Thu/Sun)
Common Mob Insignia Fatui Skirmishers / Agents / Cicin Mages

Talent Breakdown & Mechanics

Normal Attack: Sparkling Scatter

  • Star Jades: Normal attacks generate Star Jades (Max 3).
  • Charged Attack: Consumes stamina to deal AoE Geo DMG. If you have Star Jades, the charged attack costs 0 Stamina and deals increased damage.
  • Combo: N1C (Normal -> Charged) or N2C is efficient for building stacks and spending them.

Elemental Skill: Jade Screen

  • The Wall: Creates a Jade Screen that blocks enemy projectiles and deals AoE Geo DMG on cast.
  • Construct: Counts as a Geo Construct. Can be used to block enemies or resonate with Zhongli's pillar.
  • Durability: Scales off Ningguang's HP (don't build HP for this, it breaks easily anyway).
  • Passive (Strategic Reserve): Characters passing through the screen gain 12% Geo DMG Bonus for 10s.

Elemental Burst: Starshatter

  • Cost: 40 Energy | Cooldown: 12s
  • The Homing Missiles: Fires multiple gem projectiles that homing in on enemies.
  • Jade Screen Synergy: If a Jade Screen is nearby when Burst is cast, the screen shatters and fires additional projectiles. ALWAYS cast E before Q for max damage.

Talent Priority Order:

  1. Elemental Burst (Level 9) - Major source of burst damage.
  2. Normal Attack (Level 8) - For Main DPS builds.
  3. Elemental Skill (Level 8) - For Nuke/Support builds.

Stat Requirements & ER Thresholds

Ningguang has a cheap burst (40 cost), so she doesn't need much ER unless she is the solo Geo unit.

Team Context Weapon ER Requirement
Double Geo (Navia/Zhongli) Any 110% - 120%
Solo Geo (Support) Favonius/Amber 130% - 150%
C2 Unlocked Any 100% - 110%

Substat Priority:

  1. CRIT Rate / CRIT DMG (Target 60/120+)
  2. ATK% (Scales everything)
  3. Energy Recharge (Until requirement met)
  4. Flat ATK

Best Artifacts Comparison

Set Name Role Reasoning
2pc Petra / 2pc ATK BiS General Flexible and easy to farm. Provides consistent damage for both Skill and Burst.
4pc Noblesse Oblige Burst Support Great if no one else in the team has it. Buffs team ATK by 20% on Burst cast.
4pc Nighttime Whispers Personal DPS New Geo set. Gives Geo DMG bonus after using Skill. Strongest for personal damage but resin inefficient if not farming for Navia.

Weapon Rankings

Weapon Type Performance Notes
Lost Prayer CRIT Rate S+ High Base ATK + Crit Rate. Movement speed helps kiting. Best general 5-star.
The Widsith (R5) CRIT DMG S (RNG) Huge Burst potential if you roll ATK% or DMG% buffs. 10s uptime matches her burst window well.
Thrilling Tales (TTDS) HP% A (Support) 3-Star. Used purely for the 48% ATK buff to your Main DPS.
Prototype Amber HP% A (Healer) Allows Ningguang to function as a healer/battery in Hu Tao Double Geo teams or Furina teams.

Constellation Value

Ningguang gets significant power spikes from C2 and C6.

  • C1: Piercing Fragments - (AoE) Normal Attacks deal AoE DMG. Useful for grouping, but minor.
  • C2: Shock Effect - (Core) When Jade Screen is shattered (by Burst or enemies), its cooldown resets. Allows E -> Q -> E combo for double damage and particles.
  • C6: Grandeur be the Seven Stars - (Nuke) Using Burst grants 7 Star Jades instantly. Your next Charged Attack will deal massive damage. Essential for Main DPS playstyle.

Verdict: C2 is the most important for sub-DPS. C6 is key for Main DPS.

Top Team Compositions

1. Double Geo (Navia)

  • Main DPS: Navia
  • Sub-DPS: Ningguang
  • Buffer: Bennett / Furina
  • Flex: Xiangling / Zhongli

Why it works: Ningguang provides Geo Resonance, generates particles for Navia, and buffs Navia's Geo DMG (walking through screen). Navia doesn't break Ningguang's screen, unlike Itto who moves around a lot.

2. Hu Tao Double Geo

  • Main DPS: Hu Tao
  • Hydro: Xingqiu / Yelan
  • Support: Ningguang (Healer Build)
  • Shield: Zhongli

Why it works: If you run Prototype Amber on Ningguang, she heals the team just enough to deal with Corrosion while providing Geo Resonance and Noblesse/TTDS buffs.

Rotations & Combos

C2 Nuke Combo:
E (Cast Screen) > Walk through Screen > Q (Shatters Screen + Resets CD) > E (Cast Screen again) > Charged Attack (C6 only)

Tip: Always ensure the Jade Screen is present before casting Burst to get the extra projectiles.

Frequently Asked Questions

Ningguang vs. Geo Traveler?
Ningguang offers higher personal damage and Geo DMG buff. Geo Traveler offers Crit Rate buff and better battery generation. Ningguang is preferred for Navia; Geo MC for Noelle.

Why does my Jade Screen break?
Geo constructs cannot exist inside boss hitboxes. If you cast E directly on a boss, it shatters instantly. Aim slightly to the side to keep the buff/blocking utility.

Data Source: KQM Standards. Last Updated: December 2025

Noelle Guide: The Definitive Build & Analysis

Noelle, the Chivalric Blossom of the Knights of Favonius

Noelle Genshin Impact Character Art
Rarity (4-Star)
Element Geo
Weapon Claymore
Best Role Geo Hypercarry (C6) / Healer
Stat Priority DEF > CRIT > ER > ATK
Tier A (With Furina) / B (Standard)

Noelle is the "One-Maid Army." She shields, she heals, and she deals massive AoE damage. While considered a beginner character, her **C6** transforms her into a premier Geo DPS who rivals 5-star units, especially when paired with **Furina** due to her team-wide healing.


Pros

  • Role Compression: DPS + Healer + Shielder in one slot.
  • Extremely tanky (scales on DEF).
  • Best driver for Furina (heals entire team while attacking).
  • Huge AoE range on Burst (Excalibur).
  • Easy to build (Whiteblind is craftable).

Cons

  • Zero Particle Generation (Needs heavy battery support).
  • Damage is mediocre before C6.
  • Shield downtime can be long without C2/Sacrificial.
  • Requires specific supports (Gorou/Furina) to shine.

Quick Guide (TL;DR)

If you don't have time for the math, here is the cheat sheet.

  • Best Artifact: 4pc Husk of Opulent Dreams (BiS).
  • Alt Artifact: 4pc Marechaussee Hunter (With Furina) or 4pc Gladiator.
  • Best Weapon: Redhorn Stonethresher (Signature).
  • F2P Weapon: Whiteblind (Craftable - R5 is amazing).
  • Support Weapon: Favonius Greatsword (Pure Battery/Healer).
  • Main Stats: SANDS: DEF% | GOBLET: Geo DMG | CIRCLET: CRIT.
  • Talent Priority: Normal Attack > Elemental Burst > Elemental Skill.
  • Top Team: Noelle + Furina + Gorou + Albedo/Chiori (Wet Rock).
Pro Tip: Spin-to-Win: With Furina and Redhorn, Noelle's Charged Attack (Spin) becomes her highest DPS combo. It heals faster, hits faster, and has massive AoE. If using Whiteblind/Glad, stick to Normal Attacks (N3D or N4).

Need C6 Noelle?

Get Genesis Crystals to pull on banners or buy her from Paimon's Shop (Feb/Aug)!

Top Up Secure & Fast via GameCharge

Ascension & Talent Materials

Category Material Name Source
Ascension Valberry Stormbearer Mountains (Mondstadt)
Boss Drop Basalt Pillar Geo Hypostasis (Liyue)
Talent Books Teachings of Resistance Forsaken Rift (Tue/Fri/Sun)
Common Mob Masks Hilichurls

Talent Breakdown & Mechanics

Elemental Burst: Sweeping Time

  • Excalibur: Invokes the strength of stone to turn her Normal/Charged Attacks into massive Geo AoE strikes.
  • ATK Conversion: Increases ATK based on her DEF. At Talent Level 10, this is 72% of DEF. At C6, it adds another 50%, making DEF far more valuable than ATK.
  • No Timer: Unlike Razor or Cyno, Noelle's burst does not end if you swap characters. You can swap out, use supports, and swap back in to keep swinging.

Elemental Skill: Breastplate

  • The Shield: Creates a Geo shield scaling off DEF.
  • Healing: While the shield is active, Noelle's Normal/Charged attacks have a chance to heal the entire party (scaling off DEF). At C1, this chance becomes 100% if Burst is also active.
  • Snapshots? No, the shield strength is dynamic, but the damage is negligible anyway.

Passive: Devotion

  • Emergency Shield: Creates a shield automatically when the active character falls below 30% HP. This can save your other characters from one-shots in Abyss.

Talent Priority Order:

  1. Normal Attack (Level 10) - This is the multiplier for her swings.
  2. Elemental Burst (Level 9) - This increases the DEF-to-ATK conversion.
  3. Elemental Skill (Level 8) - For shield strength and healing.

Stat Requirements & ER Thresholds

Noelle generates Zero Particles. She requires a dedicated Geo Battery (Gorou/Geo MC/Albedo).

Team Context Battery ER Requirement
Triple Geo (Gorou + Albedo) Favonius Gorou 130% - 140%
Double Geo (Furina Team) Favonius Gorou 140% - 160%
Solo Geo (Driver) Favonius Team 180% - 200%

Substat Priority:

  1. Energy Recharge (Until burst is consistent - most important)
  2. CRIT Rate / CRIT DMG (Target 60/120+)
  3. DEF% (Damage & Healing)
  4. ATK% (Low priority, DEF is better)

Best Artifacts Comparison

Set Name Role Reasoning
4pc Husk of Opulent Dreams BiS Provides 54% DEF and 24% Geo DMG. Noelle snapshots these stats when she casts Burst. Remember to stack it off-field before fighting.
4pc Marechaussee Hunter Furina Team Only works with Furina. Grants 36% Crit Rate. Stronger than Husk if you have Furina, as Noelle heals back the drain instantly.
4pc Gladiator's Finale General Increases Normal Attack DMG by 35%. Good if you don't want to farm Husk, but weaker for Shield/Healing.

Weapon Rankings

Weapon Type Performance Notes
Redhorn Stonethresher CRIT DMG S+ Signature. 88% Crit DMG + DEF passive. Massive damage increase over everything else.
Serpent Spine (R5) CRIT Rate S Battle Pass. At R5, it rivals Redhorn. Noelle's shield keeps the stacks safe.
Whiteblind (R5) DEF% A (F2P) Craftable. Very strong DEF stat stick. Remember to stack the passive (4 hits) before using Burst to snapshot the buff.
Favonius Greatsword ER% A (Driver) Use if you have zero battery in the team (Solo Geo). Sacrifices damage for 100% Burst uptime.

Constellation Value

Noelle is a healer at C0. She becomes a DPS Archon at C6.

  • C1: I Got Your Back - (Healer) While Burst and Skill are both active, healing chance becomes 100%. Makes her a reliable healer.
  • C5: Favonius Sweeper Master - (Damage) +3 Levels to Burst. Good damage increase.
  • C6: Must Be Spotless - (GOD TIER) Increases Burst ATK bonus by an additional 50% of DEF. Additionally, every enemy defeated adds 1s to Burst duration (up to 10s). This allows 100% Burst uptime and massive damage.

Verdict: C6 is required to play her as a serious Main DPS.

Top Team Compositions

1. Wet Rock (Noelle Furina)

  • Main DPS: Noelle (C6)
  • Buffer: Furina
  • Buffer: Gorou (C6)
  • Battery: Albedo / Chiori / Zhongli

Why it works: The synergy is perfect. Furina drains HP to buff DMG. Noelle heals the whole team on-field, instantly maxing Furina's Fanfare stacks. Gorou buffs Noelle's DEF.

2. Mono Geo (Classic)

  • Main DPS: Noelle
  • Battery/Sub: Albedo / Chiori / Geo MC
  • Buffer: Gorou
  • Flex: Yun Jin (Normal Attack Buff)

Why it works: Yun Jin buffs Noelle's Normal Attacks massively. Gorou provides DEF/Crit. Infinite energy and shields.

Rotations & Combos

Spin-to-Win (Redhorn/Furina):
Furina EQ > Gorou EQ > Albedo E > Noelle E Q -> Hold Attack (Spin)

Standard Combo (Whiteblind):
N3D (3 Hits + Dash) or N4D. Charged attacks are generally weaker unless you have Redhorn.

Frequently Asked Questions

Itto vs. Noelle?
Itto has higher personal damage and Ushi nuke. Noelle has healing, shielding, wider AoE, and allows you to run Furina without a dedicated healer slot. In Furina teams, Noelle is often preferred.

Is C6 really needed?
Yes. Without C6, her damage is negligible, and she is just a shielder/healer. C6 adds ~30-40% more damage by converting even more DEF to ATK.

Data Source: KQM Standards. Last Updated: December 2025

Yun Jin Guide: The Definitive Build & Analysis

Yun Jin, the Director of the Yun-Han Opera Troupe

Yun Jin Genshin Impact Character Art
Rarity (4-Star)
Element Geo
Weapon Polearm
Best Role Normal Attack Buffer
Stat Priority DEF% > ER > CRIT Rate (Favonius)
Tier A (For Yoimiya/Ayato)

Yun Jin is the director of the Yun-Han Opera Troupe and a specialist support for characters who rely on Normal Attacks. Unlike other Geo supports, she thrives in "Rainbow" teams with diverse elements, using her Defense to add massive flat damage to her teammates' strikes.


Pros

  • Massive Flat DMG buff for Normal Attacks (Yoimiya/Ayato/Noelle).
  • C6 provides rare 12% Attack Speed buff.
  • Flexible team building (Passive rewards varied elements).
  • Easy to build (DEF% artifacts).
  • Skill has a fun Parry mechanic that generates decent particles.

Cons

  • Buff has a quota (30 hits). fast attackers consume it quickly.
  • Useless for Charged Attack DPS (Hu Tao/Ganyu).
  • High Energy Recharge requirements.
  • Lack of DEF% Polearm options (except Deathmatch BP).

Quick Guide (TL;DR)

If you don't have time for the math, here is the cheat sheet.

  • Best Artifact: 4pc Husk of Opulent Dreams (BiS - DEF Stacking).
  • Alt Artifact: 4pc Noblesse Oblige (If team needs ATK%).
  • Best Weapon: Favonius Lance (Mandatory for Battery/ER).
  • Alt Weapon: Engulfing Lightning (ER Stat Stick).
  • F2P Weapon: Prototype Starglitter (Craftable ER).
  • Main Stats: SANDS: DEF% or ER | GOBLET: DEF% | CIRCLET: DEF% or CRIT Rate.
  • Talent Priority: Elemental Burst (Q) > Elemental Skill (E) > Normal Attack (Ignore).
  • Top Team: Yun Jin + Yoimiya + Yelan + Zhongli.
Pro Tip: Parry Master: Yun Jin's Skill can be tapped or held. Holding it creates a shield that charges up. If you time the press exactly when an enemy hits you (Perfect Parry), you instantly gain max charge without waiting, dealing max damage and generating max particles immediately.

Need C6 Yun Jin?

Get Genesis Crystals to pull on banners or pick her during Lantern Rite!

Top Up Secure & Fast via GameCharge

Ascension & Talent Materials

Category Material Name Source
Ascension Glaze Lily Liyue Harbor / Qingce Village
Boss Drop Riftborn Regalia Golden Wolflord (Inazuma)
Talent Books Teachings of Diligence Taishan Mansion (Tue/Fri/Sun)
Common Mob Masks Hilichurls

Talent Breakdown & Mechanics

Elemental Skill: Opening Flourish

  • Parry Mechanic: Tap E for an instant strike. Hold E to charge a shield.
  • Perfect Counter: Releasing the hold exactly when hit deals max damage.
  • Energy: Generates particles upon hit. Essential for battery.

Elemental Burst: Cliffbreaker's Banner

  • Cost: 60 Energy | Cooldown: 15s
  • Flying Cloud Flag Formation: Grants a Flat DMG Bonus to all party members' Normal Attacks.
  • Scaling: The bonus damage is based on Yun Jin's current DEF. This is why you stack DEF on her.
  • Trigger Quota: Each character has a quota of 30 hits. In AoE, hitting multiple enemies consumes multiple quota stacks instantly.

Passive: Breaking Conventions

  • Rainbow Synergy: The Normal Attack DMG Bonus is further increased by 2.5% / 5% / 7.5% / 11.5% of Yun Jin's DEF for having 1/2/3/4 different elemental types in the party.
  • Implication: Yun Jin works best in teams with varied elements (e.g., Pyro + Hydro + Geo + Anemo), unlike Gorou who wants Mono Geo.

Talent Priority Order:

  1. Elemental Burst (Level 10) - The source of her buff.
  2. Elemental Skill (Level 8) - Particle generation and shield.
  3. Normal Attack (Level 1) - Ignore.

Stat Requirements & ER Thresholds

Yun Jin is stat hungry. She needs high DEF for buffs but critical ER to function.

Team Context Weapon ER Requirement
Solo Geo (Yoimiya Team) Favonius Lance 180% - 200%
Solo Geo (Yoimiya Team) Non-ER Weapon 220% - 240%
Double Geo (w/ Zhongli) Favonius Lance 160% - 180%

Substat Priority:

  1. Energy Recharge (Until burst is consistent - Priority #1)
  2. DEF% (Maximizes Buff)
  3. CRIT Rate (Only to trigger Favonius Lance)
  4. Flat DEF

Best Artifacts Comparison

Set Name Role Reasoning
4pc Husk of Opulent Dreams BiS Provides massive DEF (54% at max stacks). Since Yun Jin is off-field, she maintains the stacks easily. Best for maximizing her buff.
4pc Noblesse Oblige Team ATK If no one else in the team has Noblesse, this is a viable alternative to buff the carry's ATK% alongside Flat DMG.
2pc Husk / 2pc Emblem ER Balance If you can't reach ER requirements with 4pc Husk, mixing 2pc Emblem (20% ER) helps consistency.

Weapon Rankings

Weapon Type Performance Notes
Favonius Lance ER% S+ Solves her ER issues and batteries the main DPS. The clear winner for almost all builds.
Engulfing Lightning ER% S Massive ER stat stick. Luxury option if Raiden doesn't need it.
Prototype Starglitter ER% A (F2P) Craftable. Good ER stat. Passive is useless, but it helps getting burst back.
Deathmatch CRIT Rate B (DEF) Battle Pass. Gives DEF% if 2+ enemies are nearby. Only use if you have C4+ and somehow have enough ER from artifacts.

Constellation Value

Yun Jin is functional at C0, but C6 makes her top tier.

  • C2: Myriad Mise-En-Scene - (Buff) Normal Attack DMG increased by 15% after using Burst. Simple, effective buff.
  • C3: Seafaring General - (Scaling) +3 Levels to Burst. Directly increases the % of DEF converted to damage. Very strong.
  • C6: Decorous Harmony - (God Tier) Characters under the effect of the Burst gain 12% Normal Attack Speed. This is a rare multiplier that significantly increases DPS for Yoimiya and Ayato.

Verdict: C2 is great. C6 is the goal.

Top Team Compositions

1. Yoimiya Vaporize

  • Main DPS: Yoimiya
  • Hydro: Yelan / Xingqiu
  • Buffer: Yun Jin (C6)
  • Shield: Zhongli

Why it works: Yun Jin buffs Yoimiya's Normal Attacks massively. With C6, the Attack Speed allows Yoimiya to finish her combo strings faster, resulting in more vapes. The Rainbow passive is easily satisfied (Pyro/Hydro/Geo/Geo).

2. Ayato Hypercarry

  • Main DPS: Ayato
  • Buffer: Yun Jin
  • Anemo: Kazuha
  • Healer/Buff: Bennett

Why it works: Ayato's slashes count as Normal Attack DMG. Yun Jin's Flat DMG buff scales incredibly well with Ayato's high attack speed and Kazuha's DMG% buff/Shred.

Rotations & Combos

Standard Support Rotation:
Supports > Yun Jin EQ > Main DPS

Tip: Always use Yun Jin just before your Main DPS to maximize the buff duration (12s). If using Favonius Lance, weave a Normal Attack after E to ensure a Crit.

Frequently Asked Questions

Yun Jin vs. Bennett?
Bennett is a generalist (ATK buff + Heal). Yun Jin is a specialist (Normal Attack Flat DMG). For Yoimiya, they are often used together. For Ayato, Yun Jin can sometimes be better if Bennett is busy.

Mono Geo or Rainbow?
Rainbow. Her passive explicitly rewards different elements. While she works with Noelle/Itto in Mono Geo, she loses a bit of her passive buff potential compared to running her with Yoimiya/Ayato.

Data Source: KQM Standards. Last Updated: December 2025