RSS

Blog posts of '2025' 'December'

Clorinde Guide: The Definitive Build & Analysis

Clorinde, the Champion Duelist of Fontaine
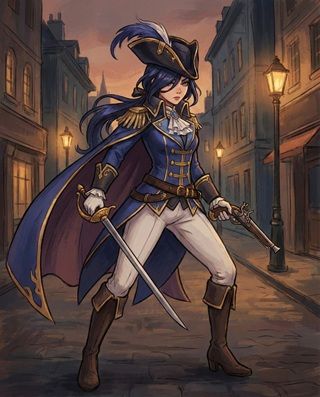
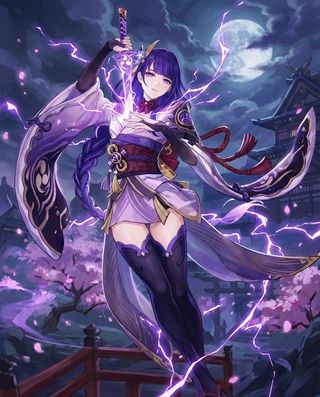
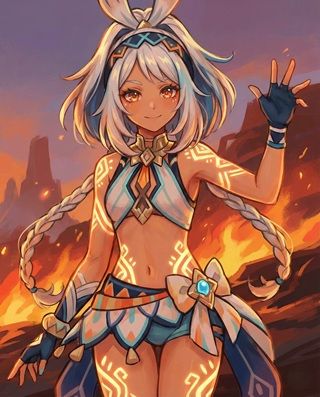
Clorinde Genshin Impact Character Art
Rarity (5-Star)
Element Electro
Weapon Sword
Best Role On-Field DPS
Stat Priority CRIT > ATK% > EM
Tier S (Versatile Carry)

Clorinde is the Champion Duelist of Fontaine, wielding a sword and pistol in a unique "Night Vigil" combat style. She relies on the Bond of Life mechanic, converting healing into massive damage boosts, making her a self-sustaining powerhouse who thrives in high-risk, high-reward gameplay.


Pros

  • High mobility with Elemental Skill (Lunge).
  • Self-sustaining (Heals herself constantly).
  • Flexible teams (Aggravate, Overload, Electro-Charged).
  • Easy to build (Ascension gives Crit Rate).
  • Fast attacks drive off-field DPS (Fischl/Xingqiu) well.

Cons

  • Vulnerable to interruption (Needs shield or Xingqiu).
  • Cannot be healed by teammates during Skill (Risk of death).
  • Short Skill uptime (7.5s) requires tight rotations.
  • Damage drops if Bond of Life isn't managed correctly.

Quick Guide (TL;DR)

If you don't have time for the math, here is the cheat sheet.

  • Best Artifact: 4pc Fragment of Harmonic Whimsy (BiS).
  • Alt Artifact: 4pc Thundering Fury (Aggravate CD Reset) or 4pc Gladiator.
  • Best Weapon: Absolution (Signature).
  • Alt Weapon: Mistsplitter Reforged or Haran Geppaku.
  • F2P Weapon: Finale of the Deep (Craftable) or The Black Sword (BP).
  • Main Stats: SANDS: ATK% | GOBLET: Electro DMG | CIRCLET: CRIT DMG.
  • Talent Priority: Elemental Skill > Elemental Burst > Normal Attack.
  • Top Team: Clorinde + Fischl + Nahida + Kazuha (Aggravate).
Pro Tip: The "3-Hit Rule": During her Skill state, perform 3 Normal Attacks (Pistol Shots) to build up Bond of Life, then press Skill (Lunge) to consume the bond for max damage and healing. Repeat this cycle: N3 -> E -> N3 -> E.

Need Primogems for Absolution?

Get Genesis Crystals at a discounted price with instant delivery.

Top Up Secure & Fast via GameCharge

Ascension & Talent Materials

Category Material Name Source
Ascension Lumitoile Liffey Region (Fontaine Underwater)
Boss Drop Fontemer Unihorn Millennial Pearl Seahorse (Fontaine)
Talent Books Teachings of Justice Pale Forgotten Glory (Tue/Fri/Sun)
Common Mob Transoceanic Pearl Fontemer Aberrants

Talent Breakdown & Mechanics

Elemental Skill: Hunter's Vigil

  • Night Vigil State: Entering this state changes her Normal Attacks to "Swift Hunt" (Pistol) and her Skill to "Impale the Night" (Lunge). She cannot use Charged Attacks.
  • Bond of Life (BoL):
    • Pistol Shots: Grant BoL (35% of max HP). Deals more damage but generates Bond.
    • Lunge: Clears BoL. If BoL ≥ 100%, she lunges further, deals massive AoE Electro DMG, and heals herself.
    • Strategy: You want to build BoL high (to ≥100%) then clear it for the heal and nuke.
  • Healing Restriction: While in this state, incoming healing from teammates is converted to BoL instead of HP (except for her own self-heal).

Elemental Burst: Last Lightfall

  • Cost: 60 Energy | Cooldown: 15s
  • The Finisher: Grants Clorinde a large amount of Bond of Life instantly and deals AoE Electro DMG.
  • Usage: Use this to start a rotation or panic-heal. It jumpstarts your BoL stacking so you can Lunge immediately.

Passive: Dark-Shattering Flame

  • Reaction Buff: When a party member triggers an Electro-related reaction, Clorinde's Electro DMG increases by 20% of her ATK (Max 1800 DMG). Max 3 stacks. This makes ATK% very valuable.

Talent Priority Order:

  1. Elemental Skill (Level 10) - Primary source of all damage.
  2. Elemental Burst (Level 8) - Burst damage and BoL generation.
  3. Normal Attack (Level 1) - Ignore (Skill uses separate scaling).

Stat Requirements & ER Thresholds

Clorinde doesn't need much ER if run with Fischl (double Electro).

Team Context Weapon ER Requirement
Double Electro (Fischl) Any 110% - 120%
Solo Electro Any 130% - 150%
Thundering Fury Set Any 100% - 110%

Substat Priority:

  1. CRIT Rate / CRIT DMG (Target 70/160+ - she ascends with CRIT Rate)
  2. ATK% (Scales well with passive)
  3. Elemental Mastery (Aim for 100-200 for Aggravate/Hyperbloom)
  4. Energy Recharge (Comfort only)

Best Artifacts Comparison

Set Name Role Reasoning
4pc Fragment of Harmonic Whimsy BiS Increases DMG by 54% when Bond of Life value changes. Since Clorinde constantly gains/clears Bond, this has 100% uptime and the highest multiplier.
4pc Thundering Fury Cooldown Reduction Decreases Skill CD when triggering reactions. Allows for nearly infinite E uptime in Aggravate teams. Very fun and competitive.
4pc Gladiator's Finale Standard Boosts Normal Attack DMG by 35%. Clorinde's pistol shots count as Normal Attacks. Solid if you have good pieces.

Weapon Rankings

Weapon Type Performance Notes
Absolution CRIT DMG S+ Signature. High Base ATK, massive Crit DMG, and increases DMG when Bond of Life value increases.
Mistsplitter Reforged CRIT DMG S Ayaka's sword. Provides massive Elemental DMG bonus. Very close to signature.
Finale of the Deep (R5) ATK% A (F2P) Craftable. Grants ATK based on Bond of Life cleared. Clorinde clears Bond naturally, making this her best F2P option.
The Black Sword CRIT Rate A (BP) Boosts Normal Attack DMG. Good stat stick, but be careful of overcapping Crit Rate.

Constellation Value

Clorinde is very complete at C0. C1 and C2 offer damage and utility.

  • C1: "From This Day, I Pass the Candle's Shadow" - (Damage) When attacking in Night Vigil state, summons a shadow that deals Electro DMG. Adds ~20% extra damage and more Electro application.
  • C2: "Now, As We Face the Perils of the Long Night" - (Interruption) Buffs her passive damage multiplier (30% instead of 20%) and grants Interruption Resistance. This fixes her biggest weakness (getting knocked around).
  • C6: "And So I Shall Never Fear the Night" - (Hypercarry) Massive Crit Rate/DMG boost, increased resistance, and additional shadows. Makes her nearly unkillable and deal absurd damage.

Verdict: C0 is great. C1 is good for Aggravate. C2 is the comfort pick.

Top Team Compositions

1. Aggravate (Standard)

  • Main DPS: Clorinde
  • Dendro: Nahida / Kirara / Baizhu
  • Electro: Fischl (C6)
  • Anemo: Kazuha / Sucrose

Why it works: Clorinde applies Electro fast, driving Fischl's A4 passive constantly. Nahida provides EM buff. Kazuha shreds Electro RES. High damage floor and ceiling.

2. Overload (Chevreuse)

  • Main DPS: Clorinde
  • Support: Chevreuse (C6)
  • Pyro: Xiangling / Thoma / Dehya
  • Electro: Fischl / Yae Miko

Why it works: Chevreuse shreds Electro/Pyro RES without needing Swirl. Clorinde's lunge helps chase enemies knocked back by Overload. Thoma/Dehya provide interruption resistance.

Rotations & Combos

The "3N1E" Combo:
Clorinde Q > Supports > Clorinde E > (Shoot x3 -> Lunge) repeat until timer ends

Explanation: Shooting 3 times (3N) builds Bond of Life to >100%. Pressing Skill (E) clears it for the enhanced Lunge. If you Lunge too early (low BoL), you deal pitiful damage and don't heal much.

Frequently Asked Questions

Clorinde vs. Raiden?
Raiden has infinite interruption resistance and batteries the team. Clorinde has higher personal mobility and self-healing. Raiden is comfier; Clorinde is faster/more dynamic.

Can I use a healer?
Yes, but healers do not heal Clorinde during her E state (healing is converted to Bond of Life). They heal the rest of the team or provide buffs (e.g., Baizhu shield/buff).

Data Source: KQM Standards. Last Updated: December 2025

Raiden Shogun Guide: The Definitive Build & Analysis

Raiden Shogun, the Electro Archon and Narukami Ogosho

Raiden Shogun Genshin Impact Character Art
Rarity (5-Star Archon)
Element Electro
Weapon Polearm
Best Role Universal Battery / Burst DPS
Stat Priority ER > CRIT > ATK% = Electro DMG
Tier SS (Universal Support)

Raiden Shogun is the Electro Archon, Beelzebul. She serves as the ultimate battery, restoring energy to the entire team while dealing massive burst damage herself. Her unique "Chakra Desiderata" mechanic rewards teams with high-cost bursts, making her the engine of the "Rational" team.


Pros

  • Restores massive energy to the entire team (Universal Battery).
  • Buffs team Elemental Burst DMG (Elemental Skill).
  • High personal damage during her burst window.
  • Infinite resistance to interruption during burst.
  • F2P Friendly (The Catch is her best 4-star weapon).

Cons

  • Beidou Synergy Issue (Her burst doesn't drive Beidou's).
  • Cannot break Electro shields (Immune).
  • Requires field time (7s) to restore energy.
  • Hyperbloom builds (EM) waste her burst potential.

Quick Guide (TL;DR)

If you don't have time for the math, here is the cheat sheet.

  • Best Artifact: 4pc Emblem of Severed Fate (Uncontested BiS).
  • Alt Artifact: 4pc Gilded Dreams (Hyperbloom Trigger Only).
  • Best Weapon: Engulfing Lightning (Signature).
  • F2P Weapon: The Catch (R5) (Best 4-star, free from fishing).
  • Alt Weapon: Skyward Spine or Favonius Lance.
  • Main Stats: SANDS: ER% | GOBLET: ATK% or Electro | CIRCLET: CRIT.
  • Talent Priority: Elemental Burst > Elemental Skill > Normal Attack (Ignore).
  • Top Team: Raiden + Xiangling + Xingqiu + Bennett (Rational).
Pro Tip: Burst Buff: Always use Raiden's Skill (E) first. It lasts 25s and buffs the Elemental Burst DMG of all party members based on their energy cost. It should be active 100% of the time.

Need Primogems for C2 Raiden?

Get Genesis Crystals at a discounted price with instant delivery.

Top Up Secure & Fast via GameCharge

Ascension & Talent Materials

Category Material Name Source
Ascension Amakumo Fruit Seirai Island (Inazuma)
Boss Drop Storm Beads Thunder Manifestation (Inazuma)
Talent Books Teachings of Light Violet Court (Wed/Sat/Sun)
Common Mob Handguards Nobushi / Kairagi (Inazuma)

Talent Breakdown & Mechanics

Elemental Skill: Transcendence: Baleful Omen

  • Eye of Stormy Judgment: Summons an eye that performs coordinated attacks with your active character.
  • Buff: Increases the Elemental Burst DMG of characters based on their Burst Energy Cost (0.3% per Energy). E.g., 80 Energy cost = 24% DMG Bonus.
  • Duration: Lasts 25s, Cooldown 10s. 100% Uptime.

Elemental Burst: Secret Art: Musou Shinsetsu

  • Cost: 90 Energy | Cooldown: 18s
  • Musou no Hitotachi: Unleashes a massive slash, then enters the "Musou Isshin" state.
  • Musou Isshin: Raiden attacks with her tachi for 7s. These attacks regenerate energy for the entire party.
  • Chakra Desiderata: A ring that charges up when teammates use their bursts. The more energy teammates consume, the brighter the ring glows. When Raiden bursts, she consumes these stacks to deal massive damage.

Passive: Enlightened One

  • ER Scaling: Each 1% of Energy Recharge above 100% grants Raiden:
    • 0.6% greater Energy Restoration from Musou Isshin.
    • 0.4% Electro DMG Bonus.
  • Goal: Aim for 270% ER with Engulfing Lightning, or 220-250% with The Catch.

Talent Priority Order:

  1. Elemental Burst (Level 10) - Main damage and energy restoration.
  2. Elemental Skill (Level 9) - Team Burst buff.
  3. Normal Attack (Level 1) - Ignore (Burst uses separate scaling).

Stat Requirements & ER Thresholds

Raiden scales heavily on ER. It gives her Electro DMG Bonus and Energy Regeneration.

Weapon Goal ER Requirement
Engulfing Lightning Max DMG 270%
The Catch (R5) Standard 220% - 240%
Skyward Spine Standard 220% - 230%

Substat Priority:

  1. CRIT Rate / CRIT DMG (Target 60/120+)
  2. Energy Recharge (Until requirement met)
  3. ATK%
  4. Elemental Mastery (Only for Hyperbloom Raiden)

Best Artifacts Comparison

Set Name Role Reasoning
4pc Emblem of Severed Fate BiS Converts ER to Burst DMG. Since Raiden needs 200%+ ER, this set provides a massive 50-75% DMG Bonus. No other set comes close.
4pc Gilded Dreams Hyperbloom Use ONLY if playing Full EM Raiden for Hyperbloom triggers. Stack full EM stats.
4pc Tenacity of the Millelith Niche Support Can work on Eula teams to buff ATK, but sacrifices Raiden's personal damage.

Weapon Rankings

Weapon Type Performance Notes
Engulfing Lightning ER% S+ Signature. Converts ER to ATK. Gives massive ER after burst. The perfect weapon for her kit.
The Catch (R5) ER% S (F2P God) Free from Fishing. Increases Burst Crit Rate and DMG. Beats most R1 5-star weapons (except Engulfing).
Staff of Homa CRIT DMG S Great stat stick, but makes ER management harder. Good if you have enough ER from artifacts.
Dragon's Bane EM S (Hyperbloom) Best for full EM builds. Useless for standard DPS Raiden.

Constellation Value

Raiden C2 is widely considered the best early constellation in the game.

  • C1: Ominous Inscription - (QoL) Chakra Desiderata accumulates faster (80% more from Electro, 20% more from others). Makes rotations smoother.
  • C2: Steelbreaker - (Broken) While using Musou no Hitotachi (Burst), attacks ignore 60% of opponents' DEF. This is a ~40% damage increase. It turns her from a sub-DPS to a Hypercarry.
  • C3: Shinkage Bygones - (Damage) +3 Levels to Burst. Massive damage increase.

Verdict: C0 is great support. C2 is a top-tier DPS.

Top Team Compositions

1. Raiden National (Rational)

  • Driver: Raiden Shogun
  • Pyro: Xiangling
  • Hydro: Xingqiu / Yelan
  • Buffer: Bennett

Why it works: Raiden batteries Xiangling/Xingqiu, allowing them to run damage stats instead of ER. She drives Vaporize/Overload reactions during her burst uptime. Easy to play and incredibly strong.

2. Raiden Hypercarry

  • Main DPS: Raiden Shogun (C2 Preferred)
  • Buffer: Sara (C6) / Lisa
  • Anemo: Kazuha / Chevreuse
  • Buffer: Bennett

Why it works: Focuses entirely on maximizing Raiden's initial slash damage. With C6 Sara and Kazuha, she can hit for 400k+ in one slash.

Rotations & Combos

Rational Rotation:
Raiden E > Xingqiu Q E > Bennett Q E > Xiangling Q E > Raiden Q -> 3xN3C + N1C

Tip: The optimal combo during burst is 3 Normal Attacks + 1 Charged Attack repeated 3 times, followed by 1 Normal + Charge. If that's too hard, just spam Normal Attacks!

Frequently Asked Questions

Is C2 necessary?
No, but it is one of the biggest power spikes in the game (~40% damage increase). C0 Raiden clears Abyss easily in Rational or Hyperbloom teams.

ATK Goblet or Electro Goblet?
They are very close. If using Engulfing Lightning (gives tons of Electro DMG bonus), ATK goblet is often better. If using The Catch with Bennett, Electro goblet usually wins. Use whichever has better substats.

Data Source: KQM Standards. Last Updated: December 2025

Ineffa Guide: The Definitive Build & Analysis

Ineffa, the exquisite mechanical housekeeper from Nod-Krai

Ineffa Genshin Impact Character Art
Rarity (5-Star)
Element Electro
Weapon Polearm
Best Role Shield Support / Reaction Enabler
Stat Priority ATK > CRIT > EM > ER
Tier S (Lunar-Charged Specialist)

Ineffa is a highly advanced robot created by Aino and affiliated with the Clink-Clank Krumkake Craftshop in Nod-Krai. She introduces the Lunar-Charged mechanic, upgrading standard Electro-Charged reactions to deal critical hits and scale with team stats. She provides a sturdy Electro shield and summons "Birgitta" to dominate the battlefield.


Pros

  • Lunar-Charged: Transforms EC reactions to deal massive Crit DMG.
  • Role Compression: Shielder + Off-field DPS + Buffer.
  • Birgitta: 100% uptime on off-field Electro application via her summon.
  • Buffs team Elemental Mastery (Passive).
  • High personal damage scaling with ATK.

Cons

  • Shield strength scales on ATK (makes her squishy if shield breaks).
  • Requires Hydro teammates to function optimally.
  • Ascension materials (Glowing Hornshroom) are region-locked to Natlan.
  • Complex mechanics regarding "Moonsign" phases.

Quick Guide (TL;DR)

If you don't have time for the math, here is the cheat sheet.

  • Best Artifact: 4pc Silken Moon's Serenade (BiS for Lunar-Charged).
  • Alt Artifact: 4pc Gilded Dreams (General Reaction DMG).
  • Best Weapon: Fractured Halo (Signature).
  • Alt Weapon: Staff of Homa or Staff of the Scarlet Sands.
  • F2P Weapon: The Catch (R5) or Prospector's Shovel (Craftable).
  • Main Stats: SANDS: ATK% | GOBLET: Electro DMG | CIRCLET: CRIT.
  • Talent Priority: Elemental Skill > Elemental Burst > Normal Attack.
  • Top Team: Ineffa + Flins + Aino + Furina (Lunar Taser).
Pro Tip: Birgitta Positioning: Using her Skill summons Birgitta. Using the Skill again while she is active will reposition her to the target's location and reset her duration. Use this to keep your turret on mobile bosses!

Need Primogems for Ineffa?

Get Genesis Crystals at a discounted price with instant delivery.

Top Up Secure & Fast via GameCharge

Ascension & Talent Materials

Category Material Name Source
Ascension Glowing Hornshroom Natlan Region
Boss Drop Secret Source Airflow Accumulator New Natlan World Boss
Talent Books Teachings of Conflict Natlan Domain (Wed/Sat/Sun)
Common Mob Whistles (Wooden/Metal/Golden) Saurian Warriors

Talent Breakdown & Mechanics

Elemental Skill: Cleaning Mode: Carrier Frequency

  • The Shield: Activates "Optical Flow Shield Barrier" which absorbs damage based on Ineffa's ATK. It has 250% absorption vs Electro.
  • Birgitta Summon: Summons the "Multipurpose Smart Assistance Unit" (Birgitta).
  • Rocket Punches: Birgitta periodically fires AoE Electro projectiles at enemies. This is her main off-field damage source.
  • Reposition: Using Skill again while Birgitta is active moves her to the target location and resets her duration.

Elemental Burst: Supreme Instruction: Cyclonic Exterminator

  • Cost: 60 Energy | Cooldown: 15s
  • The Nuke: Ineffa launches Birgitta at the enemy, dealing massive AoE Electro DMG.
  • Team Buff: Grants "Parameter Permutation" to the team. Increases Elemental Mastery of the active character by 6% of Ineffa's ATK for 20s.
  • Marking: Applies "Calm Mark" to enemies hit, which explodes for matching elemental damage if they have an aura.

Passive: Moonsign Benediction - Assemblage Hub

  • Lunar-Charged: When a party member triggers Electro-Charged, it converts into Lunar-Charged.
  • The Benefit: Lunar-Charged deals increased damage based on Ineffa's ATK (0.7% increase per 100 ATK). Unlike standard EC, this reaction can CRIT and benefits from damage bonuses.

Talent Priority Order:

  1. Elemental Skill (Level 10) - Shield strength and Birgitta damage.
  2. Elemental Burst (Level 9) - Nuke damage and Buff.
  3. Normal Attack (Level 1) - Ignore.

Stat Requirements & ER Thresholds

Ineffa scales purely on ATK for shielding, damage, and buffs. ER is secondary but important for C2/C4 uptime.

Team Context Weapon ER Requirement
Double Electro (w/ Fischl) Signature / Homa 120% - 130%
Solo Electro (Hyperbloom) Favonius Lance 150% - 160%
Solo Electro (DPS) Signature 180% - 200%

Substat Priority:

  1. ATK% (Priority #1 - Aim for 2500+)
  2. CRIT Rate / CRIT DMG (For Lunar-Charged crits)
  3. Energy Recharge (Until comfortable)
  4. Elemental Mastery (Secondary scaling for reactions)

Best Artifacts Comparison

Set Name Role Reasoning
4pc Silken Moon's Serenade BiS Specifically designed for Lunar reaction supports. Buffs Lunar-Charged DMG significantly and provides ATK/EM.
4pc Gilded Dreams Reaction DPS Provides massive ATK and EM buffs based on team composition. Great for personal damage in mixed teams.
4pc Thundering Fury CD Reduction Reduces Skill cooldown for 100% Birgitta uptime without relying on C2 refresh. Also buffs reaction damage.

Weapon Rankings

Weapon Type Performance Notes
Fractured Halo CRIT DMG S+ Signature. High Base ATK (608). Buffs ATK by 24% after Skill/Burst. Grants "Electrifying Edict" to team (+40% Lunar-Charged DMG) when shielded.
Staff of Homa CRIT DMG S Universal stat stick. High Crit DMG is excellent since Lunar-Charged can crit. HP passive adds survivability.
Favonius Lance ER% S (Support) Best if you are struggling with energy for the team. Ineffa triggers crits easily off-field.
The Catch (R5) ER% A (F2P) Boosts Burst Crit Rate and DMG. Great for C2 Nuke playstyle.
Prospector's Shovel ATK% A (Craftable) Natlan Craftable. Buffs Skill DMG based on Max HP (?). (Stats based on leaks, may vary).

Constellation Value

Ineffa is functional at C0, but C1 and C2 enable her true support potential.

  • C1: Rectifying Processor - (Buff) When Shield is active, team gains "Carrier Flow Composite" effect: Increases Lunar-Charged DMG by 2.5% per 100 ATK (Max 50%). Massive team buff.
  • C2: Support Cleaning Module - (Nuke) Burst hits inflict "Punishment Edict". Delayed explosion deals 300% ATK as AoE Lunar-Charged DMG. Also grants shields to nearby party members.
  • C4: The Edictless Path - (Energy) Restores 5 Energy when team triggers Lunar-Charged. Solves ER issues completely.
  • C6: A Dawning Morn for You - (DPS) Triggers extra AoE attacks (135% ATK) when C1 effect is active. Turns her into a rapid-fire sub-DPS.

Verdict: C1 is the best stopping point for support. C2 adds significant personal damage.

Top Team Compositions

1. Lunar Taser (Electro-Charged)

  • Main DPS: Flins / Clorinde
  • Sub-DPS: Ineffa
  • Hydro: Aino / Furina
  • Flex: Kazuha / Ororon

Why it works: Ineffa's passive converts standard Electro-Charged into the stronger Lunar-Charged reaction. Flins or Clorinde drive the reaction, while Aino/Furina provide Hydro. Ineffa shields and buffs the reaction damage.

2. Hyperbloom Engine

  • Trigger: Ineffa (EM Build)
  • Dendro: Nahida
  • Hydro: Xingqiu / Yelan
  • Flex: Alhaitham / Baizhu

Why it works: While Lunar-Charged is her specialty, Ineffa's consistent off-field Electro application makes her a viable Hyperbloom trigger if you build her with full EM. Her shield protects the active character from Dendro Core self-damage.

Rotations & Combos

Standard Support Rotation:
Ineffa E (Shield/Summon) > Ineffa Q (Buff/Nuke) > Hydro Support > Main DPS

Tip: If Birgitta (the robot) is already on field, casting E again will teleport her to the new location and reset her duration. Use this to reposition if enemies move away.

Frequently Asked Questions

Is she better than Fischl?
For raw single-target damage? No, C6 Fischl is still queen. But Ineffa offers Shielding and buffs reaction damage (Lunar-Charged), providing defensive utility that Fischl lacks.

Does Lunar-Charged scale with EM?
Yes. Ineffa's passive states that her ATK increases the base damage, but as a transformative reaction, it also scales with the triggering character's Level and Elemental Mastery. Balancing ATK and EM is key.

Data Source: Version 5.8 Beta Leaks. Last Updated: June 2025

Candace Guide: The Definitive Build & Analysis

Candace, the Guardian of Aaru Village

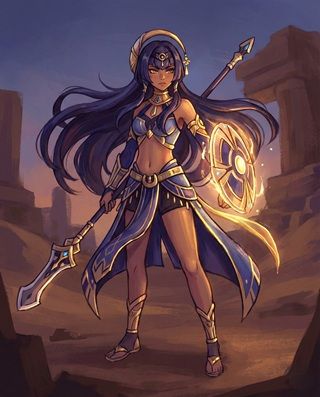
Candace Genshin Impact Character Art
Rarity (4-Star)
Element Hydro
Weapon Polearm
Best Role Hydro Buffer / Infuser
Stat Priority HP% > ER > CRIT Rate (Favonius)
Tier B (Niche Support)

Candace is the guardian of Aaru Village and a unique Hydro support. She provides Hydro Infusion to melee characters and buffs Normal Attack Element DMG based on her Max HP. While niche, she enables creative teams like Hydro Zhongli or on-field Yaoyao Bloom.


Pros

  • Hydro Infusion: Unique utility for melee chars.
  • Buffs Normal Elemental DMG (great for Ayato/Yoimiya).
  • Skill has a fun Parry mechanic (Hold E).
  • C6 adds off-field Hydro application (vital for Bloom).
  • Low cooldowns make rotations smooth.

Cons

  • Buff is lower than Yelan/Yun Jin for pure damage.
  • Hydro application is poor pre-C6 (Single instance).
  • Buff only applies to Elemental Normal Attacks (not Physical).
  • Parry damage is negligible on HP builds.

Quick Guide (TL;DR)

If you don't have time for the math, here is the cheat sheet.

  • Best Artifact: 4pc Noblesse Oblige (Team ATK Buff).
  • Alt Artifact: 2pc Tenacity / 2pc Vourukasha (Max HP for Buff).
  • Best Weapon: Favonius Lance (Team Battery - BiS).
  • F2P Weapon: Black Tassel (3⭐ HP Stat Stick).
  • DPS Weapon: Staff of Homa (Only for Main DPS Meme).
  • Main Stats: SANDS: HP% or ER | GOBLET: HP% | CIRCLET: HP% or CRIT Rate.
  • Talent Priority: Elemental Burst > Elemental Skill > Normal Attack (Ignore).
  • Top Team: Candace + Nilou + Yaoyao + Nahida (Bloom Driver).
Pro Tip: Instant Parry: Just like Beidou, if you use her Hold Skill exactly when an enemy hits you, it charges instantly to max level, dealing higher damage and generating particles without the wait time.

Need C6 Candace?

Get Genesis Crystals to pull on Sumeru/Cyno banners!

Top Up Secure & Fast via GameCharge

Ascension & Talent Materials

Category Material Name Source
Ascension Redcrest Sumeru Desert (Cactus Fruits)
Boss Drop Light Guiding Tetrahedron ASIMON (Sumeru Desert)
Talent Books Teachings of Admonition Steeple of Ignorance (Mon/Thu/Sun)
Common Mob Red Satin Eremites

Talent Breakdown & Mechanics

Elemental Skill: Sacred Rite: Heron's Sanctum

  • Tap: Dashes forward with shield. Dealing Hydro DMG.
  • Hold: Raises shield to block attacks (Hydro absorption +250%). Upon release (or if shield breaks/max time), performs a jumping strike.
  • Parry: Similar to Beidou, timing the block perfectly instantly charges the attack.

Elemental Burst: Sacred Rite: Wagtail's Tide

  • Cost: 60 Energy | Cooldown: 15s | Duration: 9s (12s at C1)
  • Prayer of the Crimson Crown:
    • Hydro Infusion: Characters wielding Sword, Claymore, or Polearm gain Hydro Infusion.
    • DMG Buff: Increases Normal Attack DMG for active character by 20% (Base) + extra based on Candace's Max HP.
    • Hydro Impact: Switching characters triggers a ripple of Hydro DMG (Max 3 times).

Passive: Celestial Dome of Sand

  • The Buffer: Increases the Elemental DMG of Normal Attacks affected by her Burst by 0.5% for every 1,000 HP Candace has.
  • Example: At 40,000 HP, she provides ~20% additional DMG Bonus (Total ~40% with base buff). This applies to ANY element Normal Attack (e.g. Ayato, Yoimiya, Cyno).

Talent Priority Order:

  1. Elemental Burst (Level 9) - Increases buff percentage.
  2. Elemental Skill (Level 8) - Damage.
  3. Normal Attack (Level 1) - Ignore.

Stat Requirements & ER Thresholds

Candace needs to Burst every rotation to maintain the infusion/buff. ER is priority #1.

Team Context Weapon ER Requirement
Solo Hydro Favonius Lance 200% - 220%
Double Hydro (Nilou) Black Tassel 180% - 200%
Double Hydro (Nilou) Favonius Lance 160% - 180%

Substat Priority:

  1. Energy Recharge (Until requirement met)
  2. HP% (Buff Scaling)
  3. CRIT Rate (For Favonius trigger)
  4. Flat HP

Best Artifacts Comparison

Set Name Role Reasoning
4pc Noblesse Oblige BiS Support Standard support set. Buffs team ATK by 20%. Combines well with her Normal Attack buffs.
2pc HP / 2pc HP Max Buff Mix Tenacity and Vourukasha for 40% HP. Maximizes her Passive buff if ATK isn't needed (e.g., Bloom teams).
4pc Emblem of Severed Fate DPS/ER If you are struggling with Energy or want her Burst to deal some damage.

Weapon Rankings

Weapon Type Performance Notes
Favonius Lance ER% S+ Solves her ER needs and batteries the team. Essential for ensuring 100% Burst uptime.
Black Tassel HP% S (Bloom) 3-Star stat stick. 46.9% HP. Best for maximizing her buff or for Bloom teams where ER is managed via artifacts.
The Catch ER% A Good ER stick if Favonius is taken. Crit Rate passive helps Favonius procs if you lack artifacts.

Constellation Value

Candace works at C0, but C1 and C6 are game-changers for her viability.

  • C1: Returning Heiress - (Duration) Increases Burst duration by 3s (Total 12s). Improves uptime significantly. Highly recommended.
  • C6: The Overflow - (Application) When characters with her infusion perform Normal Attacks, Candace unleashes an AoE Hydro wave (every 2.3s). This adds off-field Hydro application which she lacks at C0, making her viable in Bloom/Freeze.

Verdict: C1 is the baseline for support. C6 makes her a meta option for Bloom.

Top Team Compositions

1. Nilou Bloom (Yaoyao Driver)

  • Core: Nilou
  • Infuser: Candace (C6 preferred)
  • Driver/Healer: Yaoyao
  • Dendro: Nahida / Dendro MC

Why it works: Candace infuses Yaoyao's polearm with Hydro. Yaoyao stays on-field, attacking to apply Hydro while her bunnies heal/apply Dendro. Candace's C6 adds more Hydro.

2. Ayato/Yoimiya Support

  • Main DPS: Ayato / Yoimiya
  • Buffer: Candace
  • Sub-DPS: Yelan / Xingqiu
  • Flex: Zhongli / Kazuha

Why it works: Candace provides Hydro Resonance (+25% HP) and buffs Normal Attack DMG. Works well if you don't have Yun Jin or want Hydro particles.

Rotations & Combos

Standard Support Rotation:
Candace E (Hold) Q > Swap to Driver

Tip: You don't need to hold E for the full duration. Just hold it long enough to block a hit (Parry) or for the circle to charge, then release. This generates max particles.

Frequently Asked Questions

Candace vs. Yun Jin?
Yun Jin usually provides higher damage buffs for Normal Attackers. Candace offers Hydro application (C6) and Infusion. Use Candace if you need the Hydro element or AoE waves.

Does she work with Ayato?
Yes. She gives him Hydro Resonance (+HP) and buffs his slashes. While Yelan deals more damage, Candace is a viable budget option.

Data Source: KQM Standards. Last Updated: December 2025

Xingqiu Guide: The Definitive Build & Analysis

Xingqiu, the Guhua Geek and Hydro Archon in spirit

Xingqiu Genshin Impact Character Art
Rarity (4-Star)
Element Hydro
Weapon Sword
Best Role Off-Field Sub-DPS / Enabler
Stat Priority ER > CRIT > ATK%
Tier SS+ (The 6-Star Character)

Xingqiu is the Feiyun Commerce Guild's second son and arguably the most valuable unit in the game. He offers damage reduction, interruption resistance, minor healing, and the best off-field Hydro application in Genshin Impact. He is the backbone of the "National Team" and "Hyperbloom" archetypes.


Pros

  • Unrivaled off-field Hydro application (Enables Vape/Bloom).
  • Provides Damage Reduction (up to ~48%) and Interrupt Resist.
  • High personal single-target damage.
  • Micro-heals active character upon sword expiry.
  • Synergizes perfectly with Yelan (Double Hydro).

Cons

  • High Energy Cost (80) requires specific weapons (Sac Sword).
  • Long Skill cooldown (21s).
  • Orbital swords apply Wet to active character (Risk of Freeze).
  • Single-target focus (Burst doesn't hit AoE well).

Quick Guide (TL;DR)

If you don't have time for the math, here is the cheat sheet.

  • Best Artifact: 4pc Emblem of Severed Fate (BiS).
  • Alt Artifact: 4pc Noblesse Oblige (If no one else has it) or 2pc/2pc.
  • Best Weapon: Sacrificial Sword (R3+ is mandatory for smooth rotations).
  • Alt Weapon: Favonius Sword (Team Battery).
  • Damage Weapon: Primordial Jade Cutter or Mistsplitter (If C6 + High ER).
  • Main Stats: SANDS: ATK% or ER | GOBLET: Hydro DMG | CIRCLET: CRIT.
  • Talent Priority: Elemental Burst > Elemental Skill > Normal Attack (Ignore).
  • Top Team: Xingqiu + Xiangling + Bennett + Raiden (Rational).
Pro Tip: The Kick: Xingqiu's Skill (E) hits twice. If using Sacrificial Sword, wait for the first two hits to land before pressing E again to ensure the cooldown reset triggers. Also, hug the enemy while E is active to apply Hydro via the orbital swords ("Face-hugging").

Need C6 Xingqiu?

Get Genesis Crystals to pull on banners or buy him from Paimon's Shop (March/September)!

Top Up Secure & Fast via GameCharge

Ascension & Talent Materials

Category Material Name Source
Ascension Silk Flower Liyue Harbor / Wangshu Inn
Boss Drop Cleansing Heart Oceanid (Liyue)
Talent Books Teachings of Gold Taishan Mansion (Wed/Sat/Sun)
Common Mob Masks Hilichurls (Everywhere)

Talent Breakdown & Mechanics

Elemental Skill: Guhua Sword: Fatal Rainscreen

  • Rain Swords (Orbital): Deals 2 hits of Hydro DMG and summons 3-4 Rain Swords that orbit the active character.
  • Defense: These swords increase the character's Resistance to Interruption and provide Damage Reduction (up to ~29% base + 20% from Hydro DMG bonus).
  • Healing: When a sword shatters or expires, it heals the active character by 6% of Xingqiu's Max HP.
  • Application: Applies Hydro to enemies on contact (Face-hugging).

Elemental Burst: Guhua Sword: Raincutter

  • Cost: 80 Energy | Cooldown: 20s | Duration: 15s
  • Sword Rain: Normal Attacks trigger coordinated Hydro sword attacks.
  • Application: Provides incredible off-field Hydro application. Standard ICD rules apply, but he fires so many swords it doesn't matter.
  • Uptime: Persists off-field. Does not snapshot stats.

Passive: Hydropathic

  • Healing: As mentioned, swords heal on expiration. This allows Xingqiu to be the sole "healer" in skilled teams (e.g., Hu Tao double hydro).

Talent Priority Order:

  1. Elemental Burst (Level 10) - Primary damage.
  2. Elemental Skill (Level 9) - Strong nuke (especially with Vape).
  3. Normal Attack (Level 1) - Ignore.

Stat Requirements & ER Thresholds

Xingqiu lives and dies by his ER. If he doesn't Burst, he is useless.

Constellation/Weapon Team Context ER Requirement
C6 + Sac Sword (R3+) Standard 160% - 180%
C0-C5 + Sac Sword Standard 200% - 220%
Damage Weapon (Jade Cutter) With Battery (Raiden) 180% - 200%

Substat Priority:

  1. Energy Recharge (Until requirements met)
  2. CRIT Rate / CRIT DMG (He does significant personal damage)
  3. ATK%
  4. Elemental Mastery (Nice bonus for vapes)

Best Artifacts Comparison

Set Name Role Reasoning
4pc Emblem of Severed Fate BiS Converts his massive ER needs into Burst DMG. Since Xingqiu always builds ER, this set is mathematically superior to everything else.
4pc Noblesse Oblige Support If no one else in the team (Bennett) has it, Xingqiu can run it. Lowers his personal damage but buffs the team.
2pc Hydro / 2pc ATK Transition Good placeholders if you don't have a full Emblem set yet.

Weapon Rankings

Weapon Type Performance Notes
Sacrificial Sword (R3+) ER% S+ Allows E -> E combo. Generates double particles and double damage. At high refinement, it is better than most 5-stars due to energy comfort.
Primordial Jade Cutter CRIT Rate S (Damage) Highest damage ceiling, but requires C6 + ER Sands + Raiden battery to maintain burst uptime without Sac Sword.
Favonius Sword ER% A (Battery) Use if you don't have Sac Sword. Good for team energy, but less personal damage.
Skyward Blade ER% A High Base ATK + ER. Solid option if available, but Sac Sword is often comfier.

Constellation Value

Xingqiu gets better with every constellation. C6 is a massive spike.

  • C2: Rainbow Upon the Azure Sky - (Core) Extends Burst duration by 3s (Total 18s). Decreases Hydro RES of enemies hit by swords by 15%. Essential for Hu Tao/Raiden teams.
  • C6: Hence, Call Them My Own Verses - (Energy/DMG) Sword Rain pattern changes to 2-3-5. The 5-sword attack deals massive damage and regenerates 3 Energy for Xingqiu. This drastically lowers ER requirements.

Verdict: Aim for C6 over time. Buy him from Paimon's shop whenever possible.

Top Team Compositions

1. National (Raiden/Sucrose)

  • Core: Xiangling + Bennett
  • Enabler: Xingqiu
  • Driver: Raiden Shogun (Rational) / Sucrose (Classic)

Why it works: Xingqiu allows Xiangling to Vaporize her Pyronado. Raiden provides energy for Xingqiu/Xiangling. Bennett buffs everyone. The most meta team in history.

2. Hu Tao Vaporize

  • Main DPS: Hu Tao
  • Hydro: Xingqiu
  • Hydro 2: Yelan (Double Hydro)
  • Shield: Zhongli

Why it works: Xingqiu provides Hydro application, damage reduction (stacks with Hu Tao's defense), and interrupt resist. Combined with Yelan, they deal massive off-field damage and ensure Hu Tao never misses a Vape.

Rotations & Combos

Sac Sword Rotation:
Xingqiu Q (Burst) > N1 (Normal Attack) > E (Skill) > E (Skill Reset) > Swap

Tip: Always Q before E. If you E then Q, you waste time absorbing particles during the Q animation (which doesn't let you swap early). Q first allows you to E, E, and swap immediately while particles travel to you.

Frequently Asked Questions

Xingqiu vs. Yelan?
Xingqiu = Defense (Damage Reduction, Stagger Resist), Better Hydro App (C6). Yelan = Offense (Damage Buff, Mobility). Use Xingqiu if you die easily; use Yelan if you want speed.

Is R1 Sac Sword enough?
It's painful. At R1, the reset chance is low (40%) and cooldown is high. If it fails, your rotation breaks. Aim for R3+ for consistency.

Data Source: KQM Standards. Last Updated: December 2025

Traveler (Hydro) Guide: The Definitive Build & Analysis

Traveler (Hydro)

Traveler Hydro Genshin Impact Character Art
Rarity (5-Star)
Element Hydro
Weapon Sword
Best Role Sub-DPS / Pneuma Support
Stat Priority HP% > CRIT > ER
Tier C (Puzzle Solver)

The Hydro Traveler wields the power of Fontaine's waters. While their kit is awkward for meta combat due to stationary skills and a burst that floats away, they provide essential Pneuma-aligned damage for solving puzzles in Fontaine and offer a unique HP-draining "machine gun" playstyle.


Pros

  • Free Pneuma application (vital for Fontaine abyss/puzzles).
  • "Pew Pew" Skill (Hold E) is fun and unique.
  • HP Drain mechanic enables Marechaussee Hunter set.
  • Decent Hydro application for F2P Bloom teams.
  • Self-healing mechanic built into Skill.

Cons

  • Burst moves away from enemies (often missing completely).
  • Stationary while holding Skill (vulnerable to interruption).
  • Multipliers are relatively low compared to other Hydro units.
  • Skill cooldown is long without C4 shield/interruption help.

Quick Guide (TL;DR)

If you don't have time for the math, here is the cheat sheet.

  • Best Artifact: 4pc Golden Troupe (Skill DMG BiS).
  • Alt Artifact: 4pc Marechaussee Hunter (On-Field Driver) or 4pc Emblem.
  • Best Weapon: Splendor of Tranquil Waters (Furina's Sword).
  • Alt Weapon: Primordial Jade Cutter or Wolf-Fang.
  • F2P Weapon: Fleuve Cendre Ferryman (The Pipe - BiS F2P).
  • Support Weapon: Favonius Sword (Battery).
  • Main Stats: SANDS: HP% | GOBLET: Hydro DMG | CIRCLET: CRIT.
  • Talent Priority: Elemental Skill > Elemental Burst > Normal Attack.
  • Top Team: Traveler + Furina + Kazuha + Baizhu (Mono Hydro).
Pro Tip: Burst Wall Blocking: Just like Anemo Traveler's tornado, the Hydro Traveler's bubble stops moving if it hits a wall or a large enemy. Try to aim it at a wall to keep the Hydro application in one spot!

Switching back to Dendro MC?

Dendro is generally stronger, but Hydro is fun for memes!

Top Up Secure & Fast via GameCharge

Ascension & Talent Materials

Category Material Name Source
Ascension Romaritime Flower Fontaine Underwater / Salacia Plain
Boss Drop None (Specific) Traveler uses Gemstones from various bosses.
Talent Books Equity / Justice / Order Fontaine Domain (Rotates required type per level)
Common Mob Transoceanic Pearl Fontemer Aberrants

Talent Breakdown & Mechanics

Elemental Skill: Aquacrest Saber

  • Tap: Unleashes a torrent of water forward. Pneuma energy is released.
  • Hold (Pew Pew Mode): Enters Aiming Mode and rapidly fires "Dewdrops" at enemies.
  • HP Mechanic: If HP > 50%, firing dewdrops consumes HP but deals bonus damage.
  • Suffusion: If you lose HP while holding, the final slash damage increases.

Elemental Burst: Rising Waters

  • Cost: 80 Energy | Cooldown: 20s
  • The Bubble: Creates a floating bubble that deals AoE Hydro DMG.
  • Movement: The bubble moves slowly away from the character. If it hits enemies, it passes through them (C0) or slows down (C2).
  • Hydro App: Good for applying Hydro to large groups if you can position it correctly.

Passive: Spotless Waters

  • Self-Heal: When the "Dewdrops" hit an enemy, they generate "Sourcewater Droplets" (Note: These are only for the Traveler, Neuvillette cannot use them). Picking them up heals the Traveler, sustaining the Hold E drain.

Talent Priority Order:

  1. Elemental Skill (Level 9) - Main damage source in "Pew Pew" builds.
  2. Elemental Burst (Level 8) - Secondary damage.
  3. Normal Attack (Level 1) - Ignore.

Stat Requirements & ER Thresholds

High ER is needed if you want to use the Burst, though Skill-only builds can ignore it.

Team Context Weapon ER Requirement
Solo Hydro Favonius Sword 200% - 220%
Double Hydro (w/ Neuvillette) Any 150% - 160%
Skill Only (No Burst) Any 0%

Substat Priority:

  1. HP% (Damage scales on HP)
  2. CRIT Rate / CRIT DMG (Target 60/120+)
  3. Energy Recharge (If using Burst)
  4. ATK% (Much less effective than HP)

Best Artifacts Comparison

Set Name Role Reasoning
4pc Golden Troupe BiS Skill Boosts Skill DMG by 70%. Since the "Pew Pew" mode counts as Elemental Skill damage, this is the strongest set for personal damage.
4pc Marechaussee Hunter On-Field The Skill drains HP constantly, meaning you get 36% Crit Rate for free. Excellent if you use him/her on-field to shoot.
4pc Emblem of Severed Fate Burst Support If you only care about the Burst, this helps with ER needs and buffs the bubble damage.

Weapon Rankings

Weapon Type Performance Notes
Fleuve Cendre Ferryman ER% S+ (F2P) Fishing Pipe. Gives massive 16% Crit Rate to Skill and extra ER. Fits the kit perfectly.
Wolf-Fang CRIT Rate S (BP) Boosts Skill/Burst Crit Rate and DMG. Very strong for the "Pew Pew" build.
Festering Desire ER% S (Legacy) If you played in 1.2, this is amazing. Similar to the Pipe but with Skill DMG bonus.
Splendor of Tranquil Waters CRIT DMG S+ Furina's sword. The HP fluctuation from Skill triggers the passive. Best 5-star option.

Constellation Value

Traveler constellations are free (Fontaine statues/quest).

  • C2: Trickle-Down Justice - (Speed) The bubble (Burst) movement speed is decreased by 30% and duration extended by 3s. Makes the burst slightly more usable.
  • C4: Pouring Descent - (Shield) Using Skill grants a Hydro shield for 10% of Max HP. Helps prevent interruption while aiming.
  • C6: Tides of Justice - (Heal) When picking up a Droplet, heals the nearest party member for 6% HP based on their Max HP. Adds minor team utility.

Verdict: C2 is the most important fix for the burst mechanics.

Top Team Compositions

1. Neuvillette Support

  • Main DPS: Neuvillette
  • Battery: Hydro Traveler
  • Buffer: Furina
  • Anemo: Kazuha

Why it works: Hydro MC provides Hydro Resonance (+25% HP) and generates particles. It's a budget option if you lack other Hydro units.

2. F2P Nilou Bloom

  • Core: Nilou
  • Hydro: Hydro Traveler
  • Dendro: Collei / Dendro MC
  • Healer: Barbara

Why it works: If you really want to run Nilou but lack other Hydro options (Xingqiu/Yelan are busy), Hydro MC can apply enough hydro to generate cores, though it is clunky.

Rotations & Combos

Burst Rotation:
Aim toward wall > Traveler Q > Swap

Skill Rotation:
Hold E (Pew Pew) until HP drops > Pick up Droplets

Frequently Asked Questions

Why does the burst move?
It's a design choice (flaw). To counter this, try to position yourself so the bubble hits a wall or a boss enemy, which will stop it from moving away.

Dendro vs. Hydro MC?
Dendro MC is vastly superior meta-wise. Hydro MC is mostly for fun, lore lovers, or Pneuma puzzles in Fontaine.

Data Source: KQM Standards. Last Updated: December 2025

Mualani Guide: The Definitive Build & Analysis

Mualani, the "Meztli Guide" and premier Hydro DPS from Natlan

Mualani Genshin Impact Character Art
Rarity (5-Star)
Element Hydro
Weapon Catalyst
Best Role Vaporize DPS (Nuke)
Stat Priority HP% > CRIT > EM
Tier S (Top Tier Vape)

Mualani is a Meztli guide from Natlan who introduces a fresh "Surfing" playstyle. As a Hydro Catalyst, she deals massive bursts of damage by stacking "Wave Momentum" through her Skill. Her slow but heavy hits make her the undisputed queen of Forward Vaporize.


Pros

  • Insane single-target nuke damage (Vaporize).
  • Best overworld mobility (Water Surfing).
  • Extremely easy to build (Obsidian Codex gives 40% Crit Rate).
  • Not Burst reliant (All damage is on Skill).
  • F2P Friendly (Craftable weapon is great).

Cons

  • Attack animation can be clunky/miss small enemies.
  • Requires consistent Pyro application (Xiangling/Dehya/Mavuika).
  • Weak in AoE situations without grouping.
  • Vulnerable to interruption while surfing (needs shield/Xilonen).

Quick Guide (TL;DR)

If you don't have time for the math, here is the cheat sheet.

  • Best Artifact: 4pc Obsidian Codex (Uncontested BiS).
  • Alt Artifact: 4pc Heart of Depth (If you haven't farmed Natlan yet).
  • Best Weapon: Surf's Up (Signature).
  • Alt Weapon: Sacrificial Jade (BP) or Tome of the Eternal Flow.
  • F2P Weapon: Ring of Yaxche (Natlan Craftable - Amazing).
  • Main Stats: SANDS: HP% | GOBLET: Hydro DMG or HP% | CIRCLET: CRIT DMG.
  • Talent Priority: Elemental Skill > Elemental Burst > Normal Attack.
  • Top Team: Mualani + Xiangling + Xilonen + Zhongli/Kazuha.
Pro Tip: The 3-Stack Rule: While surfing (E), simply touching enemies grants 1 stack of "Wave Momentum." You need 3 stacks to unleash "Sharky's Surging Bite" (the big chomp). Always ensure you have 3 stacks before pressing Normal Attack.

Need Primogems for Surf's Up?

Get Genesis Crystals at a discounted price with instant delivery.

Top Up Secure & Fast via GameCharge

Ascension & Talent Materials

Category Material Name Source
Ascension Sprayfeather Gill Natlan (People of the Springs)
Boss Drop Mark of the Binding Blessing Holoway of the Goldflame (Natlan)
Talent Books Teachings of Contention Blazing Ruins (Mon/Thu/Sun)
Common Mob Saurian Whistles Saurian Warriors

Talent Breakdown & Mechanics

Elemental Skill: Surfshark Wavebreaker

  • Nightsoul's Blessing: Enters surfing state (60 points). Mualani rides her Sharky Surfboard.
  • Marking: Touching enemies applies "Marked as Prey".
  • Wave Momentum: You start with 0 stacks. Touching a marked enemy gives 1 stack. Max 3 stacks.
  • Sharky's Bite: Pressing Normal Attack consumes stacks to bite.
    • 0-2 Stacks: Weak bite.
    • 3 Stacks: Sharky's Surging Bite. Massive damage. This is what you want to Vaporize.
  • Nightsoul Points: Surfing consumes points over time. Hitting enemies restores points (via passive), extending your surf time.

Elemental Burst: Boomsharka-laka

  • Cost: 60 Energy | Cooldown: 15s
  • The Nuke: Fires a massive Super-Shark Missile that tracks enemies and deals AoE Hydro DMG based on Max HP.
  • Usage: Use this to start a rotation or finish off a wave. It doesn't contribute to the Skill's stacking mechanic directly but hits extremely hard on Vaporize.

Passive: Heat-Resistant Freshwater Floater

  • Burst Synergy: When a nearby party member triggers a "Nightsoul Burst" (Natlan mechanic), Mualani gains 1 stack of Wave Momentum (Max 3). This lets her start her rotation with a fully charged bite immediately if timed right.

Talent Priority Order:

  1. Elemental Skill (Level 10) - The source of her Surging Bite damage.
  2. Elemental Burst (Level 9) - Nuke damage.
  3. Normal Attack (Level 1) - Ignore (Skill uses its own scaling).

Stat Requirements & ER Thresholds

Mualani does not need much ER as her damage comes from her Skill. Focus entirely on HP and Crit.

Team Context Weapon ER Requirement
Solo Hydro (Vape) Any 120% - 130% (If bursting)
Double Hydro (w/ Xilonen) Any 100% - 110%

Substat Priority:

  1. CRIT DMG (Set gives 40% Rate, Ascension gives 24% Rate. You barely need Rate rolls).
  2. HP% (Everything scales on this)
  3. Elemental Mastery (Aim for 100-200 for big Vapes)
  4. CRIT Rate (Cap at 64% on stat screen to avoid overcap)

Best Artifacts Comparison

Set Name Role Reasoning
4pc Obsidian Codex BiS Gives 15% DMG Bonus and 40% CRIT Rate when consuming Nightsoul points (which she does constantly). Unbeatable.
4pc Heart of Depth Legacy Gives Hydro DMG and Normal Attack DMG. Good placeholder, but Obsidian Codex is ~15% better.
4pc Marechaussee Hunter Furina Team Works if you run Furina, but Obsidian Codex is still better because it doesn't require HP drain/heal cycles to stack.

Weapon Rankings

Weapon Type Performance Notes
Surf's Up CRIT DMG S+ Signature. 88% Crit DMG + HP + Massive Normal Attack DMG Bonus. Perfect synergy.
Ring of Yaxche HP% S (F2P God) Natlan Craftable. Gives HP and buffs Normal Attack DMG based on Max HP. R5 Rivals many 5-star weapons. Use this!
Sacrificial Jade CRIT Rate S (BP) Battle Pass. Huge Crit Rate and HP/EM buffs. Very strong, but be careful of overcapping Crit Rate with Obsidian set.
Tome of the Eternal Flow CRIT DMG A Neuvillette's weapon. Good stat stick, but Mualani can't stack the passive fully (Charge Attack vs Normal Attack).

Constellation Value

Mualani is very strong at C0. C1 and C2 are massive damage multipliers.

  • C1: The Leisurely "Meztli"... - (Damage) The first Surging Bite (3-stack hit) deals damage equal to 66% of Max HP. This is a huge frontloaded nuke. Reduces exploration stamina cost.
  • C2: Mualani, Going All Out! - (QoL/Damage) Obtaining 1 stack of Wave Momentum grants another stack automatically. Allows you to reach 3 stacks instantly for faster attacks.
  • C6: Spirit of the People's Springs - (Hypercarry) Removes the limit on the C1 damage buff (applies to all bites). Turns her into a C6 Neuvillette/Yelan tier carry.

Verdict: C1 is the best stopping point for value. C2 makes her gameplay faster.

Top Team Compositions

1. Natlan Vaporize (Premium)

  • Main DPS: Mualani
  • Pyro App: Xiangling / Mavuika
  • Support: Xilonen (Shred/Heal)
  • Flex: Zhongli / Kachina (Scroll)

Why it works: Mualani hits slow enough that Xiangling can maintain Pyro aura for every bite to Vaporize. Xilonen provides massive RES shred and healing.

2. Burning Vape (Emilie)

  • Main DPS: Mualani
  • Dendro: Emilie / Nahida
  • Pyro: Dehya / Thoma
  • Support: Xilonen / Bennett

Why it works: Burning maintains a Pyro aura on enemies (Dendro + Pyro). Mualani Vapes off the Burning aura. Emilie deals massive off-field damage while Burning is active.

Rotations & Combos

Standard Vape Rotation:
Xilonen E N2 Q > Xiangling Q E > Mualani E -> (Touch -> Touch -> Touch -> Attack) x3 -> Q

Tip: You don't need to spam click attack. Just surf through enemies. When you see the 3 shark icons light up above her, press Attack once to unleash the nuke.

Frequently Asked Questions

Why not Marechaussee Hunter?
While she can use it with Furina, Obsidian Codex gives 40% Crit Rate unconditionally just for using her Skill (Nightsoul consumption). It is much easier to use and frees you from Furina reliance.

Can I use Bennett?
Bennett buffs ATK. Mualani scales on HP. Bennett is useless for her personal damage, but he is still used in her teams to buff Xiangling (who does a lot of damage).

Data Source: KQM Standards. Last Updated: December 2025

Sigewinne Guide: The Definitive Build & Analysis

Sigewinne, the adorable Melusine Head Nurse of the Fortress of Meropide

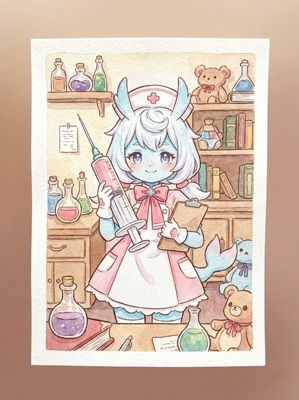
Sigewinne Genshin Impact Character Art
Rarity (5-Star)
Element Hydro
Weapon Bow
Best Role Team Healer / Off-Field Skill Buffer
Stat Priority HP% > ER > CRIT (Favonius)
Tier A (Premium Healer)

Sigewinne is the adorable Melusine Head Nurse of the Fortress of Meropide. She is a dedicated Hydro Healer who uses a unique "Bond of Life" mechanic to provide continuous healing and buff the off-field damage of Elemental Skills (like Furina, Fischl, and Yae Miko).


Pros

  • Strong teamwide healing on Elemental Skill (no Burst needed).
  • Buffs off-field Elemental Skill DMG for the team.
  • Excellent synergy with Furina (stacks Fanfare quickly).
  • Very tanky (Highest Base HP in the game).
  • Can heal underwater party members (Best for exploration).

Cons

  • Hydro application is slow and inconsistent.
  • Buff has a quota (limited hits), making it weak in AoE.
  • Signature weapon is extremely niche (HP Bow).
  • Long cooldown on Elemental Skill (18s).

Quick Guide (TL;DR)

If you don't have time for the math, here is the cheat sheet.

  • Best Artifact: 4pc Ocean-Hued Clam (Healer/DPS) or 4pc Song of Days Past (Buffer).
  • Alt Artifact: 2pc HP% / 2pc HP% (Stat Stick).
  • Best Weapon: Silvershower Heartstrings (Signature).
  • Alt Weapon: Recurve Bow (3⭐ - HP% Stat Stick) or Elegy for the End (Buffing).
  • Support Weapon: Favonius Warbow (Team Battery - Highly Recommended).
  • Main Stats: SANDS: HP% | GOBLET: HP% | CIRCLET: HP% or Healing Bonus.
  • Talent Priority: Elemental Skill > Elemental Burst > Normal Attack.
  • Top Team: Sigewinne + Furina + Navia/Clorinde + Chiori/Fischl.
Pro Tip: HP Cap: Sigewinne's damage buff maximizes at 65,000 HP. Aim for at least 50k HP to make her buff noticeable. Triple HP artifacts are standard.

Need Primogems for Silvershower Heartstrings?

Get Genesis Crystals at a discounted price with instant delivery.

Top Up Secure & Fast via GameCharge

Ascension & Talent Materials

Category Material Name Source
Ascension Romaritime Flower Underwater Fontaine
Boss Drop Water That Failed To Transcend Hydro Tulpa (Fontaine)
Talent Books Teachings of Equity Pale Forgotten Glory (Mon/Thu/Sun)
Common Mob Transoceanic Pearl Fontemer Aberrants (Crabs/Seahorses)

Talent Breakdown & Mechanics

Elemental Skill: Rebound Hydrotherapy

  • Bolstering Bubblebalm: Creates a bubble that bounces between teammates (if C1/C2) or enemies.
  • Hold E: Charges a larger bubble that traps smaller enemies briefly.
  • Healing: Heals party members based on Max HP. Also creates "Sourcewater Droplets" for Neuvillette to absorb.
  • Buff: Grants a flat DMG increase to off-field Elemental Skill damage for the team.

Elemental Burst: Super Saturated Syringing

  • Cost: 70 Energy | Cooldown: 18s
  • The Spray: Deals AoE Hydro DMG and applies Hydro.
  • Usage: Mostly used for applying Hydro or triggering Clam set damage. Healing is tied to Skill, so Burst is secondary for sustain.

Passive: Requires Appropriate Rest

  • The Buff: Based on the total HP of all party members, Sigewinne grants "Convalescence" stacks.
  • Effect: Increases the DMG of off-field Elemental Skills (e.g. Furina's Salon Members, Fischl's Oz) by a flat amount. Max 10 stacks per skill use.
  • Scaling: Buff maxes out at 65,000 HP on Sigewinne.

Talent Priority Order:

  1. Elemental Skill (Level 10) - Primary healing and buff source.
  2. Elemental Burst (Level 8) - Extra damage.
  3. Normal Attack (Level 1) - Ignore.

Stat Requirements & ER Thresholds

Sigewinne is HP hungry. ER is less critical as her healing is on Skill.

Team Context Weapon ER Requirement
Double Hydro (w/ Furina) Recurve Bow 140% - 160%
Solo Hydro Favonius Warbow 180% - 200%
Healer Only (No Burst) Any HP Bow 0%

Substat Priority:

  1. HP% (Priority #1 - Aim for 50k+)
  2. Flat HP
  3. Energy Recharge (Comfort)
  4. CRIT Rate (Only for Favonius)

Best Artifacts Comparison

Set Name Role Reasoning
4pc Ocean-Hued Clam BiS Healer Converts her massive healing into Physical DMG bubbles (30k). Since she overheals a lot, this adds significant team DPS.
4pc Song of Days Past Buffer Records healing to buff active character's DMG. Good if you want to buff a hypercarry like Neuvillette further.
2pc HP / 2pc HP Max HP Easiest way to reach the 65k HP cap for her passive buff. Recommended if you lack good 4pc sets.

Weapon Rankings

Weapon Type Performance Notes
Silvershower Heartstrings HP% S+ Signature. Massive 66% HP stat. The only bow that significantly boosts her HP scaling.
Recurve Bow HP% S (3-Star) The only F2P HP bow. Surprisingly her second best option for maximizing buffs. Do not delete it!
Favonius Warbow ER% S (Battery) Best if your team needs energy (e.g., Furina needs help). Requires Crit Rate on artifacts.
Elegy for the End ER% A (Buffing) Buffs Team EM/ATK. Good for reaction teams, but harder to proc consistently with Sigewinne's slow hits.

Constellation Value

Sigewinne is complete at C0. C1 and C2 improve her buffing capabilities.

  • C1: The Spirits of the Springs... - (Buff Upgrade) Increases the damage quota of her Skill buff (more hits boosted). Also increases the damage of her bounce. Great QoL.
  • C2: The Spirit of the Waves... - (Shield) Skill creates a bubble shield that absorbs Hydro DMG. Also reduces Hydro RES of enemies. Good defensive utility.
  • C6: The Spirit of the Radiant... - (DPS) Massive increase to Burst Crit Rate/DMG based on Max HP. Turns her into a viable Burst Nuke healer.

Verdict: C0 is perfect. C1 makes her buff last longer for fast attackers.

Top Team Compositions

1. Furina Taser/Skill

  • Main DPS: Clorinde / Yae Miko
  • Buffer: Furina
  • Healer/Buffer: Sigewinne
  • Flex: Fischl / Kazuha

Why it works: Sigewinne heals Furina's drain, maxing Fanfare. Her passive buffs Yae/Fischl/Furina's skill damage. Clorinde drives the reactions.

2. Mono Hydro / Wet Rock

  • Main DPS: Neuvillette / Ayato
  • Sub-DPS: Furina
  • Healer: Sigewinne
  • Flex: Kazuha / Zhongli

Why it works: Hydro Resonance gives +25% HP (Buffs Neuv, Furina, and Sigewinne). Sigewinne creates droplets for Neuvillette. Very comfy team.

Rotations & Combos

Healer Rotation:
Furina EQ > Sigewinne Hold E (Aim then release) > Sub-DPS > Main DPS

Tip: Hold E to aim and shoot a bigger bubble, but you don't need to hold it for long. Just tap-hold-release to ensure it targets correctly. The bubble bounces automatically.

Frequently Asked Questions

Kokomi vs. Sigewinne?
Kokomi applies Hydro much faster (better for Freeze/Bloom) and can drive teams on-field. Sigewinne provides Skill DMG buffs and heals without needing to stay on-field or manage a circle. Sigewinne is better for Furina/Fischl teams; Kokomi is better for Reaction teams.

Why Recurve Bow?
It is the only free bow with HP% secondary stat. Since Sigewinne's buff scales purely on HP, this 3-star bow outperforms almost every 4-star option.

Data Source: KQM Standards. Last Updated: December 2025

Mona Guide: The Definitive Build & Analysis

Mona, the Astrologist of majestic skill

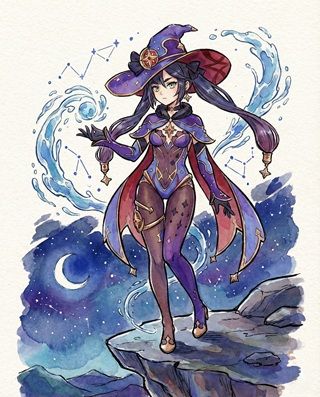
Mona Genshin Impact Character Art
Rarity (5-Star Standard)
Element Hydro
Weapon Catalyst
Best Role DMG Buffer / Nuke
Stat Priority ER > CRIT > ATK% > EM
Tier S (Freeze / Nuke)

Mona is an Astrologist who specializes in amplifying team damage through her Elemental Burst, Stellaris Phantasm. Her "Omen" mechanic provides one of the largest DMG% buffs in the game. She is a staple in Freeze teams ("Morgana") and Vaporize Nuke showcases.


Pros

  • Massive DMG Buff: Omen provides up to 60% DMG Bonus.
  • Omen Extension: In Freeze teams, the buff duration can be doubled.
  • Fast alternate sprint for overworld exploration (Water Walking).
  • Can hold Thrilling Tales of Dragon Slayers (TTDS).
  • Passive converts Energy Recharge into Hydro DMG Bonus.

Cons

  • Alternate sprint can be clunky in combat (getting stuck).
  • Low Hydro application uptime compared to Kokomi/Xingqiu.
  • Elemental Skill has a short duration and long cooldown.
  • Burst animation is long (though it has i-frames).

Quick Guide (TL;DR)

If you don't have time for the math, here is the cheat sheet.

  • Best Artifact (Support): 4pc Noblesse Oblige (Team ATK) or 4pc Tenacity.
  • Best Artifact (Personal DMG): 4pc Emblem of Severed Fate.
  • Best Weapon (Support): Thrilling Tales (TTDS) (3⭐ - 48% ATK Buff).
  • Best Weapon (Personal): The Widsith or Skyward Atlas.
  • Battery Weapon: Favonius Codex (Team Energy).
  • Main Stats: SANDS: ER% | GOBLET: Hydro DMG | CIRCLET: CRIT Rate/DMG.
  • Talent Priority: Elemental Burst > Elemental Skill > Normal Attack (Ignore).
  • Top Team: Mona + Ganyu + Venti + Diona (Morgana Freeze).
Pro Tip: Omen Extension: The Omen DMG buff timer starts after the Illusory Bubble pops. If you Freeze the enemy while they are in the bubble, the bubble won't pop immediately. This allows you to keep the Omen DMG buff active for much longer than the standard duration.

Lost 50/50 to Mona?

Get Genesis Crystals to keep pulling for your favorite character!

Top Up Secure & Fast via GameCharge

Ascension & Talent Materials

Category Material Name Source
Ascension Philanemo Mushroom Mondstadt Houses (Springvale/City)
Boss Drop Cleansing Heart Oceanid (Liyue)
Talent Books Teachings of Resistance Forsaken Rift (Tue/Fri/Sun)
Common Mob Nectar Whopperflowers

Talent Breakdown & Mechanics

Elemental Burst: Stellaris Phantasm

  • Illusory Bubble: Traps smaller enemies and applies Wet status.
  • Omen: Applies an Omen status to enemies. This increases the DMG they take by up to 60% (at Talent 10).
  • The Pop: When an enemy in a bubble takes damage, the bubble bursts, dealing Hydro DMG and starting the Omen duration timer.
  • Freeze Mechanic: If you Freeze an enemy inside the bubble, the bubble does not pop immediately. This means the Omen DMG buff persists while the bubble is held, effectively extending the buff duration from 5s to ~13s.

Elemental Skill: Mirror Reflection of Doom

  • Phantom: Creates a phantom that taunts enemies and deals intermittent Hydro DMG.
  • Particles: Generates 3-4 particles on explosion. Useful for energy, but the cooldown is long (12s).
  • Dash: Holding E creates a phantom and moves you backward.

Passive: Waterborne Destiny

  • ER to Hydro DMG: Increases Mona's Hydro DMG Bonus by 20% of her Energy Recharge. This makes building high ER (for burst uptime) also buff her personal damage.

Talent Priority Order:

  1. Elemental Burst (Level 10) - Improves Omen DMG Bonus.
  2. Elemental Skill (Level 6-8) - Decent damage.
  3. Normal Attack (Level 1) - Ignore unless Main DPS.

Stat Requirements & ER Thresholds

Mona is purely burst-reliant. If she can't burst every rotation, she is dead weight.

Team Context Weapon ER Requirement
Freeze (Ganyu/Ayaka) Favonius/TTDS 200% - 220%
Vaporize Nuke Widsith 180% - 200%
Double Hydro Any 160% - 180%

Substat Priority:

  1. Energy Recharge (Aim for 220%+)
  2. CRIT Rate (If using Favonius or for personal DMG)
  3. CRIT DMG / ATK% (Personal DMG)
  4. Elemental Mastery (Only for Vape Nuke builds)

Best Artifacts Comparison

Set Name Role Reasoning
4pc Noblesse Oblige BiS Support Provides 20% ATK to the team. Combined with Omen buff and TTDS, this makes Mona one of the strongest damage amplifiers in the game.
4pc Emblem of Severed Fate Personal DMG Converts her high ER into Burst DMG. Great if you want Mona herself to hit hard in Vape teams.
4pc Tenacity of the Millelith Niche Support Requires careful positioning so her Taunt hits enemies. Noblesse is generally more consistent.

Weapon Rankings

Weapon Type Performance Notes
Thrilling Tales (TTDS) HP% S+ (Support) 3-Star. 48% ATK Buff to your Main DPS. In Freeze teams where Mona's personal damage is low, this is unbeatable.
Favonius Codex ER% S (Battery) Provides massive energy for the team (Ayaka/Ganyu). Helps Mona burst on cooldown.
The Widsith CRIT DMG S (Nuke) Best for Vaporize Nuke showcases. The RNG buffs are huge for short burst windows.
Prototype Amber HP% A (Healer) Turns Mona into a pseudo-healer (Healing Malice). Useful in Furina teams or if you lack Diona/Kokomi.

Constellation Value

Mona is a Standard Character, so you will get cons eventually. C1 and C4 are best.

  • C1: Prophecy of Submersion - (Reaction Buff) Hitting an Omen-affected enemy enhances Hydro-related reactions (15% Vape DMG, 15% Freeze Duration, etc.). Note: Freeze duration extension is currently bugged/inconsistent.
  • C2: Lunar Chain - (DPS) Normal Attacks have a 20% chance to trigger a Charged Attack automatically. Fun for on-field Mona, useless for support.
  • C4: Prophecy of Oblivion - (Crit) Characters hitting Omen-affected enemies gain +15% Crit Rate. Very valuable for Ayaka/Ganyu.

Verdict: C0 is amazing. C4 is a nice luxury.

Top Team Compositions

1. Morgana (Classic Freeze)

  • Main DPS: Ganyu / Ayaka
  • Buffer: Mona (TTDS + Noblesse)
  • Grouper: Venti / Kazuha
  • Battery/Shield: Diona / Rosaria

Why it works: The quintessential Freeze team. Mona applies Hydro and Omen. Ganyu/Ayaka freezes the enemies, extending the Omen duration. Venti groups them for quadratic scaling.

2. Vaporize Nuke

  • Nuke: Mona
  • Pyro App: Bennett
  • Swirl: Kazuha / Sucrose
  • Pyro: Xiangling / Yanfei

Why it works: The "Big Number" team. Apply Pyro -> Swirl Pyro -> Mona Q (Vaporize, 0 dmg initially) -> Wait 2s (ICD reset) -> Pop bubble with Pyro attack. Dealing 1 million damage is possible here.

Rotations & Combos

Standard Freeze Rotation:
Ganyu Q > Venti E Q > Mona Q E > Swap to Ganyu (TTDS Buff) > Charged Shots

Tip: Always Cast Q before E on Mona to ensure you catch the energy particles from her Skill.

Frequently Asked Questions

Mona vs. Kokomi?
Mona = Higher Damage Ceiling (Omen Buff). Kokomi = Comfort, Healing, and Better Hydro Application (100% uptime). Use Mona for speedruns/nukes, Kokomi for consistency/survival.

Is C1 Freeze Extension real?
It is widely considered buggy or negligible. Do not rely on C1 for Freeze duration. The main value of Freeze with Mona is extending the *Omen* duration (Bubble), not the Freeze reaction itself.

Data Source: KQM Standards. Last Updated: December 2025

Tartaglia Guide: The Definitive Build & Analysis

Tartaglia (Childe), the 11th Fatui Harbinger

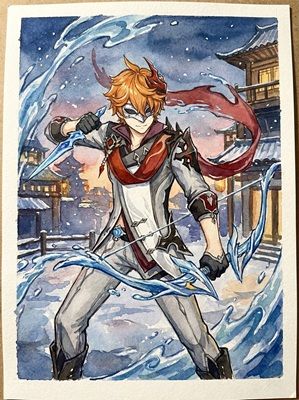
Tartaglia Genshin Impact Character Art
Rarity (5-Star)
Element Hydro
Weapon Bow (Melee Stance)
Best Role On-Field Hydro Enabler
Stat Priority CRIT > ATK% > EM > ER
Tier SS (International Team)

Tartaglia (Childe) is the 11th Fatui Harbinger and a master of weaponry. He is unique as a Bow user who switches to melee Hydro daggers. His Riptide mechanic allows him to deal exponential AoE damage in grouped scenarios, making him the best enabler for Xiangling in the game.


Pros

  • Fastest Hydro Application in the game (Enables Xiangling).
  • Riptide scales quadratically (insane AoE damage).
  • Huge Burst Nuke potential (Vaporize).
  • Passive increases team's Normal Attack level by +1.
  • Flexible rotation times (can swap out early).

Cons

  • Cooldown Management: Staying in melee stance too long results in massive cooldowns (up to 45s).
  • Strict team requirements (Needs Xiangling/Bennett/Kazuha).
  • Crit-reliant for Riptide activation (Ascension 4 passive).

Quick Guide (TL;DR)

If you don't have time for the math, here is the cheat sheet.

  • Best Artifact: 4pc Nymph's Dream (BiS) or 4pc Heart of Depth.
  • Alt Artifact: 2pc Hydro / 2pc ATK (Easier to farm).
  • Best Weapon: Polar Star (Signature).
  • Alt Weapon: Aqua Simulacra, Thundering Pulse, or Skyward Harp.
  • F2P Weapon: The Viridescent Hunt (BP - Great Grouping) or Rust.
  • Main Stats: SANDS: ATK% | GOBLET: Hydro DMG | CIRCLET: CRIT.
  • Talent Priority: Elemental Skill > Elemental Burst > Normal Attack.
  • Top Team: Childe + Xiangling + Bennett + Kazuha (International).
Pro Tip: The 9-Second Rule: In the International Team, stay in melee stance for about 9-11 seconds (usually until Pyronado expires). If you stay longer, the cooldown will desync with your teammates, ruining the rotation.

Need Primogems for Polar Star?

Get Genesis Crystals at a discounted price with instant delivery.

Top Up Secure & Fast via GameCharge

Ascension & Talent Materials

Category Material Name Source
Ascension Starconch Liyue Beaches (Yaoguang Shoal)
Boss Drop Cleansing Heart Oceanid (Liyue)
Talent Books Teachings of Freedom Forsaken Rift (Mon/Thu/Sun)
Common Mob Insignia Fatui Skirmishers

Talent Breakdown & Mechanics

Elemental Skill: Foul Legacy: Raging Tide

  • Stance Change: Switches from Ranged (Bow) to Melee (Hydro Daggers).
  • Riptide Slash: When hitting an enemy affected by Riptide in melee stance, it triggers an AoE Hydro Slash.
    • Quadratic Scaling: If enemies are grouped, each enemy triggers a splash that hits all other enemies. 5 enemies = 25 instances of damage.
    • No ICD: Riptide Slash has no internal cooldown on application, meaning it applies Hydro constantly.
  • Cooldown: The longer you stay in melee, the longer the cooldown (6s + Duration). Max 45s.

Elemental Burst: Havoc: Obliteration

  • Cost: 60 Energy | Cooldown: 15s
  • Ranged Stance (Flash of Havoc): Fires a Hydro arrow, applies Riptide, and returns 20 Energy. Preferred opener for rotation efficiency.
  • Melee Stance (Light of Obliteration): Performs a massive slash. Deals higher damage but costs more energy/time. Good for finishing chambers.

Passive: Master of Weaponry

  • Team Buff: Increases the Normal Attack level of your own party members by 1. Unique and valuable for characters like Ganyu or Xiao.

Talent Priority Order:

  1. Elemental Skill (Level 10) - Melee damage scaling.
  2. Elemental Burst (Level 9) - Nuke damage.
  3. Normal Attack (Level 6) - Only affects Riptide Burst (on death).

Stat Requirements & ER Thresholds

Childe needs to Burst every rotation (Ranged) to apply Riptide and deal damage.

Team Context Burst Type ER Requirement
International (Xiangling) Ranged Burst (Refund) 120% - 130%
International Melee Burst 160% - 180% (Not recommended)
Mono Hydro / Taser Ranged Burst 110% - 120%

Substat Priority:

  1. CRIT Rate (Priority #1 to trigger Riptide reliably)
  2. ATK%
  3. CRIT DMG
  4. Elemental Mastery (For Vaporize Burst)

Best Artifacts Comparison

Set Name Role Reasoning
4pc Nymph's Dream BiS Designed for him. Stacks ATK and Hydro DMG when hitting enemies. Requires specific combo to maintain.
4pc Heart of Depth Classic 30% Normal/Charged DMG bonus. Only slightly worse than Nymph but much easier to use (no stacking).
2pc Hydro / 2pc ATK Flexible Very competitive if substats are good. The 4pc set bonuses are not massive for Childe.

Weapon Rankings

Weapon Type Performance Notes
Polar Star CRIT Rate S+ Signature. Skill/Burst DMG buff + ATK stacking. Perfect for his kit.
Aqua Simulacra CRIT DMG S Massive 88% Crit DMG. Passive always active in melee. Very close to Polar Star.
The Viridescent Hunt CRIT Rate A (BP) Battle Pass. Passive groups small enemies, making Riptide Quadratic scaling insane. Best 4-star.
Rust (R5) ATK% A- Good for Normal Attacks, but nerfs Charged Attacks (which are good on Childe). Solid stat stick.

Constellation Value

Childe is famous for having "bait" constellations. He is perfectly fine at C0.

  • C1: Foul Legacy: Tide Withholder - (QoL) Reduces Skill CD by 20%. Helps if your rotation is messy, but doesn't increase damage per se.
  • C3: Abyssal Mayhem - (Damage) +3 Levels to Skill. Best damage increase constellation.
  • C6: Havoc: Annihilation - (Reset) Resets Skill Cooldown after using Melee Burst. Allows for 100% Melee uptime. Warning: This can ruin rotations because your supports (Xiangling) still have cooldowns. Only good for solo/speedrun play.

Verdict: Stay at C0. Spend primos on Kazuha or Polar Star instead.

Top Team Compositions

1. International (The King)

  • Enabler: Tartaglia
  • Vape Carry: Xiangling
  • Buffer: Bennett
  • Grouper/Buffer: Kazuha

Why it works: Childe applies Hydro so fast that Xiangling can vaporize every hit. Kazuha double swirls both elements. Childe can also nuke (Forward Vape) his burst. This team has no ceiling in AoE content.

2. Intergrassional (Burgeon)

  • Driver: Tartaglia
  • Dendro: Nahida
  • Pyro: Bennett / Thoma
  • Anemo: Kazuha

Why it works: Childe generates cores rapidly with Nahida. Kazuha/Thoma trigger Burgeon. Childe's hydro application prevents Burning from overtaking the aura. High risk, high reward.

Rotations & Combos

International Rotation:
Childe E (Apply Hydro) > Bennett Q > Kazuha Hold E Plunge (Double Swirl) > Xiangling Q E > Childe Ranged Q > Childe E -> Attack for 9s -> Swap

Tip: ALWAYS swap off Childe when Pyronado has ~2-3 seconds left. This ensures his cooldown aligns with the rest of the team for the next rotation.

Frequently Asked Questions

Is he cooldown impact?
Only if you play him wrong. If you stay in melee stance for the full 30s, yes, you will have a 45s cooldown. If you swap after 9s, the cooldown is manageable.

Ayato vs. Childe?
Childe has higher peak damage in Vaporize and better AoE (Quadratic scaling). Ayato is easier to play, has better range, and fits into more teams (Bloom/Taser) flexibly.

Data Source: KQM Standards. Last Updated: December 2025