
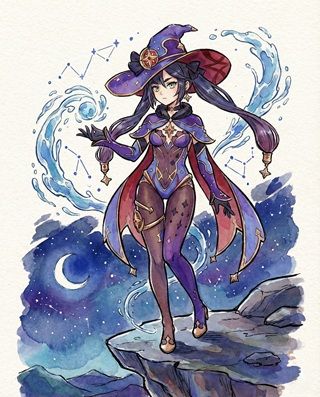
Mona, the Astrologist of majestic skill
| Rarity | (5-Star Standard) |
| Element | Hydro |
| Weapon | Catalyst |
| Best Role | DMG Buffer / Nuke |
| Stat Priority | ER > CRIT > ATK% > EM |
| Tier | S (Freeze / Nuke) |
Mona is an Astrologist who specializes in amplifying team damage through her Elemental Burst, Stellaris Phantasm. Her "Omen" mechanic provides one of the largest DMG% buffs in the game. She is a staple in Freeze teams ("Morgana") and Vaporize Nuke showcases.
Pros
- Massive DMG Buff: Omen provides up to 60% DMG Bonus.
- Omen Extension: In Freeze teams, the buff duration can be doubled.
- Fast alternate sprint for overworld exploration (Water Walking).
- Can hold Thrilling Tales of Dragon Slayers (TTDS).
- Passive converts Energy Recharge into Hydro DMG Bonus.
Cons
- Alternate sprint can be clunky in combat (getting stuck).
- Low Hydro application uptime compared to Kokomi/Xingqiu.
- Elemental Skill has a short duration and long cooldown.
- Burst animation is long (though it has i-frames).
Quick Guide (TL;DR)
If you don't have time for the math, here is the cheat sheet.
- Best Artifact (Support): 4pc Noblesse Oblige (Team ATK) or 4pc Tenacity.
- Best Artifact (Personal DMG): 4pc Emblem of Severed Fate.
- Best Weapon (Support): Thrilling Tales (TTDS) (3⭐ - 48% ATK Buff).
- Best Weapon (Personal): The Widsith or Skyward Atlas.
- Battery Weapon: Favonius Codex (Team Energy).
- Main Stats: SANDS: ER% | GOBLET: Hydro DMG | CIRCLET: CRIT Rate/DMG.
- Talent Priority: Elemental Burst > Elemental Skill > Normal Attack (Ignore).
- Top Team: Mona + Ganyu + Venti + Diona (Morgana Freeze).
Pro Tip: Omen Extension: The Omen DMG buff timer starts after the Illusory Bubble pops. If you Freeze the enemy while they are in the bubble, the bubble won't pop immediately. This allows you to keep the Omen DMG buff active for much longer than the standard duration.
Lost 50/50 to Mona?
Get Genesis Crystals to keep pulling for your favorite character!
Top Up Secure & Fast via GameChargeAscension & Talent Materials
| Category | Material Name | Source |
|---|---|---|
| Ascension | Philanemo Mushroom | Mondstadt Houses (Springvale/City) |
| Boss Drop | Cleansing Heart | Oceanid (Liyue) |
| Talent Books | Teachings of Resistance | Forsaken Rift (Tue/Fri/Sun) |
| Common Mob | Nectar | Whopperflowers |
Talent Breakdown & Mechanics
Elemental Burst: Stellaris Phantasm
- Illusory Bubble: Traps smaller enemies and applies Wet status.
- Omen: Applies an Omen status to enemies. This increases the DMG they take by up to 60% (at Talent 10).
- The Pop: When an enemy in a bubble takes damage, the bubble bursts, dealing Hydro DMG and starting the Omen duration timer.
- Freeze Mechanic: If you Freeze an enemy inside the bubble, the bubble does not pop immediately. This means the Omen DMG buff persists while the bubble is held, effectively extending the buff duration from 5s to ~13s.
Elemental Skill: Mirror Reflection of Doom
- Phantom: Creates a phantom that taunts enemies and deals intermittent Hydro DMG.
- Particles: Generates 3-4 particles on explosion. Useful for energy, but the cooldown is long (12s).
- Dash: Holding E creates a phantom and moves you backward.
Passive: Waterborne Destiny
- ER to Hydro DMG: Increases Mona's Hydro DMG Bonus by 20% of her Energy Recharge. This makes building high ER (for burst uptime) also buff her personal damage.
Talent Priority Order:
- Elemental Burst (Level 10) - Improves Omen DMG Bonus.
- Elemental Skill (Level 6-8) - Decent damage.
- Normal Attack (Level 1) - Ignore unless Main DPS.
Stat Requirements & ER Thresholds
Mona is purely burst-reliant. If she can't burst every rotation, she is dead weight.
| Team Context | Weapon | ER Requirement |
|---|---|---|
| Freeze (Ganyu/Ayaka) | Favonius/TTDS | 200% - 220% |
| Vaporize Nuke | Widsith | 180% - 200% |
| Double Hydro | Any | 160% - 180% |
Substat Priority:
- Energy Recharge (Aim for 220%+)
- CRIT Rate (If using Favonius or for personal DMG)
- CRIT DMG / ATK% (Personal DMG)
- Elemental Mastery (Only for Vape Nuke builds)
Best Artifacts Comparison
| Set Name | Role | Reasoning |
|---|---|---|
| 4pc Noblesse Oblige | BiS Support | Provides 20% ATK to the team. Combined with Omen buff and TTDS, this makes Mona one of the strongest damage amplifiers in the game. |
| 4pc Emblem of Severed Fate | Personal DMG | Converts her high ER into Burst DMG. Great if you want Mona herself to hit hard in Vape teams. |
| 4pc Tenacity of the Millelith | Niche Support | Requires careful positioning so her Taunt hits enemies. Noblesse is generally more consistent. |
Weapon Rankings
| Weapon | Type | Performance | Notes |
|---|---|---|---|
| Thrilling Tales (TTDS) | HP% | S+ (Support) | 3-Star. 48% ATK Buff to your Main DPS. In Freeze teams where Mona's personal damage is low, this is unbeatable. |
| Favonius Codex | ER% | S (Battery) | Provides massive energy for the team (Ayaka/Ganyu). Helps Mona burst on cooldown. |
| The Widsith | CRIT DMG | S (Nuke) | Best for Vaporize Nuke showcases. The RNG buffs are huge for short burst windows. |
| Prototype Amber | HP% | A (Healer) | Turns Mona into a pseudo-healer (Healing Malice). Useful in Furina teams or if you lack Diona/Kokomi. |
Constellation Value
Mona is a Standard Character, so you will get cons eventually. C1 and C4 are best.
- C1: Prophecy of Submersion - (Reaction Buff) Hitting an Omen-affected enemy enhances Hydro-related reactions (15% Vape DMG, 15% Freeze Duration, etc.). Note: Freeze duration extension is currently bugged/inconsistent.
- C2: Lunar Chain - (DPS) Normal Attacks have a 20% chance to trigger a Charged Attack automatically. Fun for on-field Mona, useless for support.
- C4: Prophecy of Oblivion - (Crit) Characters hitting Omen-affected enemies gain +15% Crit Rate. Very valuable for Ayaka/Ganyu.
Verdict: C0 is amazing. C4 is a nice luxury.
Top Team Compositions
1. Morgana (Classic Freeze)
- Main DPS: Ganyu / Ayaka
- Buffer: Mona (TTDS + Noblesse)
- Grouper: Venti / Kazuha
- Battery/Shield: Diona / Rosaria
Why it works: The quintessential Freeze team. Mona applies Hydro and Omen. Ganyu/Ayaka freezes the enemies, extending the Omen duration. Venti groups them for quadratic scaling.
2. Vaporize Nuke
- Nuke: Mona
- Pyro App: Bennett
- Swirl: Kazuha / Sucrose
- Pyro: Xiangling / Yanfei
Why it works: The "Big Number" team. Apply Pyro -> Swirl Pyro -> Mona Q (Vaporize, 0 dmg initially) -> Wait 2s (ICD reset) -> Pop bubble with Pyro attack. Dealing 1 million damage is possible here.
Rotations & Combos
Standard Freeze Rotation:Ganyu Q > Venti E Q > Mona Q E > Swap to Ganyu (TTDS Buff) > Charged Shots
Tip: Always Cast Q before E on Mona to ensure you catch the energy particles from her Skill.
Frequently Asked Questions
Mona vs. Kokomi?
Mona = Higher Damage Ceiling (Omen Buff). Kokomi = Comfort, Healing, and Better Hydro Application (100% uptime). Use Mona for speedruns/nukes, Kokomi for consistency/survival.
Is C1 Freeze Extension real?
It is widely considered buggy or negligible. Do not rely on C1 for Freeze duration. The main value of Freeze with Mona is extending the *Omen* duration (Bubble), not the Freeze reaction itself.
Data Source: KQM Standards. Last Updated: December 2025
