RSS

Blog posts of '2025' 'December'

Gorou Guide: The Definitive Build & Analysis

Gorou, the canine warrior and general of the Watatsumi Army
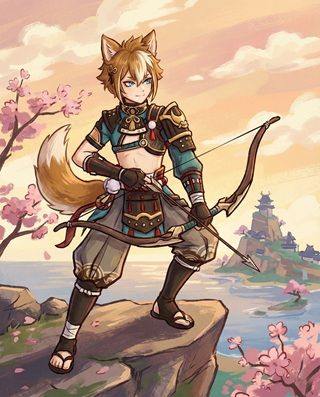
Gorou Genshin Impact Character Art
Rarity (4-Star)
Element Geo
Weapon Bow
Best Role Geo DEF/DMG Buffer
Stat Priority ER > CRIT Rate (Favonius) > DEF
Tier S (In Mono Geo) / D (Elsewhere)

Gorou is the great general of Watatsumi Island and the cornerstone of Mono Geo teams. While he offers little to other elements, for characters scaling on DEF (Itto, Noelle, Albedo, Chiori), he provides unrivaled buffs to Defense, Geo DMG Bonus, and Crit Damage (at C6).


Pros

  • Massive flat DEF buff (essential for Itto/Noelle).
  • Provides 15% Geo DMG Bonus (with 3 Geo chars).
  • C6 grants up to 40% Geo CRIT DMG.
  • Very low investment required (level Skill only).
  • Excellent battery with Favonius Warbow.

Cons

  • Completely useless outside of Geo teams.
  • Buff scales on Talent Level, not his own stats.
  • C4 Healing is very weak (barely sustains Corrosion).
  • Requires 3 Geo characters for full buff.

Quick Guide (TL;DR)

If you don't have time for the math, here is the cheat sheet.

  • Best Artifact: 4pc The Exile (Team Energy) or 4pc Noblesse Oblige.
  • Alt Artifact: 2pc Emblem / 2pc Husk (Stat Stick).
  • Best Weapon: Favonius Warbow (Mandatory for Battery).
  • Alt Weapon: Elegy for the End (Whale Buffing).
  • F2P Weapon: Sacrificial Bow (If you lack Favonius).
  • Main Stats: SANDS: ER% | GOBLET: DEF% or Geo | CIRCLET: CRIT Rate.
  • Talent Priority: Elemental Skill (E) > Elemental Burst (Q) > Normal Attack (Ignore).
  • Top Team: Gorou + Itto + Albedo/Chiori + Zhongli.
Pro Tip: Don't build DEF! Gorou's buff is a flat value based on his Talent Level, NOT his own DEF stat. Building DEF only increases his personal damage (negligible) or C4 healing. Focus purely on Energy Recharge and Crit Rate (for Favonius).

Need C6 Gorou?

Get Genesis Crystals to pull on Itto banners!

Top Up Secure & Fast via GameCharge

Ascension & Talent Materials

Category Material Name Source
Ascension Sango Pearl Watatsumi Island (Inazuma)
Boss Drop Perpetual Heart Perpetual Mechanical Array (Inazuma)
Talent Books Teachings of Light Violet Court (Wed/Sat/Sun)
Common Mob Spectral Core Specters (Inazuma)

Talent Breakdown & Mechanics

Elemental Skill: Inuzaka All-Round Defense

  • War Banner: Plants a flag. Buffs based on number of Geo characters in party.
  • 1 Geo: DEF Bonus (Flat amount).
  • 2 Geo: Resistance to Interruption.
  • 3 Geo: 15% Geo DMG Bonus. This is why you run Mono Geo.
  • Scaling: Buff value increases with Talent Level. Crown this!

Elemental Burst: Juuga: Forward Unto Victory

  • Cost: 80 Energy | Cooldown: 20s
  • General's Glory: Provides the same buffs as the Skill.
  • Follow: Unlike the Skill (stationary), the Burst field follows the active character.
  • Damage: Deals small AoE Geo DMG periodically and pulls in 1 Crystallize shard every 1.5s.
  • Defense: Increases team DEF by 25% after casting (Passive).

Passive: Heedless of the Wind and Weather

  • Utility: After using Burst, all party members' DEF is increased by 25% for 12s.

Talent Priority Order:

  1. Elemental Skill (Level 10) - Improves the Flat DEF buff.
  2. Elemental Burst (Level 6-8) - Improves damage slightly.
  3. Normal Attack (Level 1) - Ignore.

Stat Requirements & ER Thresholds

Gorou's only job is to Burst every rotation to maintain buffs and battery Itto.

Team Context Weapon ER Requirement
Mono Geo (Battery Build) Favonius Warbow 200% - 220%
Double Geo Favonius Warbow 230% - 250%

Substat Priority:

  1. CRIT Rate (Required to trigger Favonius passive - Aim for 50%+)
  2. Energy Recharge (Until requirement met)
  3. DEF% (Improves C4 healing only)

Best Artifacts Comparison

Set Name Role Reasoning
4pc The Exile BiS Battery 4-Star Set. Regenerates energy for the ENTIRE team after Burst. Crucial for Itto's uptime. Stats don't matter, just the set bonus.
4pc Noblesse Oblige ATK Buff If you are running Albedo or want max ATK for Itto. Note: Itto scales better with DEF, but ATK is still useful.
4pc Husk of Opulent Dreams Healer (C4) Maximizes his DEF for C4 healing. Only use if you struggle to survive corrosion.

Weapon Rankings

Weapon Type Performance Notes
Favonius Warbow ER% S+ Massive 61% ER and generates white particles for Itto. Essential for smooth rotations.
Elegy for the End ER% S Provides ATK buff to team. Good alternative, but Favonius energy is usually preferred for Itto.
Sacrificial Bow ER% A Lower ER than Favonius. Double E creates more Geo particles, but extends rotation time.

Constellation Value

Gorou is a complete unit at C0, but C6 is a massive damage spike for Geo teams.

  • C4: Lapping Hound: Warm as Water - (Healer) When Burst is active with 2+ Geo members, heals active character by 50% of Gorou's DEF every 1.5s. Allows you to run without a dedicated healer against corrosion.
  • C6: Valiant-Tooth: Toward Victory - (Broken) After using Skill/Burst, increases Geo CRIT DMG of all party members by 10%/20%/40% based on the number of Geo members. This is huge.

Verdict: C6 is mandatory for min-maxing Itto/Noelle.

Top Team Compositions

1. Mono Geo (Itto)

  • Main DPS: Arataki Itto
  • Buffer: Gorou (C6)
  • Sub-DPS: Albedo / Chiori
  • Shield: Zhongli

Why it works: Gorou fulfills the 3-Geo requirement to max out his buff. He provides DEF for Itto/Albedo/Chiori, Geo DMG Bonus, and Crit DMG. Zhongli provides shred. The synergy is perfect.

2. Noelle Carry

  • Main DPS: Noelle (C6)
  • Buffer: Gorou
  • Buffer: Furina
  • Sub-DPS: Albedo / Yelan

Why it works: Noelle scales heavily on DEF. Gorou buffs that DEF. Furina buffs DMG%. Noelle heals the team to stack Furina. Gorou batteries Noelle (who generates no particles).

Rotations & Combos

Standard Support Rotation:
Zhongli Hold E > Gorou E Q > Albedo E > Itto Q

Tip: Always use Gorou's E then Q immediately before switching to Itto/Noelle/Albedo to snapshot the DEF buff. Albedo's flower snapshots, so cast it *after* Gorou's buff is active.

Frequently Asked Questions

Is he good with Navia/Ningguang?
No. Navia and Ningguang scale on ATK, not DEF. Gorou's flat DEF buff is wasted on them. He provides Geo DMG bonus, but Bennett is far superior for ATK scalers.

Can I build him for damage?
Not recommended. His personal damage multipliers are low. His value comes from buffing Itto/Albedo to do millions of damage. Focus on ER and Support.

Data Source: KQM Standards. Last Updated: December 2025

Traveler (Geo) Guide: The Definitive Build & Analysis

Traveler (Geo), the bedrock of Liyue's puzzles and exploration

Traveler Geo Genshin Impact Character Art
Rarity (5-Star)
Element Geo
Weapon Sword
Best Role Geo Battery / Crit Buffer
Stat Priority CRIT > ATK% > ER
Tier B (Solid Geo Support)

The Geo Traveler is a versatile support unit often underrated. They provide excellent particle generation for Geo carries like Noelle and Itto, create constructs that resonate with Zhongli's pillar, and offer a unique 10% Crit Rate buff to the team.


Pros

  • Free C6 (Accessible to everyone).
  • Grants +10% CRIT Rate inside Burst field (C1).
  • Excellent battery for Geo teams (Short Skill CD).
  • Constructs block enemy movement/projectiles.
  • High personal damage scaling on Skill ("The Rock").

Cons

  • Constructs can block your movement and attacks.
  • Constructs break instantly against bosses.
  • Geo element doesn't react for damage (only Crystallize).
  • Burst knocks small enemies away slightly.

Quick Guide (TL;DR)

If you don't have time for the math, here is the cheat sheet.

  • Best Artifact: 4pc Noblesse Oblige (Support) or 4pc Emblem (Burst DPS).
  • Alt Artifact: 2pc Petra + 2pc ATK% (Personal DMG).
  • Best Weapon: Primordial Jade Cutter (Crit Stat Stick).
  • F2P Weapon: Amenoma Kageuchi (Craftable - Battery) or Harbinger of Dawn.
  • Support Weapon: Favonius Sword (Best Team Battery).
  • Main Stats: SANDS: ATK% or ER | GOBLET: Geo DMG | CIRCLET: CRIT.
  • Talent Priority: Elemental Skill > Elemental Burst > Normal Attack.
  • Top Team: Geo Traveler + Noelle/Itto + Gorou + Zhongli (Mono Geo).
Pro Tip: Manual Aiming: Hold E to aim your Starfell Sword. You can place it on the side of enemies to block them from moving, or drop it on top of them (if small) to deal damage without creating an obstacle that blocks your own path.

Switching to Hydro Traveler?

Don't do it! Save your Genesis Crystals for Furina instead!

Top Up Secure & Fast via GameCharge

Ascension & Talent Materials

Category Material Name Source
Ascension Windwheel Aster Mondstadt (Windrise/Stormterror)
Boss Drop Basalt Pillar Geo Hypostasis (Liyue)
Talent Books Freedom / Resistance / Ballad Mondstadt Domain (Rotates required type per level)
Common Mob Masks Hilichurls (Everywhere)

Talent Breakdown & Mechanics

Elemental Skill: Starfell Sword

  • The Rock: Summons a meteorite from the earth, dealing AoE Geo DMG.
  • Construct: The meteorite is a Geo Construct that can be climbed or used to block attacks. It counts towards the 3-construct limit.
  • Scaling: Has unusually high ATK scaling (over 400% at high levels), making it hit like a truck with low cooldown (8s).

Elemental Burst: Wake of Earth

  • Cost: 60 Energy | Cooldown: 15s
  • The Wall: Creates a shockwave of Geo crystals that pushes enemies back and deals AoE Geo DMG.
  • The Buff: The wall created by the burst provides a 10% CRIT Rate bonus to any character standing within its radius (C1 Passive).
  • Obstacle: The wall counts as a Geo Construct but does not count towards the 3-limit. It can block enemy movement effectively.

Passive: Frenzied Rockslide

  • Collapse Damage: The final hit of a Normal Attack combo triggers a collapse, dealing 60% of ATK as AoE Geo DMG. Useful if you are forced to normal attack, but generally negligible for support builds.

Talent Priority Order:

  1. Elemental Burst (Level 9) - Crit Buff & Damage.
  2. Elemental Skill (Level 8) - Particle generation & Damage.
  3. Normal Attack (Level 1) - Ignore.

Stat Requirements & ER Thresholds

Geo Traveler generates decent particles, but still needs some ER to burst consistently for the Crit Buff.

Team Context Weapon ER Requirement
Mono Geo (Battery) Favonius Sword 130% - 150%
Solo Geo (Support) Any 180% - 200%
With Amenoma (R5) Amenoma 110% - 120%

Substat Priority:

  1. CRIT Rate / CRIT DMG (Target 60/120+)
  2. ATK% (For Skill/Burst damage)
  3. Energy Recharge (Until requirement met)
  4. Flat ATK

Best Artifacts Comparison

Set Name Role Reasoning
4pc Noblesse Oblige BiS Support Grants 20% ATK to the team. With a 15s cooldown and 60 energy cost, Traveler can keep this buff up reasonably well.
4pc Emblem of Severed Fate Sub-DPS Best for personal damage if you have high ER. Maximizes the damage of the Wake of Earth shockwave.
2pc Petra / 2pc ATK Balanced Good mix for boosting both Skill and Burst damage without ER requirements.

Weapon Rankings

Weapon Type Performance Notes
Favonius Sword ER% S+ (Battery) The best option for supporting Noelle/Itto. Generates white particles to fund their expensive bursts.
Amenoma Kageuchi ATK% S (Personal) Craftable. Refunds energy, allowing you to build full offensive stats. Looks great on Traveler.
Wolf-Fang CRIT Rate A (BP) Boosts Skill and Burst DMG. Excellent for Sub-DPS builds.
Harbinger of Dawn CRIT DMG A (3-Star) Since Traveler is off-field, maintaining >90% HP is easy. Great stats for cheap.

Constellation Value

You get all constellations for free via Liyue story/statues.

  • C1: Invincible Stonewall - (Buff) Party members within the Wake of Earth radius gain +10% CRIT Rate and increased interruption resistance. This is the core support cons.
  • C2: Rockcore Meltdown - (Damage) When the meteor (Skill) is destroyed, it deals AoE Geo DMG again. Adds extra damage if you position well.
  • C6: Everlasting Boulder - (Duration) Extends the duration of the Wake of Earth walls by 5s. Also extends the duration of the C1 Crit Buff.

Verdict: C1 is the most important for support utility.

Top Team Compositions

1. Noelle/Itto Battery

  • Main DPS: Noelle / Arataki Itto
  • Battery: Geo Traveler
  • Buffer: Gorou
  • Sub-DPS: Albedo / Furina

Why it works: Noelle generates 0 particles. Geo Traveler (with Favonius) generates tons. The 10% Crit Rate buff from Traveler C1 helps Noelle/Itto hit harder. Traveler's rocks resonate with Zhongli pillars if present.

2. Microwave (Geo Pals)

  • Construct: Geo Traveler
  • Resonator: Zhongli
  • Buffer: Bennett
  • Flex: Xiangling / Albedo

Why it works: Zhongli's pillar resonates with other Geo constructs. Traveler can place up to 3 boulders (Skill) + 4 walls (Burst). Zhongli's pillar pulses off ALL of them, creating a "microwave" of constant Geo damage ticks.

Rotations & Combos

Battery Rotation:
Traveler Q > Traveler E > Swap to Main DPS (Catch Particles)

Tip: You can manual aim the E by holding it. Drop it slightly to the side of the enemy so they take damage but don't get lifted on top of the rock (which can reset their aggro or make them hard to hit).

Frequently Asked Questions

Is Geo Traveler better than Ningguang?
As a **Battery**, yes. Geo MC generates particles faster and more reliably. Ningguang is a better burst DPS (with C2/C6). Geo MC is preferred for Noelle teams; Ningguang for Navia teams.

Do rocks block my attacks?
Yes, sadly. This is the main downside. Be careful not to place rocks directly between your Archer/Catalyst and the enemy.

Data Source: KQM Standards. Last Updated: December 2025

Xilonen Guide: The Definitive Build & Analysis

Xilonen, the Nanatzcayan Smith of Natlan

Xilonen Genshin Impact Character Art
Rarity (5-Star)
Element Geo
Weapon Sword
Best Role Universal Support / Healer
Stat Priority DEF > ER > CRIT Rate (Fav)
Tier SS (Kazuha Rival)

Xilonen is the legendary Smith of the Nanatzcayan. She fundamentally changes the meta by offering Universal RES Shred (Geo + PECH elements) and potent healing in a single slot. She is essentially "Geo Kazuha" but with built-in sustain, making her one of the most valuable pulls in Natlan.


Pros

  • Shreds RES for Pyro/Hydro/Cryo/Electro AND Geo simultaneously.
  • Strong single-target healing (scales on DEF).
  • Best user of the "Scroll of Cinder City" support set.
  • Excellent overworld mobility (Wall skating).
  • Very F2P friendly (Craftable DEF sword is great).

Cons

  • Does not group enemies (unlike Kazuha).
  • Healing is single-target only (active character).
  • Requires specific team elements (PECH) to activate shred.
  • Cannot shred Anemo or Dendro RES.

Quick Guide (TL;DR)

If you don't have time for the math, here is the cheat sheet.

  • Best Artifact: 4pc Scroll of the Hero of Cinder City (Support BiS).
  • Alt Artifact: 4pc Husk of Opulent Dreams (Personal DMG / C6).
  • Best Weapon: Peak Patrol Song (Signature).
  • Alt Weapon: Freedom-Sworn (Team Buffs).
  • F2P Weapon: Flute of Ezpitzal (Craftable DEF Sword) or Favonius Sword.
  • Main Stats: SANDS: DEF% or ER | GOBLET: DEF% | CIRCLET: Healing Bonus or CRIT Rate.
  • Talent Priority: Elemental Skill > Elemental Burst > Normal Attack.
  • Top Team: Xilonen + Neuvillette + Furina + Kazuha (Hypercarry).
Pro Tip: N2 Activation: After casting her Skill (E) to enter Nightsoul state, you must perform 2 Normal Attacks. This maxes her Nightsoul points and activates her Source Samples, triggering the RES Shred. Do not swap out immediately!

Need Primogems for Xilonen?

Get Genesis Crystals at a discounted price with instant delivery.

Top Up Secure & Fast via GameCharge

Ascension & Talent Materials

Category Material Name Source
Ascension Brilliant Chrysanthemum Natlan (Stadium of the Sacred Flame)
Boss Drop Gold-Inscribed Secret Source Core Secret Source Constructor (Natlan)
Talent Books Teachings of Kindling Blazing Ruins (Tue/Fri/Sun)
Common Drop Saurian Whistles Saurian Warriors

Talent Breakdown & Mechanics

Elemental Skill: Yohual's Scratch

  • Blade Roller: Xilonen enters the "Nightsoul's Blessing" state (Roller Skates).
  • Source Samples: She has 3 "Samplers". By default, they are Geo. They change color based on teammates:
    • Pyro/Hydro/Cryo/Electro: Converts a Sampler to that element.
    • Activation: While skating, perform 2 Normal Attacks to max out Nightsoul points and activate the Samplers.
    • Effect: Once activated, she shreds 36% RES for all active Sample elements (and Geo) for 15s. This works off-field.

Elemental Burst: Ocelot's Cue!

  • Cost: 60 Energy | Cooldown: 15s
  • Stereo Mix: Deals AoE Geo DMG based on DEF.
  • Effect Logic:
    • 2+ PECH Teammates: The burst becomes a rhythmic Healer, restoring HP to the active character based on Xilonen's DEF.
    • 2+ Geo Teammates: The burst deals two additional instances of massive Geo DMG (Sub-DPS mode).

Passive: Netotiliztli's Echoes

  • Nightsoul Burst: When a party member triggers a Nightsoul Burst (Natlan mechanic), Xilonen gains DEF%.
  • The Shred: The actual RES Shred comes from her Skill (Sample Activation), but this passive reinforces her DEF scaling.

Talent Priority Order:

  1. Elemental Skill (Level 10) - Improves RES Shred percentage.
  2. Elemental Burst (Level 9) - Improves Healing/Damage.
  3. Normal Attack (Level 1) - Ignore unless C6.

Stat Requirements & ER Thresholds

Xilonen needs DEF for everything. ER is needed if you rely on her healing.

Role Stat Goal (DEF) ER Requirement
Support / Healer 3,200+ 180% - 200%
Support (Favonius) 2,800+ 160% - 180%
Geo Mono DPS Max DEF/Crit 120% - 140%

Substat Priority:

  1. DEF% (Primary scaling)
  2. Energy Recharge (Vital for healing)
  3. CRIT Rate (Only if using Favonius Sword)
  4. Flat DEF

Best Artifacts Comparison

Set Name Role Reasoning
4pc Scroll of the Hero of Cinder City BiS Support After triggering a reaction, restores energy. If she triggers a reaction in Nightsoul state (E), she grants 40% Elemental DMG Bonus to the team for 20s. Unbeatable.
4pc Husk of Opulent Dreams Personal DMG Use this only if you play her in Mono Geo DPS teams (e.g. with Itto) and someone else holds Scroll.
4pc Maiden Beloved Pure Heal Overkill on healing, but valid if you are struggling to survive Furina's drain without her signature weapon.

Weapon Rankings

Weapon Type Performance Notes
Peak Patrol Song DEF% S+ Signature. Massive DEF stats and buffs party Elemental DMG based on DEF. Hard to beat for buffing potential.
Favonius Sword ER% S The premier F2P/Support option. Solves her energy needs and batteries the team. Requires Crit Rate on artifacts.
Flute of Ezpitzal DEF% A (F2P) Natlan Craftable. High DEF stat stick. Good for maximizing healing if you don't need the Favonius particles.
Freedom-Sworn EM A (Buffs) Buffs NA/CA damage for teammates. Good for Arlecchino/Neuvillette teams, but EM main stat is useless for Xilonen herself.

Constellation Value

Xilonen's C2 makes her arguably the strongest support in the game.

  • C1: "Ocelot's Relaxation" - (QoL) Increases resistance to interruption while skating. Reduces Nightsoul consumption. Makes her feel much smoother to play.
  • C2: "Pentstatic Fruit-Picking" - (Broken) The Geo Source Samples always remain active. Additionally, active samples grant massive team buffs based on element:
    Geo: +50% DMG Bonus.
    Pyro: +45% ATK.
    Hydro: +45% HP.
    Cryo: +60% CRIT DMG.
    Electro: +25 Energy Refund.
  • C6: "Perpetual Carnival" - (DPS) Ignores Nightsoul limitations and grants massive damage scaling based on DEF. Turns her into a Main DPS for 5s.

Verdict: C0 is S-Tier. C2 is arguably the best constellation in the game.

Top Team Compositions

1. Neuvillette Hyper

  • Main DPS: Neuvillette
  • Support: Xilonen (Hydro Sample)
  • Buffer: Furina
  • Anemo: Kazuha

Why it works: Xilonen shreds Hydro RES (Stacking with Kazuha's VV). Her healing stacks Furina's Fanfare. If C2, she gives Neuvillette +45% HP, which is a massive damage increase. She replaces Baizhu/Zhongli here.

2. Arlecchino Vaporize

  • Main DPS: Arlecchino
  • Hydro: Yelan
  • Support: Xilonen (Pyro/Hydro Samples)
  • Buffer: Bennett

Why it works: Xilonen shreds both Pyro and Hydro RES simultaneously (Double Swirl equivalent). She provides healing comfort for the team (though Arle can't be healed, teammates can) and the Scroll set buff.

Rotations & Combos

Standard Support Rotation:
Xilonen E (Enter Skate) > N2 (2 Normal Attacks to activate Samples) > Xilonen Q (Heal) > Swap to DPS

Tip: You MUST do the 2 Normal Attacks after casting E. If you swap immediately, the RES shred will not activate. Watch for the sampling meter to fill up.

Frequently Asked Questions

Is she better than Kazuha?
She is a side-grade with different utility. Kazuha groups enemies better and buffs DMG%. Xilonen heals and buffs/shreds without needing to Swirl (easier to use). They can be used together for massive damage.

Does she work in Mono Geo?
Yes, but she loses her PECH versatility. In Mono Geo (Itto), she acts as a healer and Geo buffer/shredder, replacing Zhongli or Albedo depending on the need for shields vs healing.

Data Source: KQM Standards / Version 5.1 Data. Last Updated: December 2025

Albedo Guide: The Definitive Build & Analysis

Albedo, Chief Alchemist of the Knights of Favonius

Albedo Genshin Impact Character Art
Rarity (5-Star)
Element Geo
Weapon Sword
Best Role Off-Field Sub-DPS / EM Buffer
Stat Priority DEF > CRIT > ATK
Tier A (Geo Staple)

Albedo is the Chief Alchemist of the Knights of Favonius. He specializes in low-maintenance off-field damage via his "Solar Isotoma" flower. While simpler than newer Geo units, he remains a staple for Mono Geo teams and a valuable EM buffer for reaction teams like Hu Tao Double Geo.


Pros

  • Extremely easy to build (Scales on DEF).
  • Low field time required (E -> Switch).
  • Provides 125 Elemental Mastery to the team (Burst).
  • Best F2P weapon is a 3-star (Harbinger of Dawn).
  • Generates consistent Geo particles for Itto/Noelle.

Cons

  • Construct Fragility: His flower breaks instantly against bosses.
  • Split Scaling: Skill uses DEF, Burst uses ATK (fixed at C2).
  • Best weapon (Cinnabar Spindle) is unobtainable for new players.
  • Lower damage ceiling than Chiori.

Quick Guide (TL;DR)

If you don't have time for the math, here is the cheat sheet.

  • Best Artifact: 4pc Golden Troupe (BiS - 70% Skill DMG).
  • Alt Artifact: 4pc Husk of Opulent Dreams (Classic DEF stacker).
  • Best Weapon: Cinnabar Spindle (Event Exclusive - BiS).
  • Alt Weapon: Uraku Misugiri (Chiori's Sword - Stat Stick).
  • F2P Weapon: Harbinger of Dawn (3⭐ God Weapon - R5).
  • Main Stats: SANDS: DEF% | GOBLET: Geo DMG | CIRCLET: CRIT.
  • Talent Priority: Elemental Skill > Elemental Burst > Normal Attack.
  • Top Team: Albedo + Itto + Gorou + Zhongli (Mono Geo).
Pro Tip: Harbinger of Dawn gives massive Crit Rate/DMG but requires Albedo to stay above 90% HP. Since he is an off-field unit, this is very easy to maintain. Just don't switch to him when taking big damage!

Need Primogems for Albedo?

Get Genesis Crystals at a discounted price with instant delivery.

Top Up Secure & Fast via GameCharge

Ascension & Talent Materials

Category Material Name Source
Ascension Cecilia Starsnatch Cliff (Mondstadt)
Boss Drop Basalt Pillar Geo Hypostasis (Liyue)
Talent Books Teachings of Ballad Forsaken Rift (Wed/Sat/Sun)

Talent Breakdown & Mechanics

Elemental Skill: Abiogenesis: Solar Isotoma

  • The Flower: Creates a Geo construct (Solar Isotoma).
  • Transient Blossoms: When enemies in the field take damage, the flower blooms, dealing AoE Geo DMG. This occurs once every 2s.
  • DEF Scaling: The damage of these blossoms scales entirely off DEF. This is 90% of Albedo's damage contribution.
  • Elevator: Standing on the flower lifts you up. Useful for exploration or plunge attacks (Dragonstrike).

Elemental Burst: Rite of Progeniture: Tectonic Tide

  • Cost: 40 Energy | Cooldown: 12s
  • Split Scaling: Deals AoE Geo DMG. However, unlike his skill, this damage scales off ATK.
  • Fatal Blossoms: If a Solar Isotoma is on the field, the burst triggers 7 explosions. These also scale off ATK.
  • Utility vs Damage: Because you build Albedo with DEF for his Skill, his Burst deals very little damage (unless C2). You use it mainly for the team buff or i-frames.

Passive: Homuncular Nature

  • The Buff: Using Elemental Burst increases the Elemental Mastery of nearby party members by 125 for 10s. This is why he is good in Hu Tao or Vaporize teams.

Talent Priority Order:

  1. Elemental Skill (Level 10) - The source of all his damage.
  2. Elemental Burst (Level 6) - Utility/Buff primarily.
  3. Normal Attack (Level 1) - Ignore.

Stat Requirements & ER Thresholds

Albedo's energy cost is low (40), and his damage comes from his Skill (DEF). He rarely needs ER unless you desperately need the EM buff.

Build Type Construct Count ER Requirement
Standard Sub-DPS (No Burst) N/A 0% (Base)
Burst Support (EM Buff) Mono Geo 120% - 130%
Burst Support (EM Buff) Solo Geo 140% - 150%

Substat Priority:

  1. DEF% (Primary scaling for Skill)
  2. CRIT Rate / CRIT DMG (Target 60/120+)
  3. Flat DEF
  4. ATK% (Low priority, only helps Burst)

Best Artifacts Comparison

Set Name Role Reasoning
4pc Golden Troupe BiS Increases Elemental Skill DMG by 70%. Since Albedo is purely an off-field Skill bot, this set beats everything else by a significant margin.
4pc Husk of Opulent Dreams Alternative His previous BiS. Provides 54% DEF and 24% Geo DMG. Still very strong, but Golden Troupe pulls ahead for pure skill damage.
4pc Tenacity of the Millelith Pure Support Sacrifices personal damage to buff Team ATK by 20%. Useful if you want him to just be a buff bot for a hypercarry.

Weapon Rankings

Weapon Type Performance Notes
Cinnabar Spindle DEF% S+ (Unobtainable) Event exclusive from 2.3. The passive adds damage based on DEF. Perfect synergy. If you don't have it, you can never get it.
Harbinger of Dawn (R5) CRIT DMG S (F2P God) 3-Star Weapon. Provides 46.9% Crit DMG and 28% Crit Rate (if HP > 90%). Since Albedo is off-field, keeping HP high is easy (unless facing Rifthounds/Furina drain). Beats most 5-stars.
Uraku Misugiri CRIT DMG S Chiori's sword. 88% Crit DMG and buffs Skill DMG. Better than Harbinger if you struggle with HP management, but expensive.
Primordial Jade Cutter CRIT Rate A Good stat stick (44% Crit Rate), but passive HP scaling adds little to his damage compared to DEF options.

Constellation Value

Albedo is perfectly fine at C0. His constellations fix his split scaling issues.

  • C2: Opening of Phanerozoic - (Fix) Transient Blossoms grant stacks that increase Burst DMG based on Albedo's DEF. This finally makes his Burst deal decent damage even on a DEF build.
  • C4: Descent of Divinity - (Niche) Increases Plunging Attack DMG by 30% for characters in the Skill field. Specifically designed for Xiao (and now Xianyun teams).
  • C6: Dust of Purification - (Buff) Active characters protected by a Crystallize shield gain 17% DMG Bonus. A nice universal buff for Geo teams.

Verdict: C0 is great. C2 makes his kit cohesive, but isn't required.

Top Team Compositions

1. Mono Geo (Itto)

  • Main DPS: Arataki Itto / Noelle
  • Sub-DPS: Albedo
  • Buffer: Gorou
  • Shield: Zhongli

Why it works: Gorou buffs DEF and Geo DMG, which Albedo snapshots. Albedo provides energy particles for Itto. Zhongli shreds Geo RES.

2. Double Geo (Hu Tao)

  • Main DPS: Hu Tao
  • Hydro: Xingqiu / Yelan
  • Sub-DPS: Albedo
  • Shield: Zhongli

Why it works: Albedo provides 125 EM to Hu Tao for stronger Vapes, adds off-field damage, and benefits from Geo Resonance (shield strength + DMG bonus). Note: Yelan/Xingqiu Double Hydro is generally stronger now, but this is still comfy.

Rotations & Combos

Standard Sub-DPS:
Albedo E > (Optional) Albedo Q if buff needed > Swap

Tip: Albedo's flower snapshots stats. If you are using Gorou, make sure to cast Gorou's flag/buff *before* placing Albedo's flower.

Frequently Asked Questions

Albedo vs. Chiori?
Chiori deals significantly more damage (almost double in some cases) and her dolls don't break against bosses. Albedo provides the 125 EM buff which Chiori lacks. Chiori is generally the better investment now.

Is Harbinger of Dawn usable with Furina?
No. Furina drains team HP to 50%. Harbinger requires >90% HP. If you play Albedo with Furina, use Cinnabar Spindle (if you have it) or a different stat stick like Jade Cutter/Wolf-Fang.

Data Source: KQM Standards. Last Updated: December 2025

Chiori Guide: The Definitive Build & Analysis

Chiori, master of Geo constructs

Chiori Genshin Impact Character Art
Rarity (5-Star)
Element Geo
Weapon Sword
Best Role Off-Field Sub-DPS
Stat Priority DEF > CRIT > ATK
Tier S (Albedo Upgrade)

Chiori is the owner of Chioriya Boutique and a master of Geo constructs. She serves as a direct upgrade to Albedo, offering higher personal damage and less clunkiness (her dolls cannot be destroyed by bosses). She scales primarily with DEF but also benefits from ATK.


Pros

  • High off-field damage (Tamoto hits hard).
  • Indestructible constructs (unlike Albedo's flower).
  • Dual scaling (DEF & ATK) makes her versatile.
  • Fast swap mechanics for smooth rotations.
  • C1 removes Geo Construct restriction (huge flexibility).

Cons

  • At C0, she needs another Geo Construct to summon 2 dolls.
  • Limited synergy with Navia at C0 (Navia doesn't make constructs).
  • Short range on dolls compared to Yae/Fischl.
  • Burst is just damage (no utility).

Quick Guide (TL;DR)

If you don't have time for the math, here is the cheat sheet.

  • Best Artifact: 4pc Husk of Opulent Dreams (BiS).
  • Alt Artifact: 4pc Golden Troupe (Strong Skill DMG).
  • Best Weapon: Uraku Misugiri (Signature).
  • Alt Weapon: Primordial Jade Cutter or Cinnabar Spindle (Albedo's Sword).
  • F2P Weapon: Harbinger of Dawn (3⭐ God Weapon - R5).
  • Main Stats: SANDS: DEF% | GOBLET: Geo DMG | CIRCLET: CRIT.
  • Talent Priority: Elemental Skill > Elemental Burst > Normal Attack.
  • Top Team: Chiori + Itto + Gorou + Zhongli (Mono Geo).
Pro Tip: Tap E twice! When you use her skill, tap E again immediately ("Tapestry" effect). This switches you to your next character automatically and triggers coordinated attacks. Do not Normal Attack after E unless you are playing C6 Main DPS.

Need Primogems for Uraku Misugiri?

Get Genesis Crystals at a discounted price with instant delivery.

Top Up Secure & Fast via GameCharge

Ascension & Talent Materials

Category Material Name Source
Ascension Dendrobium Inazuma (Nazuchi Beach)
Boss Drop Artificed Spare Clockwork Component Coppelia (Icewind Suite)
Talent Books Teachings of Light Violet Court (Wed/Sat/Sun)
Common Mob Spectral Core Specters (Inazuma/Sumeru)

Talent Breakdown & Mechanics

Elemental Skill: Fluttering Hasode

  • Tamoto: Summons an automaton doll "Tamoto" that deals AoE Geo DMG periodically.
  • Scaling: Damage scales heavily on DEF and slightly on ATK.
  • Geo Construct Mechanic: If there is a Geo Construct nearby (e.g. Zhongli Pillar, Itto Ushi, Ningguang Screen), Chiori summons an additional Tamoto. This essentially doubles her damage. C0 Chiori needs a construct for full potential.
  • Upward Sweep: You can hold E to aim the dash upward for exploration.

Elemental Burst: Hiyoku: Twin Blades

  • Cost: 50 Energy | Cooldown: 13.5s
  • The Nuke: Deals a single instance of massive AoE Geo DMG based on ATK and DEF.
  • Usage: Simple nuke. Use it whenever available for extra damage, but don't stress about ER too much.

Passive: Tailor-Made

  • The Switch: This is her defining passive. After using Skill:
    • Press Skill again (Tapestry): Automatically switches to the next character in your roster and applies "Seize the Moment." Your active character's attacks will trigger coordinated Geo attacks from Tamoto. (Recommended for Supports).
    • Press Normal Attack (Tailoring): Grants Chiori Geo infusion. (Only for C6 Main DPS).

Talent Priority Order:

  1. Elemental Skill (Level 10) - 80% of her damage.
  2. Elemental Burst (Level 8) - Burst damage.
  3. Normal Attack (Level 1) - Ignore unless C6.

Stat Requirements & ER Thresholds

Chiori's Burst is cheap (50 cost), so she doesn't need much ER.

Team Context Construct Count ER Requirement
Mono Geo (Itto/Gorou) Yes 110% - 120%
Double Geo (Navia) No (unless C1) 130% - 140%

Substat Priority:

  1. CRIT Rate / CRIT DMG (Target 70/160+)
  2. DEF% (Primary scaling)
  3. ATK% (Secondary scaling)
  4. Energy Recharge (Low priority)

Best Artifacts Comparison

Set Name Role Reasoning
4pc Husk of Opulent Dreams BiS Provides massive DEF and Geo DMG bonus. Chiori is off-field most of the time, allowing her to maintain stacks easily.
4pc Golden Troupe Skill DMG Boosts Skill DMG by 70%. Extremely competitive with Husk, and efficient to farm. Use whichever has better substats.
2pc DEF / 2pc Geo Transitional Good placeholder while farming 4pc sets.

Weapon Rankings

Weapon Type Performance Notes
Uraku Misugiri CRIT DMG S+ Signature. 88% Crit DMG. Buffs Normal Attack and Skill DMG. Perfect for her.
Cinnabar Spindle DEF% S (Event) Albedo's signature. If you have this from 2.3, use it! It's almost as good as 5-star options for her Skill damage.
Harbinger of Dawn (R5) CRIT DMG S (F2P God) 3-Star Weapon. Gives massive Crit stats. Since Chiori is off-field, she stays above 90% HP easily (unless playing with Furina without a healer).
Wolf-Fang CRIT Rate A (BP) Solid Crit Rate stick. Passive increases Skill/Burst DMG.

Constellation Value

Chiori is great at C0, but C1 fixes her main team building restriction.

  • C1: Six Paths of Sage Silk - (Flexibility) Increases Tamoto's range by 50%. More importantly, if you have a Geo teammate, you can trigger the 2nd Tamoto without needing a Geo Construct. Essential for Navia teams.
  • C2: In Five Colors Dyed - (Damage) After using Burst, summons a "Kinu" doll every 3s that deals AoE Geo DMG. Significant DPS increase.
  • C6: Sorrowless Solemn Art - (Main DPS) Reduces Skill CD by 12s (virtually no cooldown). Increases Normal Attack DMG by 235% of DEF. Turns her into a Geo Infused carry.

Verdict: C0 is fine for Itto. C1 is highly recommended for Navia.

Top Team Compositions

1. Mono Geo (Itto)

  • Main DPS: Arataki Itto
  • Sub-DPS: Chiori
  • Buffer: Gorou (C6)
  • Shield/Construct: Zhongli / Albedo

Why it works: Itto (Ushi) and Zhongli (Pillar) create Geo Constructs, guaranteeing Chiori summons 2 Tamotos. Chiori benefits from Gorou's DEF buff.

2. Navia Double Geo

  • Main DPS: Navia
  • Sub-DPS: Chiori
  • Flex 1: Bennett / Furina
  • Flex 2: Xiangling / Zhongli

Why it works: Navia doesn't make constructs, so at C0 Chiori only summons 1 doll (unless you run Zhongli/Geo MC as the 3rd slot). At C1, Chiori summons 2 dolls just by having Navia (Geo) in the team. Chiori generates crystals for Navia's ammo.

Rotations & Combos

Quickswap Rotation:
Chiori Q > Chiori E -> E (Tap again) > Auto-Switch to next character

Tip: The "E -> E" input is critical. Tapping E the second time activates "Tapestry," which swaps characters and enables her coordinated attacks. If you Normal Attack instead, you get Geo infusion, which is useless at C0.

Frequently Asked Questions

Is she better than Albedo?
Yes. She deals significantly more damage, her dolls cannot be destroyed by bosses, and her burst is a better nuke. Albedo is only better if you really need the 125 EM buff.

Golden Troupe or Husk?
They are very close (~5% difference). Husk is generally better because it buffs both DEF (which scales everything) and Geo DMG. Golden Troupe only buffs the Skill. Use whichever has better substats.

Data Source: KQM Standards. Last Updated: December 2025

Arataki Itto Guide: The Definitive Build & Analysis

Arataki Itto, the One and Oni

Arataki Itto Genshin Impact Character Art
Rarity (5-Star)
Element Geo
Weapon Claymore
Best Role Geo Hypercarry
Stat Priority DEF > CRIT > ER > ATK
Tier S (Mono Geo)

Arataki Itto is the "One and Oni" and the undisputed king of Geo DPS. He scales heavily with **DEF** and deals massive Geo DMG through his specialized Charged Attacks ("Arataki Kesagiri"). His playstyle is fast, aggressive, and requires a dedicated team of Geo supports to shine.


Pros

  • High sustained DPS with large AoE cleave.
  • Not reliant on reactions (consistent damage).
  • Extremely tanky due to high DEF stat.
  • Ushi (Skill) hits like a truck (high multiplier nuke).
  • Infinite stagger resistance during Charged Attacks.

Cons

  • Expensive Team: Needs Gorou (C6), Zhongli/Albedo/Chiori.
  • Burst reliant (No damage without Q).
  • High Energy Cost (70) with poor particle generation.
  • Struggles against Elemental Shields (Lectors/Heralds).

Quick Guide (TL;DR)

If you don't have time for the math, here is the cheat sheet.

  • Best Artifact: 4pc Husk of Opulent Dreams (Uncontested BiS).
  • Alt Artifact: 4pc Marechaussee Hunter (Only w/ Furina) or 4pc Bolide (Shielded).
  • Best Weapon: Redhorn Stonethresher (Signature - DEF Synergy).
  • Alt Weapon: Serpent Spine (BP - R5 Rivals Redhorn).
  • F2P Weapon: Whiteblind (Craftable DEF Stat Stick).
  • Main Stats: SANDS: DEF% | GOBLET: Geo DMG | CIRCLET: CRIT.
  • Talent Priority: Normal Attack = Elemental Burst > Elemental Skill.
  • Top Team: Itto + Gorou (C6) + Chiori/Albedo + Zhongli (Mono Geo).
Pro Tip: Stack Management: Always throw Ushi (E) *during* your burst. Ushi gives stacks when hit, deals massive damage, and generates particles. Throwing him outside of burst is a DPS loss.

Need Primogems for Redhorn?

Get Genesis Crystals at a discounted price with instant delivery.

Top Up Secure & Fast via GameCharge

Ascension & Talent Materials

Category Material Name Source
Ascension Onikabuto Inazuma Trees (Narukami/Tatarasuna)
Boss Drop Riftborn Regalia Golden Wolflord (Tsurumi Island)
Talent Books Teachings of Elegance Violet Court (Tue/Fri/Sun)
Common Mob Slime Condensate Slimes

Talent Breakdown & Mechanics

Normal Attack: Fight Club Legend

  • Superstrength Stacks: When Itto hits enemies with Normal Attacks, he gains stacks.
  • Arataki Kesagiri: Holding Attack when you have stacks unleashes a rapid series of slashes that consume no stamina. This is his primary damage source. The final slash is a massive nuke.
  • Mechanic: You must weave Normal Attacks to build stacks, then unleash Charged Attacks to spend them.

Elemental Skill: Masatsu Zetsugi: Akaushi Burst!

  • Ushi: Throws a bull (Ushi) that deals massive Geo DMG.
  • Stack Generation: Ushi grants a Superstrength stack when he hits an enemy, when he takes damage, and when he leaves. He also taunts enemies.
  • Strategy: Use Ushi during your Burst window for maximum damage (since Burst converts DEF to ATK).

Elemental Burst: Royal Descent: Behold, Itto the Evil!

  • Cost: 70 Energy | Cooldown: 18s
  • Raging Oni King: Converts Itto's Normal/Charged/Plunging attacks to Geo DMG.
  • DEF Conversion: Increases his ATK based on his DEF. Also increases ATK Speed.
  • Snapshot: The DEF-to-ATK conversion snapshots on cast. However, the Geo Infusion does not.

Talent Priority Order:

  1. Normal Attack (Level 10) - Scales Kesagiri damage.
  2. Elemental Burst (Level 9) - Scales DEF-to-ATK conversion.
  3. Elemental Skill (Level 8) - Strong nuke (Ushi).

Stat Requirements & ER Thresholds

Itto generates almost no particles during his burst. He relies entirely on teammates (Gorou/Albedo) for energy.

Team Context Weapon ER Requirement
Mono Geo (w/ Gorou Fav) Redhorn 130% - 140%
Mono Geo (w/ Gorou Fav) Whiteblind (R5) 130% - 140%
C2 Itto Any 100% - 110% (Base)

Substat Priority:

  1. CRIT Rate / CRIT DMG (Target 70/160+)
  2. DEF% (Primary scaling stat)
  3. Energy Recharge (Until requirement met)
  4. ATK% (Much less valuable than DEF)

Best Artifacts Comparison

Set Name Role Reasoning
4pc Husk of Opulent Dreams BiS Provides 54% DEF and 24% Geo DMG at max stacks. Tailor-made for Itto. Remember to stack it off-field before starting the Abyss.
4pc Marechaussee Hunter Furina Team Use only if paired with Furina. Gives 36% Crit Rate. Stronger than Husk if you have Furina buffs.
4pc Retracing Bolide Shielded Consistent 40% DMG bonus if shielded. Good if you have great pieces, but Husk is better.

Weapon Rankings

Weapon Type Performance Notes
Redhorn Stonethresher CRIT DMG S+ Signature. Massive 88% Crit DMG. Increases Normal/Charged DMG based on DEF. Significantly stronger than any other option.
Serpent Spine (R5) CRIT Rate S Battle Pass weapon. At R5, it is very close to Redhorn. Requires a shielder (Zhongli) to maintain stacks.
Whiteblind (R5) DEF% A (F2P) Craftable. High DEF stats. Remember to hit enemies 4 times before Bursting to stack the passive.
Skyward Pride ER% A Solves energy issues and vacuum blades benefit from Geo DMG bonus. Good comfort pick.

Constellation Value

Itto is fully functional at C0, but C6 turns him into a god.

  • C1: Stay a While and Listen Up - (QoL) Grants extra Superstrength stacks upon using Burst. Makes rotation much smoother and allows instant Charged Attacks.
  • C2: Gather 'Round, It's a Brawl! - (Energy) Restores energy and reduces cooldown based on the number of Geo party members. Solves his ER issues completely in Mono Geo.
  • C6: Arataki Itto, Present! - (Broken) Charged Attacks have +70% Crit DMG. 50% chance to NOT consume a stack when attacking. This allows for near-infinite slash chains.

Verdict: C0 is great. C6 is one of the strongest in the game.

Top Team Compositions

1. Mono Geo (The Gold Standard)

  • Main DPS: Itto
  • Buffer: Gorou (C6 is huge)
  • Sub-DPS: Chiori / Albedo
  • Shield: Zhongli

Why it works: Gorou buffs DEF and Geo DMG based on 3 Geo members. Zhongli shreds Geo RES. Chiori/Albedo deal off-field damage scaling on DEF. Itto drives it all.

2. Itto + Furina

  • Main DPS: Itto
  • Buffer: Furina
  • Buffer: Gorou
  • Healer: Xianyun / Jean / Bennett

Why it works: Furina gives a massive DMG% buff, which Itto lacks. You need a strong team healer to stack her Fanfare, but the damage ceiling is higher than Triple Geo if managed correctly.

Rotations & Combos

Standard C0 Combo:
Supports > Itto Q > Ushi (E) > Normal Attacks (Build Stacks) > Charged Attack Spam

Tip: Ushi hits hard. Always use him inside your Burst window. Also, remember to start the fight with Itto in the party but off-field to build Husk stacks.

Frequently Asked Questions

Do I need Gorou?
Yes. Gorou is to Itto what Faruzan is to Xiao. Without Gorou, Itto loses a massive amount of DEF and Geo DMG bonus. Gorou is essential.

Whiteblind vs. Serpent Spine?
R5 Serpent Spine is significantly better than R5 Whiteblind due to the DMG% and Crit Rate. However, Whiteblind is a very respectable F2P option.

Data Source: KQM Standards. Last Updated: December 2025

Zhongli Guide: The Definitive Build & Analysis

Zhongli, Geo Archon

Zhongli Genshin Impact Character Art
Rarity (5-Star Archon)
Element Geo
Weapon Polearm
Best Role Shielder / Universal Shredder
Stat Priority HP > CRIT Rate (Favonius) > ER
Tier SS (God of Comfort)

Zhongli is the Geo Archon, Rex Lapis. He completely trivializes the game's difficulty with his Jade Shield, which is nearly unbreakable and shreds 20% of ALL Elemental and Physical Resistance from nearby enemies. He fits into almost any team that needs survival or interruption resistance.


Pros

  • Strongest shield in the game (100% Uptime).
  • Universal 20% RES Shred for all elements.
  • Makes you immune to interruption/stagger.
  • Low investment floor (just stack HP).
  • Meteor (Burst) petrifies enemies (Crowd Control).

Cons

  • Energy generation is RNG (Stele pulse).
  • Pillar can steal reactions or block movement.
  • Long burst animation (DPS loss in speedruns).
  • Corrosion (Rifthounds) bypasses shields.

Quick Guide (TL;DR)

If you don't have time for the math, here is the cheat sheet.

  • Best Artifact: 4pc Tenacity of the Millelith (Support).
  • Alt Artifact: 4pc Noblesse Oblige (Burst Support).
  • Best Weapon: Black Tassel (3-Star HP% Stat Stick).
  • Support Weapon: Favonius Lance (Team Battery - Best Utility).
  • DPS Weapon: Staff of Homa (Burst Nuke).
  • Main Stats: SANDS: HP% | GOBLET: HP% | CIRCLET: HP% (or CRIT Rate for Favonius).
  • Talent Priority: Elemental Skill > Elemental Burst > Normal Attack.
  • Top Team: Zhongli + Hu Tao + Yelan + Xingqiu (Classic Vape).
Pro Tip: Hold E, don't Tap. Tapping E only creates a pillar. Holding E creates the Shield AND a pillar (if max count not reached) AND breaks Geo shields instantly. Always Hold E.

Need Primogems for the Geo Archon?

Get Genesis Crystals at a discounted price with instant delivery.

Top Up Secure & Fast via GameCharge

Ascension & Talent Materials

Category Material Name Source
Ascension Cor Lapis Liyue Cliffs / Mt. Hulao
Boss Drop Basalt Pillar Geo Hypostasis (Liyue)
Talent Books Teachings of Gold Taishan Mansion (Wed/Sat/Sun)
Common Mob Slime Condensate Slimes (Everywhere)

Talent Breakdown & Mechanics

Elemental Skill: Dominus Lapidis

  • Tap: Creates a Stone Stele (Pillar) that resonates, dealing Geo DMG over time. It can block enemy movement (and yours).
  • Hold: Explodes Geo energy to break Geo shields (Mining God). Creates a Jade Shield based on Max HP.
  • Jade Shield: 150% absorption efficiency vs ALL damage types. While active, characters protected by the shield decrease Elemental and Physical RES of nearby opponents by 20%.

Elemental Burst: Planet Befall

  • Cost: 40 Energy | Cooldown: 12s
  • The Meatball: Calls down a meteor dealing massive Geo DMG.
  • Petrification: Enemies hit are turned to stone for up to 4 seconds. This is the only hard CC in the game that works on almost everything (except bosses).

Passive: Resonant Waves

  • Steely Skin: When the Jade Shield takes damage, it fortifies, increasing Shield Strength by 5% (Stacks up to 5 times). This makes his shield effectively 25% stronger in combat.

Talent Priority Order:

  1. Elemental Skill (Level 10) - Maximize shield HP.
  2. Elemental Burst (Level 8) - Damage and petrification duration.
  3. Normal Attack (Level 1) - Ignore.

Stat Requirements & ER Thresholds

For Shield Bot, HP is everything. For Burst Support, balance HP with Crit.

Build Type Weapon Stat Goal (HP)
Shield Bot (Pure Support) Black Tassel 50,000+
Battery Support Favonius Lance 35,000+ (Need Crit Rate)
Burst Nuke Homa / The Catch 30,000 (Focus Crit)

Substat Priority (Shield Bot):

  1. HP% (Priority #1)
  2. Flat HP
  3. Energy Recharge
  4. CRIT Rate (Only for Favonius Lance)

Best Artifacts Comparison

Set Name Role Reasoning
4pc Tenacity of the Millelith BiS Support Provides +20% HP (Shield). His pillar pulses to trigger the 4pc effect (20% ATK + Shield Strength) for the team. Downside: Pillar breaks easily vs bosses.
4pc Noblesse Oblige Alt Support If you can't keep the pillar alive, use Noblesse. 20% ATK on Burst cast.
2pc Tenacity / 2pc Vourukasha Max Shield Gives +40% HP total. Best if you just want an unbreakable shield and don't care about team buffs.

Weapon Rankings

Weapon Type Performance Notes
Black Tassel HP% S (Shield) 3-Star Weapon. Highest HP substat (46.9%) of any polearm. Easiest and best option for pure shielders.
Favonius Lance ER% S (Utility) Best for team energy. Requires Crit Rate on artifacts to trigger. Weaker shield than Black Tassel, but better for the team.
Staff of Homa CRIT DMG S (Hybrid) Provides HP% and massive Crit DMG. Best for Burst Nuke builds that still want a decent shield.
The Catch ER% A (Burst) F2P option for Burst Nuke builds. Increases Burst DMG and Crit Rate.

Constellation Value

Zhongli is feature-complete at C0. His constellations are luxury, not necessity.

  • C1: Rock, the Backbone of Earth - (Construct) Creates 2 Stone Steles instead of 1. Better Tenacity uptime, but pillars can block your path more often.
  • C2: Stone, the Cradle of Jade - (Co-op/Shield) Casting Burst grants a Jade Shield to nearby characters. Allows for 100% shield uptime without holding E, and shields teammates in Co-op. Excellent QoL.
  • C6: Chrysos, Bounty of Dominator - (Healer) When the Jade Shield takes damage, 40% of that damage is converted to HP for the active character. Turns Zhongli into a healer/shielder hybrid. WARNING: This can ruin Hu Tao builds by healing her above 50% HP.

Verdict: C0 is perfect. Stop there.

Top Team Compositions

1. Hu Tao Double Hydro

  • Main DPS: Hu Tao / Yoimiya
  • Hydro: Yelan
  • Hydro: Xingqiu
  • Shield: Zhongli

Why it works: Hu Tao needs to be at low HP and hates being interrupted. Zhongli solves both. His shield shred (20%) + Hydro Resonance (HP%) boosts the entire team.

2. Mono Geo

  • Main DPS: Arataki Itto / Navia
  • Support: Gorou
  • Sub-DPS: Albedo / Chiori
  • Shield: Zhongli

Why it works: Geo Resonance requires a shield to be active. Zhongli guarantees this resonance (+15% DMG, -20% Geo RES) is always up. His pillar resonates with other constructs for extra damage.

Rotations & Combos

Standard Shield Rotation:
Zhongli Hold E > Swap to Supports > Main DPS

Burst Rotation:
Zhongli Q (Petrify) > Hold E (Shield) > Swap

Tip: Always Hold E. Tapping E is almost never worth it unless repositioning a pillar for puzzle solving.

Frequently Asked Questions

Is Black Tassel really his best weapon?
For pure shielding? Yes. It gives more HP than any 5-star polearm (except Staff of Homa, which is close). It's cheap and effective.

Does he make the game too easy?
Yes. Players often forget how to dodge after using Zhongli for a while ("Zhongli Brainrot"). Use him if you want comfort, but remember to practice dodging for the other side of the Abyss.

Data Source: KQM Standards. Last Updated: December 2025

Navia Guide: The Definitive Build & Analysis

Navia, the President of the Spina

Navia Genshin Impact Character Art
Rarity (5-Star)
Element Geo
Weapon Claymore
Best Role Quickswap DPS / Main DPS
Stat Priority CRIT > ATK% > ER
Tier S (The Geo Savior)

Navia is the President of the Spina di Rosula and a Geo Claymore user who finally makes Crystallize reactions offensive. Unlike traditional Geo units who want Mono Geo teams, Navia demands teammates of Pyro, Hydro, Electro, or Cryo to generate shards, which she loads into her Gunbrella for massive shotgun blasts.


Pros

  • Insane front-loaded damage (200k+ Skill hits).
  • Flexible teams (doesn't need Mono Geo).
  • Very F2P friendly (Event weapon is great).
  • Self-sufficient Geo application.
  • Satisfying shotgun gameplay.

Cons

  • Relies on teammates to generate Crystallize shards.
  • Burst has standard ICD (not great for shield breaking).
  • Best artifact set (Nighttime Whispers) is resin inefficient.
  • Gunbrella can miss if enemies move fast.

Quick Guide (TL;DR)

If you don't have time for the math, here is the cheat sheet.

  • Best Artifact: 4pc Nighttime Whispers (Signature).
  • Alt Artifact: 4pc Marechaussee Hunter (Furina Team) or 2pc ATK / 2pc Skill.
  • Best Weapon: Verdict (Signature).
  • Alt Weapon: Serpent Spine (BP) or The Unforged.
  • F2P Weapon: Ultimate Overlord's Mega Magic Sword (Event) or Tidal Shadow.
  • Main Stats: SANDS: ATK% | GOBLET: Geo DMG | CIRCLET: CRIT.
  • Talent Priority: Elemental Skill > Normal Attack > Elemental Burst.
  • Top Team: Navia + Zhongli + Bennett + Xiangling (Geo Vape).
Pro Tip: Hold E to Vacuum: You don't need to run around picking up shards. Holding her Skill sucks nearby Crystallize shards to her, instantly granting "Crystal Shrapnel" charges. Aim, Hold, Fire.

Need Primogems for Verdict?

Get Genesis Crystals at a discounted price with instant delivery.

Top Up Secure & Fast via GameCharge

Ascension & Talent Materials

Category Material Name Source
Ascension Spring of the First Dewdrop Fontaine Underwater (Morte Region)
Boss Drop Artificed Spare Clockwork Component Coppelius (Icewind Suite)
Talent Books Teachings of Equity Pale Forgotten Glory (Mon/Thu/Sun)
Common Mob Transoceanic Pearl Fontemer Aberrants (Crabs/Seahorses)

Talent Breakdown & Mechanics

Elemental Skill: Ceremonial Crystalshot

  • Gunbrella Warfare: Fires a Rosula Shardshot.
  • Crystal Shrapnel (Ammo): When a party member picks up a Crystallize shard, Navia gains 1 Shrapnel charge (Max 6).
  • Damage Scaling:
    • 0-2 Charges: Deals moderate Geo DMG.
    • 3 Charges: Deals 200% Base DMG. This is your target.
    • 4-6 Charges: Further increases damage.
  • Hold E: Navia enters aiming mode and sucks in nearby Crystallize shards to build charges instantly.

Elemental Burst: As the Sunlit Sky's Singing Salute

  • Cost: 60 Energy | Cooldown: 15s
  • Cannon Fire: Calls down a bombardment that deals Geo DMG over time.
  • Support: When a cannonball hits an enemy (every 2.4s), Navia gains 1 Crystal Shrapnel charge. This helps build stacks while she is off-field or rotating.

Passive: Mutual Assistance Network

  • ATK Buff: For each Pyro/Electro/Cryo/Hydro party member (Max 2), Navia gains 20% ATK. This is why you want 2 PECH characters in her team (e.g. Bennett + Xiangling).

Talent Priority Order:

  1. Elemental Skill (Level 10) - The shotgun. 90% of her damage.
  2. Normal Attack (Level 8) - Used during infusion window.
  3. Elemental Burst (Level 8) - Stack generation.

Stat Requirements & ER Thresholds

Navia needs Energy to keep her Burst up for stack generation.

Team Context Skill Usage ER Requirement
Double Geo (Zhongli/Chiori) 2 Skills 120% - 130%
Solo Geo (Navia Driver) 2 Skills 150% - 170%
With Favonius Team 2 Skills 110% - 120%

Substat Priority:

  1. CRIT Rate / CRIT DMG (Target 70/160+)
  2. ATK%
  3. Energy Recharge (Until requirement met)

Best Artifacts Comparison

Set Name Role Reasoning
4pc Nighttime Whispers BiS Signature. Gives ATK and massive Geo DMG bonus when picking up Crystallize shards. ~10% better than other options.
4pc Marechaussee Hunter Furina Team Only works if paired with Furina (HP drain). Gives 36% Crit Rate. Very strong.
2pc ATK / 2pc Geo Flexible Efficient. Mix Golden Troupe/Petra/Glad. Only about 5-8% worse than Whispers but much easier to farm.

Weapon Rankings

Weapon Type Performance Notes
Verdict CRIT Rate S+ Signature. High Base ATK, ATK buff, and Skill DMG buff when picking up shards. Fashion + Power.
Serpent Spine (R5) CRIT Rate S BP Weapon. Rivals R1 Verdict if stacks are maintained (use a shielder like Zhongli).
Ult. Overlord's Mega Sword ER% A (Event) 4.3 Event Weapon. Gives massive ATK% based on Melusines helped. Very strong F2P option.
Tidal Shadow (R5) ATK% A (Craftable) Fontaine Craftable. Massive ATK boost if healed. Works well in Bennett/Furina teams.

Constellation Value

Navia is excellent at C0. Constellations are pure damage.

  • C1: A Lady's Rules for Keeping a Safe Distance - (Energy) Skill usage restores Energy and reduces Burst CD based on ammo used. Makes her energy management trivial.
  • C2: The President's Pursuit of Victory - (Crit) Skill gains up to 36% CRIT Rate based on ammo. Also calls down a Cannon support fire. Massive consistency boost.
  • C6: The Flexible Finesse of the Spina's President - (Nuke) Skill consumes excess ammo (beyond 3) to increase Crit DMG by 45% (up to 135%) and refunds the ammo. Turns her shotgun into a nuclear missile.

Verdict: C0 is perfect. C2 is the best stopping point for spenders.

Top Team Compositions

1. Geo-Pyro-Hydro (Standard)

  • Main DPS: Navia
  • Geo Support: Zhongli / Chiori / Albedo
  • Pyro/Hydro: Bennett / Xiangling / Furina
  • Flex: Yelan / Fischl

Why it works: Navia + Zhongli gives Geo Resonance (+15% DMG). Bennett gives huge ATK. Xiangling/Furina apply elements to create Crystallize shards for Navia to load.

2. Plunge Navia (Xianyun)

  • Main DPS: Navia
  • Plunge Support: Xianyun
  • Buffer: Furina
  • Geo/Flex: Zhongli / Chiori

Why it works: Navia has Geo infusion on her NAs after using Skill. Xianyun allows her to Plunge during this window, dealing AoE Geo damage while waiting for her next Skill charge. Furina buffs everything.

Rotations & Combos

Standard Shotgun Rotation:
Navia Q > Supports (Bennett Q / Furina EQ) > Navia Hold E (Aim) -> N4 (Infused) > Navia Hold E -> N4

Tip: Always use Q first to start generating ammo while you swap to supports. When you swap back to Navia, Hold E to suck in any shards on the floor to hit max (6) stacks.

Frequently Asked Questions

Can she work in Mono Geo?
Not recommended. She needs shards to reload. Gorou/Itto don't generate enough shards, and Gorou's buffs don't scale her as well as Bennett/Furina.

Is Nighttime Whispers worth farming?
Yes, if you main Navia. It is significantly better than 2pc/2pc. However, if you have a god-tier 4pc Marechaussee Hunter and run Furina, that is equally good.

Data Source: KQM Standards. Last Updated: December 2025

Yumemizuki Mizuki Guide: The Definitive Build & Analysis

Yumemizuki Mizuki

Yumemizuki Mizuki Genshin Impact Character Art
Rarity (5-Star)
Element Anemo
Weapon Catalyst
Best Role On-Field Driver / Healer
Stat Priority EM > ER > ATK
Tier A+ (Taser Specialist)

Yumemizuki Mizuki is an Inazuman fashion designer and a "Dream-Eating" Yokai. She is a unique 5-Star Anemo Catalyst who functions as a Swirl Driver and Healer simultaneously. Uniquely, her healing scales off Elemental Mastery, allowing her to deal massive Swirl damage while keeping the team alive.


Pros

  • Consolidates Healer and VV Driver roles (Role Compression).
  • Healing scales on EM (No damage loss for building support).
  • Excellent mobility in "Dreamdrifter" state (Hovering).
  • Buffs team Swirl and Electro-Charged damage.
  • Joins Standard Banner in 5.5 (Future accessibility).

Cons

  • Being a Standard character lowers her long-term scaling ceiling.
  • "Snack" healing mechanic (Burst) can be tricky to pick up.
  • Needs to be on-field to drive reactions effectively.
  • Requires high ER to maintain Burst uptime for healing.

Quick Guide (TL;DR)

If you don't have time for the math, here is the cheat sheet.

  • Best Artifact: 4pc Viridescent Venerer (Mandatory).
  • Alt Artifact: 4pc Ocean-Hued Clam (If another Anemo has VV).
  • Best Weapon: Sunny Morning Sleep-In (Signature).
  • Alt Weapon: A Thousand Floating Dreams (Nahida's Lamp).
  • F2P Weapon: Sacrificial Fragments (BiS 4-Star) or Mappa Mare.
  • Support Weapon: Favonius Codex (Team Battery).
  • Main Stats: SANDS: EM or ER | GOBLET: EM | CIRCLET: EM or Healing Bonus.
  • Talent Priority: Elemental Skill > Elemental Burst > Normal Attack.
  • Top Team: Mizuki + Furina + Fischl + Beidou (AFK Taser).
Pro Tip: Double Dipping: Because Mizuki's healing scales with Elemental Mastery, you do not need Healing Bonus artifacts. Stacking full EM makes her Swirls hit for 6k+ while also maximizing her healing output.

Need Primogems for Mizuki?

Get Genesis Crystals before she moves to the Standard Banner!

Top Up Secure & Fast via GameCharge

Ascension & Talent Materials

Category Material Name Source
Ascension Amakumo Fruit Seirai Island (Inazuma)
Boss Drop Storm Beads Thunder Manifestation (Inazuma)
Talent Books Teachings of Light Violet Court (Wed/Sat/Sun)

Talent Breakdown & Mechanics

Elemental Skill: Aisa Utamakura Pilgrimage

  • Dreamdrifter: Mizuki enters a hovering state. She can move freely and her Normal Attacks are converted to continuous Anemo DMG.
  • Interaction: Triggering Swirls while in this state extends its duration (up to 10s total). This encourages aggressive on-field play.
  • Scaling: Damage scales purely on Elemental Mastery. Do not build ATK.

Elemental Burst: Anraku Secret Spring Therapy

  • Cost: 80 Energy | Cooldown: 18s
  • Mini Baku: Summons a helper that follows the active character.
  • Yumemi Snacks: Drops snacks periodically. If a character with >70% HP picks it up, it explodes (Anemo DMG). If <70% HP, it heals based on Mizuki's EM.
  • Team Buff: Picking up a snack restores energy to Mizuki, helping her rotation.

Passive: In Mist-Like Waters

  • Swirl Buff: When Mizuki is in the Dreamdrifter state, she applies a debuff to enemies. If she Swirls that enemy, the Swirl DMG is increased by 900% of her EM. This is her core damage multiplier.

Talent Priority Order:

  1. Elemental Skill (Level 10) - Primary damage state.
  2. Elemental Burst (Level 9) - Healing and utility.
  3. Normal Attack (Level 1) - Ignore (Skill uses its own scaling).

Stat Requirements & ER Thresholds

Mizuki needs huge EM for healing/damage and decent ER for burst uptime.

Team Context Weapon ER Requirement
Solo Anemo (Driver) Sacrificial Fragments 150% - 160%
Double Anemo Any 120% - 130%
Solo Anemo Signature (Sunny Morning) 160% - 180%

Substat Priority:

  1. Elemental Mastery (Aim for 1000+)
  2. Energy Recharge (Until requirement met)
  3. HP% (Survivability - she is squishy)
  4. ATK% / CRIT (Low priority)

Best Artifacts Comparison

Set Name Role Reasoning
4pc Viridescent Venerer (VV) BiS Driver As an Anemo Driver, her main job is to shred RES for her off-field teammates (Fischl/Xingqiu). Mandatory set.
4pc Gilded Dreams Personal Damage Provides the highest EM possible. Good if someone else (e.g. Kazuha) holds VV in the team.
4pc Instructor Support Buffer Cheap option to buff team EM. Lowers her personal healing/damage stats significantly.

Weapon Rankings

Weapon Type Performance Notes
Sunny Morning Sleep-In EM S+ Signature. Massive 513 EM and buffs Swirl DMG. Hard to beat for personal output.
A Thousand Floating Dreams EM S Nahida's Lamp. Gives high EM and team buffs. Excellent alternative.
Sacrificial Fragments EM S (4-Star BiS) High EM (221). Resets her skill to maintain Dreamdrifter state longer. Practical perfection.
Magic Guide EM A (F2P) 3-Star weapon. Cheap to build, high EM stat. Works perfectly fine.

Constellation Value

Mizuki is a Standard Banner character, so targeting cons is hard. C1 and C2 are her best upgrades.

  • C1: "In Mist-Like Waters" - (Damage) Every 3.5s, Swirl DMG against marked enemies is increased by 900% of EM. Massive single-target damage boost.
  • C2: "Your Echo I Meet" - (Team Buff) Increases Party Elemental DMG Bonus based on Mizuki's EM. This turns her into a Kazuha-lite buffer.
  • C6: "The Heart Lingers Long" - (Crit Swirl) Allows Swirl damage to CRIT (Fixed 30% Rate / 100% DMG). Similar to Nahida C2 but for Swirl.

Verdict: C0 is fully functional. C2 makes her a meta support.

Top Team Compositions

1. Taser (Electro-Charged)

  • Driver: Mizuki
  • Hydro: Furina / Xingqiu
  • Electro: Fischl
  • Flex: Beidou / Yae Miko

Why it works: Mizuki heals Furina's HP drain while driving the team. Her Swirls trigger Electro-Charged constantly. She replaces Kokomi/Sucrose in this archetype.

2. Hyperbloom

  • Driver: Mizuki
  • Dendro: Nahida
  • Hydro: Yelan / Xingqiu
  • Trigger: Kuki Shinobu (EM)

Why it works: Mizuki provides VV shred for Hydro/Electro damage and healing for the team. Her Anemo application doesn't mess up Dendro Cores, making her a safe and comfortable driver.

Rotations & Combos

Taser Rotation:
Furina E Q > Fischl E > Mizuki Q (Burst) > Mizuki E (Float & Drive)

Tip: Ensure you use Mizuki's Burst before entering her E state to deploy the "Mini Baku" snacks for healing/buffs while you drive on-field.

Frequently Asked Questions

Is she better than Sucrose?
She is a side-grade. Sucrose offers better grouping and EM sharing for Nuke teams. Mizuki offers Healing and sustained on-field driving, freeing up a team slot (consolidates Healer + Anemo).

Should I pull for her weapon?
Only if you really love her. Sacrificial Fragments is extremely close in performance and offers utility (reset). The signature is a luxury stat stick.

Data Source: Version 5.4 Beta Leaks / Theorycrafting. Last Updated: February 2026

Lan Yan Guide: The Definitive Build & Analysis

Lan Yan, the 4-Star Anemo Catalyst

Lan Yan Genshin Impact Character Art
Rarity (4-Star)
Element Anemo
Weapon Catalyst
Best Role Shielder / Buffer / Sub-DPS
Stat Priority ATK% > ER > CRIT
Tier A (Strong 4-Star)

Lan Yan is a skilled artisan from Chenyu Vale and the first Anemo Shielder in Genshin Impact. She brings unique utility to the roster by providing an ATK-scaling shield that can absorb elements to increase its durability, while also dealing off-field Anemo damage.


Pros

  • First Anemo Shielder (Combines VV Shred + Protection).
  • Shield can absorb elements (250% efficiency) for tanking.
  • C4 provides Elemental Mastery buff to the team.
  • Works well with Normal Attackers (C2 Shield Restore).
  • F2P Friendly (Catalyst user = TTDS holder).

Cons

  • Shield scales on ATK (makes her squishy without shield).
  • Shield duration (12.5s) can be tight for long rotations.
  • Burst grouping is weaker than Kazuha/Venti.

Quick Guide (TL;DR)

If you don't have time for the math, here is the cheat sheet.

  • Best Artifact: 4pc Viridescent Venerer (Support/Shred).
  • Alt Artifact: 4pc Noblesse Oblige (If another Anemo has VV).
  • Best Weapon: Starcaller's Watch (5⭐ Stat Stick).
  • Support Weapon: Thrilling Tales (TTDS) (3⭐ - 48% ATK Buff).
  • F2P Weapon: Flowing Purity (Craftable ATK%) or Favonius Codex.
  • Main Stats: SANDS: ATK% or ER | GOBLET: ATK% or Anemo | CIRCLET: ATK% or CRIT.
  • Talent Priority: Elemental Skill (Shield) > Elemental Burst > Normal Attack.
  • Top Team: Lan Yan + Arlecchino/Yoimiya + Yelan + Bennett.
Pro Tip: Shield Restoration: At C2, Lan Yan's shield restores health when the active character hits enemies with Normal Attacks. This makes her exceptionally good for drivers like Ayato, Yoimiya, and Arlecchino.

Need Primogems for Lan Yan?

Get Genesis Crystals at a discounted price with instant delivery.

Top Up Secure & Fast via GameCharge

Ascension & Talent Materials

Category Material Name Source
Ascension Clearwater Jade Chenyu Vale (Liyue)
Boss Drop Gold-Inscribed Secret Source Core Secret Source Constructor (Natlan)
Talent Books Teachings of Diligence Taishan Mansion (Tue/Fri/Sun)
Common Mob Nectar Whopperflowers

Talent Breakdown & Mechanics

Elemental Skill: Swallow-Wisp Pinion Dance

  • The Shield: Lan Yan dashes forward and summons the "Swallow-Wisp Shield".
  • Scaling: Unlike Noelle or Zhongli, this shield's health scales based on Lan Yan's ATK. This allows her to deal damage while shielding.
  • Feathermoon Rings: While mid-air or after using Skill, she can hurl rings that deal Anemo DMG and apply Swirl.
  • Elemental Absorption: If her dash hits Hydro/Pyro/Cryo/Electro, the shield absorbs that element and gains 250% absorption efficiency against it.

Elemental Burst: Lustrous Moonrise

  • Cost: 60 Energy | Cooldown: 15s
  • Swallow Array: Creates a field that pulls in nearby opponents (Crowd Control) and deals periodic Anemo DMG.
  • Damage: The damage is decent and can trigger Swirls for team buffs (if using VV).

Passive: Four Sealing Divination Charms

  • Conversion Bonus: If her shield undergoes Elemental Absorption, the Feathermoon Rings she throws will deal additional Elemental DMG of that type. This is great for reaction application.

Talent Priority Order:

  1. Elemental Skill (Level 10) - Shield strength is priority.
  2. Elemental Burst (Level 8) - Crowd control and damage.
  3. Normal Attack (Level 1) - Ignore.

Stat Requirements & ER Thresholds

Lan Yan needs ATK for shielding and ER for burst uptime.

Team Context Weapon ER Requirement
Solo Anemo (Support) Favonius Codex 180% - 200%
Solo Anemo TTDS (No ER) 220%+
Double Anemo (Xiao/Scara) Any 140% - 160%

Substat Priority:

  1. Energy Recharge (Until requirement met)
  2. ATK% (Shield scaling)
  3. Flat ATK
  4. CRIT Rate (For Favonius trigger)

Best Artifacts Comparison

Set Name Role Reasoning
4pc Viridescent Venerer BiS Support Combining a Shield + VV Shred is the holy grail of Anemo supports. Allows you to drop a healer/shielder slot for more DPS.
4pc Noblesse Oblige Buffer If you are running a team that doesn't benefit from RES shred (like Xiao or Geo), this provides 20% ATK.
2pc ATK / 2pc ATK Max Shield Mix Gladiator/Shimenawa/Echoes for max ATK% to make her shield as thick as possible.

Weapon Rankings

Weapon Type Performance Notes
Thrilling Tales (TTDS) HP% S (Buffing) The 48% ATK buff to your carry is invaluable. Shield will be weaker (HP substat useless for her), but team DPS is higher.
Favonius Codex ER% S (Battery) Solves energy problems. Good if you need her to Burst every rotation for grouping.
Skyward Atlas ATK% S (Shield) Highest Base ATK + ATK% substat. Makes for the strongest possible shield.
Flowing Purity ATK% A (F2P) Craftable. Good ATK stat stick for shield scaling.

Constellation Value

Lan Yan works at C0, but C2 and C4 are significant upgrades.

  • C1: "As One Might Stride..." - (Damage) Adds an extra Feathermoon Ring after absorption. Good for extra element application.
  • C2: "Dance Vestments Billow..." - (Core Shielding) While shield is active, Normal Attacks from the active character restore 40% of shield absorption. This makes her shield essentially infinite for drivers like Ayato/Yoimiya.
  • C4: "With Drakefalcon's Blood-Pearls..." - (Buff) After using Burst, team gains 60 Elemental Mastery. Nice for reaction teams.
  • C6: "Let Us Away on Slyphic Wing" - (Uptime) Grants 1 extra charge of Elemental Skill. Basically 100% Shield uptime without needing C2 mechanics.

Verdict: C2 is the target for a reliable shield.

Top Team Compositions

1. Vaporize Protection (Zhongli Replacement)

  • Main DPS: Arlecchino / Yoimiya
  • Hydro: Yelan / Xingqiu
  • Buffer: Bennett
  • Shield/Shred: Lan Yan (VV)

Why it works: Lan Yan replaces Zhongli. She provides a shield AND shreds Pyro/Hydro RES with the VV set, increasing team damage ceiling compared to Zhongli (who only shreds 20%). C2 keeps the shield healthy as Arlecchino attacks.

2. Neuvillette Hypercarry

  • Main DPS: Neuvillette
  • Hydro: Furina
  • Shield/Shred: Lan Yan
  • Flex: Fischl / Baizhu

Why it works: Neuvillette C0 needs a shield to prevent interruption. Lan Yan provides that shield plus VV shred. She can also hold TTDS to buff Neuvillette's charged attacks massively.

Rotations & Combos

Standard Support Rotation:
Element Applier > Lan Yan E (Shield/Swirl) > Lan Yan Q (Group) > Main DPS

Tip: If using TTDS, make sure Lan Yan is the last support you swap from before bringing in your Main DPS.

Frequently Asked Questions

Is she better than Zhongli?
Defensively: No. Zhongli's shield is still thicker and lasts longer.
Offensively: Yes. Lan Yan can hold VV set (-40% RES) vs Zhongli's -20% RES, leading to higher team damage.

Why build ATK?
Her shield absorption scales with ATK, not HP or DEF. This is unusual for a shielder, so don't autopilot into HP artifacts.

Data Source: Version 5.3 Beta Leaks. Last Updated: December 2025