RSS

Blog posts of '2025' 'December'

PERSONA 5: THE PHANTOM X (P5X) - ULTIMATE PERSONA FUSION & ENDGAME GUIDE
Master the unique fusion system in Persona 5: The Phantom X (P5X). Learn how to fuse S-Tier Personas like Alice and Dionysus, complete Merope's requests, and optimize Wonder's build for the late game.

Table of Contents

1. P5X Fusion Mechanics Explained

In Persona 5: The Phantom X, the fusion system is significantly different from Persona 5 Royal. It incorporates gacha-style resource management.

  • Persona Seals: Instead of just owning the Persona, you need its Seal (obtained via duplicates from Mementos or the Repression Medal Shop).
  • No Loss on Fusion: You keep the base Personas; you only spend the Seals and currency.
  • Rank (Tier) System: Personas are ranked I to VIII. Fusion is gated by Wonder's level and Inspiration Points.
  • Skill Inheritance: Slots are unlocked by Overclocking a Persona using duplicate Seals.

2. Persona Archetypes & Roles

Every Persona in P5X is assigned an Archetype that determines its stat growth and inheritance compatibility:

  • Assassin (Single-Target DPS): High Strength/Magic, low Defense. Best for boss killing (e.g., Seth, Eligor).
  • Sweeper (Multi-Target DPS): Balanced stats with high AOE potential (e.g., Kohryu, Jack Frost).
  • Strategist (Buffer/Healer): High Agility and SP pools. Focuses on keeping the team alive (e.g., Dionysus, Norn).
  • Saboteur (Debuffer/Ailment): High Luck and Ailment Accuracy. Used to disable enemies (e.g., Alice, Narcissus).

3. P5X Persona Tier List (Late Game Meta)

S-Tier: The "Must-Haves"

Persona Rank Archetype Strategy
Alice VIII Saboteur Meta Defining. Passive increases damage taken by enemies. Mandatory for Joker teams.
Dionysus VII Strategist Top Tier Support. Boosts team Crit Rate. Essential for Yui and physical teams.
Kohryu VIII Sweeper Highest magic damage output for the Protagonist. Dominates Psychokinesis weaknesses.
Norn VI Strategist Best Wind-utility. Provides healing, shielding, and Windswept debuffs.

A-Tier: Situational Excellence

  • Thor (Rank VII): The backbone of "Shock" teams; boosts Electric Crit Damage significantly.
  • Seth (Rank VI): High-crit Gun damage. Best alternative if you don't have Haru (Noir).
  • Surt (Rank VI): Provides Marakunda (AoE Defense Down), one of the most valuable debuffs in the game.

4. Team Synergy: Best Persona & Character Pairings

The "Curse Meta" (Joker Focus)

Character: Joker | Wonder Persona: Alice (Rank VIII)

Why: Alice's skills increase the efficiency of the "Fury" stacks Joker relies on, while providing a massive Curse Resistance shred.

The "Crit Meta" (Yui / Akihiko Focus)

Character: Yui or Akihiko | Wonder Persona: Dionysus (Rank VII)

Why: These teams rely on landing Critical Hits for extra turns. Dionysus provides a team-wide Crit Rate buff that turns Yui into a monster.

5. Merope's Fusion Requests Walkthrough

Complete these to rank up the Synergy Link with Merope and unlock Multi-Fusion.

  1. Jack Frost with Lucky Punch: Fuse Obariyon + Mokoi.
  2. Neko Shogun with Tarukaja: Triple fusion of Anzu + Kodama + Sudama.
  3. Lilim with Attack Boost I: Fuse Agathion + Berith.
  4. Unicorn with Healing Boost II: Fuse Ippon-Datara + High Pixie.
  5. Byakko with Bufudyne: Fuse Yurlungur + Lachesis.
  6. Daisoujou with Spirit Drain: Fuse Pale Rider + Chernobog.

6. How to Farm Fusion Materials (Seals & Medals)

  • Repression Medals: Earned by completing Velvet Room Trials and Mementos requests. Trade these in the shop for any 5-star Persona Seal.
  • Mementos Grinding: Floors have a chance to drop lower-level Seals. Use the "Auto-Kill" feature on weak shadows.
  • Duplication: Pulling a Persona you already have automatically converts it into a Seal.

7. The "Auto-Buff" Starter Trick

Step 1: Turn "Persona Memory" OFF in the game settings.

Step 2: Create a "Starter" Persona (Hope or Tam Lin) with Auto-Matarukaja, Auto-Marakukaja, and Auto-Masukukaja.

Step 3: Start battle with this Persona. On Turn 1, swap Wonder to a different Persona—the buffs persist for 3 turns!

8. Wonder's Skill Tree: Unlocking Fusion Potential

You must spend points in the Metaverse branch to:

  • Increase Persona Slots: Carry up to 12 Personas.
  • Unlock High-Rank Fusion: Necessary for Rank VII and VIII Personas.
  • Stat Transfers: Inherit a higher percentage of the equipped Persona's stats.

9. FAQ: Persona 5X Fusion & Gameplay

Q: Can I play P5X without spending money?

A: Yes. P5X is F2P-friendly. You can obtain high-tier Personas like Alice and Dionysus through materials farmed in Mementos.

Q: How do I get more Persona Seals?

A: Duplicate Personas from Mementos, certain Palace chests, or purchase them using Repression Medals.

Q: Does P5X have a global release date?

A: The global English version is anticipated for late 2025.

Keywords: Persona 5 The Phantom X, P5X Guide, Persona 5X Fusion Recipes, P5X Best Personas, Wonder Build P5X, Merope Fusion Requests.
Firefly Build Guide

Firefly is a 5-Star Fire character following the Path of Destruction. She is a specialized Super Break DPS who transforms into the "SAM" mecha to deal massive damage. She is unique because she does not rely on Crit stats, focusing purely on Break Effect and Speed.

  • Role: Main DPS (Super Break)
  • Tier Ranking: S+ (Meta Defining)
  • Best Stat Priority: Break Effect > SPD > ATK%
Firefly Splash Art

Quick Build Cheat Sheet

Category Recommendation
Best Light Cone Whereabouts Should Dreams Rest (5★)
Best F2P Light Cone On the Fall of an Aeon (5★ Herta Store)
Best Relic Set 4pc Iron Cavalry Against the Scourge
Best Planar Set 2pc Forge of the Kalpagni Lantern
Trace Priority Ultimate > Skill > Talent > Basic
Suggested SPD 150 (In battle) / 210 (Complete Combustion)
Need more Oneiric Shards for Firefly?
Get secure, instant top-ups up to 30% cheaper than in-game at GameCharge.net.

1. Character Kit & Analysis

Firefly consumes her own HP to charge her Ultimate, then enters the "Complete Combustion" state where she becomes a destruction machine with enhanced efficiency and weakness implant capabilities.

Abilities Breakdown

  • Skill (Order: Aerial Bombardment):
    Analysis: Consumes HP to regenerate a massive amount of Energy (60% Max Energy). This is your primary way to charge her Ultimate.
  • Ultimate (Fyrefly Type-IV: Complete Combustion):
    Analysis: The Core of her kit. Enters the "Complete Combustion" state, advances her action by 100%, and grants massive Speed and Break Efficiency.
  • Enhanced Skill (Firefly Type-IV: Deathstar Overload):
    Analysis: Available only during Ultimate. Implants Fire Weakness on the target (ignoring RES) and deals damage scaling with Break Effect. Does not consume Skill Points (E1) or consumes SP (E0).
  • Talent (Chrysalid Pyronexus):
    Analysis: Provides damage reduction based on missing HP and increases Effect RES during Ultimate.
  • Technique (Order: Meteoric Incineration):
    Utility: Launches a plunge attack that inflicts Fire Weakness on all enemies at the start of battle. Essential for fast clears.

Trace Leveling Priority

Ultimate > Skill > Talent > Basic ATK

Major Traces to Unlock:

  1. Module γ: Core Overload: Enables Super Break DMG when attacking enemies.
  2. Module β: Autoreactive Armor: Increases Break Effect based on ATK (conversion rate).
  3. Module α: Antilag Outburst: Action Advance when entering Complete Combustion.

2. Best Light Cones (Weapons)

Damage & Utility Comparison:

Whereabouts Should Dreams Rest (S1)
100% (Best)
On the Fall of an Aeon (S5)
86% (Amazing F2P)
Indelible Promise (S5)
82% (Gacha 4★)

1. Whereabouts Should Dreams Rest (Signature)

Why it's best: Provides massive Break Effect and applies a vulnerability debuff ("Routed") that increases damage taken by enemies. This is a separate multiplier that scales extremely well.

2. On the Fall of an Aeon (Herta Store 5★)

Performance: The best F2P option by far. It gives a huge ATK% buff (which converts to Break Effect via her Trace) and is easy to max out (S5) for free.

3. Relics & Planar Ornaments

Rank Set Name Reason
Best 4pc Iron Cavalry Against the Scourge Tailor-made for Firefly. Allows her Break/Super Break damage to ignore 15-25% of enemy DEF.
Alt 4pc Genius of Brilliant Stars Good alternative if the enemy has Quantum Weakness or you have amazing substats.

Main Stats & Sub Stats

  • Body: ATK% (Converts to Break Effect)
  • Feet: SPD (Essential to reach 210 SPD breakpoint in ult)
  • Planar Sphere: ATK% (Fire DMG is useless for Break)
  • Link Rope: Break Effect

Sub-stat Focus: Break Effect > SPD > ATK%

Target Stats (Breakpoints)

  • SPD: 150 (Base) -> Becomes 210 in Ultimate (4 actions per cycle).
  • Break Effect: 360% (In battle) -> Required to max her Super Break trace.
  • ATK: 2500+ (To feed her BE conversion trace).

4. Eidolon Analysis

  • E1 (In Red Chrysalis, I Once Rest): Enhanced Skill consumes 0 Skill Points and ignores 15% DEF. Value: High (Comfort)
  • E2 (From Shattered Sky, I Free Fall): Grants an Extra Turn when breaking enemies or defeating them. Value: Game Changer (Best Eidolon)
  • E6 (In Final Tomorrow, I Bloom): Increases Fire RES Penetration and Break Efficiency. Value: Maximum Potential

Verdict: Firefly is extremely strong at E0. However, E2 is considered one of the strongest Eidolons in the entire game, effectively doubling her actions.

5. Best Teams & Synergies

Note: Firefly is heavily reliant on the **Harmony Trailblazer (Imaginary)** to function at 100% capacity due to their Super Break backup dancer mechanic.

Team Comp 1: The Premium Break Team

  • Firefly (Main DPS)
  • Harmony Trailblazer (Essential Support) - Enables Super Break.
  • Ruan Mei (Support) - Break Efficiency and Speed buffs.
  • Lingsha / Gallagher (Sustain) - Increases Break DMG taken by enemies.

Team Comp 2: F2P Friendly

  • Firefly
  • Harmony Trailblazer
  • Asta (SPD/ATK Buffs) or Pela (DEF Shred)
  • Gallagher (Best 4★ Sustain for her)

6. Gameplay & Rotation

To maximize Firefly's damage window:

  1. Technique: Enter battle with technique to apply Weakness immediately.
  2. Normal State: Use Skill to regenerate Energy. (Usually takes 1-2 skills).
  3. Ultimate: Cast immediately when energy is full. This advances her action 100%.
  4. Combustion State: Spam Enhanced Skill. Aim to fit 4 attacks into the countdown window (requires 210 SPD total).
  5. Tip: Never use Basic ATK in Combustion state unless you are desperate or fighting trash mobs.

7. Ascension & Trace Materials

Total materials required to reach Level 80 and Max Traces:

Material Type Amount Required
Raging Heart (Stagnant Shadow) x65
Borisin Teeth (Destruction Calyx) x139 (Purple) / x69 (Blue) / x18 (Green)
Lost Echo of the Shared Wish (Weekly) x12
Tatters of Thought (Enemy Drop) x56 (plus higher tier variants)
Credits ~3,300,000

8. Pros and Cons

Pros Cons
Implants Fire Weakness on everyone Heavily relies on Harmony Trailblazer
Doesn't need Crit stats (Easy to build) Damage drops significantly if enemies lock their weakness bar
High F2P friendly (Aeon LC is great) HP consumption mechanic requires attentive healing

9. Frequently Asked Questions (FAQ)

Q: Should I pull for E1 or S1 (Signature Light Cone) first?
A: E1 > S1. E1 solves her SP issues completely, allowing more comfortable team play. S1 is a damage increase, but "Fall of an Aeon" is a very close second.

Q: Can I play Firefly without Ruan Mei?
A: Yes, but the performance drop is noticeable. You can replace Ruan Mei with Asta or Pela, but Ruan Mei's Break Efficiency buff is unique and extremely valuable for Firefly.

The Dahlia (Constance) Build Guide

The Dahlia (also known as Constance) is a 5-Star Fire character following the Path of Nihility released in Version 3.8. She is a meta-defining Break Enabler who allows allies to deal Super Break DMG even without breaking the enemy's weakness.

  • Role: Super Break Support / Debuffer
  • Tier Ranking: S+ (Game Changer)
  • Best Stat Priority: Break Effect > SPD > ATK%
The Dahlia Splash Art

Quick Build Cheat Sheet

Category Recommendation
Best Light Cone Never Forget Her Flame (5★)
Best F2P Light Cone Solitary Healing (5★ Herta Store)
Best Relic Set 4pc Iron Cavalry Against the Scourge
Best Planar Set 2pc Forge of the Kalpagni Lantern
Trace Priority Skill = Talent > Ultimate > Basic
Suggested SPD 145+ (To maximize Zone uptime)
Need more Oneiric Shards for The Dahlia?
Get secure, instant top-ups up to 30% cheaper than in-game at GameCharge.net.

1. Character Kit & Analysis

The Dahlia revolutionizes Break teams by allowing "Super Break" damage to occur preemptively. Her kit revolves around her "Zone" and the "Dance Partner" mechanic.

Abilities Breakdown

  • Basic ATK (Fiddle... Fissured Memory):
    Analysis: Deals Fire DMG to a single target. Primarily used to generate SP when the Zone is already active.
  • Skill (Lick... Enkindled Betrayal):
    Analysis: The Core of her kit. Creates a "Zone" for 3 turns. While active, increases team Weakness Break Efficiency by 50%. Crucially, it converts Toughness Reduction dealt to non-broken enemies into Super Break DMG.
  • Ultimate (Wallow... Entombed Ash):
    Analysis: Applies "Wilt" to all enemies, reducing their DEF. It also implants the Weakness of all "Dance Partners" onto enemies, allowing your team to brute force any content regardless of element.
  • Talent (Who's Afraid of Constance?):
    Analysis: Links Dahlia to an ally as a "Dance Partner" (usually your main DPS). When the Partner attacks, Dahlia launches a follow-up attack that deals toughness damage and Super Break DMG.
  • Technique (The Heart Makes the Finest Tomb):
    Utility: Creates a dimension that prevents enemy attacks. Entering battle in this state automatically triggers her Skill's Zone and deals instant Super Break DMG.

Trace Leveling Priority

Skill = Talent > Ultimate > Basic ATK

Major Traces to Unlock:

  1. Outgrow the Old: SPD buff for allies who implant weakness.
  2. Yet Another Funeral: Increases team Break Effect based on Dahlia's own BE.
  3. Lament, Lost Soul: Recovers Skill Points on follow-up attacks (Critical for SP management).

2. Best Light Cones (Weapons)

Damage & Utility Comparison:

Never Forget Her Flame S1
100% (Best)
Resolution Shines (S5)
85% (Utility)
Solitary Healing S5
80% (F2P)

1. Never Forget Her Flame (Signature)

Why it's best: Provides a massive 60% Break Effect and increases Break DMG for the wearer and their Dance Partner. It also recovers Skill Points when applying Weakness, fixing her only downside (SP usage).

2. Resolution Shines As Pearls of Sweat (4★)

Performance: Excellent support option. The DEF shred from "Ensnared" stacks with her Ultimate's "Wilt," maximizing Super Break damage numbers.

3. Solitary Healing (F2P 5★)

Performance: The best free option. Provides Break Effect and high Energy Regeneration, ensuring you can keep her Ultimate uptime high.

3. Relics & Planar Ornaments

Rank Set Name Reason
Best 4pc Iron Cavalry Against the Scourge The undisputed best set. It allows her Super Break damage to ignore DEF, which is the most valuable multiplier for this build.
Alt 4pc Thief of Shooting Meteor A decent alternative if you need the extra Energy Regeneration from the 4pc effect.

Main Stats & Sub Stats

  • Body: ATK% or HP% (Survivability)
  • Feet: SPD (Crucial for generating SP and turns)
  • Planar Sphere: ATK% or HP% (Fire DMG is less valuable for Super Break)
  • Link Rope: Break Effect or Energy Regen Rate

Sub-stat Focus: Break Effect > SPD > ATK% > Effect Hit Rate

Target Stats (Breakpoints)

  • SPD: 145 (Minimum) / 161 (Ideal for high SP generation)
  • Break Effect: 150% (Minimum for Iron Cavalry passive) -> 250%+ (Goal)
  • Effect Hit Rate: ~40% (To guarantee debuffs on bosses)

4. Eidolon Analysis

  • E1 (When a Bud Readies to Bloom): Applies the "Dance Partner" Super Break multiplier to ALL allies, not just one. Value: High (Teamwide Buff)
  • E2 (Fresh, Ethereal, and Beloved): Reduces all enemies' All-Type RES by 20% permanently while Dahlia is on field. Value: Game Changer
  • E6 (Pity Its Heart Gnawed): Increases Follow-up attack hits and damage. Transforms her into a sub-DPS monster. Value: Maximum Potential

Verdict: The Dahlia is complete at E0. However, E1 is a massive team-wide damage boost comparable to Ruan Mei's E1.

5. Best Teams & Synergies

Best Synergy: The Dahlia is the best partner for Firefly, Boothill, and Rappa.

Team Comp 1: The "Break" Exodia

  • Firefly (Main DPS) - Benefits from Dahlia's weakness implant and efficiency.
  • The Dahlia (Sub-DPS/Support) - Replaces Harmony MC or Ruan Mei depending on the setup.
  • Harmony Trailblazer (Support) - Stacks Super Break multipliers.
  • Lingsha / Gallagher (Sustain) - Fire sustain units that contribute to the break bar.

Team Comp 2: Physical Break

  • Boothill (Main DPS)
  • The Dahlia
  • Ruan Mei (Support)
  • Sustain

6. Gameplay & Rotation

To maximize The Dahlia's efficiency:

  1. Technique: Always enter battle with her Technique to activate the Zone immediately.
  2. Turn 1: Skill (Refresh Zone) -> Ultimate (Apply Wilt/Weakness).
  3. Turn 2 & 3: Basic ATK (Generate SP). Her Talent will trigger follow-ups automatically when your DPS attacks.
  4. Tip: Ensure her Ultimate is active before your Main DPS (e.g., Firefly) unleashes their burst window to benefit from the Weakness Implant.

7. Ascension & Trace Materials

Total materials required to reach Level 80 and Max Traces:

Material Type Amount Required
Radiant Prominence (Stagnant Shadow) x65
Heaven Incinerator (Nihility Calyx) x139 (Purple) / x69 (Blue) / x18 (Green)
Lost Echo of the Shared Wish (Weekly) x12
Tatters of Thought (Enemy Drop) x56 (plus higher tier variants)
Credits ~3,300,000

8. Pros and Cons

Pros Cons
Enables Super Break without Breaking High SP consumption if not built fast
Universal Weakness Implant (Ultimate) Requires specific "Break" teammates
Massive Toughness Reduction buffs Lower value in Crit-based teams (e.g. Acheron/Feixiao)

9. Frequently Asked Questions (FAQ)

Q: Is The Dahlia better than Ruan Mei?
A: For Break teams (Firefly/Boothill), Yes. Her ability to trigger Super Break on non-broken enemies and implant specific weaknesses offers higher damage ceilings in those specific comps.

Q: Can she work without her Signature Light Cone?
A: Yes, "Solitary Healing" is a great F2P alternative, though you may need to manage your Skill Points more carefully.

Kaveh Build Guide | Genshin Impact
Kaveh Genshin Impact Character Art
Rarity ★★★★ (4-Star)
Element Dendro
Weapon Claymore
Role On-field Bloom Driver
Priority ER > EM > ATK
Tier B+ (Bloom Specialist)

Kaveh is the renowned architect behind the Palace of Alcazarzaray and Alhaitham's roommate. Armed with his automated briefcase Mehrak, he specializes in the Bloom reaction. Unlike other characters, Kaveh can instantly rupture Dendro Cores and heal himself when damaged by them, making him the perfect on-field driver for Bloom teams.


Pros

  • Self-Sustain: Heals himself when hit by Bloom cores (A1 Passive).
  • Instant Rupture: Elemental Skill detonates all nearby cores immediately.
  • Bloom Buff: Burst increases Bloom reaction damage for the team.
  • Excellent AoE range on Normal Attacks during Burst.
  • Very tanky in Bloom teams due to high EM/Healing conversion.

Cons

  • Energy Hungry: Needs massive ER (180%+) to Burst every rotation.
  • Lower Personal DMG: Scales poorly with ATK/Crit; relies entirely on reactions.
  • Shatters Frozen enemies, making "Fridge" (Cryo+Bloom) teams inconsistent.

Quick Guide (TL;DR)

The Goal: Use Burst to infuse attacks with Dendro, create cores, and use Skill to detonate them instantly.

  • Best Artifact: 4pc Deepwood Memories (If solo Dendro).
  • Alt Artifact: 4pc Gilded Dreams or Flower of Paradise Lost (If someone else has Deepwood).
  • Best Weapon: Mailed Flower (Event Exclusive BiS).
  • Alt Weapon: Favonius Greatsword (Solves Energy Issues).
  • F2P Weapon: Forest Regalia (Craftable, buffs team EM).
  • Main Stats: ER% / EM / EM.
  • Talent Priority: Elemental Burst > Elemental Skill > Normal Attack.
Pro Tip: The Healing Tank: Kaveh's A1 passive heals him based on his Elemental Mastery when he takes Bloom damage. High EM not only increases reaction damage but also makes him nearly immortal against core explosions.

Building Kaveh?

Get Genesis Crystals at a discounted price to refresh resin for Mourning Flowers.

Top Up Secure & Fast via GameCharge

Ascension & Talent Materials

Category Material Name Source
Ascension Mourning Flower Girdle of the Sands (Desert)
Boss Drop Quelled Creeper Dendro Hypostasis
Talents Teachings of Ingenuity Steeple of Ignorance (Tue/Fri)
Mob Drop Crystalline Cyst Dust Fungi (Do NOT use Pyro/Electro on them)

Talent Mechanics

Elemental Skill: Artistic Ingenuity

  • Radial Scan: Mehrak performs a circular scan dealing Dendro DMG.
  • Instant Rupture: Any Dendro Cores within the scan radius explode immediately. This bypasses the usual delay for Bloom cores.
  • Cooldown: 6s. Use frequently!

Elemental Burst: Painted Dome

  • Dendro Infusion: Normal, Charged, and Plunging attacks convert to Dendro (cannot be overridden).
  • Bloom Buff: Increases the rupture damage of Dendro Cores created by the entire party.
  • Range Increase: Vastly increases the AoE of his Normal Attacks.
  • Duration: 12s. Cooldown: 20s. Energy Cost: 80.

Important Passives

  • A1: An Architect's Undertaking: When Kaveh is hit by a Dendro Core (Bloom/Hyperbloom/Burgeon), he heals HP equal to 300% of his EM. This triggers once every 0.5s.

Constellation Value

Constellation Value Effect
C1: Sublime Salutations Survival Increases Dendro RES by 50% and Incoming Healing Bonus by 25% for 3s after casting Skill. Makes him even tankier.
C4: Feast of Apadana Specific Dendro Cores created by Kaveh deal 60% more damage. Note: Kaveh must be the trigger (apply Dendro second) for this to work, which is hard to guarantee.
C6: Pairidaeza's Dreams Strong During Burst, Normal Attacks unleash an extra fissure (Dendro DMG) every 3s that instantly detonates cores. Adds more ruptures to his rotation.

Verdict: C0 is fully functional. C6 is his best constellation for increasing total core detonations.

Stat Requirements

Stat Goal
Energy Recharge 180% - 220% (Priority #1)
Elemental Mastery 500 - 800+ (For Healing & Dmg)
Crit Rate 30-50% (Only for Favonius Greatsword)

Artifact Main Stats:

  1. Sands: Energy Recharge (or EM if ER is met)
  2. Goblet: Elemental Mastery
  3. Circlet: Elemental Mastery

Artifacts Comparison

Set Use Case Reasoning
4pc Deepwood Memories Best Support If Kaveh is the only Dendro character, he must wear this to shred 30% Dendro RES, increasing Bloom damage.
4pc Gilded Dreams Driver If another character (like Baizhu/Nahida) holds Deepwood, this set maximizes Kaveh's EM for healing and C4 bloom damage.
4pc Ocean-Hued Clam Survival Kaveh heals himself constantly. This set converts that healing into Physical damage bubbles, adding a decent chunk of DPS.

Weapon Rankings

Weapon Rank Notes
Mailed Flower S (Event) Best in Slot. Provides High Base ATK and EM. Passive gives more ATK and EM after skill. Perfectly tailored for him.
Favonius Greatsword S Solves his high energy needs and batteries the team. Essential if you struggle to get Burst back.
Makhaira Aquamarine A Gacha exclusive. Provides EM and shares ATK with the team based on EM. Great support option.
Forest Regalia A (F2P) Craftable Sumeru weapon. High ER stat and drops a leaf to buff EM. Solid F2P choice.

Teams

Bloom Driver (Nilou or Standard)

  • Kaveh (Driver / Detonator)
  • Xingqiu / Yelan (Hydro App)
  • Nilou (Bountiful Cores) or Kokomi
  • Nahida / Baizhu (Deepwood Holder)

Kaveh's self-healing makes him one of the safest drivers for Nilou teams, as he eats the core damage for breakfast.

Hyperbloom Driver

  • Kaveh (On-field Dendro)
  • Xingqiu (Hydro)
  • Kuki Shinobu / Raiden (Electro Trigger)
  • Beidou / Fischl (Flex)

While Kaveh focuses on rupturing cores, Kuki will steal some for Hyperbloom. This hybrid output is surprisingly effective.

Rotation

Standard Bloom Loop:
Supports (Hydro/Dendro) > Kaveh Q > Kaveh E > Kaveh NAs (Drive) > Kaveh E (Off CD)

Note: Always try to weave an E (Skill) immediately after Q (Burst) or whenever Cores are clustered to maximize damage.

FAQ

Does he work without Nilou?
Yes! Kaveh's mechanics (instant rupture, buffing bloom damage) are specifically designed to make "Regular Bloom" viable without Nilou. However, Nilou teams are still his highest damage ceiling.

Can I use him in Burgeon?
Technically yes, he heals from the damage. However, Thoma usually shields enough to mitigate the damage anyway, so Kaveh's unique defensive utility is less "required" compared to pure Bloom.

Data Source: KQM Standards. Last Updated: December 2025

Collei Build Guide | Genshin Impact
Collei Genshin Impact Character Art
Rarity ★★★★ (4-Star)
Element Dendro
Weapon Bow
Role Off-field Support / Burst Support
Priority ER > CRIT > EM > ATK
Tier A- (Nilou Bloom Specialist)

Collei is a Trainee Forest Ranger active in Avidya Forest. As one of the first Dendro characters released, she offers valuable off-field Dendro application. While her Burst duration is short, her front-loaded application is exceptional, making her a top pick for speed-clearing in Nilou Bloom teams.


Pros

  • Front-loaded App: Applies a lot of Dendro very quickly (Skill + Burst + Passive), ideal for starting Bloom cores.
  • Free Unit: Obtained for free from Spiral Abyss Floor 4.
  • C4 Buffer: Provides 60 EM to the team effortlessly.
  • No "Circle Impact" issues on Skill (Boomerang follows you).
  • Shorter animation times than Dendro Traveler.

Cons

  • Short Duration: Burst only lasts 6s (9s with C2 "Sprout"). Requires frequent swapping.
  • Small Radius: Burst area is smaller than DMC or Nahida.
  • ICD Issues: Burst has standard ICD, meaning not every hit applies Dendro.

Quick Guide (TL;DR)

The Goal: Stack ER to burst off-cooldown. Use Skill, wait for "Sprout" (C2), then Burst.

  • Best Artifact: 4pc Deepwood Memories (Support/Res Shred).
  • Alt Artifact: 4pc Instructor (EM Buff) or 4pc Emblem (Personal Dmg).
  • Best Weapon: Elegy for the End (Massive Team Buff).
  • Alt Weapon: Sacrificial Bow (Reset skill for more energy/dendro).
  • F2P Weapon: Favonius Warbow (Team Battery).
  • Main Stats: ER% / Dendro DMG / CRIT.
  • Talent Priority: Elemental Burst > Elemental Skill > Normal Attack (Ignore).
Pro Tip: The Sprout Mechanic: At C2, Collei's skill creates a "Sprout" (spinning ring) that deals Dendro DMG around the active character. To extend this duration to the max 3s, you must trigger a Dendro reaction before the boomerang returns.

Building Collei?

Get Genesis Crystals at a discounted price to farm Rukkhashava Mushrooms instantly.

Top Up Secure & Fast via GameCharge

Ascension & Talent Materials

Category Material Name Source
Ascension Rukkhashava Mushrooms Sumeru Rainforest (Mawtiyima Forest)
Boss Drop Majestic Hooked Beak Jadeplume Terrorshroom
Talents Teachings of Praxis Steeple of Ignorance (Wed/Sat)
Mob Drop Firm Arrowhead Hilichurl Archers

Talent Mechanics

Elemental Skill: Floral Brush

  • Boomerang: Throws a Floral Ring that deals Dendro DMG on the way out and back.
  • Floral Sidewinder (A1): If a reaction occurs before the ring returns, it creates a "Sprout" effect dealing continuous Dendro DMG around the active character (scaling with ATK).
  • Note: Has no vertical hitbox, can miss enemies on different elevations.

Elemental Burst: Trump-Card Kitty

  • Cuilein-Anbar: Throws a doll that creates a Zone.
  • Explosion: Deals AoE Dendro DMG on landing, then continuous ticks within the zone.
  • Duration: 6 seconds (9 seconds with A4 passive). Fast ticks make it great for shield breaking.

Important Passives

  • A4: The Languid Wood: Triggering reactions inside the Burst zone extends its duration by 1s (max +3s). This is critical for uptime.

Constellation Value

Constellation Value Effect
C2: Through Hill and Copse Core QoL Changes the "Sprout" mechanics so you always get the effect upon return, and extending it by 3s if a reaction happens. Drastically improves Dendro application consistency.
C4: Gift of the Woods Support Using Burst grants 60 EM to all nearby party members (excluding Collei) for 12s. Simple, effective buff.
C6: Forest of Falling Arrows Damage When the Boomerang hits, it creates a miniature Cuilein-Anbar that deals 200% ATK as Dendro DMG. Adds a nice burst of extra application.

Verdict: C2 is her most important constellation for smooth gameplay. C4 and C6 are nice bonuses.

Stat Requirements

Stat Goal
Energy Recharge 160% - 200% (Depends on weapon/team)
Crit Rate 50-60% (For Favonius or personal dmg)
Elemental Mastery 100+ (Secondary stat)

Artifact Main Stats:

  1. Sands: ER% (Recommended) or ATK% / EM
  2. Goblet: Dendro DMG Bonus
  3. Circlet: CRIT Rate / CRIT DMG

Artifacts Comparison

Set Use Case Reasoning
4pc Deepwood Memories Best Support Mandatory if she is the primary Dendro support to shred 30% RES. Even in double Dendro, she is often the best holder of this set.
4pc Instructor Buffer Provides 120 EM to the team. Excellent for Quicken/Aggravate teams where her personal damage matters less than buffing the carry.
4pc Emblem / 4pc Gilded Sub-DPS Use these if someone else holds Deepwood (e.g., Zhongli or Kokomi). Increases her personal damage contribution.

Weapon Rankings

Weapon Rank Notes
Elegy for the End S+ Massive team buff (EM + ATK%). Collei triggers it easily with her Burst. Best in slot for support.
Sacrificial Bow S Allows double E cast. This generates double particles and applies more Dendro. High base ATK is a bonus.
Favonius Warbow A Standard battery option. Good for energy-hungry teams (e.g., with Cyno or Xiangling).
The Stringless A (DPS) Best for personal damage due to Skill/Burst DMG bonus and EM substat.

Teams

Nilou Bloom (Speedrun)

  • Nilou (Bountiful Cores)
  • Collei (Front-load Dendro App)
  • Nahida / Dendro MC (Sustained Dendro)
  • Kokomi / Barbara (Hydro Trigger/Heal)

Collei is preferred over DMC here for faster rotations and burst application.

Aggravate Support

  • Keqing / Cyno (Main DPS)
  • Fischl (Sub-DPS)
  • Collei (Deepwood/Instructor Holder)
  • Kazuha / Zhongli (Flex)

Collei provides the Quicken aura and buffs without taking field time.

Rotation

Standard Support:
Collei E > Collei Q > Swap

Note: Cast E before Q to catch particles. If using Sacrificial Bow: E > Q > E allows for extremely high Dendro application in a short window.

FAQ

Collei vs Dendro Traveler?
Traveler has better sustained application (longer burst) and larger AoE. Collei has better "burst" application (faster hits in shorter time) and fits 15s rotations better. Collei is often preferred in Nilou teams; DMC in Hyperbloom.

Is C2 Sprout important?
Yes. Without C2, her Dendro application from skill is just one hit. C2 adds the "Sprout" ring which applies Dendro continuously around the active character, making her much better for melee DPS like Cyno or Nilou.

Data Source: KQM Standards. Last Updated: December 2025

Kirara Build Guide | Genshin Impact
Kirara Genshin Impact Character Art
Rarity ★★★★ (4-Star)
Element Dendro
Weapon Sword
Role Shielder / Off-field Applier (C4)
Priority HP > ER > EM
Tier A (Premium Shielder)

Kirara is a nekomata who works for Komaniya Express. She is an exceptional 4-star Dendro shielder who offers 100% shield uptime, incredible exploration utility (climbing walls in cat box form), and decent Dendro application at higher constellations. She is essentially the Dendro Zhongli for Aggravate teams.


Pros

  • 100% Shield Uptime: Shields stack and refresh easily.
  • Exploration God: "Urgent Neko Parcel" state climbs walls effortlessly without stamina issues.
  • Great in Aggravate teams (doesn't interfere with Quicken).
  • Very F2P friendly (HP scaling).
  • Animals (birds/boars) don't get startled when you approach.

Cons

  • Needs C4 for consistent off-field Dendro application.
  • Shield is Dendro-based (250% absorption vs Dendro), weaker vs other elements than Zhongli.
  • Burst animation is long and can sometimes miss mobile enemies.

Quick Guide (TL;DR)

The Goal: Stack HP for impenetrable shields. Use Hold E briefly to collect "Reinforced Packaging" stacks if you need a stronger shield immediately.

  • Best Artifact: 2pc Vourukasha / 2pc Tenacity (Max HP = Max Shield).
  • Alt Artifact: 4pc Deepwood Memories (Support/Res Shred) or 4pc Instructor (EM Buff).
  • Best Weapon: Key of Khaj-Nisut (Massive HP stat stick).
  • Alt Weapon: Dockhand's Assistant (4-Star HP sword).
  • F2P Weapon: Sapwood Blade (Craftable) or Favonius Sword.
  • Main Stats: HP% / HP% / HP%.
  • Talent Priority: Elemental Skill > Elemental Burst > Normal Attack (Ignore).
Pro Tip: Shield Stacking: Unlike other shielders, recasting Kirara's shield *adds* the remaining health of the old shield to the new one (up to a cap). You can refresh it early to max out its durability!

Building Kirara?

Get Genesis Crystals at a discounted price to farm Amakumo Fruits and Specters faster.

Top Up Secure & Fast via GameCharge

Ascension & Talent Materials

Category Material Name Source
Ascension Amakumo Fruit Seirai Island (Inazuma)
Boss Drop Evergloom Ring Iniquitous Baptist (Sumeru)
Talents Teachings of Transience Violet Court (Mon/Thu)
Mob Drop Spectral Heart Specters (Inazuma/Sumeru)

Talent Mechanics

Elemental Skill: Meow-teor Kick

  • Press: Performs a flip kick and creates a Shield of Safe Transport.
  • Hold (Urgent Neko Parcel): Kirara turns into a cat box. Running into enemies applies Dendro. Jumping allows climbing walls rapidly.
  • Reinforced Packaging: Hitting enemies in Box mode stacks this buff (max 3). Ending the skill grants a shield. If you already have a shield, its durability adds up.
  • Duration: 12s. Cooldown: 8s-12s.

Elemental Burst: Secret Art: Surprise Dispatch

  • Special Delivery Package: Throws a massive box that explodes into many small Cat Grass Cardamoms (mines).
  • Mines: Explode on contact or after a duration, dealing Dendro DMG. Great for triggering Deepwood Memories or reactions.

Important Passives

  • A1: Bewitching, Betwitching Tails: Hitting opponents in Box form stacks shield durability.
  • A4: Pupillary Variance: Increases Skill/Burst DMG based on Max HP. (Though you mostly build her for shield strength, not damage).

Constellation Value

Constellation Value Effect
C2: Perfectly Formed Co-op Grants shields to nearby party members when you run into them in Box mode. Essential for Co-op play.
C4: Steed of Skanda Meta After active character with shield hits an enemy, Kirara launches a coordinated Dendro attack (3.8s CD). This enables her to be a reliable Deepwood holder and off-field applier.
C6: Countless Sights... Buff Using Skill or Burst grants all party members 12% All Elemental DMG Bonus. A nice universal buff.

Verdict: C0 is a perfect shielder. C4 turns her into a viable sub-DPS/applier.

Stat Requirements

Stat Goal
HP 45,000 - 55,000+
Energy Recharge 120-140% (Only need more if bursting every rotation)
Crit Rate 30-50% (Only for Favonius Sword)

Artifact Main Stats:

  1. Sands: HP%
  2. Goblet: HP%
  3. Circlet: HP% (or CRIT Rate for Favonius)

Artifacts Comparison

Set Use Case Reasoning
2pc Vourukasha / 2pc Tenacity Max Shield Provides +40% HP. This is the easiest way to make her shield unbreakable. Recommended for general use.
4pc Deepwood Memories Support Mandatory if she is the solo Dendro in Hyperbloom/Spread teams to shred RES. Requires C4 for consistency, or frequent Burst usage.
4pc Instructor Reaction Buff Provides 120 EM to the team. Good for Aggravate teams where shield strength is less critical than damage.
4pc Noblesse Oblige ATK Buff Standard support option for ATK-scaling teams (e.g., Keqing Aggravate).

Weapon Rankings

Weapon Rank Notes
Key of Khaj-Nisut S+ Best in Slot. Massive HP boost creates huge shields and shares EM with the team based on that HP.
Dockhand's Assistant S Gacha 4-Star. The only 4-star sword with HP% substat. Excellent for shield strength.
Sapwood Blade A+ Craftable (Sumeru). High base ATK (irrelevant) but provides ER and an EM leaf buff. Great utility.
Sacrificial Sword A Allows you to cast skill twice, instantly maxing out shield stacks and generating lots of particles.
Favonius Sword A Universal battery option. Requires building Crit Rate.

Teams

Keqing/Yae Aggravate

  • Keqing / Yae Miko (Main DPS)
  • Fischl (Sub-DPS)
  • Kirara (Shield/Deepwood/C4 App)
  • Kazuha / Sucrose (VV Shred)

Kirara replaces Baizhu/Yaoyao/Zhongli here, offering a shield that doesn't interfere with Electro Swirls setup.

Nilou Bloom (Budget)

  • Nilou (Bountiful Cores)
  • Kirara (Shield against Self-DMG)
  • Nahida / Dendro MC (Dendro App)
  • Kokomi / Barbara (Hydro Trigger)

Her shield is incredibly valuable here to prevent Nilou's cores from killing your active character.

Rotation

Standard Shielding:
Kirara Hold E (Briefly touch enemy) > Kirara Q > Swap

Note: Holding E for just a split second generates 3 energy particles (vs 3 for Press) and stacks the shield slightly if you touch an enemy. It is generally better than Press E.

FAQ

Is she better than Yaoyao?
It depends. Yaoyao heals; Kirara shields. In Aggravate, Kirara is often preferred because she doesn't require field time to sustain the team (unlike Yaoyao's burst). For Bloom, Yaoyao's healing is usually safer.

How does the climbing work?
Hold E to enter Box mode. You can climb walls much faster and consume way less stamina. It also doesn't trigger the "jump off wall" issue when running out of stamina; you just fall normally.

Data Source: KQM Standards. Last Updated: December 2025

Yaoyao Build Guide | Genshin Impact
Yaoyao Genshin Impact Character Art
Rarity ★★★★ (4-Star)
Element Dendro
Weapon Polearm
Role Healer / Off-field Applier
Priority HP > ER > EM
Tier A+ (Dendro Healer)

Yaoyao is the lovable disciple of Madame Ping and a junior disciple to Xiangling. Carrying her trusted adeptus device Yuegui in her basket, she serves as the game's first Dendro healer. She consolidates healing, Dendro application, and battery utility into one adorable package.


Pros

  • Consolidates Healing and Dendro Application in one slot.
  • Very flexible: Works in Aggravate, Spread, Bloom, and Burgeon.
  • Elemental Skill heals off-field without energy cost.
  • Can serve as an On-field Driver in Nilou Bloom teams.
  • Extremely F2P friendly (Black Tassel/Favonius Lance).

Cons

  • Yuegui targeting can be erratic (prioritizes healing over damage if HP is low).
  • Elemental Burst requires Yaoyao to stay on-field for 5s to maximize effect.
  • High Energy Cost (80) if using Burst every rotation.

Quick Guide (TL;DR)

The Goal: Use E for off-field sustain. Use Q + Sprint/Jump for emergency team-wide healing or Dendro application.

  • Best Artifact: 4pc Deepwood Memories (Support/Res Shred).
  • Alt Artifact: 4pc Tenacity of the Millelith (ATK Buff/Shield Strength).
  • Best Weapon: Favonius Lance (Team Battery).
  • Alt Weapon: Moonpiercer (Craftable Support).
  • F2P Weapon: Black Tassel (3-Star HP Stat Stick).
  • Main Stats: HP / HP / Healing Bonus (or CRIT Rate for Favonius).
  • Talent Priority: Elemental Skill > Elemental Burst > Normal Attack (Ignore).
Pro Tip: Yuegui's Logic: If active character HP > 70%, Yuegui throws radishes at enemies (Dendro App). If HP < 70%, Yuegui throws radishes at YOU (Healing). Stay healthy to keep Dendro application consistent!

Building Yaoyao?

Get Genesis Crystals at a discounted price to refresh resin for Jueyun Chilis and Talent Books.

Top Up Secure & Fast via GameCharge

Ascension & Talent Materials

Category Material Name Source
Ascension Jueyun Chili Liyue (Wilds/Village)
Boss Drop Quelled Creeper Dendro Hypostasis
Talents Teachings of Diligence Taishan Mansion (Tue/Fri)
Weekly Boss Daka's Bell Scaramouche (Shouki no Kami)

Talent Mechanics

Elemental Skill: Raphanus Sky Cluster

  • Yuegui: Throws out a device "Yuegui: Throwing Mode" that lobs White Jade Radishes.
  • Radish Logic: Radishes explode on contact with enemies or characters. They deal Dendro DMG and heal based on Yaoyao's Max HP.
  • Duration: 10s. Cooldown: 15s.

Elemental Burst: Moonjade Descent

  • Legacy Mode: Spawns up to 3 Yueguis (Jumping Mode) rapidly.
  • Movement Speed: Yaoyao gains 15% Movement Speed and Dendro RES.
  • Constraint: This state ends immediately if Yaoyao leaves the field. You MUST stay on field to heal.

Important Passives

  • A4: In Others' Shoes: While in Burst state, sprinting, jumping, or running causes Yaoyao to throw extra radishes. Run around like crazy during her burst for max healing/application!

Constellation Value

Constellation Value Effect
C1: Adeptus Tutelage Great Support When Radishes explode, active character gains 15% Dendro DMG Bonus and restores 15 Stamina. Excellent for Alhaitham/Kinich.
C2: Innocent Energy Restores Energy to Yaoyao when Radishes hit enemies during Burst. Lowers ER requirements significantly.
C6: Beneficent Strong Yuegui throws "Mega Radishes" that have larger AoE, deal more damage, and heal more. Significant boost to application consistency.

Verdict: C1 is her best support constellation. C0 is perfectly functional as a healer.

Stat Requirements

Stat Goal
HP 30,000 - 40,000+
Energy Recharge 180-200% (Burst every rotation)
Crit Rate 30-50% (Only for Favonius Lance)

Artifact Main Stats:

  1. Sands: HP% (or ER if lacking)
  2. Goblet: HP%
  3. Circlet: Healing Bonus / HP% (or CRIT Rate for Favonius)

Artifacts Comparison

Set Use Case Reasoning
4pc Deepwood Memories Best Support If Yaoyao is the solo Dendro in the team, she MUST wear this to shred 30% Dendro RES for reaction damage (Bloom/Burgeon/Hyperbloom).
4pc Tenacity of the Millelith Buffer Her skill hits consistently off-field, maintaining the 20% ATK buff for teammates. Great for Aggravate teams (e.g., Keqing/Cyno).
4pc Maiden Beloved / Clam Pure Healer If you only care about maximum healing output (e.g., Furina teams or Nilou Bloom driver), these sets maximize survival.

Weapon Rankings

Weapon Rank Notes
Favonius Lance S+ Best general use. Solves her high energy cost and generates particles for the whole team. Requires Crit Rate circlet.
Black Tassel S (Healer) 3-Star Weapon. Provides massive HP% (46.9%). Best for pure healing output if energy isn't an issue. Extremely cheap to build.
Moonpiercer A Craftable (Sumeru). Creates a "Leaf of Revival" that buffs ATK% for a teammate picking it up. Good for Aggravate support.
Dialogues of the Desert Sages A Event weapon. Restores energy and provides HP. A solid middle ground between Favonius and Black Tassel.

Teams

Nilou Bloom (Yaoyao Driver)

  • Nilou (Bountiful Cores)
  • Yaoyao (On-field Driver/Healer - Full EM/HP)
  • Xingqiu / Yelan (Hydro App)
  • Nahida / Dendro MC (Off-field Dendro)

Yaoyao uses her Burst and runs around to apply Dendro and heal through the core explosion damage.

Alhaitham Spread Support

  • Alhaitham (Main DPS)
  • Yaoyao (Deepwood Holder / Healer / Battery)
  • Fischl / Yae Miko (Electro)
  • Beidou / Zhongli (Shield/Flex)

Yaoyao with C1 provides Stamina and Dendro DMG bonus, perfect for Alhaitham.

Rotation

Off-Field Support:
Yaoyao E > Swap to DPS

Emergency/Burst Heal:
Yaoyao Q > Sprint/Jump for 5s > Swap

Note: You don't need to use her Burst every rotation unless you need the massive healing or are driving a Nilou team.

FAQ

Is Black Tassel better than Favonius?
For pure healing numbers, yes. But Favonius is generally recommended because the energy particles help your entire team rotate smoother, which usually leads to more damage.

Why isn't Yuegui applying Dendro?
If your active character is below 70% HP, Yuegui prioritizes throwing radishes at YOU to heal. Once you are above 70%, he switches back to attacking enemies (applying Dendro).

Data Source: KQM Standards. Last Updated: December 2025

Dendro Traveler Build Guide | Genshin Impact
Dendro Traveler Genshin Impact Character Art
Rarity ★★★★★ (Free)
Element Dendro
Weapon Sword
Role Off-field Support / Sub-DPS
Priority ER > EM > CRIT
Tier A (Solid F2P Option)

The Traveler resonates with the Statue of the Seven in Sumeru to unlock the power of Dendro. Often considered the strongest Traveler element, DMC (Dendro Main Character) is a staple in F2P and low-spender accounts, providing consistent off-field Dendro application and buffs via their "Lea Lotus Lamp."


Pros

  • Excellent off-field Dendro application (Burst lasts 12-15s).
  • Buffs Active Character's Elemental Mastery (A1 Passive).
  • Completely F2P; Constellations are free via Archon Quests/Statues.
  • Highly versatile (Hyperbloom, Burgeon, Aggravate, Nilou Bloom).
  • Low investment floor (just needs ER and Deepwood set).

Cons

  • High Energy cost (80) requires massive ER stats.
  • Burst ("Circle Impact") stays in one place; bad for mobile enemies.
  • Burst explodes and ends early if hit by Pyro (without Hydro/Electro first).
  • Lower personal damage ceiling compared to Nahida/Emilie.

Quick Guide (TL;DR)

The Goal: Use Burst (Q) every rotation to keep the Lamp on field. Transfigure it with Hydro (Range) or Electro (Speed) ASAP.

  • Best Artifact: 4pc Deepwood Memories (Essential RES Shred).
  • Alt Artifact: 4pc Emblem of Severed Fate (Personal DMG, usually worse support).
  • Best Weapon: Favonius Sword (Battery for self/team).
  • Alt Weapon: Sacrificial Sword (Extra Skill use for particles).
  • F2P Weapon: Sapwood Blade (Craftable, great EM buff leaf).
  • Main Stats: ER / Dendro DMG (or EM) / CRIT (or EM).
  • Talent Priority: Elemental Burst > Elemental Skill > Normal Attack (Ignore).
Pro Tip: Avoid The Pyro Explosion! If the Lea Lotus Lamp is hit by Pyro before it touches Hydro or Electro, it explodes and disappears instantly. In Burgeon teams, make sure to hit the Lamp with Hydro first to expand its range and protect it before igniting cores.

Need Materials for Talents?

Get Genesis Crystals at a discounted price to refresh resin for talent books.

Top Up Secure & Fast via GameCharge

Ascension & Talent Materials

Category Material Name Source
Ascension Brilliant Diamond Adventure Rank Rewards
Common Windwheel Aster Mondstadt (Unique to Traveler)
Talents Admonition / Ingenuity / Praxis Sumeru Domains (Cycles daily)
Boss Drop Mudra of the Malefic General Raiden Shogun (Weekly Boss)

Talent Mechanics

Elemental Skill: Razorgrass Blade

  • Simple Hit: Performs a frontal sweep dealing Dendro DMG.
  • Particles: Generates 2-3 Dendro Particles. Use this to battery your Burst.
  • Cooldown: 8s. Short enough to use occasionally in rotation gaps.

Elemental Burst: Surgent Manifestation

  • Lea Lotus Lamp: Creates a lamp that continuously attacks opponents with Dendro DMG.
  • Lotus Transfiguration: The lamp changes properties based on the first element it interacts with:
    • Hydro: Increases the lamp's AoE range and attack radius (Best for Bloom/general use).
    • Electro: Increases the lamp's attack speed (Best for Aggravate/Spread/Hyperbloom).
    • Pyro: Lamp explodes immediately for AoE Dendro DMG (Generally avoid unless nuking).

Important Passives

  • A1: Verdant Overgrowth: The Lea Lotus Lamp gains a "Overflowing Lotuslight" effect, granting up to 60 Elemental Mastery to the active character within its zone (stacks over time).

Constellation Value

Constellation Value Effect
C2: Green Resilience Essential Extends the duration of the Lea Lotus Lamp by 3s. This is massive for uptime (12s -> 15s).
C4: Treacle Grass Good When the Lamp triggers a Transfiguration (Hydro/Electro/Pyro), it instantly grants 5 stacks of the A1 Passive (30 EM). Speeds up the buffing process.
C6: Wither Yesteryear Great Characters under the Lamp gain 12% Dendro DMG Bonus. If the lamp Transfigured, they gain 12% DMG Bonus of that element too (e.g., Hydro or Electro).

Verdict: All constellations are free from playing the Sumeru Archon Quest and leveling Statues of the Seven. Get them all!

Stat Requirements

Stat Goal
Energy Recharge 200% - 250% (Priority #1)
Elemental Mastery 100+ (Secondary)
Crit Rate 30-50% (Enough to trigger Favonius Sword)

Artifact Main Stats:

  1. Sands: Energy Recharge (Mandatory)
  2. Goblet: Dendro DMG Bonus (or EM/ATK)
  3. Circlet: CRIT Rate (for Favonius) or EM

Artifacts Comparison

Set Use Case Reasoning
4pc Deepwood Memories Best Support Shreds Dendro RES by 30% for 8s. Since DMC is usually the sole Dendro support for Hyperbloom/Burgeon teams, this is mandatory to buff reaction damage.
4pc Emblem of Severed Fate Personal DMG Only use this if another character (like Zhongli or Nahida) is already holding Deepwood. Increases personal Burst damage and helps with ER.
4pc Instructor Budget Buff 4-Star set. Provides 120 EM to the team. Good for low AR or specific nuking setups, but stats are lower.

Weapon Rankings

Weapon Rank Notes
Favonius Sword S+ The king of support swords. Solves DMC's energy issues and batteries the team. Build some Crit Rate.
Sapwood Blade S Craftable (Sumeru). Provides ER and drops a leaf that buffs the active character's EM by 60-120. Excellent F2P utility.
Sacrificial Sword S- Allows double E cast for more particles. Good if high refinement (R3+), otherwise cooldown sync is awkward.
Iron Sting A Provides EM for personal damage, but zero Energy Recharge. Only use if you have 250% ER from artifacts alone.

Teams

F2P Hyperbloom

  • Dendro Traveler (Deepwood)
  • Xingqiu (Hydro App)
  • Kuki Shinobu (Electro Trigger - Full EM)
  • Flex (Fischl / Sucrose / Beidou)

The gold standard for low-investment clearing. DMC provides the cores, Kuki detonates them.

Nilou Bloom (Budget)

  • Nilou (Core Creator)
  • Dendro Traveler (Off-field App)
  • Collei (Secondary Dendro)
  • Barbara / Kokomi (Healer / Hydro Driver)

Note: Ensure you hit DMC's lamp with Hydro first to expand its range before the chaos starts.

Rotation

Standard Loop:
Dendro Traveler E > Dendro Traveler Q > Swap to Hydro/Electro > Attack to Transfigure Lamp > Main DPS Rotation

Note: Always E before Q to catch the particles. If using Favonius, make sure you crit to generate white particles.

FAQ

Is Dendro Traveler better than Collei?
Generally, yes. DMC has a larger burst area, longer duration, and easier rotation. Collei is better for front-loaded burst application in specific speedrun teams (like Nilou Bloom), but DMC is more comfortable.

Why is my Burst exploding?
You are hitting it with Pyro! If Bennett or Xiangling hits the lamp before it absorbs Hydro/Electro, it self-destructs. Apply Hydro/Electro first!

Data Source: KQM Standards. Last Updated: December 2025

Lauma Build Guide | Genshin Impact
Lauma Genshin Impact Character Art
Rarity ★★★★★ (Limited)
Element Dendro
Weapon Catalyst
Region Nod-Krai
Role Bloom Support / Lunar-Bloom DPS
Priority EM > ER > CRIT

Lauma hails from the frozen lands of Nod-Krai. She is a specialized Dendro support who fundamentally alters how Dendro Cores work, converting standard Blooms into Lunar-Blooms. She excels in enhancing team reaction damage while dealing respectable personal damage through her unique "Verdant Dew" mechanic.


Pros

  • Powerful buffer for all Bloom-related reactions (Hyperbloom/Burgeon).
  • Provides massive RES Shred (Hydro & Dendro) via Skill.
  • Easy to build (EM scaling, strong F2P weapon options).
  • Enables Crit stats for Bloom reactions via A1 Passive.
  • Flexible role: Off-field buffer or On-field driver.

Cons

  • Personal damage teams require specific "Nod-Krai" teammates.
  • Vertical investment (C1/Sig) has lower impact than other units.
  • Hold Skill mechanic requires managing "Verdant Dew" stacks.

Quick Guide (TL;DR)

The Goal: Trigger Lunar-Blooms to stack "Verdant Dew", then use Hold Skill to consume them for damage and buffs.

  • Best Artifact: 4pc Deepwood Memories (Support) or 4pc Night of the Sky's Unveiling (Personal DPS).
  • Alt Artifact: 4pc Gilded Dreams (General Use).
  • Best Weapon: Nightweaver's Looking Glass (Signature).
  • F2P God Weapon: Etherlight Spindlelute (Event) or Magic Guide.
  • Alt Weapon: A Thousand Floating Dreams.
  • Main Stats: EM / EM / EM (Support) or EM / Dendro / Crit (DPS).
  • Talent Priority: Skill = Burst > Normal Attack.
Pro Tip: Moonsign Levels: Pay attention to your team comp! If Lauma is the only Nod-Krai character, she grants Crit Rate/DMG to Bloom reactions. If you have 2+ Nod-Krai characters, she buffs her own Lunar-Bloom damage instead.

Pulling for Lauma?

Get Genesis Crystals at a discounted price with instant delivery.

Top Up Secure & Fast via GameCharge

Materials & Farming

Category Material Name Source
Ascension [New Nod-Krai Specialty] Nod-Krai Region (Snowy Areas)
Boss Drop [New World Boss Material] Nod-Krai World Boss
Talents Teachings of Frost Nod-Krai Talent Domain

Talent Mechanics

Core Mechanic: Lunar-Bloom

  • Conversion: When Lauma is in the party, standard Bloom reactions are replaced by Lunar-Bloom.
  • Function: Generates a Dendro Core (same behavior as usual) AND grants 1 stack of Verdant Dew.
  • Verdant Dew: Stacks up to 3 times. Consumed by Hold Skill to deal massive Lunar-Bloom DMG.

Elemental Skill: Runo: Dawnless Rest of Karsikko

  • Tap: Deals AoE Dendro DMG and creates a Frostgrove Sanctuary.
  • Hold: Consumes Verdant Dew to deal extra Lunar-Bloom DMG and generate Moon Song stacks.
  • Sanctuary: Deals periodic Dendro DMG and shreds Hydro/Dendro RES. Essential for team damage.

Elemental Burst: Runo: All Hearts Become the Beating Moon

  • Pale Hymn: Grants the team "Pale Hymn" stacks.
  • Buff: Consumes stacks to increase Bloom/Hyperbloom/Burgeon DMG based on Lauma's EM.
  • Synergy: If you use Hold Skill (gaining Moon Song) before Burst, you get extra Pale Hymn stacks for more buffs.

Constellation Value

Constellation Value Effect
C1: "O Lips, Weave Me Songs" Comfort Provides team healing when Lunar-Bloom is triggered (500% of EM). Also improves exploration stamina. Good for role consolidation (healerless teams).
C2: "Twine Warnings" Strong Massive increase to the Burst's buff (Pale Hymn). Increases Bloom DMG buffs by 500% EM and Lunar-Bloom by 400% EM. Big team damage spike.

Verdict: C0 is a complete unit. C1 allows her to replace a healer. C2 is the damage stopping point.

Stat Requirements

Stat Goal
Elemental Mastery 800+ (Maxes out A4 Passive buffs)
Energy Recharge 160-180% (Burst needs to be up every rotation)

Artifact Main Stats:

  1. Sands: Elemental Mastery (or ER if struggling)
  2. Goblet: Elemental Mastery (Support) / Dendro DMG (DPS)
  3. Circlet: Elemental Mastery (Support) / CRIT (DPS)

Artifacts Comparison

Set Use Case Reasoning
4pc Deepwood Memories Best Support Shreds Dendro RES by 30%. Mandatory if she is the solo Dendro unit supporting Hyperbloom/Burgeon or Nilou teams.
4pc Night of the Sky's Unveiling Personal DPS Best set when Lauma is in a "Moonsign Level 2" team (2+ Nod-Krai chars) and focusing on her own Lunar-Bloom damage.
4pc Gilded Dreams General Provides massive EM. Good middle ground if someone else holds Deepwood.

Weapon Rankings

Weapon Rank Notes
Nightweaver's Looking Glass S+ Signature. Huge EM and buffs team Bloom DMG.
Etherlight Spindlelute S Event Weapon (v6.0). Provides EM and ER. excellent F2P option.
A Thousand Floating Dreams S- Nahida's weapon. Great EM stat stick and team buff.
Prototype Amber A Use this if you need Lauma to be a healer (pre-C1) and battery.

Teams

Modified Nilou Bloom

  • Lauma (Lunar Bloom Trigger/Buff)
  • Nilou (Bountiful Core Creator)
  • Aino (Nod-Krai Hydro) or Kokomi
  • Nahida / Baizhu (Dendro Resonance)

Lauma turns Nilou's cores into Lunar-Blooms, granting buffs before they explode as Bountiful Cores.

Hyperbloom / Quickbloom

  • Lauma (Deepwood Support)
  • Raiden / Kuki Shinobu (Electro Trigger)
  • Neuvillette / Yelan (Hydro App)
  • Ineffa / Zhongli (Flex)

Rotation

Standard Loop:
Lauma Hold E (Skill) > Hydro/Electro Supports (Apply Element) > Generate Verdant Dew (via Reactions) > Lauma Burst (Q) > Driver DPS

Note: Try to use Lauma's Hold Skill before her Burst if possible to consume Verdant Dew and generate Moon Song, which buffs the Burst's effects.

FAQ

What is Nod-Krai?
A new region (likely Snezhnaya-adjacent). Characters from here (like Aino/Ineffa) boost Lauma's "Moonsign" level.

Does Lunar-Bloom deal damage?
The reaction itself generates a Core (which deals damage) and a stack of Verdant Dew. The "Lunar-Bloom Damage" comes from Lauma consuming that Dew with her Hold Skill.

Data Source: KQM Standards. Last Updated: January 2026 (Version 6.0)

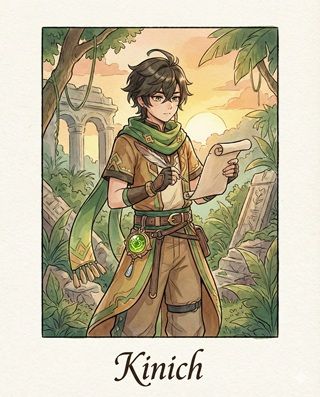
Kinich Build Guide | Genshin Impact
Kinich Genshin Impact Character Art
Rarity (Limited)
Element Dendro
Weapon Claymore
Role Nightsoul Main DPS
Priority CRIT > ATK > Dendro DMG
Tier T0 (Burning/Burgeon)

Kinich is a Huitztlan Saurian Hunter who brings a retro 8-bit gaming aesthetic to Natlan. He specializes in a unique "Nightsoul" state where he grapples enemies and swings around them, firing Dendro shots. He scales purely off ATK and thrives in Burning or Burgeon teams alongside Emilie or Pyro applicators.


Pros

  • Unique and fun grappling hook playstyle.
  • Extremely high single-target DPS via "Spine-Defier" shots.
  • Free 40% Crit Rate from Obsidian Codex artifact set.
  • Synergizes perfectly with Emilie and Bennett.
  • Excellent overworld mobility (can grapple mid-air).

Cons

  • Requires specific "Burning" aura to generate Nightsoul points fast.
  • Gameplay can be disorienting (camera spins around enemy).
  • Relies on Burst for AoE; Skill is strictly single-target.
  • Very dependent on Bennett for ATK buffs.

Quick Guide (TL;DR)

The Goal: Use E to grapple, then spam Normal Attacks to generate Nightsoul points. When the gauge is full, fire a massive "Scalespiker Cannon" shot (E).

  • Best Artifact: 4pc Obsidian Codex (40% Crit Rate is unbeatable).
  • Alt Artifact: 4pc Unfinished Reverie (Good if not using Nightsoul mechanics well, but niche).
  • Best Weapon: Fang of the Mountain King (Signature).
  • Alt Weapon: Serpent Spine (BP) or Beacon of the Reed Sea.
  • F2P Weapon: Earth Shaker (Craftable Natlan Claymore).
  • Main Stats: ATK% / Dendro DMG / CRIT DMG.
  • Talent Priority: Elemental Skill > Elemental Burst > Normal Attack.
Pro Tip: Blind Spot Mechanic: While swinging, a green "Blind Spot" zone appears near the enemy. Slide into this zone to instantly generate Nightsoul points, allowing you to fire your big cannon shot (E) much faster.

Pulling for Kinich + Ajaw?

Get Genesis Crystals at a discounted price with instant delivery.

Top Up Secure & Fast via GameCharge

Ascension & Talent Materials

Category Material Name Source
Ascension Saurian Claw Succulent Natlan Wilds
Boss Drop Overripe Flamegranade Gluttonous Yumkasaur Mountain King
Talents Teachings of Kindling Natlan Talent Domain (Tue/Fri)
Mob Drop Juvenile Fang Natlan Saurians

Talent Mechanics

Elemental Skill: Canopy Hunter: Riding High

  • Grapple: Fires a hook. If it hits an enemy, Kinich enters "Nightsoul's Blessing" state and links to them for 10s.
  • Loop Shots: Normal Attacks act as "Loop Shots" (Dendro DMG) while swinging. This generates Nightsoul points.
  • Scalespiker Cannon (E): When Nightsoul points are maxed, press E to fire a massive Dendro laser. You want to trigger this as many times as possible (usually 4 times per rotation).
  • Blind Spots: Slide into the green zones to gain points instantly.

Elemental Burst: Hail to the Almighty Dragonlord

  • Ajaw Unleashed: Unleashes K'uhul Ajaw (his pixel dragon companion).
  • AoE Damage: Ajaw unleashes periodic AoE Dendro Breath attacks.
  • Duration: Lasts 15s. It persists even if Kinich swaps off-field.

Important Passives

  • A1: Flame Spirit Pact: If an enemy is hit by Burning or Burgeon, Kinich gains 7 Nightsoul points (cd 0.8s). This is why he needs Pyro teammates.
  • A4: Hunter's Experience: Increases the DMG of his Scalespiker Cannon by 320% of his ATK after a Nightsoul Burst triggers.

Constellation Value

Constellation Value Effect
C1: Parrot's Beak Good Increases movement speed while swinging by 30% (easier to hit Blind Spots) and buffs Cannon Crit DMG by 100%.
C2: Tiger Beetle's Palm Meta Defining Elemental Skill hits decrease enemy Dendro RES by 30%. Also, the first Cannon shot has increased AoE and DMG. Massive boost for him and Emilie.
C6: Auspicious Beast's Shape Nuke Cannon shots bounce between enemies dealing 700% ATK damage. Turns his single-target skill into a nuke fest.

Verdict: C0 is excellent. C1 makes gameplay smoother. C2 is one of the best constellations in the game for Dendro teams.

Stat Requirements

Stat Goal
ATK 2200+ (He scales purely on ATK)
Crit Rate 40-60% (Obsidian Codex gives +40% for free)
Crit DMG 200%+ (Stack as much as possible)

Artifact Main Stats:

  1. Sands: ATK%
  2. Goblet: Dendro DMG Bonus
  3. Circlet: CRIT DMG (Since set gives Rate)

Artifacts Comparison

Set Use Case Reasoning
4pc Obsidian Codex Best in Slot Tailor-made for Natlan characters. Gives 15% DMG bonus and a massive 40% CRIT Rate when consuming Nightsoul points (which he does constantly).
4pc Unfinished Reverie Alternative Provides 50% DMG Bonus if Burning exists. Good stat stick, but losing 40% Crit Rate from Codex is hard to balance.
4pc Deepwood Memories Avoid Kinich is a pure carry. Let your support (Dehya/Thoma/Bennett/Emilie) hold Deepwood to shred resistance for him.

Weapon Rankings

Weapon Rank Notes
Fang of the Mountain King S+ Signature. Huge Crit Rate and buffs Elemental Skill/Burst damage based on Burning.
Serpent Spine (R5) S Battle Pass weapon. At R5, it rivals R1 signature weapons if you can maintain stacks (Bennett helps).
Beacon of the Reed Sea S- High Crit Rate stick and ATK buffs.
Earth Shaker (R5) A+ Craftable Natlan Claymore. Designed for him. Buffs Skill DMG when triggering Pyro reactions. Excellent F2P choice.
Wolf's Gravestone A Solid ATK stick, but lacks DMG% and Crit.

Teams

Burning Core (The Standard)

  • Kinich (Main DPS)
  • Emilie (Sub-DPS / Deepwood Holder)
  • Bennett (Heal / Huge ATK Buff)
  • Dehya / Thoma / Xiangling (Pyro Application)

This team ensures constant Burning to fuel Kinich's Nightsoul generation and Emilie's damage.

Burgeon

  • Kinich (Driver)
  • Xingqiu / Yelan (Hydro)
  • Thoma (Burgeon Trigger / Shield)
  • Bennett (Buff)

Rotation

The Loop:
Supports (Emilie/Bennett/Pyro) Setup > Kinich E (Grapple) > N (Swing) until Max Points > Kinich E (Cannon) > Repeat until duration ends > Kinich Q

Note: Prioritize sliding into "Blind Spots" (Green zones) whenever they appear. This generates points instantly and lets you fire the Cannon immediately.

FAQ

Does he work in Quicken/Spread?
Not well. His Nightsoul generation passive (A1) specifically requires Burning or Burgeon. Playing Spread drastically lowers his damage output because he shoots fewer Cannons.

Is Obsidian Codex mandatory?
It is significantly better than other sets. 40% Crit Rate is massive. If you don't have it, Unfinished Reverie is okay, or 2pc/2pc ATK/Dendro, but farm the Codex!

Do I need Emilie?
Emilie is his best teammate, but she is not mandatory. You can use Xiangling, Dehya, or Thoma to maintain the Burning aura, but team damage will be lower.

Data Source: KQM Standards. Last Updated: December 2025