RSS

Blog posts of '2025' 'December'

Genshin Impact: Bennet The Definitive Build & Analysis

Bennett Guide: The Definitive Build & Analysis
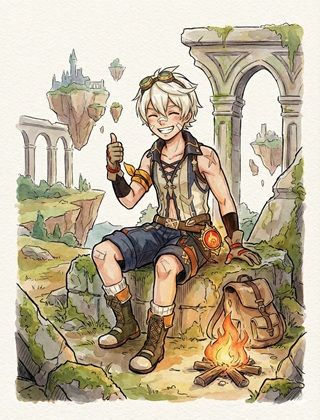
Bennett Genshin Impact Character Art
Rarity (4-Star)
Element Pyro
Weapon Sword
Best Role ATK Buffer / Healer / Battery
Stat Priority Base ATK > ER > HP > Healing Bonus
Tier SS (The 6-Star Character)

Bennett is widely considered the best character in Genshin Impact, often jokingly referred to as the "Pyro Archon." His Elemental Burst provides a massive Flat ATK buff and rapid healing, condensing two essential roles into one slot. He is the backbone of the "National Team."


Quick Guide (TL;DR)

If you don't have time for the math, here is the cheat sheet.

  • Best Artifact: 4pc Noblesse Oblige (Mandatory).
  • Best Weapon: Aquila Favonia / Mistsplitter (Highest Base ATK) or Skyward Blade (Balance).
  • F2P Weapon: Sapwood Blade (Craftable - Best F2P) or Favonius Sword.
  • Main Stats: SANDS: ER% | GOBLET: HP% | CIRCLET: Healing Bonus or CRIT Rate (for Favonius).
  • Talent Priority: Elemental Burst (Crown this) > Elemental Skill > Normal Attack (Ignore).
  • Top Team: Bennett + Xiangling + Xingqiu + Raiden (Rational).
Pro Tip: ATK% Artifacts DO NOT increase Bennett's buff. His buff scales only off his Base ATK (Character Level + Weapon Base ATK). Do not farm ATK substats for him!

Need Primogems for C5 Bennett?

Get Genesis Crystals at a discounted price with instant delivery.

Top Up Secure & Fast via GameCharge

Talent Breakdown & Mechanics

Normal Attack: Strike of Fortune

  • Usage: Useless for Support Bennett. Skip levelling this talent.
  • Note: At C6, his Normal Attacks become Pyro infused, but even then, his damage comes from reactions, not this multiplier.

Elemental Skill: Passion Overload

  • Function: A quick Pyro slash.
  • Tap: Generates energy quickly. Use this to "battery" your team (e.g., Tap E, then swap to Xiangling to let her catch the particles).
  • Hold: Launches Bennett backward. Generally a DPS loss and waste of time. Always TAP E.

Elemental Burst: Fantastic Voyage

  • Cost: 60 Energy | Cooldown: 15s | Duration: 12s
  • Analysis: Creates an Inspiration Field.
  • Healing: Heals active character up to 70% HP (scales off Bennett's Max HP).
  • Buffing: If HP > 70% (or always with C1), grants ATK Bonus based on Bennett's Base ATK.
  • Cleansing: Applies Pyro to the active character, cleansing debuffs like Slowing Water or Engulfing Storm.

Talent Priority Order:

  1. Elemental Burst (Level 10 / Crown) - Everything depends on this.
  2. Elemental Skill (Level 6) - Just for energy.
  3. Normal Attack (Level 1) - Don't waste resources.

Stat Requirements & ER Thresholds

Bennett is useless if his Burst isn't ready off-cooldown. Energy Recharge (ER) is his most critical stat.

Team Context ER Requirement
Solo Pyro (e.g., with Xiao/Wanderer) 230% - 250%
Double Pyro (e.g., with Xiangling) 200% - 220%
With Raiden Shogun 180% - 200%

Substat Priority:

  1. Energy Recharge (Until requirement met)
  2. HP% (Increases Healing)
  3. CRIT Rate (Only if using Favonius Sword to trigger passive)
  4. Flat ATK (Useless - does not affect buff)

Best Artifacts Comparison

Set Name Recommendation Reasoning
4pc Noblesse Oblige Standard BiS Bennett spams burst frequently. This set gives 20% ATK to the whole team. It stacks with his own buff.
4pc Instructor Niche (Vape) Sacrifices healing for 120 Elemental Mastery to the team. Best for high-investment Vaporize teams (International).
2pc ER / 2pc HP Placeholder Use only if you cannot meet ER requirements with Noblesse.

Weapon Rankings

Note: We rank weapons based on Base ATK (for buff) and ER (for consistency).

Weapon Base ATK Performance Description
Skyward Blade 608 S+ High Base ATK + ER Substat. The perfect balance for comfort and buffing power.
Aquila Favonia 674 S (Max Buff) Highest Base ATK in the game (tied with Mistsplitter). Offers maximum buff but zero ER. You need insanely good artifacts.
Sapwood Blade 565 A+ (F2P BiS) Craftable Sumeru sword. Highest Base ATK for a 4-star ER weapon. Also drops a leaf that buffs EM.
Favonius Sword 454 A (Utility) Very low Base ATK (weakens buff), but provides massive energy for the team. Use only if Xiangling struggles to burst.

Constellation Value

Bennett's constellations are game-changing, particularly C1 and C5.

  • C1: Grand Expectation - (ESSENTIAL) Removes the HP restriction on his ATK buff. Now you get healing AND buffing simultaneously. It also adds 20% of his Base ATK to the buff.
  • C5: True Explorer - (Great) Increases Burst Level by 3. This is a massive increase to his ATK buff and Healing scaling.
  • C6: Fire Ventures with Me - (Warning!) Infuses Sword/Polearm/Claymore characters inside the circle with Pyro and gives 15% Pyro DMG Bonus.
    Good for: Hu Tao, Xiangling, Yoimiya, Diluc.
    Bad for: Eula, Keqing, Ayaka (ruins their own infusions).

Verdict: C1 is arguably the most important constellation in the game. C6 is generally safe to activate nowadays unless you main Eula.

Top Team Compositions

1. Raiden National (Rational)

  • Driver: Raiden Shogun
  • Off-Field DPS: Xiangling
  • Hydro: Xingqiu / Yelan
  • Support: Bennett

Why it works: Bennett buffs Raiden and Xiangling's ATK massively. Raiden refunds energy to Bennett, allowing him to run less ER and more HP for healing.

2. Childe International

  • Main DPS: Tartaglia (Childe)
  • Vape Trigger: Xiangling
  • Grouper: Kazuha
  • Buffer: Bennett

Why it works: Bennett allows Xiangling to "snapshot" his ATK buff for her entire Pyronado duration. He also cleanses Childe of debuffs and allows Kazuha to double-swirl Hydro and Pyro.

Rotations & Combos

Standard Funneling Rotation:
Bennett Q > Bennett E > Swap to Xiangling immediately (Catch particles) > Xiangling Q

Tip: Always use Bennett's Burst before your main DPS abilities. Characters like Xiangling, Beidou, and Fischl (Oz) can "snapshot" the buff, meaning they keep the high ATK even if they leave the circle or the circle expires.

Frequently Asked Questions

Does ATK% on my artifacts increase his buff?
NO. His buff is based on Base ATK, which only comes from his Character Level and his Weapon. Artifact ATK% does nothing for his buffing capability.

Why isn't he healing me to 100%?
Bennett's healing stops once the character reaches 70% HP. This is intentional. It's enough to survive almost anything, but he won't top you off completely.

Data Source: KQM Standards. Last Updated: December 2025

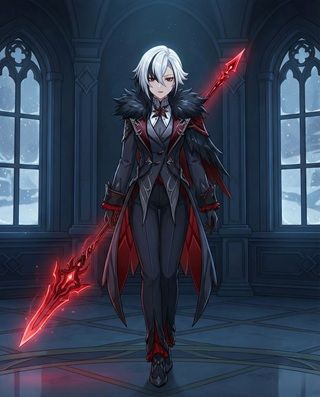
Genshin Impact. Arlecchino Guide: The Definitive Build & Analysis

Arlecchino Guide: The Definitive Build & Analysis

Arlecchino Genshin Impact Character Art
Rarity (5-Star)
Element Pyro
Weapon Polearm
Best Role Main DPS (Normal Attacker)
CV Priority CRIT > ATK% > EM > ER
Tier S+ (Top Meta)

Arlecchino (The Knave) is a Pyro Hypercarry who revolves around the Bond of Life mechanic. She sacrifices the ability to be healed by teammates in exchange for massive Pyro infusion damage on her Normal Attacks. She is currently one of the strongest damage dealers in the game.


Quick Guide (TL;DR)

If you don't have time for the math, here is the cheat sheet.

  • Best Artifact: 4pc Fragment of Harmonic Whimsy.
  • Alt Artifact: 4pc Gladiator's Finale (Very close 2nd choice).
  • Best Weapon: Crimson Moon's Semblance (5⭐).
  • F2P Weapon: White Tassel (3⭐ - R5) or Venture Stardust.
  • Main Stats: SANDS: ATK% | GOBLET: Pyro DMG | CIRCLET: CRIT Rate/DMG.
  • Talent Priority: Normal Attack > Elemental Skill > Elemental Burst.
  • Top Team: Arlecchino + Yelan + Bennett + Kazuha.
Pro Tip: Do not panic! You cannot be healed by Bennett or any healer while in combat. You can only heal yourself by using your Elemental Burst. Manage your HP carefully.

Need Primogems for Father?

Get Genesis Crystals at a discounted price with instant delivery.

Top Up Secure & Fast via GameCharge

Talent Breakdown & Mechanics

Normal Attack: Invitation to a Beheading

  • The Core: When Arlecchino has a Bond of Life (BoL) equal to or greater than 30% of her HP, her attacks are infused with Pyro and deal massive bonus damage.
  • Consumption: Each attack consumes a portion of the BoL to deal more damage and reduces her Skill cooldown.

Elemental Skill: All is Ash

  • Function: Deals AoE Pyro DMG and applies a "Blood-Debt Directive" to enemies.
  • The "Gotcha": After using Skill, WAIT 5 SECONDS. The Directive upgrades to a "Blood-Debt Due." When you use a Charged Attack to absorb these upgraded marks, you gain a massive 130% Bond of Life. This is how you fuel her damage.

Elemental Burst: Balemoon Rising

  • Cost: 60 Energy | Cooldown: 15s
  • Analysis: Deals AoE Pyro DMG, resets her Skill cooldown, and HEALS her.
  • Usage: Use this as a finisher or an emergency heal. Using it clears your Bond of Life, which ends your damage infusion, so only use it at the end of a rotation or if you are about to die.

Talent Priority Order:

  1. Normal Attack (Level 10) - Vital for damage.
  2. Elemental Skill (Level 8+) - Increases initial damage.
  3. Elemental Burst (Level 6+) - Mostly for healing utility.

Stat Requirements & ER Thresholds

Arlecchino relies on Normal Attacks, so she does not strictly *need* to burst every rotation unless she needs healing.

Team Context ER Requirement
General Use (Burst every other rotation) 100% - 110%
Burst Every Rotation (Solo Pyro) 140% - 150%

Substat Priority:

  1. CRIT Rate / CRIT DMG (Target 75/160+)
  2. ATK%
  3. Elemental Mastery (Vital for Vaporize teams)
  4. Energy Recharge

Best Artifacts Comparison

Set Name Recommendation Reasoning
4pc Harmonic Whimsy Best in Slot Tailor-made for her. Gives 54% DMG bonus when Bond of Life fluctuates.
4pc Gladiator's Finale Competitive Only ~5% worse than Whimsy. If you have amazing substats here, use them.
4pc Crimson Witch Vaporize Only Excellent for Reaction teams, but harder to farm than Gladiator.

Weapon Rankings

Weapon Rank Performance Description
Crimson Moon's Semblance S+ 100% Signature. Grants extra Bond of Life (more damage) and looks like a Scythe.
Primordial Jade Winged-Spear S 88% Standard 5-star. High Base ATK and Crit Rate are perfect for her.
White Tassel (R5) A+ (F2P God) 82% A 3-star weapon from Liyue Chests. Boosts Normal Attack DMG by 48%. Beats many 4-stars.

Constellation Value

Arlecchino is very strong at C0. Her constellations mostly add comfort or burst damage.

  • C1: "All Reprisals..." - (High Value) Grants 100% Interruption Resistance (Super Armor) while attacking. Removes the need for a shielder like Zhongli.
  • C2: "All Rewards..." - (Nuke) Blood-Debt Directives start at Level 3 instantly. Dealing damage now unleashes a massive Pyro Nuke (900% multiplier).
  • C6: "From This Day..." - (Whale Bait) Increases Crit Rate/DMG of Normal Attacks massively based on Bond of Life. Burst deals nuke damage.

Verdict: C0 is perfect. C1 makes gameplay much smoother.

Top Team Compositions

1. Premium Vaporize

  • Main DPS: Arlecchino
  • Hydro Sub-DPS: Yelan / Xingqiu
  • Buffer: Bennett
  • Shielder/Buffer: Zhongli / Kazuha

Why it works: Classic Vape setup. Bennett buffs ATK (even if he can't heal Arle, the ATK buff persists). Yelan allows Arlecchino to vaporize her hard-hitting Normal Attacks.

2. Chevreuse Overload

  • Main DPS: Arlecchino
  • Support: Chevreuse (Must have C6 for best results, but C0 works)
  • Electro: Fischl / Yae Miko
  • Defensive: Beidou / Thoma

Why it works: Chevreuse shreds Pyro/Electro RES by 40% (like VV set) but without needing Swirl. Arlecchino drives the reactions while dealing massive raw damage.

Rotations & Combos

Standard Rotation:
Arle E > Support Rotations (Wait 5s) > Arle Charged Attack (Absorb Marks) > Normal Attack Spam

Tip: If you are low on health at the end of the rotation, use Arle Q to heal, then restart.

Frequently Asked Questions

Why can't Bennett heal me?
Arlecchino has a passive that blocks all incoming healing during combat. She can only be healed by her own Burst (Q) or out of combat food.

Is White Tassel really good?
Yes. At R5, it offers 48% Normal Attack DMG bonus, which is Arlecchino's main source of damage. It outperforms many 4-star options like Dragon's Bane in non-vape teams.

Data Source: KQM Standards. Last Updated: December 2025

Genshin Impact. Amber Guide: The Definitive Build & Analysis

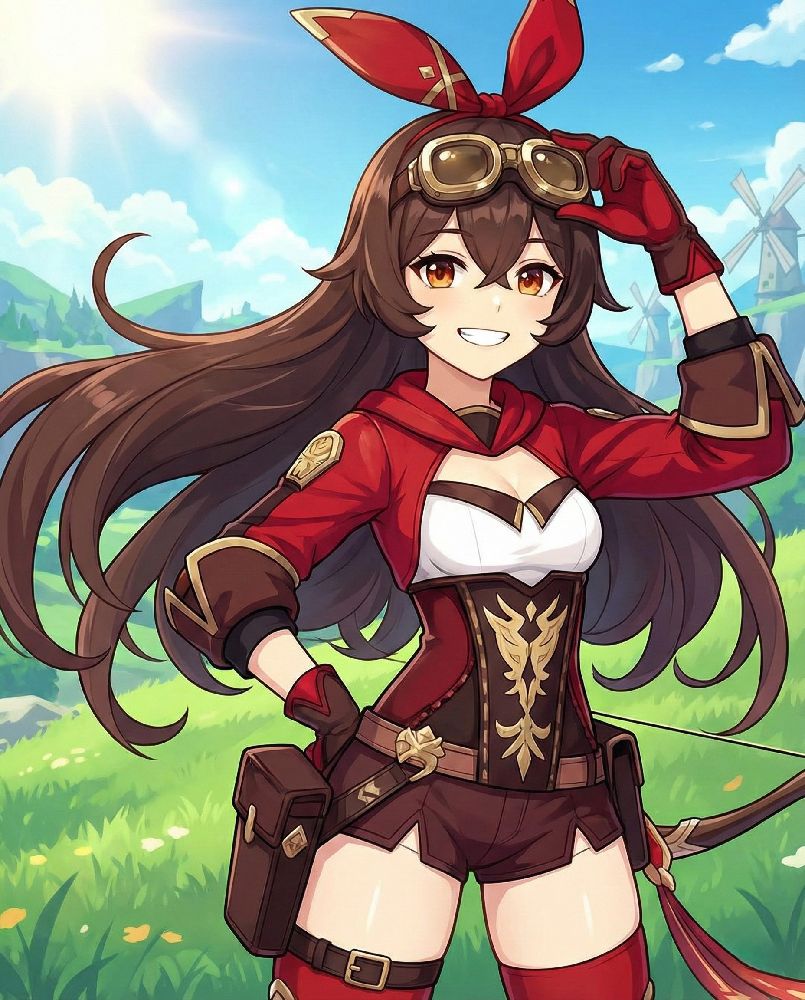
Amber Guide: The Definitive Build & Analysis

Amber Genshin Impact Character Art
Rarity (4-Star)
Element Pyro
Weapon Bow
Best Role Burst Support / Charged Shot DPS
CV Priority CRIT > ATK% > EM > ER
Tier C (General) / A (Support)

Amber is the first character you meet, but often underestimated. She excels in two specific niches: as a Shield Shredder/Buffer (C6) for Hu Tao/Arlecchino teams, or as a high-skill Melt DPS aiming for weak spots. She requires investment but scales beautifully with player skill.


Quick Guide (TL;DR)

If you don't have time for the math, here is the cheat sheet.

  • Best Artifact: 4pc Noblesse Oblige (Support) or 4pc Wanderer's Troupe (DPS).
  • Best Weapon: Elegy for the End (Support) or The First Great Magic (DPS).
  • F2P Weapon: Favonius Warbow (Support) or Sharpshooter's Oath (Weakspot DPS).
  • Main Stats: SANDS: ATK% or ER | GOBLET: Pyro DMG | CIRCLET: CRIT DMG.
  • Talent Priority: Burst (Support) / Normal Attack (DPS) > Skill.
  • Top Team: Amber + Hu Tao + Kazuha + Xingqiu.
Pro Tip: Amber's Burst applies **2 Units of Pyro** very rapidly. This makes her the fastest shield breaker in the game against Cryo Regisvines and Cryo Abyss Heralds.

Need Primogems for Amber's C6?

Get Genesis Crystals at a discounted price with instant delivery.

Top Up Secure & Fast via GameCharge

Talent Breakdown & Mechanics

Normal Attack: Sharpshooter

  • Usage: Primary source of damage for DPS Amber.
  • Mechanic: Fully charged shots apply Pyro. If you hit an enemy's Weak Spot, it guarantees a Critical Hit (ignoring your CRIT Rate stat). This allows "Weakspot Builds" to stack only CRIT DMG.

Elemental Skill: Explosive Puppet

  • Function: Throws Baron Bunny.
  • Mechanic: Taunts enemies. Explodes when destroyed or timer ends.
  • The "Gotcha": The explosion creates 4 Pyro Particles, but only if it hits an enemy. At C2, you can shoot the bunny's foot to detonate it manually for 200% damage.

Elemental Burst: Fiery Rain

  • Cost: 40 Energy | Cooldown: 12s
  • Analysis: Fires a shower of arrows. It lasts only 2 seconds but applies Pyro incredibly fast (6 gauge units).
  • Utility: Best tool in the game for breaking Cryo shields instantly. At C6, casting this gives the entire party +15% ATK and Movement Speed.

Talent Priority Order:

  1. Elemental Burst (Support Priority)
  2. Normal Attack (DPS Priority)
  3. Elemental Skill (Level up last unless C2+)

Stat Requirements & ER Thresholds

Amber has a low burst cost (40), but she rarely catches her own particles. ER is still vital for C6 Support builds.

Team Context ER Requirement
Support (Elegy/Favonius) 180% - 200%
Main DPS (Melt) 100% (Ignore Burst)
Burgeon Trigger 160% + Full EM

Substat Priority (DPS):

  1. CRIT DMG (Top priority for weakspot builds)
  2. ATK%
  3. Elemental Mastery (For Melt)
  4. CRIT Rate (Only if using C2 Bunny Nuke or non-weakspot enemies)

Best Artifacts Comparison

Set Name Role Reasoning
4pc Noblesse Oblige Support Standard support set. Combining this with Elegy Bow gives massive team ATK buffs.
4pc Wanderer's Troupe DPS Best for Charged Shot playstyle. Boosts Charged Attack DMG by 35%.
4pc Instructor Niche Support A 4-star set that provides 120 EM to the team. Excellent for Hu Tao Vaporize teams.

Weapon Rankings

Weapon Rank Role Description
Elegy for the End S+ Support Amber is the best holder of this weapon for Hu Tao teams. Her burst triggers the passive instantly.
The First Great Magic S DPS Lyney's bow is essentially a straight upgrade to Amos for Charged Shots.
Sharpshooter's Oath A (F2P) DPS A 3-star weapon that beats many 4-stars if you hit weak spots due to its massive CRIT DMG substat.
Favonius Warbow A Support Universal battery option if you don't have Elegy.

Constellation Value

Amber is one of the hardest characters to get constellations for (Standard Banner/Shop only).

  • C1: One Arrow to Rule Them All - (Low Value) Adds a second arrow dealing 20% dmg. Mostly cosmetic or for shield breaking.
  • C2: Bunny Trigger - (Game Changer) Allows you to manually detonate Baron Bunny by shooting its foot. Damage increases by 200%. Enables "Bunny Nuke" builds.
  • C6: Wildfire - (Support Peak) Fiery Rain grants 15% Movement Speed and 15% ATK to the entire party for 10s. This is why she is used in speedruns.

Verdict: Amber is functional at C0, but becomes a top-tier support at C6.

Top Team Compositions

1. "VV Vape" Support (Hu Tao)

  • Main DPS: Hu Tao
  • Support: Amber (C6 + Elegy)
  • Swirl Support: Kazuha
  • Hydro App: Xingqiu / Yelan

Why it works: Amber applies Pyro instantly with Burst so Kazuha can Swirl Pyro (buffing Hu Tao). She holds Elegy to buff Mastery and C6 buffs speed/ATK. No healer needed if played well.

2. Headshot Melt

  • Main DPS: Amber
  • Cryo App: Rosaria / Ganyu
  • Control: Diona / Zhongli
  • Buffer: Bennett / Kazuha

Why it works: Melt multiplies Amber's damage by 2.0x. Hitting weak spots guarantees crits, allowing for 50k+ Charged Shots with low investment.

Rotations & Combos

Support Setup (Hu Tao Team):
Xingqiu E Q > Amber Q > Kazuha E (Swirl Pyro) > Hu Tao E + Combo

Manual Detonation (C2):
Throw Bunny > Wait for setup > Shoot Bunny's Foot with Charged Shot.

Frequently Asked Questions

Is Amber useless?
No. She is "Niche." In high-end speedrunning (specifically with Hu Tao), she is often preferred over Xiangling/Thoma because her Burst animation is very short and she carries Elegy better than anyone else.

How to get Amber Cons?
You cannot get her on limited banners. You must buy her from Paimon's Bargains shop (April/October) or get lucky on the Standard Banner.

Data Source: KQM Standards. Last Updated: December 2025

Genshin Impact. Venti guide: The Definitive Build & Analysis

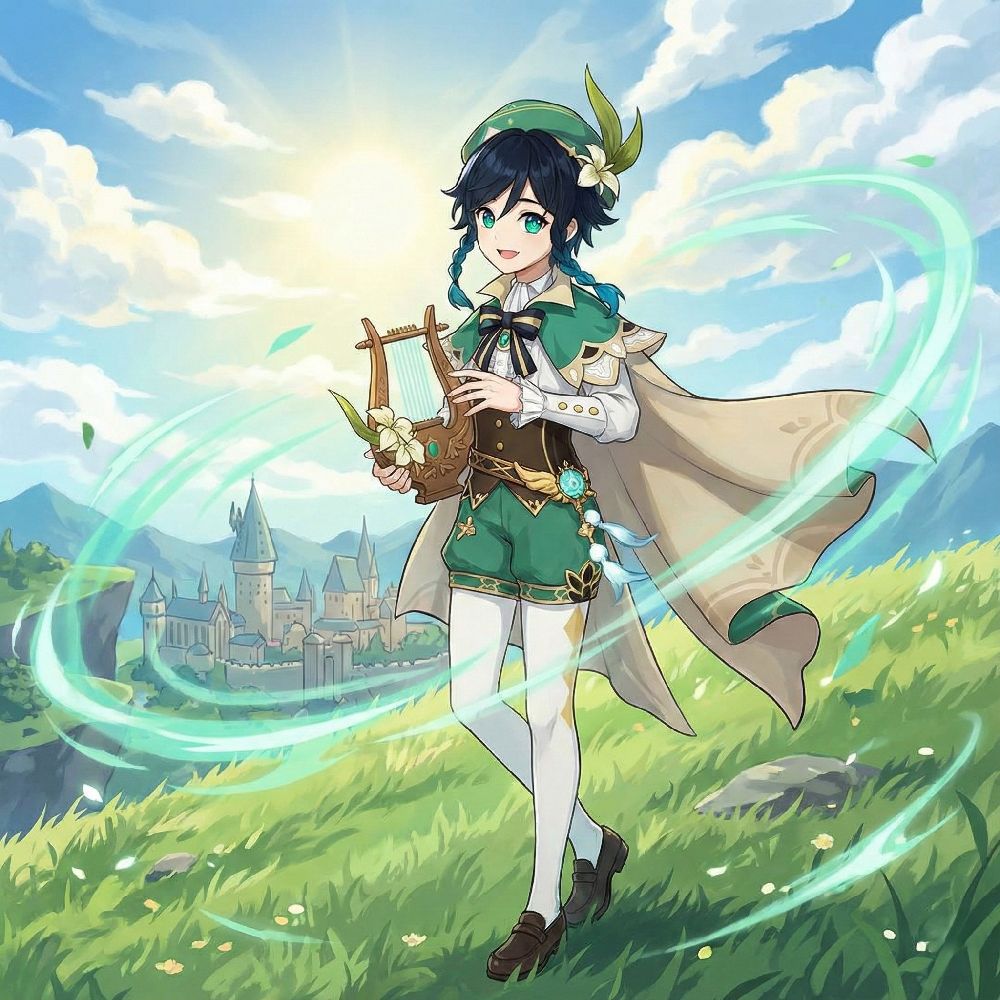
Venti Guide: The Definitive Build & Analysis

Venti Genshin Impact Character Art
Rarity (5-Star)
Element Anemo
Weapon Bow
Best Role Crowd Control / Battery / Support
CV Priority EM > ER > CRIT > ATK%
Tier SS (AoE Content) / A (Bosses)

Venti is the Anemo Archon and the undisputed king of Crowd Control. While other Anemo units buff damage, Venti trivializes content by grouping small enemies into a "black hole" and refunding Energy to the team. He is specialized for defeating mobs in the Spiral Abyss.


Quick Guide (TL;DR)

If you don't have time for the math, here is the cheat sheet.

  • Best Artifact: 4pc Viridescent Venerer (Absolute Requirement).
  • Best Weapon: Elegy for the End (5⭐) or The Stringless (4⭐).
  • F2P Weapon: Favonius Warbow (Free).
  • Main Stats: SANDS: EM or ER | GOBLET: EM | CIRCLET: EM.
  • Talent Priority: Elemental Burst > Elemental Skill > Normal Attack.
  • Top Team: Venti + Ganyu + Mona + Diona (Morgana).
Pro Tip: Always ascend Venti to Level 90. Swirl damage scales massively with character level, making the jump from Lv 80 to 90 a ~30% damage increase.

Need Primogems for Venti?

Get Genesis Crystals at a discounted price with instant delivery.

Top Up Secure & Fast via GameCharge

Talent Breakdown & Mechanics

Normal Attack: Divine Marksmanship

  • Usage: Almost never used in standard rotations.
  • Mechanic: Standard 6-shot bow combo. C1 adds a "shotgun" effect to Aimed Shots, but it is rarely practical.

Elemental Skill: Skyward Sonnet

  • Function: Launches enemies into the air.
  • Tap: Quick AoE damage and particle generation (3 particles).
  • Hold: Creates a wind current (updraft) that lasts 20s. Useful for exploration or Plunge Attack memes.
  • The "Gotcha": Always TAP in combat rotations for faster execution. Only HOLD if you need to dodge a ground attack or explore.

Elemental Burst: Wind's Grand Ode

  • Cost: 60 Energy | Cooldown: 15s
  • Analysis: The famous "Black Hole." It sucks in light enemies and deals continuous Anemo DMG.
  • Elemental Infusion: If it comes into contact with Hydro/Pyro/Cryo/Electro, it deals additional DMG of that type.
  • Energy Refund: Venti's passive refunds 15 Energy to himself AND 15 Energy to all party members of the infused element.

Talent Priority Order:

  1. Elemental Burst (Level 9+) - The core of his kit.
  2. Elemental Skill (Level 8) - Decent damage.
  3. Normal Attack (Level 1 - Skip).

Stat Requirements & ER Thresholds

Venti ascends with Energy Recharge, making him easier to build. His passive also refunds energy, lowering requirements further.

Team Context ER Requirement
Solo Anemo (Stringless build) 180% - 200%
With Favonius Warbow 160% - 170%
Double Anemo / Raiden 140% - 150%

Substat Priority:

  1. Elemental Mastery (Triple EM main stats is best for Swirl)
  2. Energy Recharge (Until Burst is consistent)
  3. CRIT Rate / DMG (Only if using ATK/Anemo/Crit build)
  4. ATK%

Best Artifacts Comparison

Set Name Recommendation Reasoning
4pc Viridescent Venerer (VV) Mandatory Reduces enemy Elemental RES by 40% when Swirling. This effect is often stronger than Venti's own damage. Do not skip this set.
4pc Emblem of Severed Fate Niche Only for pure Crit Venti in teams that don't need RES shred (e.g., Anemo/Geo teams), which is rare.

Weapon Rankings

Weapon Rank Performance Description
Elegy for the End S+ 100% Signature. Provides massive ER and buffs the entire team's EM and ATK. Best for support.
The Stringless S 95% Highest personal damage option due to EM stat and Skill/Burst DMG passive.
Favonius Warbow S (Utility) N/A Best for Energy economy. Essential if Venti or his team struggles to burst off-cooldown.
Windblume Ode A 85% Event exclusive (limited). Good EM stat stick if you have it.

Constellation Value

Is Venti worth investing beyond C0?

  • C1: Splitting Gales - (Useless) Adds 2 arrows to his Charged Shot. Often called a "meme" constellation. Zero value for support.
  • C2: Breeze of Reminiscence - (Good) Skill reduces Enemy Anemo RES by 12% (24% if launched). Good for Anemo DPS teams (Xiao/Wanderer).
  • C6: Storm of Defiance - (Whale Bait) Enemies damaged by Burst have Anemo RES reduced by 20%. If infusion occurs, that element's RES is also reduced by 20%.

Verdict: Stop at C0. Venti is fully complete out of the box. His Constellations are notoriously low value compared to newer units.

Top Team Compositions

1. The Morgana Team (Freeze)

  • Main DPS: Ganyu / Ayaka
  • Support: Venti
  • Buffer: Mona / Kokomi
  • Sustain: Diona / Rosaria

Why it works: Venti groups enemies tightly so Ganyu's icicles (which have quadratic scaling) hit every single enemy simultaneously, dealing exponential damage.

2. Neuvillette Hypercarry

  • Main DPS: Neuvillette
  • Support: Venti
  • Buffer: Furina
  • Sustain: Baizhu / Zhongli

Why it works: Neuvillette prefers enemies to be grouped in a straight line for his beam. Venti provides the grouping and refunds Energy to Neuvillette (Hydro Infusion), fixing his ER issues.

Rotations & Combos

Standard Rotation:
Element Applicator E > Venti E > Venti Q > Main DPS

Tip: Always apply the element you want to Swirl before using Venti. Venti snapshots his Burst stats on cast.

Frequently Asked Questions

Venti vs. Kazuha?
Venti is superior against many small, spread-out enemies (AoE). Kazuha is superior against heavy bosses (Single Target) and for buffing Elemental DMG. You ideally want both on your account.

Why doesn't my Venti lift enemies?
Venti can only lift small to medium enemies (Hilichurls, Treasure Hoarders). Large enemies (Lawachurls, Robots) cannot be lifted unless they are Frozen, but the suction effect will still pull them slowly toward the center.

Data Source: KQM Standards. Last Updated: December 2025

Genshin Impact. Durin Guide: The Definitive Build & Analysis

Durin Guide: The Definitive Build & Analysis

Durin Genshin Impact Character Art
Rarity (5-Star)
Element Pyro
Weapon Sword
Best Role Off-Field Sub-DPS / Resistance Buffer
CV Priority CRIT > ATK% (to 2500) > ER > EM
Tier S (Meta Support)

Durin is a Pyro Sword user who excels at flexible Off-Field damage. Unlike traditional supports like Xiangling, Durin features a unique Dual Form mechanic that allows him to switch between a Support Role (Light Form) and a selfish DPS Role (Dark Form) depending on your team's needs.


Quick Guide (TL;DR)

If you don't have time for the math, here is the cheat sheet.

  • Best Artifact: 4pc Noblesse Oblige (Support) or 4pc Crimson Witch (Vape DPS).
  • Best Weapon: Athame Artis (Signature) or Freedom-Sworn.
  • F2P Weapon: Wolf-Fang (BP) or Finale of the Deep (Craftable).
  • Main Stats: SANDS: ATK% | GOBLET: Pyro DMG | CIRCLET: CRIT Rate/DMG.
  • Talent Priority: Elemental Skill > Burst > Normal Attack.
  • Top Team: Durin + Neuvillette + Furina + Kazuha.
Pro Tip: Durin has an ATK Threshold of 2500. Reaching this maximizes his passive buffs. If you are below this, consider an ATK% Goblet over Pyro DMG.

Need Primogems for Durin?

Get Genesis Crystals at a discounted price with instant delivery.

Top Up Secure & Fast via GameCharge

Talent Breakdown & Mechanics

Normal Attack: Flamewing Cleave

  • Usage: Rarely used unless playing "Dark Form" on-field driver style.
  • Mechanic: Standard 4-strike combo. Used as a trigger to enter Dark Form (see Skill).

Elemental Skill: Binary Formula (The Core Mechanic)

  • Function: Enters "Essential Transmutation". You must choose a form immediately after casting:
    • Tap Skill again (Light Form): Enters "Affirmation of Whitening". Summons Whiteflame Dragon. Deals AoE Pyro & shreds Enemy RES. Best for Support.
    • Tap Attack (Dark Form): Enters "Negation of Darkness". Summons Dark Decay Dragon. Deals high Single-Target DMG & buffs own Vaporize/Melt. Best for Personal DPS.
  • The "Gotcha": Do not button mash! If you accidentally Normal Attack after E, you lock yourself into Dark Form and lose the team buffs.

Elemental Burst: Whitening Law / Smoldering Stars

  • Cost: 60 Energy | Cooldown: 15s
  • Analysis: The Burst effect changes based on your current form (Light vs Dark). It snapshots buffs on cast, so ensure Bennett's circle is active before pressing Q.

Talent Priority Order:

  1. Elemental Skill (Level 9+) - The source of his scaling.
  2. Elemental Burst (Level 8) - Good nuke damage.
  3. Normal Attack (Level 1 - Safe to ignore for Support).

Stat Requirements & ER Thresholds

Building Durin requires hitting his 2500 ATK passive requirement first, then balancing CRIT and ER.

Team Context ER Requirement
Solo Pyro (Off-Field) 160% - 180%
Double Pyro (e.g. w/ Bennett) 130% - 140%
With Raiden Shogun 110% - 120%

Substat Priority:

  1. ATK% (Until 2500 Total ATK)
  2. CRIT Rate / DMG (1:2 Ratio)
  3. Energy Recharge (Until requirement met)
  4. Elemental Mastery (Only for Vape/Melt teams)

Best Artifacts Comparison

Set Name Recommendation Reasoning
4pc Noblesse Oblige Best for Support Maximizes his team buffing potential. Essential for teams where Durin is the sole buffer.
4pc Crimson Witch Best for Damage Superior if you are vaporizing his hits (e.g. with Neuvillette).
4pc Emblem of Severed Fate Comfort Pick Solves ER issues easily, but lower damage ceiling than Crimson.

Weapon Rankings

Weapon Rank Performance Description
Athame Artis S+ 100% Signature. Massive CRIT Rate and grants Team ATK buff based on Burst hits.
Freedom-Sworn S 92% Excellent support utility. High EM is wasted on Mono-Pyro but great for Vape.
Wolf-Fang (R5) A+ 88% Strongest 4-star for personal damage. CRIT Rate passive is valuable.
Finale of the Deep A 80% Fontaine Craftable. High ATK% stat stick that helps reach the 2500 threshold.

Constellation Value

Is Durin worth investing beyond C0?

  • C1: Bringer of Blessing - (High Value) Removes the cooldown restriction on generating energy in Light Form. Makes rotations much smoother.
  • C2: Plum Blossoms Underfoot - (DPS Spike) Increases the damage of the "Whiteflame Dragon" coordinated attacks by 40%.
  • C6: Evil-Daunting Roar - (Whale Bait) Allows Durin to maintain both Light and Dark buffs simultaneously.

Verdict: Durin is complete at C0. C1 is a great quality-of-life upgrade for comfort.

Top Team Compositions

1. The "Hydro Dragon" Core (Vaporize)

  • Main DPS: Neuvillette / Mualani
  • Sub-DPS: Durin (Light Form)
  • Buffer: Furina
  • Sustain: Kazuha / Xilonen

Why it works: Durin provides consistent off-field Pyro application (no Circle Impact!) allowing Neuvillette to trigger Vaporize consistently. His RES shred from Light Form stacks with VV/Xilonen.

2. The Hexenzirkel Synergy (Mono-Pyro / Theme)

  • Main DPS: Klee / Arlecchino
  • Sub-DPS: Durin
  • Utility: Albedo / Mona
  • Healer: Bennett

Why it works: Version 6.2 introduced the "Hexerei" buff. Using Durin with other Hexenzirkel-related characters (Klee, Albedo, Mona) grants additional party-wide stats.

Rotations & Combos

Support Rotation (Light Form):
Support E Q > Durin E > TAP E (Enter Light) > Durin Q > Main DPS Combo

DPS Rotation (Dark Form):
Supports Setup > Durin E > TAP Normal Attack (Enter Dark) > Durin Q > N3C Spam

Frequently Asked Questions

Can Durin replace Xiangling?
Yes, specifically in teams that struggle with Energy (like Mualani/Navia teams). Durin has lower ER requirements but slightly lower raw damage ceiling than C6 Xiangling.

Does Durin work with Kinich?
Yes, Durin is an excellent Burning/Burgeon trigger for Kinich, providing consistent Pyro from range.

Data Source: Based on Version 6.2 Beta Values. Last Updated: December 2025

The Order vs. The Trailblaze: Why We Reject Paradise in Honkai: Star Rail

The Order vs. The Trailblaze: Why We Reject Paradise in Honkai: Star Rail

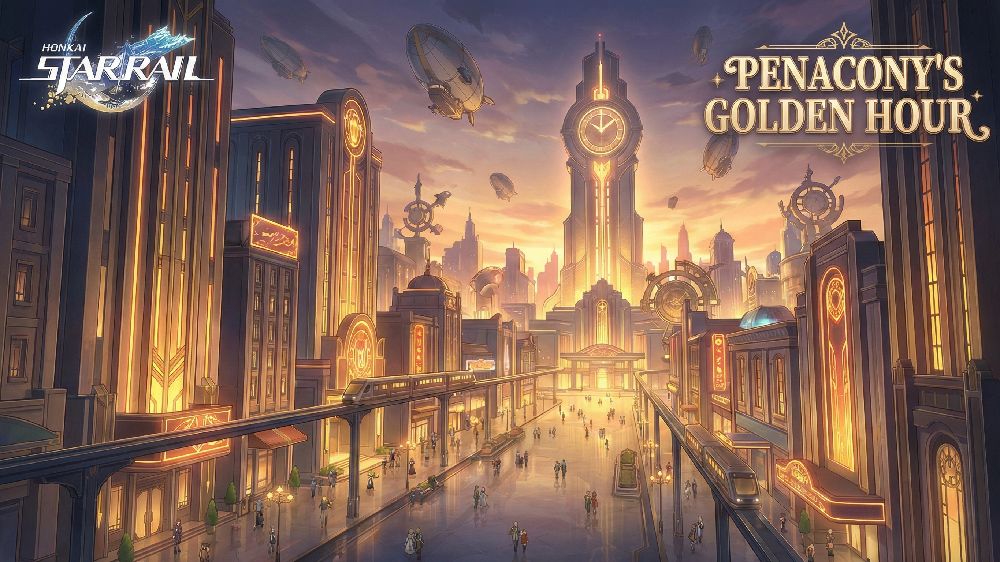
The dazzling cityscape of Penacony's Golden Hour dreamscape
The Golden Hour: A paradise where the party never stops.

Imagine a world where you never have to say goodbye. A world where your bank account never runs dry, the food never loses its taste, and the people you’ve lost are standing right in front of you, alive and smiling.

This isn’t heaven—it’s Penacony.

In the latest story arc of Honkai: Star Rail, HoYoverse traded the snowy wastelands of Belobog and the sci-fi politics of the Luofu for something far more insidious: a philosophical debate wrapped in a jazz age aesthetic.

At the center of this conflict is Sunday, a tragic antagonist who asks the player a question that has haunted philosophers for centuries: If a lie makes you happy, and the truth only brings pain, is it really a sin to choose the lie?

Most RPGs tell you to defeat the villain because they want to destroy the world. Star Rail asks you to defeat Sunday not because he hates you, but because he loves you too much to let you be free.

Let’s dive into the philosophy of Penacony and why the battle between The Order and The Trailblaze is the best storytelling HoYoverse has ever produced.

The Case for The Order: Sunday Was (Almost) Right

To understand Penacony, you have to understand that Sunday is not a villain in the traditional sense. He is a savior with a broken heart.

Sunday from Honkai Star Rail looking contemplative
Sunday: The benevolent antagonist who wanted to end suffering.

His philosophy is best explained through the childhood story of the Charmony Dove. When Sunday and his sister Robin found an injured bird, they faced a choice: keep it in a cage where it is safe, or let it fly and risk it dying.

Sunday chose the cage.

His logic is rooted in a twisted form of Utilitarianism. He looks at the universe and sees suffering. He sees people dying of star-sickness, poverty, and grief. To Sunday, the "Trailblaze"—the desire to explore and struggle—is just a romantic way of describing unnecessary pain.

If he uses the power of the Aeon Ena (The Order) to trap everyone in a "Sweet Dream," suffering is mathematically eliminated. The weak are protected. The dying live forever.

It is difficult to argue against him because, for some people, he is right. Think of Tizocic II, the Empress, or the frantic dreamers in the Golden Hour. For them, reality is a death sentence. Sunday’s "Order" offers them dignity.

The Flaw in the Dream: The Experience Machine

If Sunday’s plan creates a world of pure happiness, why does the Astral Express fight so hard to wake up?

The answer lies in a famous philosophical thought experiment by Robert Nozick called The Experience Machine.

"Imagine a machine that could simulate a perfect life for you. You would think you were a great artist, a hero, or a loved parent. You wouldn't know it was a simulation. Nozick argued that most humans would still reject the machine. Why?"

Because we want to do things, not just feel like we did them.

Acheron from Honkai Star Rail drawing her sword
Acheron represents the harsh truth that a dream without consequences is meaningless.

This is the fatal flaw of The Order. Acheron (representing The Nihility) serves as the perfect counter-weight to Sunday. She reminds us that a world without "The Bitter" makes "The Sweet" meaningless. If you cannot fail, your success has no value. If you cannot lose, your love has no stakes.

Sunday wanted to create a paradise, but by removing the possibility of failure, he accidentally created a graveyard. A place where nothing changes, nothing grows, and nothing matters.

The Will of the Trailblaze: The Courage to Fall

While Sunday represents Determinism (your fate is decided for your own safety), the Astral Express represents Existentialism (you create your own meaning through choices).

The emotional climax of the arc isn't just the boss fight; it's the ideological clash between Sunday and his sister, Robin.

Robin performing on stage in Honkai Star Rail
Robin believes humanity must have the freedom to struggle in order to grow.

Robin loves the bird just as much as Sunday does. But she realizes that protecting the bird from the sky strips it of its nature. To be a bird is to fly. To be human is to struggle.

When the Trailblazer answers Sunday’s final question—"Why does life slumber?"—with the answer "Because someday we will wake from our dreams," it is a declaration of intent. We don't wake up because reality is better. We wake up because reality is true.

The "Trailblaze" isn't about the destination; it's about the road. And you cannot walk the road if you are asleep.

The Hidden Tragedy of Sunday

There is one final detail that elevates this arc from "great" to "masterpiece," and it’s often overlooked.

In Sunday’s plan for the perfect dream, someone still had to manage the system. Someone had to stay awake to ensure the Order was maintained. That person was Sunday.

He wasn’t trying to become a god to rule over people; he was preparing to sacrifice his own eternal happiness to become the server administrator of paradise. He would have been the only lonely soul in a universe of bliss.

He was willing to be the eternal prisoner so that everyone else could be free.

Prepare for Your Next Warp

Ready to pull for your favorite character? Make sure you have enough resources.

Top up Honkai Star Rail at GameCharge.

Cheap, secure and instant delivery.

Get Oneiric Shards Now

Conclusion: Would You Take the Ticket?

The Penacony arc ends with the heroes rejecting the dream, but it doesn't shame those who wanted to stay. It simply acknowledges a hard truth: Waking up is painful.

Reality is messy. It is full of 50/50 losses, grief, and unfairness. But it is also the only place where we can truly connect with others. We reject the Order not because we hate happiness, but because we love freedom more.

So, I leave you with this question: If Sunday appeared before you today, offering a ticket to a dream where your biggest regret never happened and your loved ones were still here...

Would you have the strength to tear that ticket up?

Roblox's 'Darkest' Fashion Game

I Played Roblox's 'Darkest' Fashion Game, and It’s Actually Terrifying

By CrewposterX

I admit it: I am a snob. My Steam library is filled with FromSoftware titles, competitive shooters, and indie psychological horror games. To me, Roblox has always been that chaotic playground for the iPad generation—a landscape of screaming children and "brainrot" obbys.

So when I booted up Dress to Impress (DTI), currently one of the biggest games on the platform, I did it ironically. I expected to laugh at bad graphics, stomp on some toddlers in a fashion competition, and log off.

I loaded into the lobby. It looked like a Sephora had exploded. Hyper-feminine neon pinks, sterile white floors, and aggressive pop music blasting on a loop. The gameplay loop was exactly what you’d expect: you have five minutes to raid a closet, dress to a theme like "Y2K" or "Dark Academia," and walk a runway. It was shallow. It was competitive. It was harmless.

Or so I thought.

Then I walked over to the nail salon station to fix my avatar’s manicure, and I saw Her. The nail technician. She wasn't painting nails. She was crying.

I zoomed in. She looked terrified.

A week later, I logged back in. She was gone. Sitting in her chair was a smiling, dead-eyed duplicate who refused to acknowledge that she had replaced the original.

That was the moment I realized Dress to Impress isn't just a fashion simulator. It is an active Alternate Reality Game (ARG) featuring doppelgängers, a secret meat-processing cult, and a lore depth that rivals Five Nights at Freddy's. And it is terrifying.

Want to upgrade your avatar before the horror starts?
Buy Roblox Global epins at discounted price at https://www.gamecharge.net/buy-roblox-gift-card

Secure, Instant Delivery and Lower Price

The Uncanny Valley of High Fashion

Even before you find the secrets, DTI feels... off. If you've ever seen the movie The Neon Demon, you know the vibe. It’s a liminal space disguised as a luxury mall.

The avatars themselves are deep in the uncanny valley. To mimic high-fashion sketches, the character models have elongated limbs, snatched waists, and blank, unblinking stares. When you cycle through the animations to pose on the runway—specifically the infamous "Pose 28"—the movement is robotic, almost jerky.

It’s supposed to be "slay." It feels dystopian. You are surrounded by hundreds of identical, plastic faces, all fighting for the approval of a rating system that determines your rank. It is the perfect setting for horror because it already feels sterile and hostile.

The Case of Lana the Nail Tech

The horror in DTI is subtle, deployed in updates that the developers drop without patch notes, leaving the community to scream on Twitter.

The central figure of this nightmare is Lana, the NPC nail tech. For months, she was just a normal background character. Then, the "Lore Updates" began.

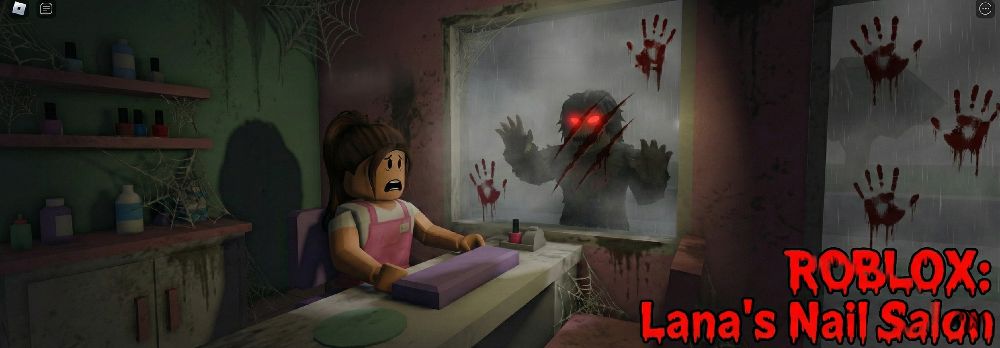
Visual Reference 1: The Window Stalker - Lana looking exhausted with Doppelgänger smiling through window
  1. The Fatigue: First, Lana started appearing with heavy bags under her eyes. She looked exhausted.
  2. The Stalker: Then, players noticed a figure standing outside the salon window. It was a duplicate of Lana, staring in, smiling maliciously.
  3. The Replacement: Finally, the window broke. The "Real" Lana vanished. She was replaced by "Lina"—an identical model with a slightly different dress and a smile that never falters.

This is classic Invasion of the Body Snatchers horror, spoon-fed to a demographic that might not even know the reference. It turned a "cute" game into a paranoia simulator. Every time you sat down to get your nails done, you were complicit in a kidnapping.

The Room Behind the Shelf

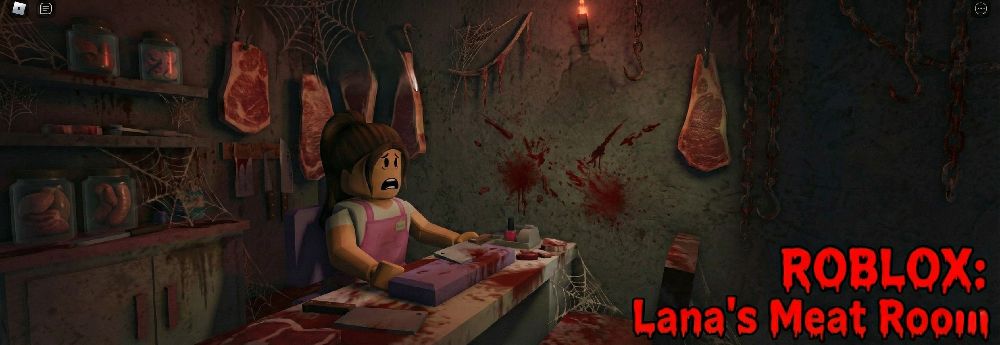
If the doppelgänger plot wasn't enough, the "hardcore" investigation community (yes, DTI has one) found the Meat Room. This isn't a glitch; it’s a hidden area accessed by interacting with a nondescript shelf near the dressing stalls, which slides open to reveal a dark void.

Transitioning from the main floor to this basement is a sensory shock. The aggressive, upbeat pop music cuts out instantly, replaced by a low, wet mechanical hum. The sterile white tiles of the salon vanish, giving way to walls textured to look disturbingly like raw, pulsing muscle fibers. It looks less like a basement and more like the inside of a stomach.

Visual Reference 2: The Meat Room - Red muscle-fiber walls, rusted cage, blood-stained dress

Inside, the environmental storytelling turns stomach-churning. Players found human-sized cages, rusted medical gurneys, and a singular, blood-stained dress on a mannequin. Scattered notes on the floor imply a gruesome industrial process. The diaries, written by a panicked Lana before her disappearance, mention "The Fortress"—a shadowy organization that seems to treat the fashion show not as a competition, but as a harvest.

The most chilling detail? A rack of clothes found in the corner of this dungeon. In the context of the meat walls and the cages, the implication hit the community like a truck: Are the "exclusive" textures and fabrics made from the losers? It recontextualizes the entire game. You aren't just dressing to impress; you are dressing to avoid being processed into next season's handbag.

The Forest Mother

The climax of this madness (so far) was the Halloween update, introducing the enigmatic "Forest Mother" questline. The developers stopped pretending this was a dress-up game entirely.

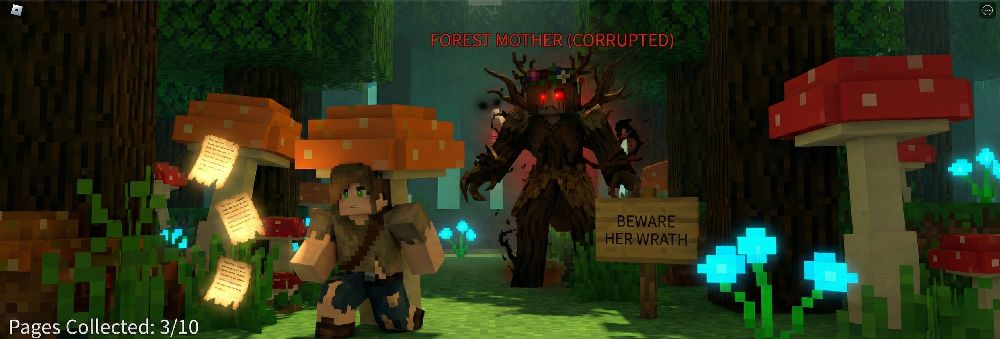
Accessing this quest required a ritualistic sequence of actions in the lobby, teleporting players out of the safety of the salon and into a pitch-black, fog-drenched woodland. Here, the game mechanic shifted instantly from "Dress Up" to "Survival Horror." You were stripped of your fashion tools and given a lantern with a dying battery. Your goal? To collect scattered pages of Lana’s final diary entries while avoiding Her.

Visual Reference 3: The Forest Silhouette - First-person lantern view, fog, shadowy silhouette in trees

The "Forest Mother"—or the entity the community has dubbed as such—stalks the treeline. She appears as a towering, distorted silhouette, often accompanied by the sound of weeping that gets louder as she approaches. The jump scares aren't cheap; they are built on dread and audio cues. At the center of the woods lies a dilapidated cabin. Inside, players found a bloody dress and a contract signed by "Agamemnon," confirming the darkest theory of all: the fashion house isn't just a business. It’s a cult. And the "models" are the currency.

The chat log, usually filled with "Omg cute skirt" and "1 star for you," descended into chaos. "HOW DO I ESCAPE?" and "WHAT IS THAT THING?" became the only messages. It was a masterclass in subverting expectations.

The "Trojan Horse" of Roblox

I walked into Dress to Impress to make fun of it. I walked out with a profound respect for the developers.

They are teenagers—Gen Z creators who understand modern horror better than many AAA studios. They know that gore isn't scary; wrongness is scary. They know that horror is most effective when it invades a "safe" space. Doki Doki Literature Club did it with dating sims; Dress to Impress is doing it with fast fashion.

So, if you consider yourself a "real" gamer, I dare you to log in. Put on a cute skirt. Walk the runway. But on your way out, stop by the nail desk. Look into the eyes of the woman sitting there.

And ask yourself: Is that the real Lana?

Buy Roblox Global epins at discounted price at https://www.gamecharge.net/buy-roblox-gift-card

Secure, Instant Delivery and Lower Price