RSS

Blog posts of '2025' 'December'

Lynette Guide: The Definitive Build & Analysis

Lynette, Multi-Function Magic Assistant

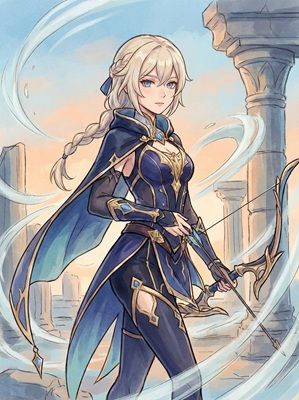
Lynette Genshin Impact Character Art
Rarity (4-Star)
Element Anemo (Ousia)
Weapon Sword
Best Role VV Support / C6 Driver
Stat Priority ER > ATK% > CRIT > EM
Tier B (Support) / A (C6 Main)

Lynette is a Multi-Function Magic Assistant who provides Anemo support with a side of Ousia utility. While often overshadowed by Kazuha or Sucrose in pure buffing, Lynette offers unique ATK buffs based on elemental variety, a taunting summon, and at C6, she unlocks Anemo Infusion to become a stylish on-field driver.


Pros

  • Free Unit (Given at AR 25).
  • Strong exploration utility (Speed dash).
  • C6 unlocks Anemo Infusion for DPS builds.
  • Synergizes with Furina (HP Drain/Heal mechanic).
  • Unique Taunt mechanic on Burst distracts enemies.

Cons

  • Lower crowd control than Sucrose/Kazuha (until C1).
  • Burst does not snapshot.
  • Single-target focused Skill.
  • Requires C6 to be a viable Main DPS.

Quick Guide (TL;DR)

If you don't have time for the math, here is the cheat sheet.

  • Best Artifact (Support): 4pc Viridescent Venerer (Mandatory).
  • Best Artifact (C6 DPS): 4pc Marechaussee Hunter (Furina Team) or 4pc Desert Pavilion.
  • Best Weapon (Support): Favonius Sword (Battery) or Sacrificial Sword.
  • Best Weapon (C6 DPS): Mistsplitter Reforged or Primordial Jade Cutter.
  • F2P Weapon: Fleuve Cendre Ferryman (Fishing Pipe) or Amenoma Kageuchi.
  • Main Stats: SANDS: ER% or ATK% | GOBLET: Anemo | CIRCLET: CRIT.
  • Talent Priority: Elemental Burst > Elemental Skill > Normal Attack (Only for C6).
  • Top Team: Lynette + Bennett + Xiangling + Furina/Yelan.
Pro Tip: Element Absorption Priority: Lynette's Bogglecat Box absorbs elements in this order: Cryo > Pyro > Hydro > Electro. This is unique (most Anemo absorb Pyro first). Use this to guarantee Cryo absorption for Freeze teams!

Need C6 Lynette?

Get Genesis Crystals to pull on Lyney or Arlecchino banners!

Top Up Secure & Fast via GameCharge

Ascension & Talent Materials

Category Material Name Source
Ascension Lumidouce Bell Fontaine (North of Court)
Boss Drop Artificed Spare Clockwork Component Coppelius (Icewind Suite)
Talent Books Teachings of Order Pale Forgotten Glory (Wed/Sat/Sun)
Common Mob Meshing Gear Clockwork Meka

Talent Breakdown & Mechanics

Elemental Skill: Enigmatic Feint

  • Enigma Thrust: A piercing Anemo strike. Deals Ousia-aligned DMG periodically.
  • HP Mechanics: Using the Skill restores HP (25% max HP) then drains HP (6% current HP/sec for 4s). This drain allows her to stack the Marechaussee Hunter set buff instantly.
  • Hold Mode: Enters a running state ("Pilfering Shadow"). Applying marks to enemies allows the Enigma Thrust to teleport to them instantly.

Elemental Burst: Magic Trick: Astonishing Shift

  • Cost: 70 Energy | Cooldown: 18s | Duration: 12s
  • Bogglecat Box: Summons a giant cat box that taunts enemies (Crowd Control) and fires Vivid Shots.
  • Vivid Shot: If the Box absorbs Hydro/Pyro/Cryo/Electro, it fires heavier element-aligned shots at intervals.

Passive: Sophisticated Synergy

  • Rainbow Buff: If the party has 1/2/3/4 different Elemental Types (including Anemo), the team's ATK increases by 8%/12%/16%/20% after using Burst. This encourages using her in "Rainbow" teams (e.g., Anemo + Pyro + Hydro + Electro).

Talent Priority Order:

  1. Elemental Burst (Level 9) - Main damage source for Support.
  2. Elemental Skill (Level 8) - Ousia damage and energy.
  3. Normal Attack (Level 1 / 9) - Max this if C6 Main DPS.

Stat Requirements & ER Thresholds

Lynette is energy hungry. As a solo Anemo support, she needs ~200% ER.

Build Type Weapon ER Requirement
Solo Anemo (Support) Favonius Sword 190% - 210%
C6 Main DPS DPS Weapon 130% - 150% (w/ Faruzan)
Triple Anemo (Lyney) Any 140% - 160%

Substat Priority (Support):

  1. Energy Recharge (Priority #1)
  2. CRIT Rate (For Favonius)
  3. ATK% / CRIT DMG (For personal damage)
  4. EM (Nice bonus for Swirls)

Substat Priority (C6 DPS):

  1. CRIT Rate / CRIT DMG (Target 60/120+)
  2. ATK%
  3. Energy Recharge

Best Artifacts Comparison

Set Name Role Reasoning
4pc Viridescent Venerer (VV) BiS Support Standard Anemo Support set. Shreds RES for PECH elements. Mandatory for Taser/National teams.
4pc Marechaussee Hunter C6 DPS Her Skill drains and heals HP, instantly triggering the 36% Crit Rate buff. Best for On-Field DPS builds.
4pc Noblesse Oblige Buffer Good if another teammate already has VV (e.g. Kazuha/Venti). Boosts team ATK.

Weapon Rankings

Weapon Type Performance Notes
Favonius Sword ER% S+ (Support) Generates particles for the whole team. Best option for Support Lynette.
Mistsplitter Reforged CRIT DMG S (C6 DPS) Best damage option for C6 Main DPS builds. Massive Elemental DMG bonus.
Fleuve Cendre Ferryman ER% A (F2P) Fishing Pipe. Gives ER and Crit Rate for Skill. Ugly but very effective.
Sacrificial Sword ER% A Double E casts allow for better energy generation and more damage.

Constellation Value

Lynette's C6 changes her role completely.

  • C1: A Cold Blade Like a Shadow - (CC) Enigma Thrust (Skill) generates a vortex that pulls enemies in. Adds Crowd Control to her kit. Very useful.
  • C2: Endless Mysteries - (App) Bogglecat Box (Burst) fires 2 Vivid Shots instead of 1. Doubles her elemental application. Crucial for reaction teams.
  • C6: Watchful Eye - (DPS Mode) Using Skill grants Anemo Infusion and 20% Anemo DMG Bonus for 6s. This turns her into an Anemo Keqing/Alhaitham driver.

Verdict: C1 is a great QoL. C6 opens up a whole new playstyle.

Top Team Compositions

1. Lyney Mono Pyro

  • Main DPS: Lyney
  • Buffer: Bennett
  • Defense: Dehya / Zhongli
  • Support: Lynette

Why it works: Lynette provides Anemo VV Shred, Taunt (Box), and ATK buff (Passive). Since she is not Pyro, she satisfies the "Elemental Variety" check to grant Lyney ATK buffs while still shredding Pyro RES.

2. C6 Anemo Driver (Taser/National)

  • Driver: Lynette (C6)
  • Sub-DPS: Faruzan (C6)
  • Hydro/Pyro: Xingqiu / Xiangling
  • Flex: Bennett / Yelan

Why it works: At C6, Lynette gains Anemo infusion. Paired with Faruzan's buffs, she deals respectful damage while driving off-field DPS units like Xingqiu or Xiangling.

Rotations & Combos

Support Rotation:
Element Applier > Lynette E Q > Main DPS

C6 Driver Combo:
Lynette E Q > N3D (3 Normal + Dash) Spam until infusion ends.

Frequently Asked Questions

Lynette vs. Sucrose/Kazuha?
Kazuha/Sucrose are generally better buffers/groupers. Lynette is a free alternative who offers unique ATK buffs (Passive) and Ousia application for Fontaine mechanics.

Why Marechaussee at C6?
Her Skill drains HP and then heals it. This HP fluctuation instantly stacks Marechaussee Hunter's 36% Crit Rate, making it her strongest DPS set.

Data Source: KQM Standards. Last Updated: December 2025

Heizou Guide: The Definitive Build & Analysis

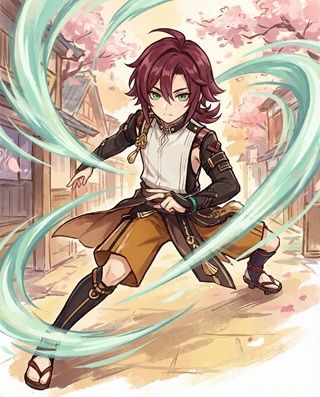
Shikanoin Heizou

Heizou Genshin Impact Character Art
Rarity (4-Star)
Element Anemo
Weapon Catalyst (Melee)
Best Role Anemo Driver / Burst DPS
Stat Priority CRIT > ATK% > EM > ER
Tier A (Driver) / B (Hypercarry)

Shikanoin Heizou is the first male Catalyst user and a martial artist who punches enemies with Anemo. He excels as an On-Field Driver for Taser (Electro-Charged) teams, swirling elements rapidly with his fists while building up "Declension" stacks for massive Elemental Skill nukes.


Pros

  • High personal damage multipliers on Skill (E).
  • Fast Normal Attacks make him an excellent driver (Beidou/Xingqiu).
  • Very flexible build paths (ADC or Full EM).
  • Unique and fun melee-catalyst playstyle.
  • Low Energy Cost (40) for Burst.

Cons

  • Crowd Control (Burst) is weaker than Kazuha/Venti.
  • Requires stack management for maximum damage.
  • Lack of defensive utility (squishy on-field).
  • Single-target focus on Skill can feel bad in AoE.

Quick Guide (TL;DR)

If you don't have time for the math, here is the cheat sheet.

  • Best Artifact (DPS): 4pc Viridescent Venerer (Always BiS for Team DMG) or 2pc/2pc ATK/Anemo (Personal DMG).
  • Best Artifact (EM): 4pc Viridescent Venerer (Mandatory).
  • Best Weapon: Tulaytullah's Remembrance (5⭐) or Skyward Atlas.
  • 4-Star Weapon: The Widsith (R5 rivals 5-stars) or Solar Pearl (BP).
  • F2P Weapon: Mappa Mare (Craftable) or Sacrificial Fragments (EM Build).
  • Main Stats (DPS): SANDS: ATK% | GOBLET: Anemo | CIRCLET: CRIT.
  • Main Stats (EM): SANDS: EM | GOBLET: EM | CIRCLET: EM.
  • Talent Priority: Elemental Skill > Normal Attack > Elemental Burst.
  • Top Team: Heizou + Xingqiu + Beidou + Fischl (Taser).
Pro Tip: Don't Hold E forever! Heizou gains "Declension" stacks by triggering Swirl reactions. Do a Normal Attack -> Charged Attack -> Burst combo to quickly build stacks via Swirls, then tap/hold E for an instant max-damage punch. Charging manually is a DPS loss.

Need Primogems for Heizou?

Get Genesis Crystals at a discounted price with instant delivery.

Top Up Secure & Fast via GameCharge

Ascension & Talent Materials

Category Material Name Source
Ascension Onikabuto Inazuma (Trees/Caves)
Boss Drop Runic Fang Ruin Serpent (Chasm)
Talent Books Teachings of Transience Violet Court (Mon/Thu/Sun)
Common Mob Treasure Hoarder Insignia Treasure Hoarders

Talent Breakdown & Mechanics

Elemental Skill: Heartstopper Strike

  • The Punch: Heizou charges up a powerful punch.
  • Declension Stacks: When holding the skill, he gains stacks.
    • 0 Stacks: Weak damage.
    • 4 Stacks (Max): Deals massive damage + increased AoE ("Conviction" effect).
  • Passive (Paradoxical Practice): When Heizou triggers a Swirl, he gains 1 Declension stack immediately. This allows you to gain max stacks without holding the button for seconds.

Elemental Burst: Windmuster Kick

  • Cost: 40 Energy | Cooldown: 12s
  • The Kick: Leaps into the air and kicks a Vacuum Slugger.
  • Windmuster Iris: If the kick hits enemies affected by Pyro/Hydro/Cryo/Electro, it explodes and deals delayed AoE damage of that element.
  • CC: Provides a brief pull effect, grouping small enemies for his punch.

Passive: Penetrative Reasoning

  • Team Buff: After Heizou hits an enemy with his Elemental Skill, increases the Elemental Mastery of all party members (except Heizou) by 80 for 10s. Great for reaction teams.

Talent Priority Order:

  1. Elemental Skill (Level 10) - The nuke.
  2. Normal Attack (Level 9) - Driver damage.
  3. Elemental Burst (Level 8) - Burst damage.

Stat Requirements & ER Thresholds

Heizou has a cheap burst (40 cost), so ER is not a huge concern.

Build Type Weapon ER Requirement
On-Field Driver Any 110% - 120%
Quickswap (Nuke) Any 120% - 140%

Substat Priority (ADC Build):

  1. CRIT Rate / CRIT DMG (Target 60/120+)
  2. ATK%
  3. Elemental Mastery (Nice bonus)
  4. Energy Recharge (Low priority)

Substat Priority (EM Build):

  1. Elemental Mastery (Everything)
  2. Energy Recharge

Best Artifacts Comparison

Set Name Role Reasoning
4pc Viridescent Venerer (VV) Mandatory Even for DPS Heizou, shredding RES for his teammates (Fischl/Xingqiu) provides more team DPS than a personal damage set.
2pc Anemo / 2pc ATK Selfish DPS Highest personal damage for his punch. Use only if another teammate holds VV (e.g. Faruzan).
4pc Desert Pavilion Attack Speed Good for Normal Attack spam, but usually not worth farming specifically for him.

Weapon Rankings

Weapon Type Performance Notes
The Widsith (R5) CRIT DMG S+ Heizou benefits from ALL 3 buffs (ATK, DMG%, EM). At R5, this rivals 5-star weapons for burst windows.
Skyward Atlas ATK% S Solid, consistent 5-star option. High base ATK helps his scaling.
Solar Pearl CRIT Rate A (BP) Perfect synergy. NAs buff Skill/Burst, Skill/Burst buff NAs. Great stat stick.
Sacrificial Fragments EM A (EM Build) For Full EM driver builds. Allows double E for more energy and Swirls.

Constellation Value

Heizou is fully functional at C0, but C6 is a massive damage spike.

  • C1: Juvenile Law - (QoL) Increases Normal Attack SPD by 15% and grants 1 Declension stack when taking the field. Makes comboing much smoother.
  • C2: Investigative Collection - (CC) Enhances Burst's pull effect and duration. Makes grouping enemies easier.
  • C6: Curious Casefiles - (Nuke) Each Declension stack increases Skill Crit Rate by 4% (16% Max) and Crit DMG by 32% (Max). This turns his punch into a tactical nuke.

Verdict: C1 makes him feel good. C6 makes him hit like a truck.

Top Team Compositions

1. Taser Driver

  • Driver: Heizou
  • Hydro: Xingqiu / Yelan
  • Electro: Fischl
  • Electro/Flex: Beidou / Kuki Shinobu

Why it works: Heizou attacks fast with Anemo punches, driving Xingqiu/Beidou bursts while constantly swirling Electro-Charged enemies (Double Swirl). He shreds RES with VV and deals heavy personal damage.

2. Hypercarry (One Punch Man)

  • Main DPS: Heizou
  • Buffer: Faruzan (C6)
  • Buffer: Bennett
  • Sub-DPS: Furina / Zhongli

Why it works: Focuses purely on Heizou's personal damage. Faruzan and Bennett buff his Skill to deal 100k+ damage per punch. Less consistent than Taser but bigger numbers.

Rotations & Combos

Quick Stack Combo (N1C):
Normal Attack > Charged Attack > Burst (Q) > Skill (E)

Tip: You don't need to hold E to charge it. Triggering Swirls with Normal/Charged/Burst attacks grants stacks. Once you have 4 symbols floating behind you, just tap E for max damage.

Frequently Asked Questions

Heizou vs. Sucrose?
Sucrose is a better support (EM Buff, TToDS, Grouping). Heizou deals more personal damage and is a better on-field driver due to faster attack animations and durability.

Is Full EM viable?
Yes, in Taser teams. Full EM Heizou swirls for 5k-6k per hit. It is very competitive with ADC (Attack/Dmg/Crit) builds, often cheaper to farm, but sees lower "big yellow numbers."

Data Source: KQM Standards. Last Updated: December 2025

Sayu Guide: The Definitive Build & Analysis

Sayu, the Mujina Ninja of the Shuumatsuban

Sayu Genshin Impact Character Art
Rarity (4-Star)
Element Anemo
Weapon Claymore
Best Role Healer / VV Support / Driver
Stat Priority ER > EM (Swirl) > ATK (Heal)
Tier B (Niche Healer/Driver)

Sayu is the sleepiest ninja of the Shuumatsuban. She is a unique hybrid of healer and driver. Her Elemental Skill allows her to roll around the battlefield, spreading elements (Swirl) while dealing damage, making her surprisingly effective in teams that require constant elemental application.


Pros

  • Best overworld exploration skill (fast rolling).
  • Can heal and shred RES (VV) simultaneously.
  • Swirls multiple times during her roll (Driver potential).
  • Passive prevents startling Crystalflies.

Cons

  • Healing scales on ATK (squishy) or EM (C6), making builds split.
  • Energy hungry (80 cost burst).
  • Rolling can be interrupted by heavy attacks.
  • Outclassed by Jean (instant heal) and Kazuha (buffs).

Quick Guide (TL;DR)

If you don't have time for the math, here is the cheat sheet.

  • Best Artifact: 4pc Viridescent Venerer (Mandatory for Support).
  • Alt Artifact: 4pc Ocean-Hued Clam (Healer/Driver).
  • Best Weapon: Wolf's Gravestone (ATK Buff) or Beacon of the Reed Sea.
  • F2P Weapon: Katsuragikiri Nagamasa (Craftable - Solves Energy).
  • Support Weapon: Favonius Greatsword (Team Battery - BiS).
  • Main Stats: SANDS: ER% or EM | GOBLET: EM or ATK% | CIRCLET: Healing Bonus or EM.
  • Talent Priority: Elemental Burst > Elemental Skill > Normal Attack.
  • Top Team: Sayu + Xiangling + Kaeya + Rosaria (Sayunado).
Pro Tip: Roll to Win: In combat, use Hold E to roll. If you roll into an element (Pyro/Hydro/Electro/Cryo), you absorb it. You can then roll into enemies to apply that element + Anemo constantly, triggering endless Swirls.

Need C6 Sayu?

Get Genesis Crystals to pull on standard or featured banners!

Top Up Secure & Fast via GameCharge

Ascension & Talent Materials

Category Material Name Source
Ascension Crystal Marrow Yashiori Island (Inazuma)
Boss Drop Marionette Core Maguu Kenki (Inazuma)
Talent Books Teachings of Light Violet Court (Wed/Sat/Sun)

Talent Breakdown & Mechanics

Elemental Skill: Yoohoo Art: Fuuin Dash

  • Fuufuu Windwheel: Sayu curls into a ball. Holding E lets you roll for up to 10s.
  • Elemental Absorption: If she touches Hydro/Pyro/Cryo/Electro while rolling, she absorbs it and deals additional damage of that type.
  • Swirl: While rolling, she triggers Swirl reactions periodically on enemies she touches.

Elemental Burst: Yoohoo Art: Mujina Flurry

  • Cost: 80 Energy | Cooldown: 20s
  • Muji-Muji Daruma: Summons a Daruma that heals nearby characters or attacks enemies.
  • Logic: If character HP > 70%, it attacks enemies (Anemo DMG). If HP < 70%, it heals the active character (Scales on ATK).

Passive: Someone More Capable

  • Healing on Swirl: Whenever Sayu triggers a Swirl, she heals all party members for 300 HP + 1.2 per point of her Elemental Mastery. This incentivizes building full EM for both damage and healing.

Talent Priority Order:

  1. Elemental Burst (Level 9) - Main healing source.
  2. Elemental Skill (Level 8) - Damage.
  3. Normal Attack (Level 1) - Ignore.

Stat Requirements & ER Thresholds

Sayu needs high ER. C6 changes her build from ATK% to Full EM.

Constellation Weapon ER Requirement
C0 - C5 Favonius Greatsword 180% - 200%
C0 - C5 Katsuragikiri (Craftable) 160% - 180%
C6 Mailed Flower (EM) 200%+

Substat Priority (C0-C5):

  1. Energy Recharge (Until requirement met)
  2. ATK% (Healing scaling)
  3. Elemental Mastery (Swirl dmg / Passive healing)

Substat Priority (C6):

  1. Elemental Mastery (Heals & Damage scale off this now)
  2. Energy Recharge
  3. ATK%

Best Artifacts Comparison

Set Name Role Reasoning
4pc Viridescent Venerer (VV) Mandatory Shreds 40% Elemental RES. Sayu is an Anemo Support; she must wear this.
4pc Gilded Dreams Dendro Teams If someone else has VV (e.g. Kazuha), or in Dendro teams where VV is useless, this maximizes her EM for Swirl/Heal.
4pc Noblesse Oblige Buffer Decent for ATK buffing, but usually VV is better for team DPS.

Weapon Rankings

Weapon Type Performance Notes
Favonius Greatsword ER% S+ High ER and batteries the team. Best for support. Requires Crit Rate.
Katsuragikiri Nagamasa ER% S (F2P) Inazuma Craftable. Passive regenerates energy automatically. Solves her ER issues better than any other weapon for personal uptime.
Mailed Flower EM A (C6) Highest EM Claymore (Event). Best for C6 healing/swirl scaling if you have enough ER artifacts.
Wolf's Gravestone ATK% A (Healer) Massive ATK for C0-C5 healing scaling. Buffs team ATK.

Constellation Value

Sayu's C1 is essential for consistency. C6 transforms her build.

  • C1: Multi-Task no Jutsu - (Core) Removes the HP limit on her Burst. Now the Daruma attacks AND heals simultaneously. Essential for reliable swirl support.
  • C2: Egress Prep - (Damage) Increases Skill DMG by 3.3% for every 0.5s spent rolling. Makes "Roll to Win" playstyle viable.
  • C6: Sleep O'Clock - (Game Changer) The Daruma's healing and damage now scale with Sayu's Elemental Mastery. This allows you to build Full EM (for Swirls) without sacrificing Healing output.

Verdict: C1 is mandatory. C6 is optimal.

Top Team Compositions

1. Sayunado (Rolling National)

  • Driver: Sayu
  • Pyro: Xiangling
  • Cryo: Kaeya / Rosaria
  • Buffer: Bennett

Why it works: Xiangling's Pyronado and Kaeya's Glacial Waltz follow the active character. Sayu rolls into enemies, bringing these spinning bursts with her, triggering rapid Melt reactions while shredding RES with VV.

2. Aggravate Healer

  • Main DPS: Keqing / Yae Miko / Cyno
  • Dendro: Nahida / Baizhu
  • Electro: Fischl
  • Healer/VV: Sayu

Why it works: In teams that need an Anemo healer (because Kazuha doesn't heal), Sayu fits perfectly. She shreds Electro RES and heals the team.

Rotations & Combos

Standard Support Rotation:
Sayu Q > Sayu Tap E (Particles) > Swap to Main DPS

Driver Rotation (Rolling):
Sub-DPS Bursts (Xiangling/Kaeya) > Sayu Hold E (Roll around counter-clockwise) > Sayu E (Kick) at end.

Frequently Asked Questions

Jean vs. Sayu?
Jean has instant team healing (Burst) and better energy generation. Sayu is more fun (rolling), better for exploration, and better at driving off-field elements continuously. Jean is generally stronger in meta.

Does she need C6?
For healing build? No (ATK scaling works fine). For Swirl/Reaction build? Yes. C6 allows you to stack full EM without losing healing power.

Data Source: KQM Standards. Last Updated: December 2025

Sucrose Guide: The Definitive Build & Analysis

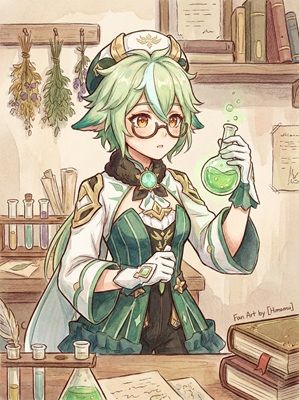
Background of Sucrose

Sucrose Genshin Impact Character Art
Rarity (4-Star)
Element Anemo
Weapon Catalyst
Best Role EM Buffer / On-Field Driver
Stat Priority EM > ER > ATK%
Tier SS (Reaction Teams)

Sucrose is a bio-alchemist of the Knights of Favonius and one of the premier 4-star supports in the game. Unlike Kazuha who buffs Elemental DMG, Sucrose shares massive amounts of Elemental Mastery with her team, making her the mathematical ceiling for Amplifying Reactions (Vaporize/Melt).


Pros

  • Grants huge EM buffs to the party (20% of her own).
  • Excellent driver for Taser (Electro-Charged) teams.
  • Can hold Thrilling Tales of Dragon Slayers (TTDS).
  • Guoba Swirl mechanic allows advanced Pyro application.
  • C6 provides Elemental DMG bonus, mimicking Kazuha.

Cons

  • Burst has an 80 Energy Cost (needs C1 or Sac Frags).
  • Auto-targeting on Burst can be frustrating (throws it away).
  • Crowd Control is weaker/slower than Venti/Kazuha.
  • Burst absorption can be difficult to control (e.g., absorbing Pyro instead of Hydro).

Quick Guide (TL;DR)

If you don't have time for the math, here is the cheat sheet.

  • Best Artifact: 4pc Viridescent Venerer (Mandatory).
  • Alt Artifact: 4pc Instructor (Lower personal dmg, higher team EM).
  • Best Weapon: Sacrificial Fragments (EM + Skill Reset).
  • Support Weapon: Thrilling Tales (TTDS) (48% ATK Buff).
  • F2P Weapon: Mappa Mare (Craftable) or Magic Guide (3-Star).
  • Main Stats: SANDS: EM | GOBLET: EM | CIRCLET: EM.
  • Talent Priority: Elemental Skill = Elemental Burst > Normal Attack.
  • Top Team: Sucrose + Xiangling + Xingqiu + Bennett (National).
Pro Tip: Guoba Swirl: In the National Team, summon Guoba (Xiangling E) and then use Sucrose's Skill (E) near him. Guoba applies Pyro to entities (including Sucrose's wind spirit), allowing Sucrose to swirl Pyro even if the enemy has a different aura.

Need C6 Sucrose?

Save your Starglitter or pull on featured banners!

Top Up Secure & Fast via GameCharge

Ascension & Talent Materials

Category Material Name Source
Ascension Sweet Flower Found Everywhere (Mondstadt/Liyue)
Boss Drop Hurricane Seed Anemo Hypostasis (Mondstadt)
Talent Books Teachings of Freedom Forsaken Rift (Mon/Thu/Sun)

Talent Breakdown & Mechanics

Elemental Skill: Astable Anemohypostasis Creation - 6308

  • CC & Energy: Summons a wind spirit that pulls enemies in and launches them. Generates 3.5 energy particles (excellent battery).
  • Charges: Has 1 charge by default, but 2 at C1. This is massive for energy generation.

Elemental Burst: Forbidden Creation - Isomer 75 / Type II

  • Cost: 80 Energy | Cooldown: 20s
  • The Butterfly: Throws a concoction that creates a Large Wind Spirit. It pulls enemies and deals DoT.
  • Absorption: Absorbs Hydro/Pyro/Cryo/Electro and deals additional damage of that type.
  • EM Buff (A4): While active, increases the EM of all party members (except Sucrose) by 20% of Sucrose's EM.

Passive: Mollis Favonius

  • EM Share: When Sucrose hits an enemy with E or Q, she grants 50 EM to party members of the matching element (A1 Passive). Combined with her A4 passive, she can grant 200+ EM to the team effortlessly.

Talent Priority Order:

  1. Elemental Skill (Level 8) - Primary damage source.
  2. Elemental Burst (Level 8) - Absorption damage.
  3. Normal Attack (Level 1-6) - Level only if playing "Driver" Sucrose.

Stat Requirements & ER Thresholds

Sucrose needs EM for buffing/swirling and ER for bursting. At C1 with Sac Frags, her ER needs drop significantly.

Team Context Constellation/Weapon ER Requirement
Support (National) C1 + Sacrificial Frags 130% - 140%
Support (National) C0 + TTDS 200% - 220%
Driver (Taser) On-Field 100% - 120%

Substat Priority:

  1. Elemental Mastery (Aim for 800-1000 total)
  2. Energy Recharge (Until requirement met)
  3. ATK% (Increases Swirl slightly)

Best Artifacts Comparison

Set Name Role Reasoning
4pc Viridescent Venerer Mandatory Shreds 40% Elemental RES and boosts Swirl DMG by 60%. There is almost no reason to run anything else.
4pc Instructor Niche Support If you are playing a reaction team where VV shred is less important (e.g. some Dendro teams), this gives 120 EM to the team.
2pc EM / 2pc EM Placeholder Only use while farming for VV. The RES shred from 4pc VV is too good to pass up.

Weapon Rankings

Weapon Type Performance Notes
Sacrificial Fragments EM S+ Highest 4-star EM stat (221). Skill Reset gives more particles and crowd control. The definitive Sucrose weapon.
Thrilling Tales (TTDS) HP% S (Buff) 3-Star weapon. Gives 48% ATK to your carry. Essential for hypercarry teams (Xiangling/Beidou).
Magic Guide EM A (F2P) 3-Star stat stick. If you don't have Sac Frags, use this for the 187 EM substat.
Hakushin Ring ER% A (Electro) Craftable. Good for Taser teams as it buffs Electro DMG.

Constellation Value

Sucrose's C1 is her most important upgrade.

  • C1: Clustered Vacuum Field - (Essential) Grants 1 additional charge to Elemental Skill. More particles, more crowd control. Game changing.
  • C2: Beth: Unbound Form - (Duration) Increases Burst duration by 2s. Better CC and application.
  • C6: Chaotic Entropy - (Damage) If Burst absorbs an element, all party members get 20% Elemental DMG Bonus for that element. This makes her comparable to Kazuha for buffing.

Verdict: C1 is mandatory. C6 is great.

Top Team Compositions

1. Sucrose National

  • Driver/Buffer: Sucrose
  • Pyro App: Xiangling
  • Hydro App: Xingqiu
  • Buffer/Heal: Bennett

Why it works: Sucrose shares EM (buffing Xiangling's Vapes) and shreds Pyro/Hydro RES (VV). She drives Xingqiu's rain swords with her Normal Attacks.

2. Taser (Electro-Charged)

  • Driver: Sucrose (Hakushin/Sac)
  • Sub-DPS: Beidou
  • Sub-DPS: Fischl
  • Hydro: Xingqiu

Why it works: Sucrose's Swirls trigger chain reactions. Electro-Charged keeps both Hydro and Electro on the enemy, allowing her to Swirl both elements simultaneously (Double Swirl).

Rotations & Combos

National Rotation:
Bennett Q E > Xingqiu Q E > Xiangling Q E > Sucrose N1 E Q (Swirl Pyro) > Sucrose NA Spam

Tip: Always weave a Normal Attack (N1) before using her Skill/Burst to apply the element you want to swirl, or to drive Xingqiu's rain swords.

Frequently Asked Questions

Sucrose vs. Kazuha?
For **Vaporize/Melt**, Sucrose is often better due to the EM buff (unless Kazuha is C2). For **Freeze/Mono-Element**, Kazuha is better due to DMG% buff.

Is she hard to play?
She requires understanding of Swirl mechanics. Specifically, absorbing the *correct* element with her Burst (usually Hydro or Pyro) can be tricky. Practice the Guoba Swirl!

Data Source: KQM Standards. Last Updated: December 2025

Faruzan Guide: The Definitive Build & Analysis

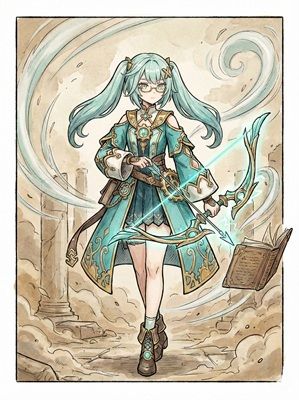
Background of Faruzan 

Faruzan Genshin Impact Character Art
Rarity (4-Star)
Element Anemo
Weapon Bow
Best Role Dedicated Anemo Buffer
Stat Priority ER > CRIT Rate (Favonius) > ATK
Tier SS (For Xiao/Wanderer)

Faruzan is the "Madam" of Haravatat and the most essential support character for any Anemo DPS. She provides a trifecta of buffs: Anemo DMG Bonus, Anemo RES Shred, and Flat DMG increase. At C6, she also grants 40% Anemo Crit DMG, making her indispensable for Xiao and Wanderer.


Pros

  • Massive Anemo DMG Buffs (best in slot for Anemo).
  • Shreds Anemo RES (rare debuff).
  • C6 provides 40% Crit DMG and perfect grouping.
  • Great Tenacity of the Millelith holder (C6 only).

Cons

  • Extreme Energy Issues at C0 (needs 300%+ ER).
  • Clunky Charged Attack gameplay pre-C6.
  • Circle Impact (Burst moves in a triangle, can miss).
  • Virtually useless outside of Anemo teams.

Quick Guide (TL;DR)

If you don't have time for the math, here is the cheat sheet.

  • Best Artifact (C0-C5): 4pc Noblesse Oblige or 4pc Emblem (If struggling with ER).
  • Best Artifact (C6): 4pc Tenacity of the Millelith (100% Uptime).
  • Best Weapon: Favonius Warbow (Mandatory for Energy).
  • Alt Weapon: Elegy for the End (5⭐ - Only if ER is managed).
  • F2P Weapon: End of the Line (The Fish Bow) for ER.
  • Main Stats: SANDS: ER% | GOBLET: Anemo or ATK% | CIRCLET: CRIT Rate.
  • Talent Priority: Elemental Burst > Elemental Skill > Normal Attack.
  • Top Team: Faruzan + Xiao/Wanderer + Bennett + Zhongli.
Pro Tip: Favonius is King. Faruzan's energy requirements are so high that running anything other than Favonius Warbow at C0-C5 is usually a mistake. Even at C6, the white particles are vital for Xiao.

Need C6 Faruzan?

Get Genesis Crystals to pull on Wanderer/Xiao banners!

Top Up Secure & Fast via GameCharge

Ascension & Talent Materials

Category Material Name Source
Ascension Redcrest (Henna Berry) Sumeru Desert (Cactus)
Boss Drop Light Guiding Tetrahedron ASIMON (Sumeru Desert)
Talent Books Teachings of Admonition Steeple of Ignorance (Mon/Thu/Sun)

Talent Breakdown & Mechanics

Elemental Skill: Wind Realm of Nasamjnin

  • Manifest Gale: Deals AoE Anemo DMG.
  • Charged Shot (Hurricane Arrow): After using Skill, her next Charged Shot creates a "Pressurized Collapse" that groups enemies.
  • Particle Generation: She generates ZERO particles on cast. She ONLY generates particles (2) when the Charged Shot hits. This clunky mechanic is why she needs high ER.

Elemental Burst: The Wind's Secret Ways

  • Cost: 80 Energy | Cooldown: 20s
  • Polyhedron: Deploys a "Dazzling Polyhedron" that moves in a triangular path.
  • The Buffs:
    • Anemo DMG Bonus: Increases Anemo DMG for all party members.
    • Anemo RES Shred: Decreases Anemo RES of enemies hit by 30%.
  • Uptime: Lasts 12s (18s at C2). Essential for maximizing Xiao/Wanderer.

Passive: Lost Wisdom of the Seven Caverns

  • Flat DMG Buff: When characters deal Anemo DMG, it is increased by 32% of Faruzan's Base ATK. Similar to Bennett, but for Anemo.
  • Significance: This encourages leveling her weapon to 90 and using high base ATK bows (Skyward/Elegy) if you can meet ER needs.

Talent Priority Order:

  1. Elemental Burst (Level 10) - Improves DMG bonus.
  2. Elemental Skill (Level 6) - Utility.
  3. Normal Attack (Level 1) - Ignore.

Stat Requirements & ER Thresholds

Faruzan has the most punishing ER requirements in the game at C0.

Constellation Weapon ER Requirement
C0 - C5 Favonius Warbow 280% - 300%+
C0 - C5 Non-ER Weapon Impossible (Don't do it)
C6 Any 160% - 180%

Substat Priority:

  1. Energy Recharge (Until burst is consistent - priority #1)
  2. CRIT Rate (To trigger Favonius)
  3. Base ATK (Weapon/Level only - artifacts don't help much)

Best Artifacts Comparison

Set Name Role Reasoning
4pc Tenacity of the Millelith BiS at C6 Her C6 triggers "Pressurized Collapses" off-field, which counts as Skill DMG. This gives 100% uptime on the 20% ATK buff. Do not use pre-C6.
4pc Noblesse Oblige BiS at C0-C5 Standard buffing set. Since she bursts every rotation (hopefully), this is reliable.
2pc Emblem / 2pc Exile Energy Starved If you can't reach 300% ER, ignore set bonuses and just stack ER pieces.

Weapon Rankings

Weapon Type Performance Notes
Favonius Warbow ER% S+ The only real choice for C0-C5. High ER + Particles. Essential.
Elegy for the End ER% S (C6 Only) 5-Star. High Base ATK boosts her passive. Team buff is great. Only viable if you have C6 to solve energy issues.
End of the Line ER% B Sumeru Fishing weapon. Decent ER stick if you don't have Favonius.

Constellation Value

Faruzan has the most valuable C6 of any 4-star in the game.

  • C2: Overzealous Intellect - (Duration) Extends Burst by 6s. This allows the buffs to last through Xiao/Cyno's entire field time. Very important.
  • C4: Divine Comprehension - (Energy) Restores energy based on enemies hit. Helps slightly, but not enough to drop Favonius.
  • C6: The Wondrous Path of Truth - (God Tier)
    • Grants 40% Anemo CRIT DMG.
    • Triggers Pressurized Collapses every 3s off-field (Grouping + Particles + Tenacity Proc).
    • Solves her Energy issues completely.

Verdict: C6 is a different character. Try to get it if you main Xiao/Wanderer.

Top Team Compositions

1. Wanderer Hypercarry

  • Main DPS: Wanderer
  • Buffer: Faruzan
  • Buffer/Heal: Bennett
  • Shield: Zhongli / Thoma

Why it works: Faruzan maximizes Wanderer's damage. With C6, she also groups enemies so Wanderer's Charged Attacks hit more targets.

2. Xiao FFXX

  • Main DPS: Xiao
  • Buffer: Faruzan
  • Plunge Support: Xianyun
  • Buffer: Furina

Why it works: The highest damage ceiling team in the game. Faruzan C6 + Xianyun + Furina turns Xiao into a monster.

Rotations & Combos

C0 Rotation (Painful):
Faruzan E -> Charged Shot -> Q

C6 Rotation (Smooth):
Faruzan Q (That's it. She does everything else automatically.)

Frequently Asked Questions

Is she unusable at C0?
Not "unusable," but very frustrating. You spend 3 seconds on field charging a shot just to get energy. If you have 300% ER, she works fine.

Is C6 Faruzan better than Bennett?
For Anemo carries? Yes. The shred + crit damage + grouping outweighs raw ATK, though you usually run both anyway.

Data Source: KQM Standards. Last Updated: December 2025

Traveler (Anemo) Guide: The Definitive Build & Analysis

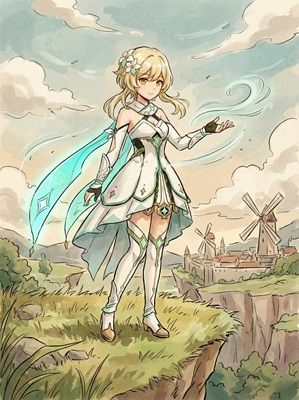
Background of Traveler (Anemo)

Traveler Anemo Genshin Impact Character Art
Rarity (5-Star)
Element Anemo
Weapon Sword
Best Role VV Support / C6 Shredder
Stat Priority EM > ER > ATK%
Tier B (Starter Value)

The Anemo Traveler is the first character you play and your introduction to the Swirl element. While often replaced by Sucrose or Kazuha later, they offer unique utility at C6, shredding both Anemo and Elemental Resistance, making them a viable budget support for Xiao or Wanderer teams.


Pros

  • Free C6 (Available via storyline/AR).
  • C6 shreds 20% Anemo RES and 20% Elemental RES.
  • Short Elemental Skill cooldown (Palm Vortex).
  • Can pull enemies (crowd control) at low levels.

Cons

  • Tornado Problem: Burst carries small enemies away from you.
  • Skill makes you stationary and vulnerable.
  • Strictly outclassed by Sucrose (EM Buff) and Kazuha (DMG Buff).
  • Targeting the Burst can be frustrating.

Quick Guide (TL;DR)

If you don't have time for the math, here is the cheat sheet.

  • Best Artifact: 4pc Viridescent Venerer (Mandatory).
  • Alt Artifact: 4pc Noblesse Oblige (Only if another Anemo uses VV).
  • Best Weapon: Freedom-Sworn (Team Buffs).
  • F2P Weapon: Iron Sting (Craftable EM) or Amenoma Kageuchi.
  • Support Weapon: Favonius Sword (Team Battery - Best choice).
  • Main Stats: SANDS: ER% or EM | GOBLET: Anemo or EM | CIRCLET: EM or CRIT.
  • Talent Priority: Elemental Burst > Elemental Skill > Normal Attack.
  • Top Team: Traveler + Xiao + Faruzan + Bennett (Anemo Shred Team).
Pro Tip: Wall Pinning: When using the Elemental Burst (Tornado), try to aim it towards a wall or a large enemy. This prevents the tornado from carrying enemies out of your melee range, allowing you to hit them while they are trapped.

Switching to Dendro Traveler?

Get Genesis Crystals to pull for Nahida instead!

Top Up Secure & Fast via GameCharge

Ascension & Talent Materials

Category Material Name Source
Ascension Windwheel Aster Statues of the Seven (Mondstadt)
Boss Drop None (Specific) Traveler uses Gemstones from various bosses.
Talent Books Freedom / Resistance / Ballad Mondstadt Domain (Rotates required type per level)

Talent Breakdown & Mechanics

Elemental Skill: Palm Vortex

  • Tap vs Hold: Hold E creates a vacuum that pulls enemies and deals continuous Anemo DMG. At the end, it explodes.
  • Absorption: If the vortex contacts Hydro/Pyro/Cryo/Electro, it deals additional Elemental damage.
  • Vulnerability: You are stationary while holding E. Be careful not to get hit.

Elemental Burst: Gust Surge

  • Cost: 60 Energy | Cooldown: 15s
  • The Tornado: Summons a tornado that moves forward, pulling in small enemies.
  • Mechanic Issue: The tornado moves away from you. This is bad for melee DPS. However, if it hits a large enemy (Boss/Lawachurl) or a wall, it stops moving and deals massive damage ticks in place.
  • C6 Utility: At C6, targets damaged by Gust Surge have their Anemo RES reduced by 20%. If an element is absorbed, that element's RES is also reduced by 20%.

Passive: Slitting Wind

  • Extra Hit: The last hit of a Normal Attack combo sends a wind blade. Useful for small chip damage or puzzles, but negligible in combat.

Talent Priority Order:

  1. Elemental Burst (Level 9) - Main utility and damage.
  2. Elemental Skill (Level 6) - Energy generation.
  3. Normal Attack (Level 1) - Ignore.

Stat Requirements & ER Thresholds

Traveler needs enough ER to burst off-cooldown to maintain the RES shred (C6).

Team Context Weapon ER Requirement
Solo Anemo (Support) Favonius Sword 180% - 200%
Solo Anemo (Support) Iron Sting 220%+
Double Anemo (Xiao/Scara) Any 150% - 160%

Substat Priority:

  1. Energy Recharge (Until requirements met)
  2. Elemental Mastery (Swirl Damage)
  3. CRIT Rate (For Favonius Sword proc)
  4. ATK% (Low priority)

Best Artifacts Comparison

Set Name Role Reasoning
4pc Viridescent Venerer (VV) Mandatory Shreds 40% Elemental RES on Swirl. This is the main reason to run Anemo Traveler in most teams.
4pc Noblesse Oblige Alt Support Use ONLY if another team member (like Kazuha/Sucrose) already holds VV. Provides 20% ATK.
2pc Emblem / 2pc VV Sub-DPS For personal damage or if you can't complete a 4pc set. Generally not recommended over 4pc VV.

Weapon Rankings

Weapon Type Performance Notes
Favonius Sword ER% S+ Solves energy issues for Traveler and the team. Best utility weapon.
Iron Sting EM A (Swirl) Craftable F2P option. Good for Swirl damage if you have enough ER from artifacts.
Freedom-Sworn EM S (Buff) Premium option. Buffs team Normal Attack DMG. Great if you happen to have it.
Skyward Blade ER% A High Base ATK + ER. Good stat stick.

Constellation Value

You get all constellations for free by playing the game.

  • C2: Uprising Whirlwind - (ER) Energy Recharge is increased by 16%. Simple but very effective stat boost.
  • C6: Intertwined Winds - (The Reason) Targets damaged by Gust Surge have their Anemo RES decreased by 20%. If an elemental absorption occurred, then their RES towards the corresponding element is also decreased by 20%. This makes Traveler a viable support for Xiao/Wanderer.

Verdict: C6 is the only reason to play Anemo Traveler in late game.

Top Team Compositions

1. Budget Morgana (Freeze)

  • Main DPS: Ganyu / Ayaka
  • Support: Anemo Traveler (VV)
  • Hydro: Mona / Barbara
  • Cryo: Kaeya / Rosaria

Why it works: Traveler triggers VV shred for Cryo. Against frozen enemies, the Tornado will not push them away (they are stuck), solving the main issue of the kit.

2. Anemo Battery/Shred

  • Main DPS: Xiao / Wanderer
  • Battery: Anemo Traveler (C6)
  • Buffer: Bennett
  • Shield: Zhongli

Why it works: Before you get Faruzan C6, Anemo Traveler is a decent substitute. C6 shreds Anemo RES by 20%, increasing Xiao's damage.

Rotations & Combos

Standard VV Rotation:
Element Applier > Traveler Tap E (Swirl) > Traveler Q > Main DPS

Tip: Never hold E in combat unless you really need to group small slimes. The duration is too long and exposes you to damage.

Frequently Asked Questions

Is Anemo Traveler better than Sucrose?
No. Sucrose offers Elemental Mastery sharing, better grouping, and can hold TToDS. Anemo Traveler is only used if you don't have Sucrose/Kazuha or specifically need C6 Anemo Shred.

Should I level talents?
Only level the Burst if you want more damage. The Shred (VV) works regardless of talent levels.

Data Source: KQM Standards. Last Updated: December 2025

Chasca Guide: The Definitive Build & Analysis

Background of Chasca 

Chasca Genshin Impact Character Art
Rarity (5-Star)
Element Anemo
Weapon Bow
Best Role Nightsoul Main DPS
Stat Priority CRIT > ATK% > EM (If Nuke)
Tier S (Rainbow Carry)

Chasca is the Peacemaker of the Flower-Feather Clan and a unique Anemo DPS from Natlan. Unlike Wanderer or Xiao, she is a "Rainbow Carry" who deals massive damage by absorbing elements from her teammates. She floats in mid-air and fires homing missiles that convert to Pyro, Hydro, Cryo, or Electro based on your party composition.


Pros

  • Excellent open-world mobility (Flight/Nightsoul).
  • Not dependent on Bennett (ATK buff is secondary to reactions/conversion).
  • Extremely high damage floor with "Rainbow" teams.
  • Self-sufficient Crit Rate via Obsidian Codex set.
  • Can snipe enemies from massive distances.

Cons

  • Requires teammates of specific elements (PECH).
  • No Resistance to Interruption while flying (Shield recommended).
  • Damage is single-target oriented (Missiles).
  • Cannot use Viridescent Venerer effectively (she is the carry).

Quick Guide (TL;DR)

If you don't have time for the math, here is the cheat sheet.

  • Best Artifact: 4pc Obsidian Codex (Natlan DPS Set).
  • Alt Artifact: 4pc Desert Pavilion (Wanderer Set) or 4pc Shimenawa.
  • Best Weapon: Astral Vulture's Crimson Plumage (Signature).
  • Alt Weapon: The First Great Magic or Aqua Simulacra.
  • F2P Weapon: Chain Breaker (Natlan Craftable) or Song of Stillness.
  • Main Stats: SANDS: ATK% | GOBLET: ATK% or Anemo | CIRCLET: CRIT DMG.
  • Talent Priority: Elemental Skill > Elemental Burst > Normal Attack.
  • Top Team: Chasca + Ororon + Furina + Bennett (Rainbow Nuke).
Pro Tip: The "Tap" Trick: While in her flying state (E), do not just hold the attack button. Tap it rhythmically. Just like Neuvillette needs to charge, Chasca needs to load bullets. Tapping ensures you fire "Shining Shadowhunter Shells" (the big elemental nukes) as fast as possible.

Need Primogems for Chasca?

Get Genesis Crystals at a discounted price with instant delivery.

Top Up Secure & Fast via GameCharge

Ascension & Talent Materials

Category Material Name Source
Ascension Withering Purpurbloom Natlan (Ochkanatlan region)
Boss Drop Ensnaring Gaze Secret Source Constructor (Natlan)
Talent Books Teachings of Conflict Blazing Ruins (Wed/Sat/Sun)
Common Mob Fangs (Juvenile/Seasoned/Tyrant) Saurians (Natlan)

Talent Breakdown & Mechanics

Elemental Skill: Spirit Reins, Shadow Hunt

  • Nightsoul's Blessing: Chasca enters a flying state (60 Nightsoul points).
  • Multisensory Missiles: While flying, Tapping Attack or Skill loads bullets into her rifle.
  • Elemental Conversion:
    • She loads 6 bullets. By default, they are Anemo.
    • If you have Pyro/Hydro/Cryo/Electro party members, the bullets change element to match them.
    • Goal: You want at least 3 "converted" bullets for maximum damage. This means running 3 characters of PECH elements.
  • Shining Shadowhunter Shell: The converted bullets deal massive damage based on Chasca's ATK, but deal elemental damage of the absorbed type (e.g., Pyro DMG).

Elemental Burst: Soul Reaper's Fatal Round

  • Cost: 60 Energy | Cooldown: 15s
  • The Nuke: Fires a massive gale-force shell dealing AoE Anemo DMG.
  • Split Shells: Afterwards, it splits into 6 smaller shells. These also undergo elemental conversion based on your party composition.

Passive: Tricks of the Trouble-Maker

  • The Rainbow Buff: For every type of Elemental Conversion (Pyro/Hydro/Cryo/Electro) present among teammates, Chasca gains a stacking damage buff to her Shining Shadowhunter Shells.
  • Math: Ideally, you want 3 different elements (e.g. Pyro + Hydro + Electro) or 2 elements + Anemo resonance.

Talent Priority Order:

  1. Elemental Skill (Level 10) - This is 90% of her damage.
  2. Elemental Burst (Level 8) - Good nuke, secondary priority.
  3. Normal Attack (Level 1) - Ignore.

Stat Requirements & ER Thresholds

Chasca relies on her Skill, not her Burst, so ER requirements are very low.

Team Context Weapon ER Requirement
Standard Rainbow Team Any 110% - 120%
With C1 (Reduced Consumption) Any 100% - 110%

Substat Priority:

  1. CRIT DMG (Obsidian Codex gives 40% Rate, so stack DMG)
  2. ATK% (Her bullets scale on ATK)
  3. CRIT Rate (Aim for ~40-50% on stat screen, set gives +40%)
  4. Elemental Mastery (If triggering heavy reactions like Vape/Melt)

Best Artifacts Comparison

Set Name Role Reasoning
4pc Obsidian Codex BiS Chasca consumes Nightsoul points to attack. This set gives 15% DMG and a massive 40% CRIT Rate when consuming Nightsoul points. Nothing else compares.
4pc Desert Pavilion Substitute Boosts Normal/Charged/Plunge. Viable if you have amazing substats, but much weaker than Codex.
4pc Viridescent Venerer Support Chasca If you run her as a sub-DPS/driver for Furina/Xiangling, this shreds RES for the team. Lowers personal damage but buffs team.

Weapon Rankings

Weapon Type Performance Notes
Astral Vulture's Crimson Plumage CRIT DMG S+ Signature. Buffs ATK% and Element DMG when triggering Swirl. Synergizes perfectly with her multi-element playstyle.
The First Great Magic CRIT DMG S Lyney's Bow. Good stat stick, but passive requires mono-element stacking which conflicts with Chasca's rainbow passive. Still strong stats.
Chain Breaker ATK% A (Craftable) Natlan Craftable. Buffs ATK based on party members from Natlan or different elements. Very good F2P synergy.
Cloudforged EM A (Event) If you played the 4.7 event, this gives decent EM and ATK stats. Good for reaction damage.

Constellation Value

Chasca is a powerhouse at C0, but C1 fixes her team building.

  • C1: "The Cylinder's Restless Firing" - (QoL/Buff) Increases the probability of triggering elemental conversion bullets. Also reduces the Night Soul points consumed by Skill. This makes her gameplay much smoother and less RNG.
  • C2: "The Muzzle's Scorching Heat" - (Damage) When hitting enemies with conversion bullets, deals additional damage equal to 400% of ATK. Huge nuke potential.
  • C6: "The Showdown's Glory" - (Infinite Ammo) After casting Burst, her next Skill consumes NO Nightsoul points and fires instantly. Basically a machine gun mode.

Verdict: C0 is great. C1 makes her team building much more flexible.

Top Team Compositions

1. Rainbow Nuke (Standard)

  • Main DPS: Chasca
  • Pyro: Bennett (ATK Buff/Heal)
  • Hydro: Furina (DMG Buff)
  • Electro/Cryo: Ororon / Shenhe / Fischl

Why it works: Chasca absorbs Pyro, Hydro, and Electro to fire specialized bullets. Bennett buffs her ATK. Furina buffs damage. Ororon (if available) provides Natlan synergy.

2. Mono-Element Driver

  • Driver: Chasca
  • Off-Field 1: Xiangling (Pyro)
  • Off-Field 2: Rosaria (Cryo)
  • Support: Bennett

Why it works: Chasca drives Melt reactions by firing Pyro and Cryo bullets rapidly. Her mobility allows her to kite enemies while dealing massive reaction damage.

Rotations & Combos

Standard Rotation:
Furina E Q > Bennett Q E > Sub-DPS E/Q > Chasca Q E > Chasca Charged Attacks (Tap)

Tip: While flying (E), Tap the attack button. Do not hold. Tapping lets her auto-load bullets faster. Only Hold if you need to aim at a specific weak point.

Frequently Asked Questions

Can I use VV on her?
You can, but Obsidian Codex is significantly better for her personal damage (which is high). Only use VV if she is purely a driver for extremely high-investment sub-DPS chars.

Is she better than Wanderer?
They are different. Wanderer is a Hypercarry who wants Faruzan/Bennett. Chasca is a Rainbow carry who wants elemental variety. Chasca is generally more flexible and has higher burst damage in multi-element teams.

Data Source: KQM Standards / Version 5.2 Data. Last Updated: December 2025

Jean Guide: The Definitive Build & Analysis

Background of Jean

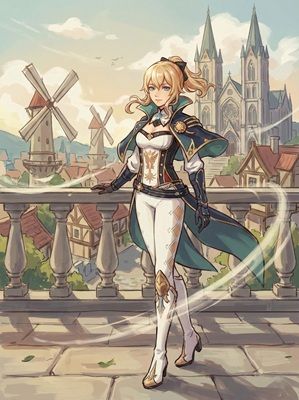
Jean Genshin Impact Character Art
Rarity (5-Star Standard)
Element Anemo
Weapon Sword
Best Role Healer / VV Support / Sunfire
Stat Priority ER > ATK% > CRIT Rate (Favonius)
Tier A (Universal Support)

Jean is the Acting Grand Master and a staple of the Standard Banner. She is a jack-of-all-trades: she heals instantly (Burst), shreds Resistance (VV Set), generates energy (Favonius), and can abuse physics to deal percentage-based Fall Damage to humanoid enemies.


Pros

  • Instant teamwide healing (Furina's best friend).
  • Can cleanse debuffs on self (Sunfire).
  • Abuses Fall Damage in Abyss (Yeet mechanic).
  • C4 shreds Anemo RES (Best Xiao/Wanderer support).
  • Easy to build (ATK scaling).

Cons

  • Pushback on Skill/Charged Attack can be annoying.
  • High Energy Cost (80) requires ER investment.
  • Circle Impact (Burst field is stationary).
  • Lower crowd control than Kazuha/Venti.

Quick Guide (TL;DR)

If you don't have time for the math, here is the cheat sheet.

  • Best Artifact: 4pc Viridescent Venerer (Mandatory).
  • Alt Artifact: 4pc Noblesse Oblige (If another Anemo has VV).
  • Best Weapon: Favonius Sword (Team Battery - BiS).
  • F2P Weapon: Amenoma Kageuchi (ATK & Energy Refund).
  • Sunfire Weapon: Freedom-Sworn or Xiphos' Moonlight (EM).
  • Main Stats: SANDS: ER% or ATK% | GOBLET: ATK% or Anemo | CIRCLET: Healing Bonus or CRIT.
  • Talent Priority: Elemental Burst > Elemental Skill > Normal Attack (Ignore).
  • Top Team: Jean + Furina + Neuvillette/Wriothesley + Flex.
Pro Tip: The Yeet: Hold E to pick up small enemies. Aim high into the air and release. They will take massive Fall Damage relative to their max HP. You can also pull them down (Charged Attack) and hold E to slam them into the floor for double fall damage.

Lost 50/50 to C4 Jean?

You just unlocked the best Anemo support in the game! Get Genesis Crystals for her skin.

Top Up Secure & Fast via GameCharge

Ascension & Talent Materials

Category Material Name Source
Ascension Dandelion Seed Mondstadt Gates (Requires Anemo)
Boss Drop Hurricane Seed Anemo Hypostasis (Mondstadt)
Talent Books Teachings of Resistance Forsaken Rift (Tue/Fri/Sun)

Talent Breakdown & Mechanics

Elemental Skill: Gale Blade

  • The Yeet: Holding E pulls small enemies into a whirlwind. Aiming up launches them.
  • Particles: Generates 2-3 particles. Short cooldown (6s). Good for quick swapping.
  • Fall Damage: Enemies take % HP damage when hitting the floor. Against Abyss Mages or Fatui Agents, this can deal 50k-100k "white damage" regardless of your stats.

Elemental Burst: Dandelion Breeze

  • Cost: 80 Energy | Cooldown: 20s
  • Healing: Instantly heals the entire party for a massive amount (ATK scaling). Then creates a Dandelion Field.
  • Self-Swirl (Sunfire): The field applies Anemo to characters inside it. If you have Bennett's circle (which applies Pyro to self), Jean will constantly Swirl Pyro off you and onto nearby enemies. This pulsing Pyro Swirl deals massive reaction damage.

Passive: Wind Companion

  • Normal Attack Heal: Normal attacks have a 50% chance to heal the party. Minor, but nice for co-op or emergency top-ups.

Talent Priority Order:

  1. Elemental Burst (Level 9) - For stronger healing.
  2. Elemental Skill (Level 8) - For damage.
  3. Normal Attack (Level 1) - Ignore.

Stat Requirements & ER Thresholds

Jean heals based on ATK, but her Burst costs 80. ER is the priority until comfortable.

Team Context Weapon ER Requirement
Solo Anemo (Furina Team) Favonius Sword 180% - 200%
Double Anemo (Xiao/Wanderer) Any 140% - 160%
Sunfire (Raiden Team) Iron Sting/Freedom 160% (Raiden battery)

Substat Priority:

  1. Energy Recharge (Until requirement met)
  2. ATK% (Increases Healing and Damage)
  3. CRIT Rate (Required for Favonius Sword)
  4. Elemental Mastery (Only for Sunfire builds)

Best Artifacts Comparison

Set Name Role Reasoning
4pc Viridescent Venerer BiS General Provides 40% RES Shred. Mandatory if running her with Hydro/Pyro/Electro/Cryo DPS.
4pc Noblesse Oblige Anemo Support Best if supporting Xiao/Scara (who don't need VV shred). Buffs their ATK.
4pc Ocean-Hued Clam Pure Healer If you don't care about shred and just want damage from healing. Viable but usually VV is better for team dps.

Weapon Rankings

Weapon Type Performance Notes
Favonius Sword ER% S+ Best general weapon. Solves her energy and batteries the team. Requires Crit Rate circlet.
Amenoma Kageuchi ATK% S Craftable. High ATK boosts healing significantly. Passive refunds energy. Great non-Favonius option.
Freedom-Sworn EM A (Sunfire) Only use for Sunfire teams where Jean triggers reactions. The passive buffs the team.
Skyward Blade ER% A High Base ATK (healing) + ER. Solid stat stick if you have it lying around.

Constellation Value

Jean has some of the best Standard Banner constellations.

  • C2: People's Aegis - (Speed) When Jean picks up an orb, Party Move/ATK Speed increased by 15% for 15s. Excellent for Ayato/Yoimiya/Raiden.
  • C4: Lands of Dandelion - (Anemo Shred) Enemies within Burst field have Anemo RES decreased by 40%. This makes her the BEST support for Xiao, Wanderer, and Heizou. Rare effect.
  • C6: Lion's Fang - (Tank) Reduces DMG received by 35% within field. Can make your team nearly invincible combined with other DR sources (Xingqiu).

Verdict: C2 is great utility. C4 is a game-changer for Anemo mains.

Top Team Compositions

1. Sunfire (Vape/Melt Enabler)

  • Core: Jean + Bennett
  • Carry: Raiden / Ganyu / Ayato
  • Flex: Xingqiu / Yelan

Why it works: Standing in Bennett's Q + Jean's Q causes Jean to continuously swirl Pyro off your own character onto enemies nearby. This pulses Pyro damage rapidly (Sunfire), enabling Melts/Vapes and shredding shields.

2. Furina Healer

  • Main DPS: Neuvillette / Wriothesley / Raiden
  • Buffer: Furina
  • Healer: Jean (VV)
  • Flex: Zhongli / Fischl

Why it works: Furina drains team HP. Jean's burst heals the entire team to full instantly. This immediately maxes out Furina's "Fanfare" stacks, giving your team a massive damage boost.

Rotations & Combos

Standard Support Rotation:
Element Applier > Jean E (Swirl) > Jean Q (Heal) > Main DPS

Tip: If using Favonius Sword, do a Normal Attack after E to trigger a Crit and generate particles if the E didn't crit.

Frequently Asked Questions

Jean vs. Xianyun?
Xianyun is better for Plunge teams (Xiao/Gaming) and exploration. Jean is better for "Sunfire" interactions, C4 Anemo shred, and simpler burst healing.

Should I build EM on Jean?
Only for Sunfire teams (Jean+Bennett) where she triggers Overloads/Vapes. For general healing/support, build ATK/Crit/ER.

Data Source: KQM Standards. Last Updated: December 2025

Xianyun Guide: The Definitive Build & Analysis

Background of Xianyun

Xianyun Genshin Impact Character Art
Rarity (5-Star)
Element Anemo
Weapon Catalyst
Best Role Plunge Enabler / Healer
Stat Priority ATK% > ER > CRIT Rate (Favonius)
Tier S (Meta Enabler)

Xianyun (Cloud Retainer) is an Anemo Catalyst user who revolutionizes gameplay by enabling Plunge Attacks for any character. She provides massive teamwide healing and a flat damage buff to plunges based on her ATK, making her the cornerstone of modern Xiao, Diluc, and Gaming teams.


Pros

  • Enables Plunge playstyle for everyone (Dragonstrike).
  • Massive continuous teamwide healing (Great for Furina).
  • Excellent overworld exploration (Triple mid-air jump).
  • Strong single-target Plunge buffs.

Cons

  • Plunge buff is single-target only (limited AoE scaling).
  • Can feel clunky without adequate Energy Recharge.
  • Grouping capability (CC) is weaker than Kazuha/Venti.

Quick Guide (TL;DR)

If you don't have time for the math, here is the cheat sheet.

  • Best Artifact: 4pc Viridescent Venerer (PECH Teams) or 4pc Song of Days Past (Anemo/Geo/Dendro Teams).
  • Alt Artifact: 2pc ATK / 2pc ER (Budget Build).
  • Best Weapon: Crane's Echoing Call (Signature).
  • F2P Weapon: Oathsworn Eye (Best 4* - Event) or Flowing Purity (Craftable).
  • Support Weapon: Favonius Codex (Team Battery - Highly Recommended).
  • Main Stats: SANDS: ATK% or ER | GOBLET: ATK% | CIRCLET: ATK% or Healing Bonus.
  • Talent Priority: Elemental Burst > Elemental Skill > Normal Attack.
  • Top Team: Xiao + Xianyun + Furina + Faruzan (FFXX).
Pro Tip: ATK Cap: Xianyun's plunge buff caps at 4,500 ATK. It is very hard to reach this cap without her signature weapon. Prioritize ER to burst every rotation (approx 160-180%) before stacking pure ATK.

Need Primogems for Cloud Retainer?

Get Genesis Crystals at a discounted price with instant delivery.

Top Up Secure & Fast via GameCharge

Ascension & Talent Materials

Category Material Name Source
Ascension Cloudseam Scale Chenyu Vale (Liyue)
Boss Drop Cloudseam Scale Solitary Suanni (Chenyu Vale)
Talent Books Teachings of Gold Taishan Mansion (Wed/Sat/Sun)

Talent Breakdown & Mechanics

Elemental Skill: White Clouds at Dawn

  • Skyladder: Enters the "Cloud Transmogrification" state. Can leap up to 3 times in mid-air.
  • Driftcloud Wave: If you Plunge Attack during this state, it deals AoE Anemo DMG. This is her main exploration tool and particle generator.
  • CC: The plunge pulls enemies in slightly, but don't rely on it for massive grouping.

Elemental Burst: Stars Gather at Dusk

  • Cost: 70 Energy | Cooldown: 18s
  • Starwicker: Summons a mechanism that follows the active character.
  • Healing: Heals the entire party on cast, then heals the active character periodically.
  • Adeptal Assist: Grants the active character 8 boosted jumps, allowing anyone to perform Plunge Attacks. Deals Anemo damage when they plunge.

Passive: Consider, the Adeptus in Her Realm

  • The Buffer: When the Starwicker is active, Plunge Attack shockwave DMG is increased by 200% of Xianyun's ATK.
  • The Cap: The maximum DMG increase is 9,000 (Requires 4,500 ATK). This is a Flat DMG addition (like Shenhe/Yun Jin), meaning it scales with the carry's Crit and DMG%.

Talent Priority Order:

  1. Elemental Burst (Level 10) - Healing and Jump mechanic.
  2. Elemental Skill (Level 8) - Exploration and damage.
  3. Normal Attack (Level 1) - Ignore.

Stat Requirements & ER Thresholds

Xianyun needs to burst every rotation. Prioritize ER until comfortable, then stack ATK.

Team Context Weapon ER Requirement
Double Anemo (Xiao) Oathsworn / Favonius 160% - 180%
Solo Anemo (Diluc/Hu Tao) Favonius Codex 200% - 220%
Triple Anemo (FFXX) Any 130% - 150%

Substat Priority:

  1. Energy Recharge (Until requirement met)
  2. ATK% (To maximize buff and healing)
  3. Flat ATK
  4. CRIT Rate (Only if using Favonius Codex)

Best Artifacts Comparison

Set Name Role Reasoning
4pc Viridescent Venerer (VV) BiS Reaction Mandatory for Pyro/Hydro/Electro carries (Diluc/Gaming). Shreds elemental RES. Useless for Xiao/Itto.
4pc Song of Days Past Anemo/Geo Support Best for Xiao or Navia. Records healing and provides a flat damage buff.
4pc Noblesse Oblige General Classic 20% ATK buff. Good if no one else has it.
2pc ATK / 2pc ER Stat Stick Easier to reach high ATK/ER thresholds if you don't need set bonuses.

Weapon Rankings

Weapon Type Performance Notes
Crane's Echoing Call ATK% S+ Signature. Highest Base ATK, Energy refund, and Plunge buff. Hard to beat.
Oathsworn Eye ATK% S (Event) Best F2P option. Gives ATK and massive ER buff (48%) after using Skill. (Limited Event item).
Favonius Codex ER% S (Battery) Ensures smooth rotations for the whole team. Low Base ATK reduces her buff slightly, but consistency is worth it.
Flowing Purity ATK% A (Craftable) High ATK stat stick. Use if you have enough ER from artifacts.

Constellation Value

Xianyun is a complete unit at C0, but C2 is a massive buff.

  • C1: Purifying Winds - (Exploration) Adds 1 charge to Elemental Skill. Great for overworld and lowers ER requirements slightly.
  • C2: Aloof from the World - (Core Buff) Increases ATK by 20%. Doubles the flat damage buff cap (from 9,000 to 18,000). This is a huge damage increase for your carry.
  • C6: Spirit of the Cloud - (DPS Unlock) Elemental Skill Crit DMG increased by up to 70%. Using Skill no longer consumes cooldown during Burst. Turns her into a Main DPS.

Verdict: C0 is great. C2 makes her a god-tier buffer.

Top Team Compositions

1. FFXX (Xiao Premium)

  • Main DPS: Xiao
  • Support: Xianyun
  • Buffer: Faruzan (C6)
  • Buffer: Furina

Why it works: The highest ceiling team for Xiao. Xianyun heals Furina's drain, buffs Xiao's plunges, and generates particles. Faruzan shreds Anemo RES.

2. Dragonstrike Diluc / Gaming

  • Main DPS: Diluc / Gaming
  • Support: Xianyun (VV Set)
  • Hydro: Furina / Yelan
  • Buffer: Bennett

Why it works: Transforms Diluc into a Plunge monster (highest scaling in his kit). Gaming already plunges, so she just buffs him massively. VV set shreds Pyro RES.

Rotations & Combos

Standard Support Rotation:
Furina E Q > Xianyun E Plunge Q > Faruzan/Bennett Q > Main DPS Plunge Spam

Tip: You don't need to do the full triple jump on her Skill every time. One jump + Plunge is faster and generates the same particles/crowd control for rotation purposes.

Frequently Asked Questions

VV or Song of Days Past?
If your DPS relies on reactions (Diluc Vape, Gaming), use VV to shred resistance. If your DPS is Anemo/Geo/Physical (Xiao, Navia) where VV doesn't help, use Song of Days Past or Noblesse.

Jean vs. Xianyun?
Xianyun is generally better because she offers the Plunge buff and continuous team healing. Jean provides a burst heal and can use VV, but lacks the offensive buffs unless C4.

Data Source: KQM Standards. Last Updated: December 2025

Xiao Guide: The Definitive Build & Analysis

Background of Xiao

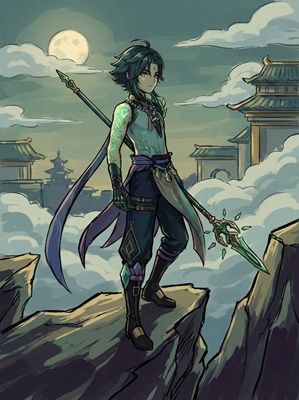
Xiao Genshin Impact Character Art
Rarity (5-Star)
Element Anemo
Weapon Polearm
Best Role Anemo Plunge Hypercarry
Stat Priority CRIT > ATK% > ER
Tier S (With Premium Team)

Xiao is the Vigilant Yaksha and one of the "Liyue Big Three" hypercarries. His playstyle is aggressive and acrobatic, utilizing his Elemental Burst to don the "Yaksha Mask," draining his own HP to jump high and rain down devastating Anemo Plunge Attacks.


Pros

  • Unrivaled AoE (Area of Effect) damage.
  • Strongest Plunge DPS in the game.
  • Synergizes perfectly with Xianyun and Furina.
  • Ignores enemy shields (staggers them).
  • Fun and dynamic gameplay.

Cons

  • Energy Hungry (Relies on batteries).
  • HP Drain mechanic requires a healer.
  • Knocks small enemies away (needs grouping).
  • Performance is heavily tied to premium supports (C6 Faruzan/Xianyun).

Quick Guide (TL;DR)

If you don't have time for the math, here is the cheat sheet.

  • Best Artifact: 4pc Vermillion Hereafter (Signature).
  • Alt Artifact: 4pc Marechaussee Hunter (Only with Furina/Xianyun).
  • Best Weapon: Primordial Jade Winged-Spear (Signature) or Staff of Homa.
  • F2P Weapon: Blackcliff Pole (Shop) or Missive Windspear (Event).
  • Main Stats: SANDS: ATK% | GOBLET: Anemo DMG | CIRCLET: CRIT.
  • Talent Priority: Normal Attack > Elemental Burst > Elemental Skill.
  • Top Team: Xiao + Xianyun + Furina + Faruzan (C6).
Pro Tip: Plunge Collision ("Jet Tech"): Try to aim your plunges so you land *on top* of the enemy's hitbox rather than just the floor. This triggers a "Collision" damage instance in addition to the AoE splash, significantly increasing DPS against bosses.

Need Primogems for PJWS?

Get Genesis Crystals at a discounted price with instant delivery.

Top Up Secure & Fast via GameCharge

Ascension & Talent Materials

Category Material Name Source
Ascension Qingxin Liyue Peaks (Jueyun Karst)
Boss Drop Juvenile Jade Primo Geovishap (Liyue)
Talent Books Teachings of Prosperity Taishan Mansion (Mon/Thu/Sun)
Common Mob Slime Condensate Slimes (Everywhere)

Talent Breakdown & Mechanics

Normal Attack: Whirlwind Thrust

  • The Plunge: This is Xiao's main damage source. During his Burst, he gains massive jump height and AoE range on Plunges.
  • Scaling: Xiao has some of the highest Normal Attack scalings in the game. Even his NAs hit hard, but Plunges are his specialty.

Elemental Skill: Lemniscatic Wind Cycling

  • Dash: Xiao dashes forward dealing Anemo DMG. Can be used in mid-air.
  • Particles: Generates 3 particles. Important: He does NOT generate particles if used during his Burst. Always use Skill *before* Burst (E E Q) to catch the energy.
  • Exploration: Essential for climbing and gliding efficiency (Passive).

Elemental Burst: Bane of All Evil

  • Yaksha Mask: Xiao dons his mask. He gains increased jumping ability, AoE, and converts damage to Anemo.
  • HP Drain: Xiao continuously loses HP while in this state (2% current HP/sec). Requires a healer.
  • Damage Bonus: Provides a massive DMG% bonus to Normal/Charged/Plunge attacks.

Passive: Conqueror of Evil

  • Ramping DMG: While under the effects of Bane of All Evil, Xiao's DMG increases by 5% every 3 seconds. Max 25% bonus.

Talent Priority Order:

  1. Normal Attack (Level 10) - Directly scales Plunge DMG.
  2. Elemental Burst (Level 9) - Increases DMG Bonus and drain.
  3. Elemental Skill (Level 8) - Burst damage and particles.

Stat Requirements & ER Thresholds

Xiao is burst-reliant (70 Cost). If you aren't plunging, you aren't dealing damage.

Team Context ER Requirement (C0) ER Requirement (C1/C6 Faruzan)
Triple Anemo (FFXX) 120% - 130% 110% - 120%
Double Anemo (Standard) 130% - 140% 120% - 130%
Solo Anemo (Not Recommended) 160%+ 140%

Substat Priority:

  1. CRIT Rate / CRIT DMG (Target 75/180+)
  2. ATK% (Xiao has high Base ATK, this scales well)
  3. Energy Recharge (Comfort is key)
  4. Flat ATK

Best Artifacts Comparison

Set Name Role Reasoning
4pc Vermillion Hereafter BiS General Signature set. Gains ATK% when losing HP (which Xiao does automatically). Best universal set.
4pc Marechaussee Hunter Furina Teams If playing with Furina, this gives 36% Crit Rate. Can outperform Vermillion in specific Furina setups due to stat efficiency.
4pc Desert Pavilion Strong Alt Good bonuses, but requires a Charged Attack before plunging. Slightly clunkier than Vermillion.

Weapon Rankings

Weapon Type Performance Notes
Primordial Jade Winged-Spear CRIT Rate S+ Signature. Stacks ATK on hit. Perfect aesthetic and performance balance.
Staff of Homa CRIT DMG S+ Massive Crit DMG. HP passive is useful as Xiao drains HP. Often performs equal to PJWS.
Deathmatch CRIT Rate S (BP) The best 4-star option. High Crit Rate makes building him very easy.
Blackcliff Pole CRIT DMG A (Shop) Decent stat stick if you lack Deathmatch. Passive is unreliable against bosses.
Missive Windspear ATK% A (Event) Solid ATK/EM stats. Good F2P option if you played during the event.

Constellation Value

Xiao is a complete hypercarry at C0. His early constellations are QoL, while C6 changes him entirely.

  • C1: Dissolution Eon: Destroyer of Worlds - (Energy) Adds 1 charge to Lemniscatic Wind Cycling (3 total). Great for energy generation and exploration.
  • C2: Annihilation Eon: Blossom of Kaleidos - (Weak) Increases Energy Recharge when off-field. Xiao is usually on-field, making this low value.
  • C6: Conqueror of Evil: Guardian Yaksha - (Game Breaker) Hitting 2+ enemies with a Plunge grants 1 charge of Skill and allows spamming Skill for 1s. Transforms him into a dashing machine. Highest damage ceiling in AoE.

Verdict: C0 is perfect. Stop there unless you plan to go all the way to C6.

Top Team Compositions

1. FFXX (Premium Anemo)

  • Main DPS: Xiao
  • Buffer/Healer: Xianyun (Cloud Retainer)
  • Buffer/Battery: Faruzan (C6)
  • Buffer/Sub-DPS: Furina

Why it works: The strongest Xiao team. Xianyun heals and buffs Plunge DMG. Faruzan shreds Anemo RES. Furina provides massive DMG% buff. Xiao utilizes all these to hit 100k+ plunges consistently.

2. Classic Double Geo

  • Main DPS: Xiao
  • Healer/Battery: Jean / Sucrose
  • Shield: Zhongli
  • Sub-DPS: Albedo / Bennett

Why it works: The old reliable. Zhongli provides shred and shield. Jean/Sucrose generate particles. Albedo adds off-field damage. Comfortable and safe.

Rotations & Combos

FFXX Rotation:
Furina E Q > Faruzan Q E CA (or just Q if C6) > Xianyun E Q > Xiao E E Q -> Plunge Spam

Tip: Always use Xiao's skills (E E) immediately *before* pressing Q. This allows him to catch the particles during his burst animation, ensuring better uptime for the next rotation.

Frequently Asked Questions

Xiao vs. Wanderer?
Xiao has better AoE and survivability (higher base stats). Wanderer is better for single-target, exploration, and range. Xiao feels more "impactful" but requires Burst; Wanderer can drive with Normals.

Vermillion vs. Marechaussee Hunter?
Vermillion is his unconditional best set. Marechaussee Hunter is strictly better *if and only if* you run him with Furina, due to the massive Crit Rate buff. Without Furina, stick to Vermillion.

Data Source: KQM Standards. Last Updated: December 2025