RSS

Blog posts of '2025' 'December'

Wanderer Guide: The Definitive Build & Analysis

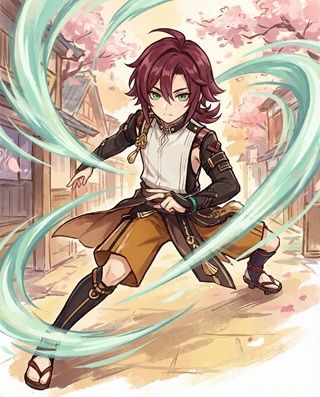
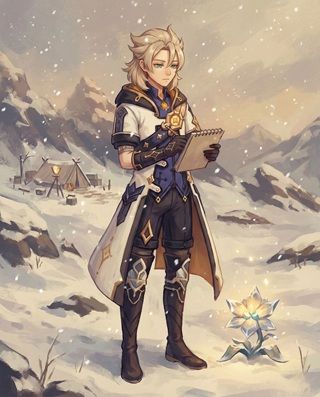
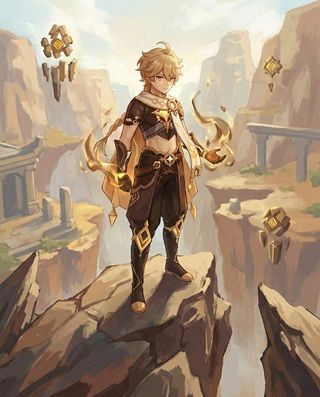
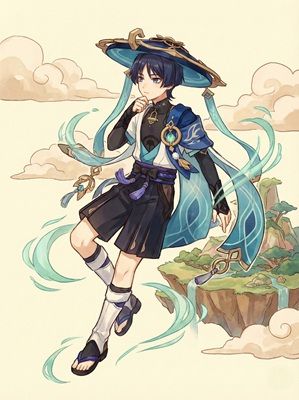
Background of Wanderer 

Wanderer Genshin Impact Character Art
Rarity (5-Star)
Element Anemo
Weapon Catalyst
Best Role Anemo Hypercarry
Stat Priority CRIT > ATK% > ER
Tier S (With C6 Faruzan)

The Wanderer (Scaramouche) is a unique Anemo DPS who fights while hovering in mid-air. His kit focuses on high-speed Normal and Charged Attacks. He is unrivaled in overworld exploration and possesses one of the highest damage ceilings in the game when paired with his dedicated support, Faruzan.


Pros

  • Best overworld exploration (flight/hover).
  • Extremely flexible team options (Driver or Hypercarry).
  • Attack Speed scaling makes gameplay feel very smooth.
  • Can absorb elements for free buffs (Crit Rate, ATK, etc).

Cons

  • Very low Interruption Resistance (Shield is almost mandatory).
  • Highly dependent on C6 Faruzan for meta damage.
  • Flight duration can feel short without Hydro absorption.

Quick Guide (TL;DR)

If you don't have time for the math, here is the cheat sheet.

  • Best Artifact: 4pc Desert Pavilion Chronicle (Signature).
  • Alt Artifact: 4pc Shimenawa's Reminiscence (If not using Burst).
  • Best Weapon: Tulaytullah's Remembrance (Signature) or Lost Prayer.
  • F2P Weapon: Flowing Purity (Craftable) or The Widsith (4-Star King).
  • Main Stats: SANDS: ATK% | GOBLET: Anemo DMG | CIRCLET: CRIT.
  • Talent Priority: Normal Attack > Elemental Skill > Elemental Burst.
  • Top Team: Wanderer + Faruzan (C6) + Bennett + Zhongli/Thoma.
Pro Tip: Shields are non-negotiable. When hovering, Wanderer gets knocked out of the air by the slightest breeze. Unless you are a dodge god, bring a shielder like Zhongli, Thoma, or Layla to maintain your DPS uptime.

Need Primogems for Tulaytullah?

Get Genesis Crystals at a discounted price with instant delivery.

Top Up Secure & Fast via GameCharge

Ascension & Talent Materials

Category Material Name Source
Ascension Rukkhashava Mushrooms Sumeru Rainforest (Mawtiyima Forest)
Boss Drop Perpetual Caliber Aeonblight Drake (Sumeru)
Talent Books Teachings of Praxis Steeple of Ignorance (Wed/Sat/Sun)
Handguards Old/Kageuchi/Famed Nobushi / Kairagi (Inazuma)

Talent Breakdown & Mechanics

Elemental Skill: Hanega: Song of the Wind

  • Hovering State: Wanderer leaps into the air. In this state, he cannot Plunge Attack, but his Normal and Charged attacks deal increased damage and have larger AoE.
  • Kuugoryoku Points (Stamina): Instead of regular stamina, he consumes a blue bar. Dashing or ascending consumes extra points.
  • A1 Passive (Jade-Claimed Flower): If you swirl an element upon casting E, you get a buff:
    • Pyro: ATK +30%
    • Cryo: CRIT Rate +20%
    • Hydro: Kuugoryoku Points +20 (Longer flight)
    • Electro: Restores Energy

Elemental Burst: Kyougen: Five Ceremonial Plays

  • The Stomp: Wanderer compresses the atmosphere into a vacuum and stomps it, dealing multiple instances of AoE Anemo DMG.
  • Finisher: Using Burst ends his hovering state immediately. Therefore, you should always use this at the very end of his E duration (or if you are about to run out of flight stamina).
  • C2 Synergy: At C2, the burst deals more damage the less flight stamina you have left. Always use it at the last second.

Passive: Gales of Reverie

  • Free Dodge: When hitting enemies in Hover state, he has a chance to gain a "Descent" effect. This allows him to dash for free (no stamina cost) and fire 4 wind arrows.
  • DPS Gain: Dashing with this effect is actually a DPS gain because the arrows deal decent damage and animation cancel your attack string. Listen for the "ding" sound or look for the glowing back effect.

Talent Priority Order:

  1. Normal Attack (Level 10) - This scales his E-infused attacks.
  2. Elemental Skill (Level 9) - Increases damage multiplier.
  3. Elemental Burst (Level 8) - Strong nuke finisher.

Stat Requirements & ER Thresholds

Wanderer is a hypercarry. He needs standard DPS stats. ER is generally not a priority unless you rely on C2 nuke.

Team Context ER Requirement (Burst every rotation) ER Requirement (Burst every other)
With Faruzan (C6) 120% - 130% 100% (Base)
With Faruzan (Pre-C6) 140% - 160% 100% - 110%
Shimenawa Build Not Recommended 100% (Never Burst)

Substat Priority:

  1. CRIT Rate / CRIT DMG (Target 75/180+ ratio)
  2. ATK%
  3. Energy Recharge (Comfort only)
  4. Elemental Mastery (Useless for Hypercarry)

Best Artifacts Comparison

Set Name Role Reasoning
4pc Desert Pavilion Chronicle BiS Signature set. Provides Anemo DMG and 10% Attack Speed. Remember to do 1 Charged Attack before spamming Normals to activate it.
4pc Shimenawa's Reminiscence Strong Alt Competitive damage (50% Normal DMG) but drains energy, preventing you from using Burst. Good if you have C0 and bad ER.
4pc Marechaussee Hunter Furina Teams Only use if running with Furina. The 36% Crit Rate is massive, but useless without HP drain.

Weapon Rankings

Weapon Type Performance Notes
Tulaytullah's Remembrance CRIT DMG S+ Signature. High Base ATK, Crit DMG, and ramps up Normal Attack Speed/DMG. Tailor-made for his playstyle.
Lost Prayer to the Sacred Winds CRIT Rate S Excellent stat stick. The movement speed helps, and Wanderer stays on-field long enough to stack the passive.
The Widsith (R5) CRIT DMG S (RNG) The "6-Star Weapon." If you roll the ATK or Elemental DMG buff, it beats most 5-stars. If you roll EM, it's useless. 20s cooldown aligns okay with rotation.
Flowing Purity (R5) ATK% A (F2P) Fontaine Craftable. Grants Elemental DMG bonus. Best F2P option if you have a healer to clear the Bond of Life.

Constellation Value

Wanderer is functional at C0, but his constellations improve his speed and burst significantly.

  • C1: Shoban: Ostentatious Plumage - (Speed) Increases Attack Speed by 10% during Hover. Also increases the damage of his passive wind arrows. Makes combos feel much faster.
  • C2: Niban: Isle Amidst White Waves - (Nuke) Elemental Burst deals increased damage based on the difference between max and current flight stamina. Essentially doubles his Burst damage if used at the end of flight.
  • C6: Shugen: The Curtains' Melancholic Sway - (Game Breaker) Normal Attacks restore flight stamina (extending flight duration) and deal an extra instance of 40% DMG. This is a massive DPS increase.

Verdict: C0 is fine. C2 makes his burst relevant. C6 changes his gameplay loop.

Top Team Compositions

1. Hypercarry (The Standard)

  • Main DPS: Wanderer
  • Buffer: Faruzan (C6 is crucial)
  • Buffer/Heal: Bennett
  • Shield: Zhongli / Thoma / Layla

Why it works: Faruzan shreds Anemo RES and buffs Anemo DMG. Bennett buffs ATK and allows Wanderer to absorb Pyro (30% ATK buff). Shielder prevents him from getting knocked down.

2. Double Hydro / Driver

  • Driver: Wanderer
  • Sub-DPS: Yelan
  • Sub-DPS: Xingqiu
  • Flex: Faruzan / Bennett / Mika

Why it works: Wanderer attacks extremely fast, driving Yelan and Xingqiu's rain swords perfectly. The Hydro absorption extends his flight time by 20 points, allowing for longer field time.

Rotations & Combos

Hypercarry Rotation:
Faruzan Q E CA > Zhongli Hold E > Bennett E Q > Wanderer CA E -> NA Spam -> Q (Finish)

Tip: Always use one Charged Attack before using E if you have Desert Pavilion Chronicle to activate the set bonus. If playing C2 Wanderer, save Q for the very last split second of flight.

Frequently Asked Questions

Wanderer vs. Xiao?
Xiao has better AoE and survivability but relies heavily on Burst. Wanderer is better for single-target/tracking enemies, overworld exploration, and doesn't rely on Burst, but is more fragile.

Is Faruzan mandatory?
For Hypercarry, yes. She provides RES Shred and DMG Bonus that no one else can match. At C6 she also provides 40% Crit DMG. Without her, Wanderer's damage ceiling is significantly lower.

Data Source: KQM Standards. Last Updated: December 2025

Kazuha Guide: The Definitive Build & Analysis

Background of Kazuha 

Kazuha Genshin Impact Character Art
Rarity (5-Star)
Element Anemo
Weapon Sword
Best Role Elemental Buffer / Grouper
Stat Priority EM > ER > ATK%
Tier SS+ (Universal Support)

Kaedehara Kazuha is widely considered the best support character in Genshin Impact. His ability to group enemies, shred resistances (VV Set), and provide a massive Elemental DMG Bonus (Passive) based on his EM makes him the cornerstone of almost every reaction-based team.


Pros

  • Provides massive Elemental DMG Bonus to teammates.
  • Strong crowd control (suction) on a short cooldown.
  • Can "Double Swirl" to buff two elements at once.
  • Excellent exploration utility (mid-air jump).
  • Easy to build (Full EM + ER).

Cons

  • Burst animation can obscure vision.
  • Cannot swirl Geo or Dendro (useless in pure Dendro teams).
  • High EM pieces are rare and hard to farm.

Quick Guide (TL;DR)

If you don't have time for the math, here is the cheat sheet.

  • Best Artifact: 4pc Viridescent Venerer (Mandatory).
  • Alt Artifact: None. VV is the reason you play him.
  • Best Weapon: Freedom-Sworn (Signature - Team Buffs).
  • F2P Weapon: Iron Sting (Craftable EM) or Toukabou Shigure.
  • Support Weapon: Favonius Sword (Battery - High Value).
  • Main Stats: SANDS: EM or ER | GOBLET: EM | CIRCLET: EM.
  • Talent Priority: Elemental Burst > Elemental Skill > Normal Attack.
  • Top Team: Kazuha + Childe + Xiangling + Bennett (International).
Pro Tip: Double Swirl: In teams like International (Hydro/Pyro), Kazuha can swirl both elements. Apply Hydro to enemy -> Bennett Q (applies Pyro to self) -> Kazuha E (Swirls Hydro on enemy, then infuses self-Pyro to Swirl Pyro). This shreds RES and buffs DMG for BOTH elements.

Need Primogems for Kazuha?

Get Genesis Crystals at a discounted price with instant delivery.

Top Up Secure & Fast via GameCharge

Ascension & Talent Materials

Category Material Name Source
Ascension Sea Ganoderma Inazuma Coasts / Golden Apple Archipelago (Temp)
Boss Drop Marionette Core Maguu Kenki (Inazuma)
Talent Books Teachings of Diligence Taishan Mansion (Tue/Fri/Sun)
Common Drop Treasure Hoarder Insignia Treasure Hoarders

Talent Breakdown & Mechanics

Elemental Skill: Chihayaburu

  • Tap E: Quick jump. Can be used in mid-air. Good for exploration and quick energy. Cooldown 6s.
  • Hold E: Larger AoE, stronger pull (suction). Cooldown 9s. Better for grouping spread-out enemies.
  • Midare Ranzan: After using E, your Plunging Attack converts to Anemo DMG and creates a wind tunnel that pulls enemies. This is a crucial part of his rotation.

Elemental Burst: Kazuha Slash

  • Cost: 60 Energy | Cooldown: 15s
  • Autumn Whirlwind: Creates a large field that deals periodic Anemo DMG.
  • Absorption: Absorbs Hydro/Pyro/Cryo/Electro and deals additional damage of that type. This is excellent for maintaining elemental aura (e.g. keeping Hydro on enemies for Hu Tao).

Passive: Poetics of Fuubutsu

  • The Buffer: Upon triggering a Swirl reaction, Kazuha grants teammates an Elemental DMG Bonus to their corresponding element based on 0.04% of his Elemental Mastery for 8s.
  • The Math: 1000 EM = 40% DMG Bonus. This is huge. Bonuses for different elements can coexist (Double Swirl).

Talent Priority Order:

  1. Elemental Burst (Level 9) - Damage source.
  2. Elemental Skill (Level 9) - Damage source.
  3. Normal Attack (Level 8) - Increases Plunge damage from Skill.

Stat Requirements & ER Thresholds

Kazuha needs EM for buffing and ER for bursting. Balancing these is the key to building him.

Weapon Team Context ER Requirement
Freedom-Sworn / Iron Sting Solo Anemo 180% - 200%
Favonius Sword Any 160% - 170%
Xiphos' Moonlight High Refinement 160% - 180%

Substat Priority:

  1. Energy Recharge (Until requirements met)
  2. Elemental Mastery (Every roll helps)
  3. CRIT Rate (Only if using Favonius Sword)
  4. ATK% (Increases Swirl DMG slightly, low priority)

Best Artifacts Comparison

Set Name Role Reasoning
4pc Viridescent Venerer (VV) Mandatory Reduces enemy Elemental RES by 40% when Swirling. This is non-negotiable. Do not run any other set on Support Kazuha.
4pc Thundering Fury Aggravate Driver Niche build for on-field DPS Kazuha in Aggravate teams. Reduces Skill CD for more plunges. Fun but not meta support.

Weapon Rankings

Weapon Type Performance Notes
Freedom-Sworn EM S+ Signature. High EM. Passive buffs team ATK and Normal/Charged/Plunge DMG. Stacks with Noblesse.
Xiphos' Moonlight EM S Converts Kazuha's EM into Energy Recharge for the whole team. Extremely valuable for team rotation smoothing.
Favonius Sword ER% S (Utility) Solves energy problems entirely. Requires Crit Rate circlet or substats. Often preferred over Iron Sting in energy-hungry teams.
Iron Sting / Toukabou EM A (F2P) Solid EM stat sticks. Passives are negligible for support, but they help reach the 1000 EM goal.

Constellation Value

Kazuha is perfectly complete at C0. His C2 is his strongest spike.

  • C1: Scarlet Hills - (Energy/Combo) Resets Skill cooldown after using Burst. Allows E -> Q -> E combo. Great for energy generation and grouping.
  • C2: Yamaarashi Tailwind - (Broken) Inside his Burst field, Kazuha gets +200 EM, and the active character gets +200 EM. This is a massive buff for Vape/Melt teams (comparable to Sucrose C6).
  • C6: Crimson Momiji - (DPS Unlock) Infuses Normal Attacks with Anemo after using Skill/Burst. Increases DMG based on EM. Turns him into a viable Main DPS.

Verdict: C0 is S-Tier. C2 is God-Tier. C6 is for fun.

Top Team Compositions

1. International (Childe Vape)

  • Main DPS: Tartaglia (Childe)
  • Sub-DPS: Xiangling
  • Buffer/Healer: Bennett
  • Support: Kazuha

Why it works: Kazuha can Double Swirl Hydro and Pyro easily here. He gathers enemies for Childe's riptide and Xiangling's Pyronado to shred. The highest damage ceiling team in the game for AoE.

2. Ayaka Premium Freeze

  • Main DPS: Ayaka
  • Sub-DPS: Shenhe / Rosaria
  • Hydro: Kokomi / Mona
  • Support: Kazuha

Why it works: Kazuha groups enemies so Ayaka's burst hits all of them. His Cryo DMG buff scales Ayaka's damage significantly.

Rotations & Combos

Double Swirl Setup (International):
Childe E (Apply Hydro) > Bennett Q (Apply Pyro to Kazuha) > Kazuha Hold E -> Plunge

Explanation: Kazuha's E swirls the Hydro on the enemy first. Then, on the way down (Plunge), he absorbs the Pyro from Bennett's circle on himself, dealing Pyro DMG and swirling Pyro. Both elements are now buffed and shredded.

Frequently Asked Questions

Venti vs. Kazuha?
Venti is better for energy refund and gathering spread-out small mobs (Morgana). Kazuha is better for buffing damage (Elemental DMG Bonus) and handling heavier enemies that Venti can't lift.

Is EM or Crit better?
For C0-C5 Support Kazuha, Full EM is always better because his buff scales off it. Crit is only relevant if you use Favonius Sword (need Crit Rate to proc) or if you are C6 DPS.

Data Source: KQM Standards. Last Updated: December 2025

Ifa Guide: The Definitive Build & Analysis

Background of Ifa 

Ifa Genshin Impact Character Art
Rarity (4-Star)
Element Anemo
Weapon Catalyst
Best Role EM Healer / Taser Support
Stat Priority EM > ER > ATK%
Tier A (Electro-Charged Niche)

Ifa is the Flower-Feather Clan's acclaimed Saurian Veterinarian. He is a unique 4-star Anemo Healer who scales entirely off Elemental Mastery (EM). Unlike Jean or Sayu (ATK scaling), Ifa is built to maximize Swirl damage while keeping the team alive, making him a premier pick for "Taser" (Electro-Charged) teams.


Pros

  • Unique EM-scaling healing (Double dips stats).
  • Strong synergy with Ororon and Electro-Charged.
  • Provides "Nightsoul" points for Natlan team mechanics.
  • Excellent crowd control via Burst.

Cons

  • Healing can be lower than burst healers (Jean/Bennett).
  • Niche usage (mostly Taser/Swirl teams).
  • Requires energy management to maintain Burst uptime.

Quick Guide (TL;DR)

If you don't have time for the math, here is the cheat sheet.

  • Best Artifact: 4pc Viridescent Venerer (Uncontested BiS).
  • Alt Artifact: 4pc Scroll of the Hero of Cinder City (If another Anemo has VV).
  • Best Weapon: A Thousand Floating Dreams (EM Stat Stick).
  • F2P Weapon: Sacrificial Fragments (EM & CD Reset) or Mappa Mare.
  • Support Weapon: Favonius Codex (Team Battery - Needs Crit).
  • Main Stats: SANDS: ER% or EM | GOBLET: EM | CIRCLET: EM or Healing Bonus.
  • Talent Priority: Elemental Burst > Elemental Skill > Normal Attack.
  • Top Team: Ifa + Ororon + Furina + Fischl (Natlan Taser).
Pro Tip: Unlike other healers, Ifa's healing scales with Elemental Mastery. This means you don't need Healing Bonus circlets; stacking pure EM increases both his Swirl damage and his healing output simultaneously.

Need Primogems for Ifa?

Get Genesis Crystals at a discounted price with instant delivery.

Top Up Secure & Fast via GameCharge

Ascension & Talent Materials

Category Material Name Source
Ascension Saurian Claw Succulent Natlan (Children of Echoes region)
Boss Drop Sparkless Statue Core Lava Dragon Statue (New World Boss)
Talent Books Teachings of Conflict Blazing Ruins (Wed/Sat/Sun)

Talent Breakdown & Mechanics

Elemental Skill: Airborne Disease Prevention

  • Cacucu Summon: Ifa summons his saurian companion, "Cacucu".
  • Nightsoul Blessing: Ifa gains 80 Nightsoul points and hovers. He can fire "Tonicshots" (Tap) or enter an Aiming Mode (Hold).
  • Healing Shot: Hitting allies with Tonicshots heals them based on Ifa's EM. Hitting enemies deals Anemo DMG.

Elemental Burst: Compound Sedation Field

  • Cost: 60 Energy | Cooldown: 15s
  • Crowd Control: Creates a wind field that pulls enemies in (similar to Kazuha/Venti but smaller).
  • Sedation Mark: If the field hits an enemy affected by Hydro/Pyro/Cryo/Electro, it applies a mark that explodes, dealing additional elemental damage.

Passive: Field Medic's Vision

  • Rescue Essentials: While in Nightsoul state, Ifa accumulates "Rescue Essentials" points based on the team's total Nightsoul points.
  • Buff: These points increase the damage of Swirl and Electro-Charged reactions for the entire party. This is his core buffing mechanic.

Talent Priority Order:

  1. Elemental Skill (Level 10) - Increases Healing scaling.
  2. Elemental Burst (Level 9) - Increases damage and pull strength.
  3. Normal Attack (Level 1) - Ignore.

Stat Requirements & ER Thresholds

Ifa needs high EM for healing/buffs, but must burst every rotation.

Team Context Weapon ER Requirement
Solo Anemo (Support) Sacrificial Fragments 180% - 200%
With Favonius Codex Favonius Codex 160% - 180%
Double Anemo (w/ Venti/Kazuha) Any 140% - 150%

Substat Priority:

  1. Elemental Mastery (Everything scales on this)
  2. Energy Recharge (Until requirement met)
  3. CRIT Rate (Only if using Favonius Codex)

Best Artifacts Comparison

Set Name Role Reasoning
4pc Viridescent Venerer (VV) BiS Support Ifa is Anemo. He Swirls. VV shreds 40% RES. This is mandatory for any Anemo support in reaction teams.
4pc Scroll of the Hero of Cinder City Natlan Support If another character holds VV (e.g. Kazuha is also in the team), Ifa can run this to buff Elemental DMG.
4pc Maiden Beloved Pure Healer Not recommended unless you are dying constantly. VV offers much more utility.

Weapon Rankings

Weapon Type Performance Notes
Sacrificial Fragments EM S+ Highest 4-star EM stat (221). Skill reset allows for more particles and better positioning of Cacucu.
A Thousand Floating Dreams EM S Nahida's lamp. Highest EM stat in game. Buffs team mastery. Best for healing output.
Favonius Codex ER% A (Battery) Use if your team needs energy. Requires building Crit Rate which dilutes his EM healing scaling.
Magic Guide EM A (3-Star) Cheap 3-star option with high EM. Surprisingly competitive if you have enough ER artifacts.

Constellation Value

Ifa is a 4-star, so C6 is the goal for maximum support capability.

  • C1: Vitiferous Elixir - (Energy) Restores 6 Energy when Skill hits an enemy. Significantly reduces ER needs.
  • C2: Ballistic Prayer - (Buff) When in Nightsoul Blessing, high party Nightsoul points grant more "Rescue Essentials" stacks, increasing the damage buff to EC/Swirl.
  • C6: Oath on a Feathered Knot - (Healing/DMG) Adds a 50% chance to fire an extra Tonicshot. Reduces Nightsoul/Phlogiston consumption by 20%. Greatly improves healing uptime and exploration.

Verdict: C1 makes him comfortable. C2 is his best buffing constellation.

Top Team Compositions

1. Natlan Taser (Recommended)

  • Driver/Healer: Ifa
  • Electro Sub: Ororon / Fischl
  • Hydro Sub: Furina / Xingqiu
  • Flex: Kazuha / Mavuika

Why it works: Ifa heals Furina's drain while swirling Electro/Hydro. His passive buffs the Electro-Charged damage. Ororon provides consistent off-field Electro and Nightsoul points.

2. Hyperbloom Trigger

  • Trigger: Ifa (Full EM)
  • Dendro: Nahida / Baizhu
  • Hydro: Yelan / Xingqiu
  • Electro: Fischl / Beidou

Why it works: While Kuki is better, Ifa can work as an Anemo trigger. By Swirling Electro onto Dendro Cores, he can trigger Hyperblooms that scale off his massive EM stat.

Rotations & Combos

Standard Support Rotation:
Furina E Q > Ifa Q (Heal) E (Hover) > Ororon E Q > Main DPS

Tip: Ifa's Skill (E) enters a flight mode. You can Hold E to aim and fire, or just let him hover to auto-target while you swap characters (if mechanics allow, otherwise stay on field to drive).

Frequently Asked Questions

Is he better than Jean/Sayu?
For **Nightsoul/Natlan** teams, yes, because he interacts with the regional mechanic. For generic teams, Jean offers better raw healing (Burst) and Sayu offers mobility. Ifa is a side-grade specializing in EM/Reaction buffs.

Why Elemental Mastery?
Ifa is unique; his healing scales off EM. This allows you to build him for full damage (Swirls) without sacrificing healing potency.

Data Source: Version 5.6 Beta Leaks. Last Updated: December 2025

Genshin Impact: Character Guide (Anemo & Geo)

Barbara Guide: The Definitive Build & Analysis


Barbara Genshin Impact Character Art
Rarity (4-Star Free)
Element Hydro
Weapon Catalyst
Best Role Healer / Bloom Driver
Stat Priority HP% (Healer) or EM (Bloom)
Tier B (Healer) / A (Nilou Bloom)

Barbara is the Deaconess of the Church of Favonius and an "Idol" in Mondstadt. She is a dedicated healer who provides Hydro application via her Melody Loop. While simple to play, she is a top-tier choice for Nilou Bloom teams due to her ability to apply Hydro on-field while tanking Dendro core damage.


Pros

  • Free character (Guaranteed at AR 18).
  • Instant full-party healing with Burst (Great for Furina).
  • C6 provides an auto-revive (Abyss lifesaver).
  • Low investment; works with 3-star weapon (TTDS).
  • Strong Hydro application in melee range (Bloom).

Cons

  • Applies "Wet" to self (Gets you frozen constantly vs Cryo).
  • Generates Zero energy particles (Needs battery).
  • Long cooldowns on Skill (32s) and Burst (20s).
  • Hydro application radius is very small (Melee only).

Quick Guide (TL;DR)

If you don't have time for the math, here is the cheat sheet.

  • Best Artifact (Healer): 4pc Ocean-Hued Clam (Adds DMG) or 4pc Maiden Beloved.
  • Best Artifact (Bloom): 4pc Gilded Dreams or 4pc Flower of Paradise Lost.
  • Best Weapon: Thrilling Tales of Dragon Slayers (3⭐ - Best Buffer).
  • Alt Weapon: Prototype Amber (Energy + Healing) or Sacrificial Fragments (Bloom).
  • Main Stats (Healer): SANDS: HP% / ER | GOBLET: HP% | CIRCLET: Healing Bonus.
  • Main Stats (Bloom): SANDS: EM | GOBLET: EM | CIRCLET: EM.
  • Talent Priority: Elemental Skill = Elemental Burst > Normal Attack.
  • Top Team: Barbara + Nilou + Nahida + Dendro MC (F2P Bloom).
Pro Tip: Be very careful using Barbara's Skill against Cryo enemies (Slimes, Mages, Heralds). You will be frozen repeatedly. In those matchups, use her strictly for Burst healing or switch characters.

Need Primogems for Nilou?

Get Genesis Crystals at a discounted price with instant delivery.

Top Up Secure & Fast via GameCharge

Ascension & Talent Materials

Category Material Name Source
Ascension Philanemo Mushroom Mondstadt Houses (On Walls/Roofs)
Boss Drop Cleansing Heart Oceanid (Liyue)
Talent Books Teachings of Freedom Forsaken Rift (Mon/Thu/Sun)
Common Mob Divining Scroll Samachurls

Talent Breakdown & Mechanics

Elemental Skill: Let the Show Begin♪

  • Melody Loop: Creates a water ring around the active character.
  • Wet Status: Applies Hydro to the active character periodically. This cleanses Pyro/Electro debuffs but makes you vulnerable to Freeze.
  • Healing: Heals the active character periodically based on Barbara's Max HP. If Barbara attacks while the loop is active, she heals the entire party.
  • Hydro App: Applies Hydro to enemies in melee range ("face-hugging"). This is crucial for Bloom teams.

Elemental Burst: Shining Miracle♪

  • Cost: 80 Energy | Cooldown: 20s
  • Big Heal: Instantly restores a massive amount of HP to all party members. The scaling is very high, often healing 20k+ HP at once.
  • I-Frame: Has a long animation, useful for dodging enemy nukes.

Passive: Glorious Season

  • Stamina: Characters within the Melody Loop consume 12% less Stamina. Good for charged attack users like Hu Tao or Yanfei.

Talent Priority Order:

  1. Elemental Skill (Level 9) - Main source of sustained healing/application.
  2. Elemental Burst (Level 8) - Emergency button.
  3. Normal Attack (Level 1) - Ignore unless Driver.

Stat Requirements & ER Thresholds

Barbara generates NO energy. You must rely on teammates, weapons, or stats to burst.

Build Stat Goal ER Requirement
Standard Healer 30,000+ HP 180% - 200%
Nilou Bloom 800+ Elemental Mastery 140% (Burst less important)

Substat Priority (Healer):

  1. HP% (Healing)
  2. Energy Recharge (To use Burst)
  3. Flat HP

Substat Priority (Bloom):

  1. Elemental Mastery (Damage)
  2. HP% (Survival)
  3. Energy Recharge

Best Artifacts Comparison

Set Name Role Reasoning
4pc Ocean-Hued Clam Healer/DPS Converts her massive healing into Physical DMG bubbles (up to 30k DMG). Best general set.
4pc Gilded Dreams Bloom Provides massive EM for reaction damage. Essential for Nilou Bloom triggers.
4pc Maiden Beloved Pure Heal Overkill on healing, but good if you are struggling to survive. Usually Clam is better.
4pc Instructor Support Cheap 4-star set. Provides 120 EM to the team. Good for Vape teams.

Weapon Rankings

Weapon Type Performance Notes
Thrilling Tales (TTDS) HP% S (BiS) 3-Star Weapon. Grants 48% ATK to the next character you swap to. HP substat boosts healing. Cheap and overpowered.
Sacrificial Fragments EM S (Bloom) Massive EM stat for Bloom reactions. Resets skill (not very useful for Barb, but stats are king).
Prototype Amber HP% A (Energy) Craftable. Restores energy after burst, solving her ER issues. Adds even more healing.
Favonius Codex ER% A (Battery) Use if your team needs energy particles. Requires Crit Rate on artifacts.

Constellation Value

Barbara is a free unit, so you will likely get her constellations over time.

  • C2: Vitality Burst - (Cooldown) Decreases Skill CD by 15%. While Skill is active, active character gains 15% Hydro DMG Bonus. Great for Childe/Ayato teams.
  • C6: Dedicating Everything to You - (Revive) When a party member falls, they are instantly revived to 100% HP. 15-minute cooldown. Invaluable for Spiral Abyss resets.

Verdict: C6 is her peak utility.

Top Team Compositions

1. Nilou Bloom (F2P Friendly)

  • Core: Nilou
  • Driver/Trigger: Barbara (Full EM)
  • Dendro: Nahida / Dendro MC
  • Dendro: Collei / Yaoyao

Why it works: Barbara's water ring applies Hydro to enemies in melee range constantly. Since Nilou's Bountiful Cores damage the player, Barbara's high healing keeps the team alive while she triggers blooms.

2. Taser Driver

  • Driver: Barbara (Clam)
  • Sub-DPS: Beidou
  • Sub-DPS: Fischl
  • Anemo: Kazuha / Sucrose

Why it works: Barbara attacks fast with normal attacks to drive Beidou/Fischl. She keeps the team healthy and deals physical damage with the Clam set.

Rotations & Combos

TTDS Buff Rotation:
Supports > Barbara E > IMMEDIATELY Swap to Main DPS

Tip: TTDS only buffs the character you swap into. Make sure you switch directly from Barbara to your Carry (e.g., Ayaka or Xiangling).

Frequently Asked Questions

Is Kokomi better?
Yes, Kokomi has better Hydro application range (Jellyfish), generates energy, and doesn't apply Wet to herself. However, Barbara is free, can crit (unlike Kokomi), and has burst healing.

Why do I keep freezing?
Barbara's skill applies "Wet" status to you every few seconds. If an enemy hits you with Cryo during that tick, you freeze. Be careful against Cryo enemies!

Data Source: KQM Standards. Last Updated: December 2025

Kamisato Ayato Guide: The Definitive Build & Analysis


Kamisato Ayato Genshin Impact Character Art
Rarity (5-Star)
Element Hydro
Weapon Sword
Best Role On-Field Hydro DPS
Stat Priority CRIT > ATK% > HP% > ER
Tier A (Versatile Carry)

Kamisato Ayato is the current head of the Kamisato Clan. As a Hydro sword user, he specializes in rapid, wide-area Hydro slashes. He is one of the most flexible DPS characters in the game, fitting comfortably into Vaporize, Freeze, Electro-Charged ("Soup"), and Hyperbloom teams.


Pros

  • Extremely easy to play (Hold Attack button).
  • Large AoE on both Skill and Burst.
  • Highly flexible team options (Hydro works everywhere).
  • Off-field Hydro application via Burst.

Cons

  • "Echoes" artifact set is ping-dependent (Bad for high ping).
  • Lower single-target ceiling than Hu Tao/Neuvillette.
  • Immobile during Elemental Skill slashes (vulnerable to interruption).

Quick Guide (TL;DR)

If you don't have time for the math, here is the cheat sheet.

  • Best Artifact: 4pc Echoes of an Offering (Ping < 100ms) or 4pc Heart of Depth.
  • Alt Artifact: 4pc Gladiator's Finale (Great stats) or 4pc Marechaussee Hunter (Furina teams).
  • Best Weapon: Haran Geppaku Futsu (Signature) or Primordial Jade Cutter.
  • F2P Weapon: Amenoma Kageuchi (Craftable/Style) or Finale of the Deep.
  • Support Weapon: The Black Sword (BP) or Lion's Roar (Taser).
  • Main Stats: SANDS: ATK% | GOBLET: Hydro DMG | CIRCLET: CRIT.
  • Talent Priority: Elemental Skill > Elemental Burst > Normal Attack (Ignore).
  • Top Team: Ayato + Nahida + Kuki Shinobu + Kazuha (Hyperbloom).
Pro Tip: Don't click! Just HOLD. When using his Elemental Skill, you can simply hold down the attack button to perform his slashes automatically at max speed.

Need Primogems for Haran Geppaku Futsu?

Get Genesis Crystals at a discounted price with instant delivery.

Top Up Secure & Fast via GameCharge

Ascension & Talent Materials

Category Material Name Source
Ascension Sakura Bloom Inazuma (Narukami Island) - Needs Electro
Boss Drop Dew of Repudiation Hydro Hypostasis (Watatsumi Island)
Talent Books Teachings of Elegance Violet Court (Tue/Fri/Sun)
Handguards Old/Kageuchi/Famed Nobushi / Kairagi

Talent Breakdown & Mechanics

Elemental Skill: Kamisato Art: Kyouka

  • Shunsuiken: Ayato leaves a watery illusion and enters the "Takimeguri Kanka" state. His Normal Attacks become insanely fast Hydro slashes.
  • Namisen Effect: When slashes hit, he gains Namisen stacks (up to 4/5). These stacks increase his slash damage based on his Max HP.
  • Immobility: During this state, he cannot move or use Charged/Plunge attacks. Holding the attack button is the optimal way to use it.

Elemental Burst: Kamisato Art: Suiyuu

  • Cost: 80 Energy | Cooldown: 20s | Duration: 18s
  • Hydro Field: Creates a massive area that rains down Bloomwater Blades (Hydro DMG).
  • Buff: Increases the Normal Attack DMG of characters inside the field. This buffs Ayato himself or teammates like Yoimiya.
  • Off-Field: Persists when Ayato swaps out, making him a great Hydro applicator for Freeze/Bloom.

Passive: Michiyuku Hagetsu

  • Energy Refund: If Ayato is off-field and has less than 40 Energy, he regenerates 2 Energy per second. This drastically lowers his ER requirements compared to other 80-cost burst units.

Talent Priority Order:

  1. Elemental Skill (Level 10) - Primary damage source.
  2. Elemental Burst (Level 9) - Great damage and buff.
  3. Normal Attack (Level 1) - Do not level this. His E skill has its own scaling.

Stat Requirements & ER Thresholds

Thanks to his passive, Ayato's ER needs are lower than expected.

Weapon Team Context ER Requirement
Amenoma Kageuchi (R5) Any 100% - 110%
Haran / Jade Cutter Double Hydro (w/ Yelan) 120% - 130%
Haran / Jade Cutter Solo Hydro 140% - 150%

Substat Priority:

  1. CRIT Rate / CRIT DMG (Target 70/140+)
  2. ATK%
  3. HP% (Valuable due to Namisen scaling, but ATK% is slightly better)
  4. Energy Recharge (Until requirement met)

Best Artifacts Comparison

Set Name Condition Reasoning
4pc Echoes of an Offering Ping < 100ms BiS if your internet is good. RNG procs boost Normal Attack DMG. If laggy, this set fails to trigger correctly.
4pc Heart of Depth Universal Consistent 30% Normal/Charged DMG bonus after using Skill. Safe choice for everyone.
4pc Gladiator's Finale High Substats Provides 35% Normal Attack DMG. You probably have good pieces of this from bosses.

Weapon Rankings

Weapon Type Performance Notes
Haran Geppaku Futsu CRIT Rate S+ Signature. Provides Elemental DMG bonus and massive Normal Attack DMG buffs. Matches his aesthetic perfectly.
Primordial Jade Cutter CRIT Rate S Massive 44% Crit Rate and HP% passive (which Ayato uses). Extremely competitive with Haran.
The Black Sword CRIT Rate A+ (BP) Best 4-star DPS weapon. Buffs Normal Attacks and provides healing sustain.
Amenoma Kageuchi ATK% A (F2P) Inazuma Craftable. Solves energy issues completely at R5. Looks great on him (Katana style).

Constellation Value

Ayato is a complete unit at C0. His constellations are mostly damage increases.

  • C2: World Source - (HP/Damage) Max Namisen stacks increased to 5. When at 3+ stacks, Max HP increased by 50%. This makes HP% substats much more valuable.
  • C3: To Admire the Flowers - (Skill) +3 Levels to Skill. Big damage boost for his slashes.
  • C6: Boundless Origin - (Nuke) First strike of Skill creates 2 extra slashes, each dealing 450% ATK. This is a massive burst of front-loaded damage.

Verdict: C0 is perfect. C2 is the best stopping point for investment.

Top Team Compositions

1. Hyperbloom

  • Driver: Ayato
  • Dendro: Nahida / Dendro MC
  • Trigger: Kuki Shinobu / Raiden (EM)
  • Flex: Kazuha / Yelan

Why it works: Ayato's fast Hydro application generates tons of Dendro Cores. His AoE slash hits multiple enemies, making this team excellent for mobbing.

2. Ayato Soup (Electro-Charged/Overload)

  • Main DPS: Ayato
  • Electro: Fischl
  • Anemo: Kazuha
  • Pyro/Buffer: Bennett

Why it works: "Soup" means mixing many reactions (Swirl, Electro-Charged, Vaporize, Overload) at once. Ayato drives everything while standing in Bennett's buff.

Rotations & Combos

Standard Rotation:
Ayato Q > Supports (Skill/Burst) > Ayato E (Hold Attack) > Repeat

Tip: Ayato's burst duration is long (18s). Cast it first so it's active while you cycle through supports, and it will still be up when you switch back to Ayato to slash.

Frequently Asked Questions

Heart of Depth or Echoes?
If your ping is usually under 100ms, Echoes is slightly better. If your ping fluctuates or is high (mobile data), stick to Heart of Depth or Gladiator for consistency.

Ayato vs. Tartaglia (Childe)?
Ayato is easier to play, has better AoE sustain, and is more flexible. Childe has a higher damage ceiling in International teams (Nuke) but requires strict cooldown management.

Data Source: KQM Standards. Last Updated: December 2025

Aino Guide: The Definitive Build & Analysis


Aino Genshin Impact Character Art
Rarity (4-Star)
Element Hydro
Weapon Claymore
Best Role Off-Field Hydro / Lunar Support
Stat Priority EM > ER > ATK
Tier A (Nod-Krai Specialist)

Aino is the genius inventor of the Clink-Clank Krumkake Craftshop in Nod-Krai. As the first Hydro Claymore user, she provides consistent off-field Hydro application via her "Cool Your Jets Ducky" turret. While comparable to Xingqiu, her true value lies in buffing Lunar Reactions and increasing the party's Moonsign level.


Pros

  • First off-field Hydro Claymore user (Unique weapon options).
  • Increases Party "Moonsign" level (Essential for Lauma/Flins).
  • Massive EM buffs for Lunar-Charged and Lunar-Bloom teams.
  • Turret has excellent uptime (comparable to Kokomi).

Cons

  • Lower personal damage than Xingqiu/Yelan.
  • Restricted to Nod-Krai teammates for full potential.
  • Turret is stationary (Circle Impact).
  • Claymore hit lag can feel clunky if played on-field.

Quick Guide (TL;DR)

If you don't have time for the math, here is the cheat sheet.

  • Best Artifact: 4pc Silken Moon's Serenade (BiS Support).
  • Alt Artifact: 4pc Flower of Paradise Lost (Hyperbloom/Lunar Bloom).
  • Best Weapon: Master Key (Craftable Nod-Krai Claymore).
  • Support Weapon: Favonius Greatsword (Universal Battery).
  • F2P Weapon: Mailed Flower (EM Stat Stick) or Rain Slasher.
  • Main Stats: SANDS: ER% or EM | GOBLET: Hydro DMG or EM | CIRCLET: CRIT or EM.
  • Talent Priority: Elemental Burst > Elemental Skill > Normal Attack.
  • Top Team: Aino + Lauma + Flins + Nefer (Nod-Krai Moon Team).
Pro Tip: Aino is the cheapest way to activate the "Gibbous" Moonsign tier. Even if you don't use her for damage, just having her in the party buffs your 5-star Nod-Krai characters significantly.

Need Primogems for Aino's Cons?

Get Genesis Crystals at a discounted price with instant delivery.

Top Up Secure & Fast via GameCharge

Ascension & Talent Materials

Category Material Name Source
Ascension Krumkake Gear (Placeholder) Nod-Krai Local Specialty (Factory Zone)
Boss Drop Frostmoon Core New 6.0 World Boss
Talent Books Teachings of Innovation Nod-Krai Talent Domain (Mon/Thu/Sun)

Talent Breakdown & Mechanics

Elemental Skill: Musecatcher

  • Deployment: Aino throws her Musecatcher device. It can be tapped for auto-target or held to aim.
  • Turret Mode: Deploys a field that deals AoE Hydro DMG every 2s.
  • Dragging: Unique to Claymores, Aino can drag enemies slightly with the anchor, providing minor crowd control.

Elemental Burst: Precision Hydronic Cooler

  • Cost: 60 Energy | Cooldown: 15s
  • Cool Your Jets Ducky: Summons a giant mechanical duck (yes, really) that bombards the area with Hydro.
  • Moonsign Synergy: The fire rate and AoE of the Ducky increase based on the party's "Moonsign" level (ascendant/gibbous).
  • Off-Field Application: Applies Hydro fast enough to support Dendro cores or Electro-Charged, but maybe not Hu Tao Vape solo.

Passive: Modular Efficiency Protocol

  • The Buffer: When Aino triggers a Hydro-related reaction, she boosts the party's Elemental Mastery by 60-120 (scaling with Moonsign level). This makes her a budget Nilou/Nahida hybrid for Lunar teams.

Talent Priority Order:

  1. Elemental Burst (Level 9) - Main source of Hydro App.
  2. Elemental Skill (Level 8) - Positioning tool.
  3. Normal Attack (Level 1) - Ignore.

Stat Requirements & ER Thresholds

Aino is an off-field support, so ER is king. She needs to burst every rotation to maintain the Hydro field.

Team Context Weapon ER Requirement
Solo Hydro Favonius Greatsword 180% - 200%
Double Hydro (w/ Yelan) Master Key (EM) 150% - 160%
Lunar Team (Triple Nod-Krai) Any 130% - 140%

Substat Priority:

  1. Energy Recharge (Until requirement met)
  2. Elemental Mastery (Buff scaling)
  3. ATK% (Damage scaling)
  4. CRIT Rate (Favonius trigger)

Best Artifacts Comparison

Set Name Role Reasoning
4pc Silken Moon's Serenade BiS Support Specifically designed for Nod-Krai supports. Buffs Lunar Reaction DMG and Elemental Mastery for the team.
4pc Noblesse Oblige General ATK Buff If you aren't running a Lunar team, the standard 20% ATK buff is always reliable.
4pc Flower of Paradise Lost Hyperbloom If Aino is triggering blooms herself (less likely), this maximizes reaction damage.

Weapon Rankings

Weapon Type Performance Notes
Master Key EM S Nod-Krai Craftable. Grants huge EM buffs based on ER. Perfect synergy with her kit.
Favonius Greatsword ER% S (Comfort) Essential for smooth rotations in energy-starved teams.
Mailed Flower EM A (Event) High EM stat stick. Good for personal reaction damage.
Rainslasher EM A- Use if you lack the above options. Passive works in Electro-Charged teams.

Constellation Value

Aino is a 4-star, so C6 is the goal for maximum support capability.

  • C1: Theory of Ash-Field - (Buff) After using Skill/Burst, increases her own EM by 80. Shares this EM with the team. Basic but solid support.
  • C4: Butter and Cats - (Energy) Restores 10 Energy when Skill hits an opponent. Massive QoL upgrade that allows you to drop ER for more offensive stats.
  • C6: Burden of Creative Genius - (The Big One) Increases DMG of Electro-Charged, Bloom, and Lunar-Bloom reactions by 15%. If in Ascendant Gleam (Moonsign), this doubles to 30%. This is her Kazuha C2 equivalent.

Verdict: C4 makes her comfortable. C6 makes her meta.

Top Team Compositions

1. Lunar Bloom (Lauma Team)

  • Main DPS: Lauma (Dendro)
  • Sub-DPS: Flins (Electro)
  • Hydro Support: Aino
  • Flex: Nahida / Baizhu

Why it works: Aino + Lauma + Flins activates the max "Moonsign" buffs. Aino applies Hydro for blooms, while Flins triggers them. Lauma drives the reaction on-field.

2. Budget Nilou Bloom

  • Driver: Nilou
  • Hydro: Aino
  • Dendro: Nahida
  • Healer: Yaoyao / Baizhu

Why it works: Aino works as a budget Kokomi/Xingqiu replacement. She provides Hydro application and EM buffs (C1) which directly benefit Bountiful Cores.

Rotations & Combos

Standard Support Rotation:
Aino Q (Deploy Ducky) > Aino E (Generate Particles) > Swap to Main DPS

Tip: Always Burst first if using C1/C6 buffs to ensure the Main DPS gets the full duration of the EM boost.

Frequently Asked Questions

Is she better than Xingqiu?
Generally, no. Xingqiu offers damage reduction, interrupt resistance, and faster hydro app. Aino is better specifically in Nod-Krai / Lunar teams where her passive buffs shine.

What is "Moonsign"?
It's a regional mechanic from Version 6.0. Having 2+ Nod-Krai characters in a team increases the Moonsign level (Ascendant/Gibbous), unlocking extra passives on characters like Aino and Lauma.

Data Source: Version 6.0 Beta Leaks. Last Updated: October 2025

Genshin Impact Character Guide (Pyro & Cryo)

Kamisato Ayaka Guide: The Definitive Build & Analysis


Kamisato Ayaka Genshin Impact Character Art
Rarity (5-Star)
Element Cryo
Weapon Sword
Best Role Freeze Main DPS
Stat Priority CRIT DMG > ATK% > ER > CRIT Rate
Tier S (The Freeze Queen)

Kamisato Ayaka is the Shirasagi Himegimi and the gold standard for Cryo DPS. Famous for her "blender" Elemental Burst which deals massive ticking damage, she excels in Perma-Freeze teams where she can lock enemies in place and delete them instantly. Her alternate sprint gives her 100% Cryo uptime.


Pros

  • Highest front-loaded burst damage in the game.
  • Freeze teams offer incredible safety and crowd control.
  • Very F2P friendly (Amenoma Kageuchi is amazing).
  • Alternate sprint makes overworld traversal over water easy.
  • Doesn't rely on Bennett, freeing him for other teams.

Cons

  • Burst can miss moving/unfreezable bosses easily.
  • Standard dash feels clunky to some players (Alternate Sprint).
  • Highly dependent on freezing enemies for Crit Rate (Blizzard set).
  • Requires good energy management without Amenoma.

Quick Guide (TL;DR)

If you don't have time for the math, here is the cheat sheet.

  • Best Artifact: 4pc Blizzard Strayer (Uncontested BiS).
  • Alt Artifact: 2pc Blizzard + 2pc ATK% (Only for bosses).
  • Best Weapon: Mistsplitter Reforged (Signature) or Haran Geppaku.
  • F2P Weapon: Amenoma Kageuchi (Craftable - R5 is highly recommended).
  • Main Stats: SANDS: ATK% | GOBLET: Cryo DMG | CIRCLET: CRIT DMG.
  • Talent Priority: Elemental Burst > Normal Attack > Elemental Skill.
  • Top Team: Ayaka + Shenhe + Kazuha + Kokomi (Premium Freeze).
Pro Tip: Don't overcap Crit Rate! With 4pc Blizzard Strayer (+40% vs Frozen) and Cryo Resonance (+15%), Ayaka gets 55% FREE Crit Rate. You only need about 30-45% Crit Rate on her stats screen. Focus everything else on Crit DMG and ATK.

Need Primogems for Mistsplitter?

Get Genesis Crystals at a discounted price with instant delivery.

Top Up Secure & Fast via GameCharge

Ascension & Talent Materials

Category Material Name Source
Ascension Sakura Bloom Inazuma (Narukami Island) - Needs Electro
Boss Drop Perpetual Heart Perpetual Mechanical Array (Inazuma)
Talent Books Teachings of Elegance Violet Court (Tue/Fri/Sun)
Common Mob Handguards Nobushi / Kairagi

Talent Breakdown & Mechanics

Alternate Sprint: Kamisato Art: Senho

  • Cryo Infusion: When Ayaka reappears from her dash, she applies Cryo to nearby enemies and infuses her attacks with Cryo for 5s.
  • Gameplay Loop: You must dash every 5 seconds to keep your weapon infused. This also grants you 18% Cryo DMG Bonus (Ascension 4 Passive).

Elemental Burst: Kamisato Art: Soumetsu

  • The Blender: Unleashes a snowstorm that moves forward, slashing enemies repeatedly. Deals 19 cuts + 1 bloom damage.
  • Snapshot: The damage of the entire burst is calculated based on Ayaka's stats at the moment of casting. If you are standing in Bennett's circle or have Kazuha's buff when you press Q, the entire storm keeps that buff even if it expires.
  • Freeze Interaction: The storm pushes small enemies away. Freezing them locks them in place, ensuring every single tick of damage hits. This is why Freeze is mandatory.

Elemental Skill: Kamisato Art: Hyouka

  • Launcher: Deals AoE Cryo DMG and launches small enemies.
  • Buff: Grants 30% Normal and Charged Attack DMG bonus for 6s (Passive).
  • Particles: Generates 4-5 particles. Use this to battery your Burst.

Talent Priority Order:

  1. Elemental Burst (Level 10) - 60-70% of her total damage.
  2. Normal Attack (Level 9) - For Charged Attack spam.
  3. Elemental Skill (Level 8) - Good nuke, but lower priority.

Stat Requirements & ER Thresholds

Ayaka is burst-reliant (80 Cost). Missing a burst rotation results in massive DPS loss. Amenoma Kageuchi lowers these requirements significantly.

Weapon Team Context ER Requirement
Amenoma Kageuchi (R5) Double Cryo 100% - 110% (Base)
Mistsplitter / Other 5* Double Cryo (w/ Battery) 130% - 140%
Mistsplitter / Other 5* No Battery / Solo Cryo 160%+ (Not recommended)

Substat Priority:

  1. Energy Recharge (Until requirement met - critical)
  2. CRIT DMG (Stack as much as possible, 200%+)
  3. ATK% (Aim for 2000+)
  4. CRIT Rate (Stop at ~45%)

Best Artifacts Comparison

Set Name Role Reasoning
4pc Blizzard Strayer BiS Provides +40% Crit Rate vs Frozen enemies. Combined with Cryo Resonance (+15%), you get 55% Free Crit Rate. Unbeatable.
4pc Emblem of Severed Fate Burst Support Viable if you use Ayaka solely as a Burst bot and struggle with energy, but lower damage ceiling than Blizzard.
2pc Blizzard / 2pc ATK Unfreezable Bosses Against bosses that cannot be frozen, 4pc Blizzard loses value. This mix is consistent but requires higher Crit Rate stats.

Weapon Rankings

Weapon Type Performance Notes
Mistsplitter Reforged CRIT DMG S+ Signature. Provides massive Elemental DMG bonus. Ayaka easily maintains all 3 stacks (Infused Normal Attack -> Burst).
Amenoma Kageuchi (R5) ATK% S (F2P God) Inazuma Craftable. Refunds huge amounts of energy after burst. Allows you to ignore ER stats completely. Often beats 5-star weapons like Aquila/Skyward.
Finale of the Deep (R5) ATK% A+ Fontaine Craftable. Higher damage ceiling than Amenoma IF you have a healer (Kokomi/Charlotte) to clear the Bond of Life, but requires ER stats.
Haran Geppaku Futsu CRIT Rate S Ayato's sword. Good stat stick, but be careful not to overcap Crit Rate with Blizzard Strayer.

Constellation Value

Ayaka is complete at C0. Her constellations are pure damage increases.

  • C2: Blizzard Blade Seki no To - (Damage/AoE) Burst creates 2 additional smaller whirlwinds dealing 20% damage each. Adds massive AoE coverage and shield breaking. ~30% DPS increase.
  • C4: Ebb and Flow - (Shred) Enemies damaged by Burst have their DEF decreased by 30%. This is a rare multiplier that boosts the entire team's damage. Extremely powerful.
  • C6: Dance of Suigetsu - (Frontload) Every 10s, Charged Attack DMG is increased by 298%. Gives her a "mini-nuke" charged attack, great for speedrunning small waves.

Verdict: C0 is perfect. C2 and C4 are the best stopping points for whales.

Top Team Compositions

1. Premium Freeze (Shenhe)

  • Main DPS: Ayaka
  • Buffer: Shenhe
  • Anemo: Kazuha
  • Hydro: Kokomi / Mona

Why it works: Shenhe buffs Ayaka's Quills. Kazuha boosts Elemental DMG. Kokomi applies hydro and holds Thrilling Tales (TTDS) + Tenacity. Ayaka snapshots all these buffs into her burst for apocalyptic damage.

2. F2P Freeze

  • Main DPS: Ayaka
  • Battery: Rosaria / Kaeya / Diona
  • Anemo: Sucrose
  • Hydro: Barbara / Xingqiu

Why it works: Functional version of the premium team. Rosaria generates particles. Sucrose shreds RES (VV). Barbara applies hydro at close range (Ayaka is melee anyway).

Rotations & Combos

Premium Rotation:
Shenhe Hold E Q > Kazuha E Q > Kokomi E > Ayaka Dash -> N1 -> E -> Q > Ayaka N2C Spam

Explanation: You must Dash -> N1 (Normal Attack) before Q to ensure you apply Cryo for Kazuha to swirl/buff (if it wore off) and to gain Mistsplitter stacks if you have it.

Frequently Asked Questions

Freeze vs. Bosses?
Ayaka struggles slightly against unfreezable bosses because they can move out of her burst. However, her raw damage is usually high enough to brute force them. Against bosses, Amenoma value drops slightly and ER value rises (less particles from enemies).

Finale of the Deep or Amenoma?
Amenoma Kageuchi is generally preferred for comfort (no ER needed). Finale of the Deep has a higher damage ceiling but forces you to build ER artifacts and requires a healer to clear the Bond of Life.

Data Source: KQM Standards. Last Updated: December 2025

Wriothesley Guide: The Definitive Build & Analysis


Wriothesley Genshin Impact Character Art
Rarity (5-Star)
Element Cryo
Weapon Catalyst (Melee)
Best Role On-Field DPS (Melt/Freeze)
Stat Priority CRIT > ATK% > EM (Melt)
Tier A+ (Solid Carry)

Wriothesley is the Administrator of the Fortress of Meropide and a Cryo Catalyst user who prefers to punch his problems away. He specializes in Normal Attack weaving, draining his own HP to deal increased damage, and recovering it with powerful Charged Attack uppercuts.


Pros

  • Excellent damage in both Freeze and Melt teams.
  • Best user of the broken Marechaussee Hunter set.
  • Self-sustaining (heals himself).
  • Flexible rotations; doesn't rely heavily on Burst.
  • Very strong C1 (Quality of Life + Damage).

Cons

  • HP management can be tricky at C0 (needs a healer).
  • Lacks interruption resistance (needs a shield).
  • Short range compared to other Catalysts.
  • C1 feels like a "complete kit" lock for some players.

Quick Guide (TL;DR)

If you don't have time for the math, here is the cheat sheet.

  • Best Artifact: 4pc Marechaussee Hunter (BiS - 36% Free Crit).
  • Alt Artifact: 4pc Blizzard Strayer (Freeze) or 4pc Shimenawa (Melt).
  • Best Weapon: Cashflow Supervision (Signature) or Tulaytullah's Remembrance.
  • F2P Weapon: Flowing Purity (Craftable) or Ballad of the Boundless Blue.
  • Main Stats: SANDS: ATK% or EM | GOBLET: Cryo DMG | CIRCLET: CRIT DMG.
  • Talent Priority: Normal Attack > Elemental Skill > Elemental Burst.
  • Top Team: Wriothesley + Xiangling + Bennett + Shenhe (Burnmelt).
Pro Tip: At C0, Wriothesley stops draining HP (and losing damage buffs) if he drops below 50% HP. You MUST run a healer (Bennett/Mika) to keep him above 50% HP to maintain his skill buff. At C1, he sustains himself much better.

Need Primogems for C1 Wriothesley?

Get Genesis Crystals at a discounted price with instant delivery.

Top Up Secure & Fast via GameCharge

Ascension & Talent Materials

Category Material Name Source
Ascension Subdetection Unit Fontaine Research Institute Areas
Boss Drop Tourbillon Device Experimental Field Generator (Fontaine)
Talent Books Teachings of Order Pale Forgotten Glory (Wed/Sat/Sun)

Talent Breakdown & Mechanics

Normal Attack: Forceful Fists of Frost

  • The Combo: A 5-hit combo (fast punches). This is your main damage source.
  • The Mechanic: Using Normal Attacks drains his HP (if Skill is active).

Elemental Skill: Icefang Rush

  • Chilling Penalty: Wriothesley enters a state where he gains resistance to interruption.
  • Buff: If his HP is > 50%, his Normal Attacks deal increased damage but drain 4.5% HP per hit.
  • Strategy: You want to be in this state 100% of the time you are attacking. If you drop below 50% HP, the buff turns off.

Elemental Burst: Darkgold Wolfbite

  • Cost: 60 Energy | Cooldown: 15s
  • The Nuke: Deals multiple hits of AoE Cryo DMG in a frontal cone. Uses Ousia alignment.
  • Usage: Use it to finish rotations or trigger melt, but don't build excessive ER for it.

Passive: Gracious Rebuke (The Uppercut)

  • The Heal: When Wriothesley's HP falls below 60%, he gains a "Gracious Rebuke."
  • Effect: His next Charged Attack consumes 0 Stamina, deals 50% increased damage, and heals him for 30% of his Max HP. This is how you sustain his HP drain without a healer (mostly).

Talent Priority Order:

  1. Normal Attack (Level 10) - Most damage comes from NAs and the Rebuke CA.
  2. Elemental Skill (Level 9) - Buffs the NA multiplier.
  3. Elemental Burst (Level 8) - Good nuke, but lower priority.

Stat Requirements & ER Thresholds

Wriothesley is primarily a Normal Attack DPS, so ER is not a strict requirement unless you want to burst every rotation.

Team Context ER Requirement (Burst Every Rotation) ER Requirement (Burst Every Other)
Burnmelt (Solo Cryo) 130% - 140% 0% - 110%
Freeze (Double Cryo) 110% - 120% 0%

Substat Priority:

  1. CRIT DMG (Ascension + MH Set gives tons of Rate)
  2. CRIT Rate (Cap at 64% due to MH set passive)
  3. ATK%
  4. Elemental Mastery (Vital for Melt teams)

Best Artifacts Comparison

Set Name Role Reasoning
4pc Marechaussee Hunter BiS Wrio drains his own HP constantly. This set gives 15% Normal Attack DMG and 36% CRIT Rate. It is mathematically superior to everything else.
4pc Blizzard Strayer Freeze Only Good for Perma-Freeze teams, but overcaps on Crit Rate easily. Useless for Melt.
4pc Shimenawa's Reminiscence Melt Alt Boosts Normal/Charged DMG by 50%. Viable for Melt, but restricts Burst usage.

Weapon Rankings

Weapon Type Performance Notes
Cashflow Supervision CRIT Rate S+ Signature. High Base ATK, Crit Rate, and buffs Normal/Charged Attack DMG based on HP fluctuation. Perfect.
Tulaytullah's Remembrance CRIT DMG S Wanderer's Bell. Buffs Normal Attack speed and damage. Excellent alternative.
The Widsith (R5) CRIT DMG A+ (RNG) Massive burst damage if you roll the right buff. Downtime hurts consistent DPS.
Flowing Purity (R5) ATK% A (F2P) Fontaine Craftable. Grants Elemental DMG bonus when healing (Bond of Life mechanic). Wrio clears the bond easily.

Constellation Value

Wriothesley has one of the most impactful C1s in the game.

  • C1: Terror for the Evildoers - (Game Changer) Changes "Gracious Rebuke" condition from <60% HP to "If HP is <60% OR if the 5th attack of the combo hits". This means you get a guaranteed healing uppercut every combo string, making him self-sufficient and increasing damage massively (200% DMG on CA).
  • C2: Shackles for the Arrogant - (Burst) Increases Burst DMG by up to 200% based on HP fluctuation stacks. Turns his burst into a nuclear bomb.
  • C6: Esteem for the Innocent - (Whale) Increases Rebuke Charged Attack Crit Rate by 10% and Crit DMG by 80%. Also creates an additional icicle.

Verdict: C1 is highly recommended if you main him. It solves his HP management issues.

Top Team Compositions

1. Burnmelt (Highest Ceiling)

  • Main DPS: Wriothesley
  • Dendro: Nahida / Emilie
  • Pyro: Thoma / Dehya
  • Buffer: Bennett / Shenhe

Why it works: Burning maintains a constant Pyro aura on the enemy. Wriothesley melts his hits (2.0x DMG) against this aura. Requires Thoma/Dehya for interrupt resistance.

2. Oven / Freeze

  • Main DPS: Wriothesley
  • Sub-DPS: Furina
  • Healer: Charlotte / Mika / Jean
  • Anemo/Flex: Kazuha / Yelan

Why it works: Furina buffs damage and freezes enemies. A team healer (Charlotte/Jean) ensures Furina's fanfare stacks max out instantly, while Wriothesley manages his own HP.

Rotations & Combos

C0 Combo (HP Positive):
E > N5 > N5C (Charged Attack) > Repeat. Watch for the red aura (Rebuke) before CA.

C1 Combo (Optimum):
E > N5C (Always do CA after 5th hit) > N5C...

Frequently Asked Questions

Do I need a healer?
At C0, yes. Wriothesley drains his HP to 50% quickly. If he is below 50%, his Skill stops buffing him. You need Bennett, Mika, or Charlotte to keep him topped up. At C1, he heals himself enough to sustain, but a healer is still comfy.

Wriothesley vs. Ayaka?
Ayaka has higher front-loaded burst damage (better for speedrunning bosses). Wriothesley has better sustained damage and flexibility (can Melt or Freeze). He is also much easier to play in the overworld.

Data Source: KQM Standards. Last Updated: December 2025