RSS

Blog posts of '2025' 'December'

Skirk Guide: The Definitive Build & Analysis


Skirk Genshin Impact Character Art
Rarity (5-Star)
Element Hydro (Speculative)
Weapon Sword
Best Role Hypercarry / Shield Breaker
Stat Priority CRIT > HP% > ER
Tier SS (Abyss Tier)

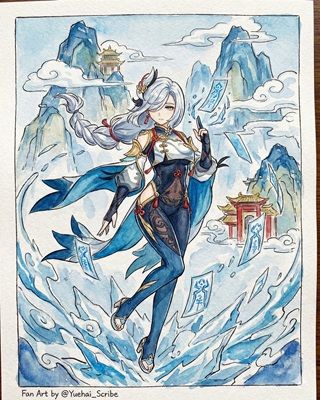
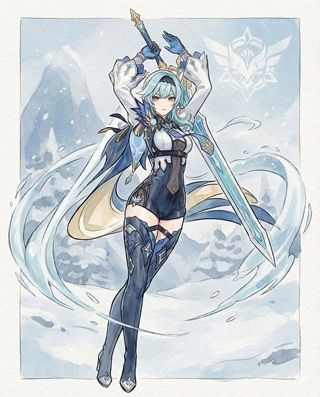
Skirk is a mysterious swordswoman from the darkest corners of the universe and the master of Tartaglia. While her official release is pending, she is theorized to be a "Void-Style" DPS who utilizes HP manipulation to deal damage that ignores enemy defenses, embodying the "Foul Legacy" fighting style.


Pros

  • Insane scaling that ignores partial DEF (Speculative).
  • Unique "Abyssal" aesthetic and animations.
  • Synergizes perfectly with HP fluctuation buffers (Furina).
  • Strongest single-target burst potential in lore.

Cons

  • Likely drains team HP, requiring a strong healer.
  • May have energy issues without a battery.
  • High investment floor (Artifacts/Weapon).
  • Release date is currently unknown (Long wait).

Quick Guide (TL;DR)

If you don't have time for the math, here is the cheat sheet (Speculative).

  • Best Artifact: 4pc Nymph's Dream (Lore Accurate) or 4pc Marechaussee Hunter.
  • Alt Artifact: 4pc Heart of Depth (General Hydro).
  • Best Weapon: Splendor of Tranquil Waters (Furina's Sword) or Primordial Jade Cutter.
  • F2P Weapon: Finale of the Deep (Craftable) or The Catch (If polearm).
  • Main Stats: SANDS: HP% or ATK% | GOBLET: Hydro DMG | CIRCLET: CRIT.
  • Talent Priority: Elemental Burst > Elemental Skill > Normal Attack.
  • Top Team: Skirk + Furina + Yelan + Baizhu (Mono Hydro/Abyss).
Pro Tip: As Childe's master, Skirk is expected to have a "Stance Change" mechanic. Managing her cooldowns will likely be key to her gameplay loop, similar to the International Team rotation.

Saving for Skirk?

Stock up on Genesis Crystals now to be ready for her release!

Top Up Secure & Fast via GameCharge

Ascension & Talent Materials (Speculative)

Category Material Name Source
Ascension Unknown Abyssal Gem Future Khaenri'ah/Abyss Expansion
Boss Drop All-Devouring Narwhal Horn Shadow of Another World (Fontaine)
Talent Books Teachings of Order/Light Likely a new domain

Talent Breakdown & Mechanics (Theory)

Elemental Skill: Void Breach

  • Blink Strike: Skirk dashes through enemies (similar to Rosaria but faster), dealing Hydro/Abyssal DMG.
  • Rift Marks: Marks enemies with "Abyssal Corrosion." Marked enemies take damage over time and have reduced DEF.
  • Stance Change? Like Childe, she might enter a "Foul Legacy" stance, swapping her sword for dual blades or a whip-blade.

Elemental Burst: Celestial Devourer

  • The Whale: Summons a massive entity (similar to the Narwhal boss) to crash onto the field.
  • Black Hole: After the crash, leaves a singularity that pulls enemies in continuously (Venti-tier CC).
  • Execution: Deals increased damage to enemies below 30% HP.

Passive: Master of the Foul

  • Team Buff: Increases the entire party's Normal Attack Level by +1 (similar to Childe).

Talent Priority Order (Predicted):

  1. Elemental Skill (Stance/Damage)
  2. Elemental Burst (Nuke)
  3. Normal Attack (Passive utility)

Stat Requirements & ER Thresholds

Assuming a standard 60-80 Energy Cost, Skirk will likely need a battery or Hydro resonance.

Team Context Weapon ER Requirement
Double Hydro (w/ Yelan) Signature 130% - 140%
Mono Hydro (w/ Furina) Any 110% - 120%
Solo Hydro Any 180%+

Substat Priority:

  1. CRIT Rate / CRIT DMG (Standard Carry)
  2. HP% (If scaling on HP like other Hydro units)
  3. ATK% (If scaling on ATK)
  4. Energy Recharge

Best Artifacts Comparison

Set Name Role Reasoning
4pc Nymph's Dream Lore BiS Given to Childe by the Abyss. Likely designed for Skirk's combat style of weaving attacks and skills.
4pc Marechaussee Hunter HP Drain If her kit involves HP manipulation (common in Fontaine/Abyss themes), this provides a massive 36% Crit Rate.
4pc Emblem of Severed Fate Burst Nuke If her main damage source is her Burst, this is the universal standard.

Weapon Rankings

Weapon Type Performance Notes
Splendor of Tranquil Waters CRIT DMG S+ Furina's sword. Good for HP scalers who fluctuate HP.
Primordial Jade Cutter CRIT Rate S Universal stat stick. 44% Crit Rate is hard to beat for any DPS.
The Black Sword CRIT Rate A (BP) Boosts Normal/Charged attacks. Solid if she is a NA spammer.
Finale of the Deep ATK% A (F2P) Craftable Fontaine sword. Good aesthetics and decent stats for ATK scalers.

Constellation Value (Predicted)

As a master of the Abyss, her constellations likely break game rules (CD reduction, DEF ignore).

  • C1: Abyssal Hunger - (Energy) Restores energy when defeating enemies or hitting weak points.
  • C2: Void Form - (Damage) Stance change duration increased. Gain Interruption Resistance.
  • C6: The World Beyond - (Hypercarry) Attacks ignore 60% of enemy DEF. Cooldowns reset on kill. The ultimate solo carry constellation.

Verdict: C0 will likely be complete, but C2 is the bait for comfort.

Top Team Compositions

1. Mono Hydro / Abyss

  • Main DPS: Skirk
  • Sub-DPS: Yelan
  • Buffer: Furina
  • Healer/Shield: Baizhu / Zhongli

Why it works: Hydro Resonance gives HP% (vital for Skirk/Yelan/Furina). Yelan provides off-field damage and ramping buffs. Furina provides massive DMG% buffs. Baizhu provides teamwide healing to counter Furina's drain.

2. Master & Apprentice (Dual Carry)

  • Carry 1: Tartaglia (Childe)
  • Carry 2: Skirk
  • Support: Kazuha
  • Healer: Bennett

Why it works: Childe has downtime on his melee stance. Skirk fills this downtime with her own burst window. Kazuha swirls Hydro for both.

Rotations & Combos

Burst Rotation:
Furina E Q > Baizhu Q E > Yelan E Q > Skirk E (Stance) -> Combo -> Q (Finisher)

Tip: If Skirk's burst has a high cost, use Yelan's skill *before* swapping to Skirk so she catches the Hydro particles.

Frequently Asked Questions

When is she releasing?
Unknown. She appeared in the Version 4.2 Archon Quest but has not been announced as playable yet. She is likely a late-game or Khaenri'ah chapter release.

Will she work with Childe?
Lore-wise, yes. Gameplay-wise, Dual Carry teams can be tricky but fun. They likely won't be the optimal meta team compared to Hypercarry setups.

Data Source: Speculative / Lore Based. Last Updated: December 2025

Shenhe Guide: The Definitive Build & Analysis


Shenhe Genshin Impact Character Art
Rarity (5-Star)
Element Cryo
Weapon Polearm
Best Role Dedicated Cryo Buffer
Stat Priority ATK% > ER > CRIT
Tier S (For Cryo Teams)

Shenhe is an adepti disciple with a homicidal urge she keeps in check with red ropes. She is a niche but extraordinarily powerful Cryo Buffer. Her "Icy Quill" mechanic adds Flat Damage to her teammates' attacks based on her own ATK, making her the best support for Ayaka, Ganyu, and Wriothesley.


Pros

  • Highest damage ceiling for Cryo Hypercarry teams.
  • Buffs Cryo DMG, shreds Cryo RES, and adds Flat DMG.
  • Flexible rotations (Press/Hold E options).
  • C6 creates infinite damage scaling for Normal Attackers.

Cons

  • Extremely niche (only works with Cryo DPS units).
  • Quill quota (5/7 hits) runs out instantly in AoE.
  • High Energy Recharge requirements (80 Cost Burst).
  • Difficult to balance ATK and ER without signature weapon.

Quick Guide (TL;DR)

If you don't have time for the math, here is the cheat sheet.

  • Best Artifact: 4pc Noblesse Oblige (Team Buff).
  • Alt Artifact: 2pc Gladiator + 2pc Shimenawa (Max ATK% for Quills).
  • Best Weapon: Calamity Queller (Signature - Massive ATK).
  • Support Weapon: Favonius Lance (Team Battery - Highly Recommended).
  • F2P Weapon: The Catch (For ER) or Missive Windspear (Event ATK).
  • Main Stats: SANDS: ATK% or ER | GOBLET: ATK% | CIRCLET: ATK%.
  • Talent Priority: Elemental Skill > Elemental Burst > Normal Attack (Ignore).
  • Top Team: Shenhe + Ayaka + Kazuha + Kokomi (Premium Freeze).
Pro Tip: Icy Quills are per character. In a Mono Cryo team (e.g., Shenhe, Ganyu, Ayaka, Kazuha), ALL characters can trigger the quills independently. This effectively triples the damage output of her buff.

Need Primogems for Calamity Queller?

Get Genesis Crystals at a discounted price with instant delivery.

Top Up Secure & Fast via GameCharge

Ascension & Talent Materials

Category Material Name Source
Ascension Qingxin Liyue Peaks (Jueyun Karst)
Boss Drop Dragonheir's False Fin Bathysmal Vishap Herd (Enkanomiya)
Talent Books Teachings of Prosperity Taishan Mansion (Mon/Thu/Sun)

Talent Breakdown & Mechanics

Elemental Skill: Spring Spirit Summoning

  • Icy Quill Effect: When a party member deals Cryo DMG, the damage is increased based on Shenhe's current ATK. This is a Flat DMG Bonus (like Yunjin/Zhongli), meaning it scales with the triggering character's Crit Rate and Crit DMG.
  • Tap: Grants 5 Quills. Duration 10s. Buffs Elemental Skill/Burst DMG.
  • Hold: Grants 7 Quills. Duration 15s. Buffs Normal/Charged/Plunge DMG.
  • Quota Warning: If you hit 3 enemies with one Ayaka Charged Attack, you consume 3 Quills instantly. In AoE, your stacks vanish in a split second.

Elemental Burst: Divine Maiden's Deliverance

  • Cost: 80 Energy | Cooldown: 20s
  • Field Effect: Deals periodic Cryo DMG. Reduces enemy Cryo RES and Physical RES (up to 15% at Talent 10).
  • Passive Buff: Characters inside the field gain 15% Cryo DMG Bonus.

Passive: Spirit Communion Seal

  • Tap vs Hold: This passive determines your rotation.
    Tap E: Buffs Skill/Burst DMG (Good for Ayaka/Rosaria/Kaeya).
    Hold E: Buffs Normal/Charged/Plunge (Good for Ganyu/Wriothesley).

Talent Priority Order:

  1. Elemental Skill (Level 10) - Improves the Flat DMG buff (Essential).
  2. Elemental Burst (Level 8) - Improves RES shred.
  3. Normal Attack (Level 1) - Ignore.

Stat Requirements & ER Thresholds

Shenhe is extremely energy hungry (80 cost). Without Burst, you lose the RES shred and Cryo DMG bonus.

Team Context Weapon ER Requirement
Double Cryo (Ayaka/Ganyu) Favonius Lance 180% - 190%
Double Cryo Calamity (Non-ER) 200% - 220%
Triple Cryo (Mono) Any 160% - 170%

Substat Priority:

  1. Energy Recharge (Until requirement met)
  2. ATK% (Maximize the Quill Buff)
  3. Flat ATK
  4. CRIT Rate (Only if using Favonius)

Best Artifacts Comparison

Set Name Role Reasoning
4pc Noblesse Oblige BiS Team 20% ATK buff to the team helps Ayaka/Ganyu significantly. However, if she can't burst every rotation, this set loses value.
2pc ATK / 2pc ATK Max Quills Mix Gladiator/Shimenawa/Vermillion to get the highest possible ATK stat (3500+). Best for maximizing Quill damage.
4pc Blizzard Strayer Sub-DPS Only if you run her in Mono Cryo and want her own personal damage to be high (requires Crit build).

Weapon Rankings

Weapon Type Performance Notes
Calamity Queller ATK% S+ Signature. Highest Base ATK in game + Passive ATK buff. Requires heavy ER investment in artifacts.
Favonius Lance ER% S (Support) The practical BiS. High Base ATK for a 4-star (565) and solves energy issues for the whole team (Ayaka needs it).
Engulfing Lightning ER% S Converts ER to ATK. Great balance of stats, but usually better on Raiden/Xiangling.
Missive Windspear ATK% A (F2P) Event weapon. High ATK stat stick. Use if you don't have Favonius or Calamity.

Constellation Value

Shenhe is great at C0, but C1 and C6 are game-changers.

  • C1: Clarity of Heart - (QoL) Elemental Skill gains 1 additional charge. solves energy issues significantly and allows more front-loaded damage.
  • C2: Centered Spirit - (Damage) Burst lasts 6s longer (18s total). Active characters in field gain +15% Cryo CRIT DMG. Huge for Freeze teams.
  • C6: Mystical Abandon - (Broken) When characters trigger Icy Quill effects using Normal or Charged Attacks, Quill stacks are NOT consumed. This allows Ayaka/Ganyu/Wriothesley to have infinite flat damage buffs.

Verdict: C1 is a great stop. C6 is whale territory but enables "speedrun" clears.

Top Team Compositions

1. Premium Freeze

  • Main DPS: Ayaka / Wriothesley
  • Buffer: Shenhe
  • Hydro: Kokomi / Furina / Mona
  • Anemo: Kazuha

Why it works: Shenhe buffs Ayaka's burst tick damage via Quills. Kazuha swirls Cryo. Kokomi freezes. It's the highest DPS Cryo team.

2. Mono Cryo

  • DPS 1: Ganyu
  • DPS 2: Ayaka / Kaeya
  • Buffer: Shenhe
  • Anemo/Shield: Kazuha / Layla

Why it works: In Mono Cryo, ALL three Cryo characters use up their own Quill quotas separately. Shenhe essentially triples her own contribution.

Rotations & Combos

Freeze Rotation:
Shenhe Tap/Hold E Q > Kazuha E Q > Kokomi E > Ayaka Dash N1 E Q

Tip: Use Tap E for Ayaka (Buffs Burst DMG). Use Hold E for Ganyu/Wriothesley (Buffs Normal/Charged DMG). Refresh E immediately after Ayaka's burst ends to buff her next rotation.

Frequently Asked Questions

Shenhe vs. Rosaria?
For Cryo hypercarries (Ayaka/Ganyu), Shenhe is strictly better due to Quills + RES Shred + DMG% buffs. Rosaria is a budget alternative who offers Crit Rate.

Is she worth it for C0 Ayaka?
Yes, but she is a luxury unit. Getting Kazuha or Kokomi first is usually higher priority. Shenhe pushes the damage ceiling but isn't required to clear content.

Data Source: KQM Standards. Last Updated: December 2025

Rosaria Guide: The Definitive Build & Analysis


Rosaria Genshin Impact Character Art
Rarity (4-Star)
Element Cryo
Weapon Polearm
Best Role Crit Buffer / Sub-DPS
Stat Priority CRIT Rate > ATK% > ER
Tier A (Utility Sub-DPS)

Rosaria is a nun who skips prayers to hunt down threats to Mondstadt. She is a highly aggressive Cryo Sub-DPS whose primary utility lies in her ability to share 15% of her Crit Rate with the party and (at C6) shred Physical Resistance, making her indispensable for Eula and Melt teams.


Pros

  • Shares Crit Rate with teammates (up to 15%).
  • Strong off-field Cryo application (no circle impact like Diona).
  • Excellent particle generation (Short Skill CD).
  • C6 shreds Physical RES, making her Eula's best support.
  • Teleports behind small enemies (gap closer).

Cons

  • Burst is stationary (enemies can move out of it).
  • Cannot teleport behind large enemies/bosses.
  • Needs high Crit Rate investment to maximize buff.
  • Burst duration (8s) is shorter than Kaeya's without C2.

Quick Guide (TL;DR)

If you don't have time for the math, here is the cheat sheet.

  • Best Artifact: 4pc Noblesse Oblige (Support) or 4pc Emblem (Personal DMG).
  • Alt Artifact: 4pc Blizzard Strayer (Freeze only) or 4pc Lavawalker (Reverse Melt).
  • Best Weapon: Favonius Lance (Team Battery - Most Recommended).
  • Damage Weapon: Staff of the Scarlet Sands (Stat Stick) or The Catch.
  • F2P Weapon: The Catch (R5) or Dragon's Bane (Reverse Melt).
  • Main Stats: SANDS: ATK% or ER | GOBLET: Cryo DMG | CIRCLET: CRIT Rate.
  • Talent Priority: Elemental Burst > Elemental Skill > Normal Attack (Ignore).
  • Top Team: Rosaria + Eula + Raiden + Zhongli (Physical).
Pro Tip: Always use Skill before Burst. Her A1 Passive grants her 12% Crit Rate if she hits an enemy from behind with her Skill. This 12% is included in the Crit Rate she shares with her team via her Burst (A4 Passive).

Need C6 Rosaria?

Get Genesis Crystals to pull on banners featuring her!

Top Up Secure & Fast via GameCharge

Ascension & Talent Materials

Category Material Name Source
Ascension Valberry Stormbearer Mountains (Mondstadt)
Boss Drop Hoarfrost Core Cryo Regisvine (Mondstadt)
Talent Books Teachings of Ballad Forsaken Rift (Wed/Sat/Sun)

Talent Breakdown & Mechanics

Elemental Skill: Ravaging Confession

  • The Backstab: Rosaria shifts behind the enemy and pierces them. Note: She cannot teleport behind large enemies (Ruin Guards, Lawachurls).
  • Crit Buff (Passive): Hitting an enemy from behind increases her Crit Rate by 12% for 5s. This is crucial for her burst snapshot.
  • Particle Gen: Creates 3 particles. Excellent battery for Ayaka/Eula.

Elemental Burst: Rites of Termination

  • Cost: 60 Energy | Cooldown: 15s | Duration: 8s (12s at C2)
  • The Field: Slams an Ice Lance into the ground that pulses Cryo DMG every 2s.
  • Crit Sharing (Passive): Upon casting, increases Crit Rate of all nearby party members (except herself) by 15% of Rosaria's Crit Rate for 10s. Max bonus is 15% (requires 100% CR on Rosaria).
  • No ICD: Every pulse applies Cryo, making it perfect for Reverse Melt (Rosaria melts) or enabling Pyro carries.

Passive: Shadow Samaritan

  • The Core: Casting Rites of Termination increases Crit Rate of all nearby party members (except Rosaria) by 15% of Rosaria's Crit Rate for 10s. This counts buffs she has on herself (like the 12% from Skill).

Talent Priority Order:

  1. Elemental Burst (Level 9) - Main damage and utility source.
  2. Elemental Skill (Level 8) - Energy and decent damage.
  3. Normal Attack (Level 1) - Ignore unless Physical Main DPS.

Stat Requirements & ER Thresholds

Your goal is 100% Crit Rate to maximize the team buff, but don't sacrifice ER.

Team Context Build ER Requirement
Freeze (Double Cryo) Noblesse/Blizzard 140% - 160%
Reverse Melt Emblem/Lavawalker 160% - 180%
Eula Support Noblesse (Favonius) 150% - 170%

Substat Priority:

  1. CRIT Rate (Priority #1 for support role)
  2. Energy Recharge (Until requirement met)
  3. ATK% (For personal damage)
  4. CRIT DMG (Secondary priority)

Best Artifacts Comparison

Set Name Role Reasoning
4pc Noblesse Oblige BiS Support Buffs team ATK by 20%. Since Rosaria bursts often, this has high uptime. Essential for Eula/Ayaka teams.
4pc Emblem of Severed Fate Sub-DPS Best for personal damage, especially in Melt teams where she needs higher ER.
4pc Blizzard Strayer Freeze Good for personal damage in Freeze, BUT the Crit Rate gained from this set DOES NOT count towards her A4 sharing passive. Only base stats count.

Weapon Rankings

Weapon Type Performance Notes
Favonius Lance ER% S+ (Support) High Base ATK for a 4-star. Generates particles for the team on Crit. Since you build Crit Rate anyway, this weapon is perfect.
The Catch (R5) ER% S (Damage) Best F2P option for personal damage. The 12% Crit Rate from passive counts towards her personal stats (but not sharing).
Deathmatch CRIT Rate S (Stat Stick) BP Weapon. Massive Crit Rate stat (36.8%). Easiest way to reach 100% Crit Rate for max buff sharing.
Dragon's Bane EM A (Melt) Only use for Reverse Melt teams where Rosaria is the one triggering reactions.

Constellation Value

Rosaria is a complete unit at C0, but C2 and C6 are significant milestones.

  • C2: Land Without Promise - (Core) Increases Ice Lance duration by 4s (Total 12s). This significantly increases total damage and Cryo application uptime. Essential for Freeze/Physical support.
  • C5: Last Rites - (Damage) +3 Levels to Burst. Good for Melt nukes.
  • C6: Divine Retribution - (Physical Support) Burst hits decrease enemy Physical RES by 20% for 10s. This makes her the best offensive support for Eula/Razor.

Verdict: C2 is the most important for general use. C6 is key for Physical teams.

Top Team Compositions

1. Eula Physical Support

  • Main DPS: Eula
  • Battery/Buffer: Rosaria (C6)
  • Electro: Raiden Shogun / Fischl
  • Sustain: Zhongli / Bennett / Mika

Why it works: Rosaria batteries Eula (Favonius), buffs her Crit Rate (making Eula's nuke more consistent), and shreds Physical RES (C6). Perfect synergy.

2. Reverse Melt Quickswap

  • Melter 1: Rosaria
  • Melter 2: Kaeya / Chongyun
  • Pyro App: Xiangling
  • Buffer: Bennett

Why it works: Rosaria's burst has no ICD, meaning every tick can melt if enough Pyro is applied. This team deals massive AoE damage.

Rotations & Combos

Crit buff Rotation:
Rosaria Skill (Backstab for +12% CR) > Rosaria Burst (Share CR) > Swap to DPS

Tip: Always try to position yourself so that using Skill teleports you behind the enemy. If you are already behind them, just cast it. Large bosses cannot be backstabbed, so you lose the 12% bonus (and thus share less).

Frequently Asked Questions

Does Blizzard Strayer Crit Rate count for sharing?
No. Only Crit Rate visible on the stat sheet counts. Conditional buffs like Blizzard Strayer or Cryo Resonance do not transfer.

Rosaria vs. Kaeya?
Rosaria is better for crit sharing and stationary fights. Kaeya is better for mobile fights (burst moves with you) and generates slightly more energy. They are often used together.

Data Source: KQM Standards. Last Updated: December 2025

Qiqi Guide: The Definitive Build & Analysis
Qiqi Genshin Impact Character Art
Rarity (5-Star Standard)
Element Cryo
Weapon Sword
Best Role Pure Healer / Clam Driver
Stat Priority ATK% > ER > Healing Bonus
Tier B (Invincible Healer)

Qiqi is the zombie herb gatherer of Bubu Pharmacy. While her kit lacks particle generation and utility buffs, she boasts the highest raw healing output in the game. When equipped with the Ocean-Hued Clam set, she converts her massive overhealing into respectable AoE Physical damage.


Pros

  • Unrivaled healing output (basically immortality).
  • Best user of Ocean-Hued Clam (easy 30k bubbles).
  • Fast Normal Attacks make her a surprisingly good Driver.
  • C6 provides a full team revive (Spiral Abyss clutch).

Cons

  • Zero particle generation (Major Energy issues).
  • Very long skill cooldown (30s).
  • Offers no buffs (ATK/EM/DMG) to the team.
  • Cryo application is slow and inconsistent.

Quick Guide (TL;DR)

If you don't have time for the math, here is the cheat sheet.

  • Best Artifact: 4pc Ocean-Hued Clam (Turns healing into DMG).
  • Alt Artifact: 4pc Tenacity of the Millelith (ATK Buffer - Niche).
  • Best Weapon: Sacrificial Sword (Mandatory for E uptime).
  • Alt Weapon: Skyward Blade or Favonius Sword (Energy).
  • F2P Weapon: Amenoma Kageuchi (Craftable).
  • Main Stats: SANDS: ER% or ATK% | GOBLET: ATK% | CIRCLET: Healing Bonus.
  • Talent Priority: Elemental Burst > Elemental Skill > Normal Attack.
  • Top Team: Qiqi + Furina + Fischl + Beidou (Taser Driver).
Pro Tip: Qiqi generates NO energy particles. You almost always want an Energy Recharge Sands or a Battery teammate (like Raiden or Rosaria) to use her 80-cost burst consistently.

Lost 50/50 to Qiqi?

Get Genesis Crystals to keep pulling for the limited banner!

Top Up Secure & Fast via GameCharge

Ascension & Talent Materials

Category Material Name Source
Ascension Violetgrass Liyue Cliffs / Bubu Pharmacy
Boss Drop Hoarfrost Core Cryo Regisvine (Mondstadt)
Talent Books Teachings of Prosperity Taishan Mansion (Mon/Thu/Sun)

Talent Breakdown & Mechanics

Elemental Skill: Adeptus Art: Herald of Frost

  • Herald of Frost: Summons an orb that orbits the active character. It deals Cryo DMG periodically and heals the active character based on Qiqi's ATK.
  • Particle Issue: This skill generates 0 Energy Particles. This is Qiqi's biggest flaw.
  • Cooldown: Lasts 15s, Cooldown 30s. This huge gap (50% uptime) is why Sacrificial Sword is vital to reset the CD.

Elemental Burst: Adeptus Art: Preserver of Fortune

  • Cost: 80 Energy | Cooldown: 20s
  • Fortune-Preserving Talisman: Marks enemies with a Talisman for 15s.
  • Vampirism: When the Active Character hits a marked enemy, they restore HP based on Qiqi's ATK. This allows your DPS to heal themselves by attacking, making them nearly invincible.

Passive: A Glimpse into Arcanum

  • Talisman Application: When Qiqi hits enemies with Normal/Charged attacks, she has a 50% chance to apply a Talisman for 6s. This allows her to heal the team without using her Burst, which is crucial given her energy issues.

Talent Priority Order:

  1. Elemental Burst (Level 8) - Primary Talisman source.
  2. Elemental Skill (Level 8) - Passive healing.
  3. Normal Attack (Level 1) - Ignore unless playing "Driver Qiqi".

Stat Requirements & ER Thresholds

Qiqi scales on ATK, but without ER, she cannot burst. Balance is key.

Team Context Weapon ER Requirement
Solo Cryo (No Battery) Sacrificial Sword 220% - 240%
Solo Cryo (No Battery) ATK Weapon (Flute) 260%+ (Unrealistic)
With Raiden Shogun Sacrificial Sword 160% - 180%

Substat Priority:

  1. Energy Recharge (Until requirements met - very important)
  2. ATK% (Increases Healing)
  3. Flat ATK
  4. CRIT Rate (Only if using Favonius Sword)

Best Artifacts Comparison

Set Name Role Reasoning
4pc Ocean-Hued Clam BiS Qiqi overheals massively. This set converts that overhealing into a Physical Damage bubble that pops for ~30k damage every 3.5s. It gives her meaningful DPS.
4pc Tenacity of the Millelith ATK Buffer Her Skill (Orb) hits periodically, keeping the ATK buff active. Only works if you are in melee range. Weaker than Clam usually.
2pc ATK / 2pc ER Budget If you don't have a full Clam set, mix these to balance her stats.

Weapon Rankings

Weapon Type Performance Notes
Sacrificial Sword (R3+) ER% S+ Resets her 30s Skill cooldown. Essential for maintaining Clam bubble damage and healing uptime.
Skyward Blade ER% S High Base ATK (boosts healing) + ER. Good if you don't have Sac Sword or need Sac Sword on Xingqiu.
Favonius Sword ER% S (Battery) Generates particles for the team. Requires building Crit Rate, which dilutes her healing/ATK stats slightly.
Amenoma Kageuchi ATK% A (F2P) Inazuma Craftable. Refunds energy after Burst. High ATK stat makes her healing massive.

Constellation Value

Qiqi's constellations are generally considered weak, except for C6.

  • C1: Ascetics of Frost - (Energy) When the Herald of Frost hits an enemy marked by a Talisman, Qiqi regenerates 2 Energy. Helps slightly with her energy issues.
  • C2: Frozen to the Bone - (DPS Meme) Qiqi's Normal Attack DMG against enemies affected by Cryo is increased by 15%. Only useful for On-Field Driver builds.
  • C6: Rite of Resurrection - (The Revive) Using Elemental Burst revives all fallen party members and heals them to 50% HP. 15min Cooldown. A true "Get out of Jail Free" card for Abyss.

Verdict: Don't pull for cons. C0 is fine. C6 is a nice safety net.

Top Team Compositions

1. Qiqi Taser (Clam Driver)

  • Driver: Qiqi
  • Sub-DPS: Fischl / Yae Miko
  • Sub-DPS: Beidou / Xingqiu
  • Flex: Furina / Kazuha

Why it works: Qiqi attacks fast, driving Beidou/Xingqiu procs. Her massive healing maxes out Clam bubble damage (Physical) which is boosted by Superconduct (Electro+Cryo). She is unkillable.

2. Hyperfridge

  • Driver: Qiqi
  • Dendro: Nahida / Traveler
  • Hydro: Xingqiu / Yelan
  • Electro: Kuki Shinobu (EM)

Why it works: Qiqi applies Cryo to freeze enemies ("Fridge"), preventing Dendro from consuming Hydro too fast. This generates more Bloom seeds for Kuki to hyperbloom.

Rotations & Combos

Clam Support Rotation:
Qiqi E > Qiqi Q (Apply Talisman) > Swap to Main DPS

Tip: If using Sacrificial Sword, hit the enemy with E. If cooldown doesn't reset, hit a few times. Don't swap until you see the reset or particles (if C1).

Frequently Asked Questions

Is Qiqi bad?
She was considered "bad" because late-game Genshin favored shields and buffs over raw healing. However, with Furina and Clam Set, Qiqi is actually a very strong, comfortable pick for clearing Abyss.

Qiqi vs. Diona/Charlotte?
Diona offers energy and shields (better utility). Charlotte offers teamwide healing and Cryo application (offensive). Qiqi offers immortality. If you die with Qiqi, it's a skill issue.

Data Source: KQM Standards. Last Updated: December 2025

Genshin Impact: Mika Guide

The Definitive Build & Analysis

Mika Genshin Impact Character Art
Rarity (4-Star)
Element Cryo
Weapon Polearm
Best Role Physical Support / Healer
Stat Priority HP% > ER > CRIT Rate (Favonius)
Tier A (Physical) / C (General)

Mika is the Front-Line Surveyor of the Knights of Favonius and the dedicated support for Physical DPS characters. He provides Attack Speed, Physical DMG Bonus, and consistent Healing, making him the premier partner for Eula and Razor.


Pros

  • Provides massive Physical DMG% buffs.
  • Rare Attack Speed buffer (great for Eula/Ayato/Wanderer).
  • Consolidates Healing and Buffing into one slot.
  • C6 grants 60% Physical Crit DMG (Huge DPS spike).

Cons

  • Extremely niche (Physical teams only for full value).
  • Energy hungry (needs Burst to heal).
  • Buff duration can be tricky for Eula rotations without C6.
  • Low personal damage.

Quick Guide (TL;DR)

If you don't have time for the math, here is the cheat sheet.

  • Best Artifact: 4pc Noblesse Oblige (Team ATK) or 4pc Ocean-Hued Clam (Healing/DMG).
  • Alt Artifact: 4pc Song of Days Past (Buffing).
  • Best Weapon: Favonius Lance (Uncontested BiS).
  • F2P Weapon: Rightful Reward (Craftable) or Black Tassel (HP Stat Stick).
  • Main Stats: SANDS: ER% or HP% | GOBLET: HP% | CIRCLET: HP% or Healing Bonus.
  • Talent Priority: Elemental Skill = Elemental Burst > Normal Attack (Ignore).
  • Top Team: Mika + Eula + Raiden + Furina.
Pro Tip: Hit multiple enemies with his Skill (Hold E). The more enemies you hit with his "Rimestar Flares," the more "Detector" stacks you gain. Each stack increases Physical DMG by 10%.

Need Primogems for C6 Mika?

Get Genesis Crystals at a discounted price with instant delivery.

Top Up Secure & Fast via GameCharge

Ascension & Talent Materials

Category Material Name Source
Ascension Wolfhook Wolvendom (Mondstadt)
Boss Drop Pseudo-Stamens Setekh Wenut (Sumeru Desert)
Talent Books Teachings of Ballad Forsaken Rift (Wed/Sat/Sun)

Talent Breakdown & Mechanics

Elemental Skill: Starfrost Swirl

  • Tap: Fires a Flowfrost Arrow. Grants "Soulwind" state to the party.
  • Hold: Enters aiming mode to fire Rimestar Flares at up to 3 enemies. Generates 4 particles.
  • Soulwind: Increases the active character's Attack Speed (up to 25% at Level 13).
  • Detector Stacks: If the Skill hits multiple enemies, you gain stacks (up to 3). Each stack increases Physical DMG Bonus by 10%.

Elemental Burst: Skyfeather Song

  • Cost: 70 Energy | Cooldown: 15s | Duration: 15s
  • Eagleplume: Heals the party instantly on cast, then heals the active character periodically when they hit enemies with Normal Attacks (similar to Qiqi).
  • Synergy: The healing interval is 2.5s. This is enough to keep characters healthy and trigger artifact sets like Ocean-Hued Clam.

Passive: Suppressive Barrage

  • Stack Generation: If the active character scores a Critical Hit while under the effect of both Soulwind (Skill) and Eagleplume (Burst), they gain 1 Detector stack (Phys DMG Bonus). This helps you reach max stacks in single-target scenarios.

Talent Priority Order:

  1. Elemental Skill (Level 9) - Increases Attack Speed buff.
  2. Elemental Burst (Level 8) - Increases Healing amount.
  3. Normal Attack (Level 1) - Ignore.

Stat Requirements & ER Thresholds

Mika needs to Burst every rotation to heal and trigger his A4 passive (Physical Buff). ER is priority #1.

Weapon Team Context ER Requirement
Favonius Lance Double Cryo (w/ Eula/Rosaria) 160% - 180%
Favonius Lance Solo Cryo (w/ Razor) 180% - 200%
Black Tassel (No ER) Any 210% - 240%

Substat Priority:

  1. Energy Recharge (Until requirement met)
  2. HP% (Scales Healing)
  3. CRIT Rate (Required for Favonius Lance passive)
  4. Flat HP

Best Artifacts Comparison

Set Name Role Reasoning
4pc Noblesse Oblige BiS Support Provides 20% ATK to the team upon Burst. Essential for Eula/Razor who scale well with ATK.
4pc Ocean-Hued Clam Healer / Sub-DPS Converts his healing into Physical damage bubbles (20k-30k). Since Mika buffs Phys DMG, the bubbles hit harder if you have Superconduct.
4pc Song of Days Past Buffer Alternative to Noblesse. Records healing to provide a flat damage buff. Often weaker than Noblesse but viable.

Weapon Rankings

Weapon Type Performance Notes
Favonius Lance ER% S+ Generates white particles for the entire team. Essential for energy-hungry Eula.
Rightful Reward HP% A (Healer) Fontaine Craftable. Restores energy when healed. Good personal energy economy but doesn't help team energy like Favonius.
Black Tassel HP% A (Budget) 3-Star stat stick. Highest HP% polearm in the game. Use if you have enough ER from artifacts.

Constellation Value

Mika is functional at C0, but C6 transforms him into a monster buffer.

  • C2: Companion's Entrance - (QoL) The first hit of Elemental Skill generates 1 Detector stack automatically. Helps guarantee stacks in single-target fights.
  • C4: Sunfrost Encomium - (Energy) When Eagleplume (Burst) heals a party member, Mika restores 3 Energy (Max 15). Massive ER reduction.
  • C6: Companion's Counsel - (Broken) Increases the max number of Detector stacks by 1 (Total 50% Phys DMG Bonus). Additionally, active characters affected by Soulwind gain 60% Physical CRIT DMG.

Verdict: C6 is mandatory for top-tier Physical teams.

Top Team Compositions

1. Eula Hypercarry

  • Main DPS: Eula
  • Battery/Sub-DPS: Raiden Shogun
  • Buffer/Healer: Mika (C6)
  • Flex: Furina / Rosaria / Zhongli

Why it works: Mika provides Healing (for Furina stacks), Attack Speed (for Eula stacks), and Phys Crit DMG. Raiden provides energy and Superconduct. This is the ceiling for Physical DMG.

2. Razor / Fischl Physical

  • Main DPS: Razor (or Phys Fischl/Zhongli)
  • Cryo App: Rosaria
  • Support: Mika
  • Flex: Yunjin / Bennett

Why it works: Razor loves Attack Speed to mash his claymore faster. Mika provides that + Healing, allowing Razor to face-tank enemies during his burst.

Rotations & Combos

Standard Support Rotation:
Raiden E > Furina E Q > Mika Q (Heal) > Mika Hold E (Buff) > Eula Combo

Tip: Always use Hold E to hit multiple enemies for max detector stacks. Use Q before E to ensure the healing starts ticking immediately.

Frequently Asked Questions

Is C0 Mika worth it?
At C0, he is arguably worse than Bennett for Eula because his buff is smaller. However, he heals and provides particles. He becomes strictly better than Bennett at C6.

Does he work with Wanderer/Ayato?
Yes. While they don't use the Physical buff, they benefit greatly from the Attack Speed buff (up to 25%) and healing.

Data Source: KQM Standards. Last Updated: December 2025

Genshin Impact: Layla Guide

The Definitive Build & Analysis

Layla Genshin Impact Character Art
Rarity (4-Star)
Element Cryo
Weapon Sword
Best Role Shielder / Tenacity Buffer
Stat Priority HP% > ER > CRIT Rate (Favonius)
Tier A (Budget Zhongli)

Layla is a sleep-deprived student from the Rtawahist Darshan who boasts the second strongest shield in the game (after Zhongli). Her kit is designed for 100% shield uptime and consistent off-field Cryo application via her "Night Stars," making her the premier holder of the Tenacity of the Millelith set.


Pros

  • 100% Shield Uptime (12s Duration / 12s CD).
  • Best user of "Tenacity of the Millelith" (consistent procs).
  • Strongest 4-star shield (scales purely on HP).
  • C4 provides a massive damage buff to Normal/Charged Attacks.
  • Very low energy cost (40) for Burst.

Cons

  • Zero healing capability (pure shielder).
  • Cryo application can mess up reactions if not careful.
  • Shield takes time to ramp up strength (Night Stars).
  • Low personal damage output.

Quick Guide (TL;DR)

If you don't have time for the math, here is the cheat sheet.

  • Best Artifact: 4pc Tenacity of the Millelith (BiS Support).
  • Alt Artifact: 2pc Tenacity / 2pc Vourukasha's Glow (Max Shield).
  • Best Weapon: Key of Khaj-Nisut (Massive HP stat stick + Team EM).
  • F2P Weapon: Fleuve Cendre Ferryman (Pipe) or Harbinger of Dawn.
  • Support Weapon: Favonius Sword (Team Battery - Requires Crit).
  • Main Stats: SANDS: HP% | GOBLET: HP% | CIRCLET: HP% (or CRIT Rate for Fav).
  • Talent Priority: Elemental Skill > Elemental Burst > Normal Attack (Ignore).
  • Top Team: Layla + Hu Tao + Yelan + Xingqiu.
Pro Tip: Night Stars = Tenacity Buff. Layla generates "Night Stars" over time while her shield is active. When she has 4, they shoot out. These hits count as Elemental Skill DMG, which triggers the 4pc Tenacity buff (20% ATK) off-field perfectly.

Need Primogems for Key of Khaj-Nisut?

Get Genesis Crystals at a discounted price with instant delivery.

Top Up Secure & Fast via GameCharge

Ascension & Talent Materials

Category Material Name Source
Ascension Nilotpala Lotus Sumeru Water Bodies (Night Only)
Boss Drop Perpetual Caliber Aeonblight Drake (Sumeru)
Talent Books Teachings of Ingenuity Steeple of Ignorance (Tue/Fri/Sun)

Talent Breakdown & Mechanics

Elemental Skill: Nights of Formal Focus

  • Curtain of Slumber: Creates a Cryo shield that absorbs damage based on her Max HP.
  • Night Stars: While the shield is active, it generates 1 Night Star every 1.5s. When the active character uses an Elemental Skill, it generates 2 Night Stars.
  • Shooting Stars: Once 4 stars accumulate, they fire at nearby enemies as homing Cryo projectiles. This is what triggers Tenacity of the Millelith.

Elemental Burst: Dream of the Star-Stream Shaker

  • Cost: 40 Energy | Cooldown: 12s | Duration: 12s
  • The Turret: Summons a Celestial Dreamsphere that fires Starlight Slugs at enemies.
  • Synergy: Each slug hit generates 1 Night Star for her shield. This creates a loop: Burst feeds Shield Stars -> Shield fires Stars -> Tenacity Buff stays active.

Passive: Like Nascent Light

  • Ramping Strength: While the shield is active, every time a Night Star is gained, the Shield Strength increases by 6% (Max 24%). This makes her shield much tankier the longer it stays up.

Talent Priority Order:

  1. Elemental Skill (Level 10) - Pure shield strength.
  2. Elemental Burst (Level 8) - Extra damage.
  3. Normal Attack (Level 1) - Ignore.

Stat Requirements & ER Thresholds

Layla's ER needs are modest due to her 40-cost burst, but you want to burst every rotation to generate stars.

Team Context Weapon ER Requirement
Solo Cryo (Support) Favonius Sword 130% - 150%
Solo Cryo (Support) HP Weapon (Key/Dockhand) 160% - 180%
Double Cryo (Freeze) Any 120% - 130%

Substat Priority:

  1. HP% (Aim for 40k+)
  2. Flat HP
  3. Energy Recharge (Until requirement met)
  4. CRIT Rate (Only if using Favonius)

Best Artifacts Comparison

Set Name Role Reasoning
4pc Tenacity of the Millelith BiS Provides +20% HP (Stronger Shield) and her stars trigger the ATK buff off-field perfectly.
4pc Noblesse Oblige Alt Support If someone else has Tenacity, use this. 12s/40-cost burst makes her a good Noblesse holder.
2pc Tenacity / 2pc Vourukasha Max Shield Provides +40% HP total. Best if you just want the thickest possible shield and don't care about team buffs.

Weapon Rankings

Weapon Type Performance Notes
Key of Khaj-Nisut HP% S+ Nilou's sword. Massive HP stat (= massive shield) and shares EM with the team. Best for Vape/Melt support.
Favonius Sword ER% S Universal support weapon. Generates particles for energy-hungry teammates like Ayaka or Eula.
Fleuve Cendre Ferryman ER% A (F2P) Fishing weapon (The Pipe). High ER helps her burst uptime.
Harbinger of Dawn CRIT DMG B (DPS Meme) 3-Star weapon. Only use if you are trying to make Layla deal personal damage (not recommended).

Constellation Value

Layla gets significantly tankier with constellations.

  • C1: Fortress of Fantasy - (Shield) Increases Shield Absorption by 20%. Also generates shields for Co-op teammates. Essential for comfort.
  • C3: Secrets of the Night - (Strength) +3 Levels to Skill. Directly buffs shield HP.
  • C4: Starry Dawn - (Buff) When shooting Night Stars, grants the party a Normal/Charged Attack DMG bonus based on 5% of Layla's Max HP. Huge for Hu Tao/Ganyu.
  • C6: Radiant Soulfire - (Interval) Reduces interval of Night Star generation by 20%. Means faster Tenacity procs and more C4 buffs.

Verdict: C1 makes her shield competitive. C4 turns her into a buffer.

Top Team Compositions

1. Hu Tao Vape/Melt

  • Main DPS: Hu Tao
  • Hydro: Yelan / Xingqiu
  • Support: Layla (C4 + Key)
  • Flex: Kazuha / Mona

Why it works: Layla shields Hu Tao (who is usually at low HP). Her off-field Cryo allows Hu Tao to occasionally Melt charged attacks for huge numbers. C4 Layla buffs Hu Tao's CA damage.

2. Morgana Variation (Freeze)

  • Main DPS: Ganyu / Ayaka
  • Hydro: Mona / Kokomi
  • Anemo: Venti / Kazuha
  • Support: Layla

Why it works: Layla provides Cryo Resonance (Crit Rate) and a shield so Ganyu doesn't get interrupted while aiming. Her stars help keep enemies frozen.

Rotations & Combos

Standard Support Rotation:
Layla Q E > Main DPS

Tip: Always use Q before E if possible. The Q generates stars, which instantly start charging up the shield's star count for faster firing.

Frequently Asked Questions

Layla vs. Diona?
Layla has a stronger shield (100% uptime, higher HP scaling) and better offensive buffs (Tenacity + C4). Diona heals and batteries better. Pick Layla for shielding, Diona for healing/battery.

Is her damage good?
Not really. Her multipliers are HP-based but low. Building her for damage (Blizzard Strayer / Crit) usually results in a paper-thin shield for mediocre returns. Stick to HP support.

Data Source: KQM Standards. Last Updated: December 2025

Genshin Impact: Kaeya Guide

The Definitive Build & Analysis

Kaeya Genshin Impact Character Art
Rarity (4-Star)
Element Cryo
Weapon Sword
Best Role Sub-DPS / Battery / Freeze Support
CV Priority CRIT > ATK% > ER > EM
Tier A (Premium Starter)

Kaeya is the Cavalry Captain of the Knights of Favonius and one of the best 4-star units you get for free. He serves as an excellent Cryo battery and off-field Sub-DPS. His Elemental Burst follows the active character, making him highly mobile and perfect for melee Freeze or Melt teams.


Pros

  • High particle generation (excellent battery).
  • Burst follows the character (mobile Cryo app).
  • High scalings on Normal Attacks for a 4-star.
  • Self-sustaining with Elemental Skill healing.
  • Free to obtain for everyone.

Cons

  • Cons are extremely hard to get (Standard Banner/Shop only).
  • Small AoE on Elemental Burst.
  • Overshadowed by Rosaria in Crit Rate buffing.

Quick Guide (TL;DR)

If you don't have time for the math, here is the cheat sheet.

  • Best Artifact (Sub-DPS): 4pc Emblem of Severed Fate or 4pc Noblesse Oblige.
  • Best Artifact (Freeze): 4pc Blizzard Strayer (Free 40% Crit Rate).
  • Best Weapon: Mistsplitter Reforged (5⭐) or Skyward Blade.
  • F2P Weapon: Amenoma Kageuchi (Craftable) or Favonius Sword (Battery).
  • Main Stats: SANDS: ATK% or ER | GOBLET: Cryo DMG | CIRCLET: CRIT Rate/DMG.
  • Talent Priority: Elemental Burst > Elemental Skill > Normal Attack (Optional).
  • Top Team: Kaeya + Rosaria + Xiangling + Bennett (Reverse Melt).
Pro Tip: Kaeya has the highest Normal Attack scaling for a Sword user among 4-stars. While usually played as a Sub-DPS, he can function as a viable Physical Main DPS with Aquila Favonia and Superconduct.

Need C6 Kaeya?

Don't rely on the standard banner! Save your Starglitter for the Paimon Shop (June/December).

Top Up Secure & Fast via GameCharge

Ascension & Talent Materials

Category Material Name Source
Ascension Calla Lily Springvale / Mondstadt Lakes
Boss Drop Hoarfrost Core Cryo Regisvine (Mondstadt)
Talent Books Teachings of Ballad Forsaken Rift (Wed/Sat/Sun)

Talent Breakdown & Mechanics

Normal Attack: Ceremonial Bladework

  • Scaling: Surprisingly high multipliers for a 4-star. His Charged Attack is standard, but his Normal string is fast and fluid.
  • Usage: Only level this if you are playing Physical Main DPS Kaeya. For Sub-DPS, leave it at Level 1.

Elemental Skill: Frostgnaw

  • Instant Cast: A quick cone of Cryo DMG. Low cooldown (6s).
  • Battery: Generates 2-3 Cryo Particles.
  • Self-Sustain: His "Cold-Blooded Strike" passive heals Kaeya for 15% of his ATK every time Frostgnaw hits an enemy. This gives him surprising survivability in solo situations.

Elemental Burst: Glacial Waltz

  • Cost: 60 Energy | Cooldown: 15s | Duration: 8s
  • The Icicle Ring: Summons 3 icicles that orbit the active character. They deal Cryo DMG multiple times per second.
  • Application: Follows the character, meaning it never misses mobile enemies (unlike Rosaria's stationary burst).
  • Reverse Melt: Applies Cryo frequently enough to allow Xiangling to Melt some hits, or for Kaeya to Melt off Pyro aura.

Talent Priority Order:

  1. Elemental Burst (Level 9) - Main damage source.
  2. Elemental Skill (Level 8) - Energy and healing.
  3. Normal Attack (Level 1) - Only for Main DPS.

Stat Requirements & ER Thresholds

Kaeya ascends with Energy Recharge, which makes him easier to build than many other units.

Team Context C0-C5 ER Requirement C6 ER Requirement
Freeze (Double Cryo) 160% - 180% 140% - 150%
Reverse Melt (Solo Cryo) 200% - 220% 160% - 180%
With Amenoma (R5) -30% ER Required -30% ER Required

Substat Priority:

  1. CRIT Rate / CRIT DMG (Target 60/120+ for Melt, 30-40/180+ for Freeze)
  2. ATK%
  3. Energy Recharge (Until requirement met)
  4. Elemental Mastery (Only for Melt teams)

Best Artifacts Comparison

Set Name Role Reasoning
4pc Emblem of Severed Fate Sub-DPS (BiS) Maximizes Burst damage. Best for Melt teams where ER is high.
4pc Blizzard Strayer Freeze Free 40% Crit Rate against Frozen enemies. Allows you to stack pure ATK and Crit DMG.
4pc Noblesse Oblige Support If no one else in the team (like Bennett) has it, Kaeya is a great holder due to his low cooldown burst.

Weapon Rankings

Weapon Type Performance Notes
Mistsplitter Reforged CRIT DMG S+ Highest damage ceiling. Kaeya can maintain the stacks easily with C6 Bennett or just Skill/Burst usage.
Wolf-Fang CRIT Rate S Battle Pass weapon. Boosts Skill and Burst DMG significantly. Very strong on him.
Amenoma Kageuchi (R5) ATK% A+ (F2P) Inazuma Craftable. Refunds massive energy after burst. Allows you to run 0% ER and full ATK stats.
Favonius Sword ER% A (Support) Best for pure battery build to funnel energy to teammates (like Ayaka or Eula).

Constellation Value

Kaeya's constellations are extremely rare but powerful.

  • C1: Excellent Blood - (Crit) Normal/Charged Attack CRIT Rate +15% against enemies affected by Cryo. Essential for Main DPS Kaeya.
  • C2: Never-Ending Performance - (Core) Every time an enemy is defeated while Glacial Waltz is active, its duration extends by 2.5s (Max 15s). In mob scenarios, this gives him 100% Burst uptime.
  • C6: Glacial Whirlwind - (The Peak) Glacial Waltz generates 1 additional icicle (4 total) and refunds 15 Energy upon cast. Massive damage increase and solves all energy issues.

Verdict: C2 is the most important for his Sub-DPS role.

Top Team Compositions

1. Perma-Freeze

  • Cryo 1: Kaeya (Sub-DPS)
  • Cryo 2: Rosaria (Crit Share/Battery)
  • Hydro: Xingqiu / Yelan / Kokomi
  • Anemo: Kazuha / Sucrose

Why it works: Kaeya and Rosaria provide endless Cryo application and particles. Enemies stay frozen permanently. Blizzard Strayer artifact set becomes incredibly powerful here.

2. Reverse Melt

  • Melter: Kaeya
  • Melter 2: Rosaria
  • Pyro App: Xiangling
  • Buffer: Bennett

Why it works: A variation of the National Team. Instead of Xingqiu's Hydro, you use two Cryo units to melt Xiangling's Pyro (and vice versa). Very high burst damage but no defensive freeze/shield utility.

Rotations & Combos

Freeze Rotation:
Rosaria E Q > Kazuha E Q > Kokomi E > Kaeya E Q > Attack

Tip: Kaeya's E generates particles instantly. You can do E -> Q and he will catch the particles during his burst animation, lowering ER needs.

Frequently Asked Questions

Kaeya or Rosaria?
Rosaria provides Crit Rate sharing and is better for stationary bosses. Kaeya is better for mobile enemies (burst follows you), generates more energy, and has better personal survivability. Use whichever you have more cons for.

Physical Kaeya?
It works because his Normal Attacks have high scaling, but Cryo Kaeya is generally stronger and easier to build. Only go Physical if you have Aquila Favonia and really like his attack animations.

Data Source: KQM Standards. Last Updated: December 2025

Genshin Impact: Ganyu Guide

The Definitive Build & Analysis

Ganyu Genshin Impact Character Art
Rarity (5-Star)
Element Cryo
Weapon Bow
Best Role Melt DPS / Freeze DPS
CV Priority CRIT > ATK% > EM (Melt)
Tier S (The Cocogoat)

Ganyu is Liyue's half-qilin secretary and one of the strongest damage dealers in the game. She defined the "Hypercarry" meta with her massive Frostflake Arrow bloom damage. She is incredibly versatile, excelling in both Reverse Melt teams (charged shots) and Freeze teams (quadratic scaling burst).


Pros

  • Insane AoE damage with Frostflake Bloom.
  • Quadratic scaling on Burst (destroys grouped mobs).
  • Extremely F2P friendly (Prototype Crescent/Hamayumi).
  • Can be played as Main DPS or Off-Field Support.

Cons

  • Charging shots leaves you vulnerable (needs shielder).
  • Melt playstyle requires close range (Xiangling).
  • Aiming can be difficult on mobile devices.
  • Burst steals Melts in Melt teams (do not use it there).

Quick Guide (TL;DR)

If you don't have time for the math, here is the cheat sheet.

  • Best Artifact (Melt): 4pc Wanderer's Troupe (Standard) or 4pc Shimenawa.
  • Best Artifact (Freeze): 4pc Blizzard Strayer (Free 40% Crit Rate).
  • Best Weapon: The First Great Magic (Lyney's Bow) or Amos' Bow.
  • F2P Weapon: Hamayumi (Melt Craftable) or Prototype Crescent (General).
  • Support Weapon: Elegy for the End (Team Buffs).
  • Main Stats: SANDS: ATK% or EM (Melt) | GOBLET: Cryo DMG | CIRCLET: CRIT DMG.
  • Talent Priority: Normal Attack > Elemental Burst > Elemental Skill.
  • Top Team: Ganyu + Xiangling + Bennett + Zhongli (Meltyu).
Pro Tip: In Freeze Teams (Morgana), use her Burst off-cooldown to group and kill mobs. In Melt Teams, do NOT use her Burst, as the icicles will steal reactions from your Charged Shots.

Need Primogems for Amos' Bow?

Get Genesis Crystals at a discounted price with instant delivery.

Top Up Secure & Fast via GameCharge

Ascension & Talent Materials

Category Material Name Source
Ascension Qingxin Liyue Peaks (Jueyun Karst)
Boss Drop Hoarfrost Core Cryo Regisvine (Mondstadt)
Talent Books Teachings of Diligence Taishan Mansion (Tue/Fri/Sun)

Talent Breakdown & Mechanics

Normal Attack: Liutian Archery

  • Frostflake Arrow: Charging beyond Level 2 fires a Frostflake Arrow.
  • The Bloom: Upon hitting a target (or ground), the arrow blooms, dealing massive AoE Cryo DMG. This bloom is the source of 80% of her damage.
  • Aiming: You can shoot the floor near enemies. The bloom will still hit them. This is useful for shielded enemies or groups.

Elemental Skill: Trail of the Qilin

  • Taunt: Dashes backward and leaves an Ice Lotus. The Lotus taunts enemies, grouping them for your bloom shot.
  • Durability: Scales off Ganyu's HP (don't build HP for this, it's just for distraction).
  • Particles: Generates 2 particles on cast and 2 on explosion.

Elemental Burst: Celestial Shower

  • Cost: 60 Energy | Cooldown: 15s | Duration: 15s
  • Quadratic Scaling: Icicles rain down on enemies. If enemies are grouped tightly (Venti/Kazuha), multiple icicles hit multiple enemies simultaneously, causing damage to scale exponentially.
  • Buff: Grants 20% Cryo DMG Bonus to active members in the field.

Talent Priority Order:

  1. Normal Attack (Level 10) - Frostflake Arrow damage.
  2. Elemental Burst (Level 8-10) - Essential for Freeze.
  3. Elemental Skill (Level 6) - Utility only.

Stat Requirements & ER Thresholds

Ganyu's ER needs depend entirely on whether you use her Burst. In Melt teams, you usually skip Burst, so ER is 0.

Team Context Build ER Requirement
Melt Ganyu Wanderer/Shimenawa 0% (Burst not used)
Freeze (Morgana) Blizzard Strayer 130% - 140%
Support Ganyu Noblesse/Emblem 160% - 180%

Substat Priority (Melt):

  1. CRIT DMG (Ascension gives Crit DMG)
  2. CRIT Rate (Target 60-70% for Melt)
  3. Elemental Mastery (Target 200-300 EM)
  4. ATK%

Substat Priority (Freeze):

  1. CRIT DMG (Go all in. 40% Rate comes from set + 15% from resonance)
  2. ATK%
  3. Energy Recharge
  4. CRIT Rate (Cap at 45%)

Best Artifacts Comparison

Set Name Role Reasoning
4pc Wanderer's Troupe Melt BiS Unconditional 35% Charged Attack DMG + 80 EM. Perfect for Melt. Can be farmed via Strongbox.
4pc Blizzard Strayer Freeze BiS Free 40% Crit Rate vs Frozen enemies. Allows you to stack pure Crit DMG. Useless for Melt.
4pc Shimenawa's Reminiscence Melt Alt Higher Charged Attack buff (50%) than Wanderer's, but drains energy. Good for Melt since you don't burst anyway.

Weapon Rankings

Weapon Type Performance Notes
The First Great Magic CRIT DMG S+ Lyney's bow. Massive Crit DMG and Charged Attack buffs. Generally beats Amos due to easier stats.
Amos' Bow ATK% S Her "Canonical" signature. Passive buffs arrow flight time (Bloom damage). Still excellent.
Hamayumi (R5) ATK% S (F2P) Inazuma Craftable. Buffs Charged Attack DMG if energy is full. Great for Melt (since you don't burst).
Prototype Crescent (R5) ATK% A (Conditional) Mondstadt Craftable. Gives massive ATK if you hit weak spots. Useless against enemies without weak spots (Slimes, some Bosses).

Constellation Value

Ganyu is perfectly complete at C0. Her constellations are luxury.

  • C1: Dew-Drinker - (QoL) Charged Attacks reduce enemy Cryo RES by 15% and restore 2 Energy. Great damage increase and energy comfort.
  • C2: The Auspicious - (Utility) Grants an extra charge of Elemental Skill. Helps with taunt uptime and energy.
  • C6: The Clement - (Speedrun God) Using Elemental Skill makes the next Frostflake Arrow instant (no charge time). This allows for "E > Shot > E > Shot" burst combos.

Verdict: Stick to C0. C1 is nice but not needed. C6 changes her playstyle entirely.

Top Team Compositions

1. Meltyu (Reverse Melt)

  • Main DPS: Ganyu
  • Pyro App: Xiangling / Kazuha (Pyro Swirl)
  • Buffer: Bennett
  • Shield: Zhongli / Layla

Why it works: Ganyu shoots enemies affected by Pyro to trigger Melt (1.5x DMG). Since she is squishy and standing still to aim, a Shield is mandatory. Damage numbers per shot are massive (100k+).

2. Morgana (Classic Freeze)

  • Main DPS: Ganyu
  • Hydro: Mona / Kokomi
  • Anemo: Venti / Kazuha
  • Cryo: Diona / Rosaria / Shenhe

Why it works: Venti groups enemies. Mona applies Hydro omen (extension). Ganyu drops her burst. The quadratic scaling obliterates grouped enemies while they remain permanently frozen.

Rotations & Combos

Melt Rotation:
Zhongli Hold E > Bennett Q E > Xiangling Q E > Ganyu Charged Shots (3-4 times)

Freeze Rotation:
Ganyu E Q > Venti E Q > Mona Q E > Ganyu Charged Shots

Frequently Asked Questions

Wanderer's vs. Shimenawa?
Wanderer's allows you to use Burst if needed and is unconditional. Shimenawa offers slightly higher CA damage but drains energy, making it strictly for Melt. Wanderer's is generally preferred for flexibility.

Mobile Controls?
Playing Ganyu on mobile can be hard due to aiming. If you struggle, play her in a **Freeze** team where you rely on her Burst (auto-targeting) more than her aimed shots.

Data Source: KQM Standards. Last Updated: December 2025

Genshin Impact: Freminet Guide

The Definitive Build & Analysis

Freminet Genshin Impact Character Art
Rarity (4-Star)
Element Cryo
Weapon Claymore
Best Role Physical / Shatter DPS
CV Priority CRIT > ATK% > ER
Tier B (Niche Physical)

Freminet is a diver from Fontaine who utilizes a unique "Pressure" mechanic. Unlike Eula, who focuses purely on raw Physical damage, Freminet encourages a mix of Cryo and Physical damage, specifically incentivizing the Shatter reaction (breaking frozen enemies) to buff his skills.


Pros

  • Unique playstyle blending Cryo and Physical damage.
  • Makes the "Shatter" reaction actually viable.
  • Excellent synergy with off-field Hydro (Xingqiu/Yelan).
  • Very F2P friendly (Craftable weapon is his 4-star BiS).

Cons

  • Lower damage ceiling than Eula or Hyperbloom teams.
  • Dependent on Shatter (requires Hydro + Freeze).
  • Fragile interruption resistance without a shield/Xingqiu.
  • Single-target focused; struggles in heavy AoE.

Quick Guide (TL;DR)

If you don't have time for the math, here is the cheat sheet.

  • Best Artifact: 4pc Pale Flame (Physical BiS).
  • Alt Artifact: 4pc Golden Troupe (Skill DMG focus).
  • Best Weapon: Beacon of the Reed Sea (5⭐) or Song of Broken Pines.
  • F2P Weapon: Tidal Shadow (Craftable - R5 is amazing) or Snow-Tombed Starsilver.
  • Support Weapon: Serpent Spine (BP - Critical Rate stick).
  • Main Stats: SANDS: ATK% | GOBLET: Physical DMG | CIRCLET: CRIT Rate/DMG.
  • Talent Priority: Elemental Skill > Normal Attack > Elemental Burst.
  • Top Team: Freminet + Xingqiu + Fischl + Mika (Shatter-Conduct).
Pro Tip: When Freminet's helmet is on (Skill Active), do NOT just spam attack. You want to weave Normal Attacks until you see "Pressure Level 4" (the gauge fills up), then press E again to unleash a massive Physical hit.

Need Primogems for C6 Freminet?

Get Genesis Crystals at a discounted price with instant delivery.

Top Up Secure & Fast via GameCharge

Ascension & Talent Materials

Category Material Name Source
Ascension Romaritime Flower Underwater in Fontaine (Salacia Plain)
Boss Drop Artificed Spare Clockwork Component Coppelius (Icewind Suite - Fontaine)
Talent Books Teachings of Justice Pale Forgotten Glory (Tue/Fri/Sun)

Talent Breakdown & Mechanics

Elemental Skill: Pressurized Floe

  • Pers Timer: Upon casting, Freminet summons Pers and enters the "Pers Timer" for 10s. During this time, his Normal Attacks deal Cryo DMG and increase his Pressure Level.
  • Level 0-3 (Cryo): If you press E again early, he deals Cryo DMG.
  • Level 4 (Physical): If you hit Normal Attack 4 times (filling the gauge), Pers unleashes a massive Physical DMG shockwave. This is his main damage source.

Elemental Burst: Shadowhunter's Ambush

  • Cost: 60 Energy | Cooldown: 15s
  • Subnautic Hunter Mode: Resets Skill Cooldown immediately. Reduces Skill Cooldown by 70% for 10s.
  • Hyper-Speed: Normal Attacks now grant 2 Pressure Stacks instead of 1. This means you only need 2 hits to reach Level 4 Pressure.

Passive: Saturation Deep Dive

  • Shatter Synergy: If Freminet triggers Shatter (breaking freeze with Claymore), his Skill DMG increases by 40%. This incentivizes bringing a Hydro character to keep enemies Frozen before you smash them.

Talent Priority Order:

  1. Elemental Skill (Level 10) - The Shattering Pressure damage is here.
  2. Normal Attack (Level 9) - You weave these constantly.
  3. Elemental Burst (Level 8) - Boosts rotation speed.

Stat Requirements & ER Thresholds

Freminet needs his Burst to maximize his DPS window (reducing Skill CD). Do not neglect ER.

Constellation Team Context ER Requirement
C0 - C1 Double Cryo (w/ Mika/Rosaria) 130% - 150%
C2+ Double Cryo 110% - 130%
Any Solo Cryo (Not Recommended) 160%+

Substat Priority:

  1. CRIT Rate / CRIT DMG (Target 60/120+)
  2. ATK%
  3. Energy Recharge (Until requirement met)
  4. Elemental Mastery (Only incidental for Shatter damage, don't focus it)

Best Artifacts Comparison

Set Name Role Reasoning
4pc Pale Flame BiS Provides 50% Physical DMG and 18% ATK. Freminet can stack this easily due to his low skill cooldown in Burst mode.
4pc Golden Troupe Skill DMG Massive +70% Skill DMG. His "Shattering Pressure" nuke counts as Elemental Skill DMG. A very strong contender.
4pc Blizzard Strayer Cryo Meme Only use if playing "Cryo Freminet" with Chongyun infusion. Not recommended for standard play.

Weapon Rankings

Weapon Type Performance Notes
Beacon of the Reed Sea CRIT Rate S+ Highest raw stats. Freminet is often unshielded to trigger Shatter, so he can activate the passive easily.
Serpent Spine (R5) CRIT Rate S BP Weapon. Requires a shielder (Layla/Zhongli) or careful play to maintain stacks.
Tidal Shadow (R5) ATK% S (F2P) Fontaine Craftable. Massive ATK boost when healed. Since you run him with a healer (Mika/Kuki), this is consistent.
Snow-Tombed Starsilver Phys DMG A Aesthetically perfect, but generally weaker than Tidal Shadow R5 due to the passive being unreliable.

Constellation Value

Freminet is a 4-star, so aiming for constellations is realistic over time.

  • C1: Dreams of the Seething Deep - (Crit) Pressurized Floe: Shattering Pressure CRIT Rate increased by 15%. Makes building him much easier.
  • C2: Penguins and the Land of Plenty - (Energy) Using Shattering Pressure restores 2 Energy. Allows you to drop ER substats for more ATK/Crit.
  • C6: Moment of Waking and Resolve - (Damage) After triggering Freeze, Superconduct, or Shatter, CRIT DMG increases by 12% (Max 3 stacks = 36% CD). Massive damage boost.

Verdict: C2 makes him comfortable. C6 makes him competitive.

Top Team Compositions

1. Shatter-Conduct (Physical)

  • Main DPS: Freminet
  • Hydro: Xingqiu / Yelan / Furina
  • Electro: Fischl / Kuki Shinobu
  • Support: Mika (Phys Buff/Heal)

Why it works: Hydro + Cryo freezes enemies. Electro + Cryo creates Superconduct (Phys Shred). Freminet breaks the freeze (Shatter), boosting his E damage. Mika heals and buffs Phys speed/damage.

2. Hyperfridge

  • Driver: Freminet
  • Dendro: Nahida / Baizhu
  • Hydro: Xingqiu / Yelan
  • Electro: Kuki Shinobu (Full EM)

Why it works: Freminet triggers Shatter on frozen enemies while Kuki triggers Hyperbloom on the seeds generated by Hydro+Dendro. Freminet's Cryo preserves the Dendro aura (Fridge), generating more seeds than usual.

Rotations & Combos

Burst Rotation:
Supports Setup > Freminet Q > E > N2 (Normal x2) > E (Shattering Pressure) > Repeat.

Note: Under his Burst (Q), Freminet gains 2 Pressure stacks per hit. This means you only need 2 Normal Attacks to reach Level 4 Pressure, instead of the usual 4. This speeds up his nuke cycle significantly.

Frequently Asked Questions

Is he better than Eula?
Generally, no. Eula has a much higher damage ceiling with her Burst. However, Freminet's damage is more consistent (frontloaded on Skill) and he doesn't suffer as much if enemies teleport away.

Do I build EM for Shatter?
No. Shatter damage is nice, but it's not high enough to justify sacrificing ATK/Crit. Build him like a standard DPS; let the Shatter just be a bonus that triggers his passive buffs.

Data Source: KQM Standards. Last Updated: December 2025

Genshin Impact: Eula Guide

The Definitive Build & Analysis

Eula Genshin Impact Character Art
Rarity (5-Star)
Element Cryo
Weapon Claymore
Best Role Physical Hypercarry
Stat Priority CRIT > ATK% > ER
Tier A (Physical Specialist)

Eula is the Spindrift Knight and the undisputed queen of Physical damage. Her kit revolves around her Elemental Burst, which creates a Lightfall Sword that charges up as she attacks, eventually detonating for one of the highest single-hit damage numbers in the game.


Pros

  • Highest damage ceiling for Physical DPS.
  • Built-in Physical and Cryo RES shred (Hold Skill).
  • Immune to interruption during Burst combo.
  • High defense buff makes her surprisingly tanky.

Cons

  • Backloaded damage (enemies may die or teleport before Nuke).
  • Physical damage is weak against elemental shields.
  • Energy hungry (requires a battery like Raiden or Rosaria).
  • Burst does not crit... occasionally (reset impact).

Quick Guide (TL;DR)

If you don't have time for the math, here is the cheat sheet.

  • Best Artifact: 4pc Pale Flame (BiS).
  • Alt Artifact: 2pc Pale Flame / 2pc Bloodstained Chivalry (Easier substats).
  • Best Weapon: Song of Broken Pines (Signature) or Beacon of the Reed Sea.
  • F2P Weapon: Tidal Shadow (Craftable) or Luxurious Sea-Lord (Event).
  • Support Weapon: Serpent Spine (BP - Excellent Crit stick).
  • Main Stats: SANDS: ATK% | GOBLET: Physical DMG | CIRCLET: CRIT Rate/DMG.
  • Talent Priority: Elemental Burst > Normal Attack > Elemental Skill.
  • Top Team: Eula + Raiden + Furina + Mika (Premium Physical).
Pro Tip: Superconduct is mandatory. Always pair Eula with an Electro character (Raiden/Fischl/Kuki) to reduce enemy Physical Resistance by 40%.

Need Primogems for Song of Broken Pines?

Get Genesis Crystals at a discounted price with instant delivery.

Top Up Secure & Fast via GameCharge

Ascension & Talent Materials

Category Material Name Source
Ascension Dandelion Seed Mondstadt Gates (Requires Anemo to harvest)
Boss Drop Crystalline Bloom Cryo Hypostasis (Dragonspine)
Talent Books Teachings of Resistance Forsaken Rift (Tue/Fri/Sun)

Talent Breakdown & Mechanics

Elemental Skill: Icetide Vortex

  • Tap: Deals quick Cryo DMG and grants 1 "Grimheart" stack.
  • Hold: Consumes all Grimheart stacks. Reduces enemy Physical and Cryo RES by up to 25%. Also deals AoE Cryo DMG.
  • Grimheart: Increases Eula's defense and resistance to interruption. Essential for face-tanking hits while stacking her Burst.

Elemental Burst: Glacial Illumination

  • Cost: 80 Energy | Cooldown: 20s
  • The Nuke: Deals Cryo DMG and summons a "Lightfall Sword."
  • Stacking: For 7 seconds, every Normal Attack, Elemental Skill, and Burst hit adds a stack to the sword. Eula gains interruption immunity during this time.
  • Detonation: After 7 seconds (or if Eula swaps out), the sword falls and explodes, dealing massive Physical DMG based on the number of stacks.

Passive: Roiling Rime

  • Mini-Nuke: If you consume 2 Grimheart stacks with Hold E, a shattered Lightfall Sword explodes immediately for 50% of the Burst's base damage. This is a key part of her burst combo.

Talent Priority Order:

  1. Elemental Burst (Level 10) - The source of her millions of damage.
  2. Normal Attack (Level 9) - You will be attacking a lot to build stacks.
  3. Elemental Skill (Level 8) - Useful for RES shred.

Stat Requirements & ER Thresholds

Eula has an 80-cost burst and generates few particles. She needs a Cryo Battery (Raiden/Rosaria/Diona).

Team Context ER Requirement
With Raiden Shogun 130% - 140%
With Cryo Battery (Rosaria/Diona) 135% - 150%
No Battery (Not Recommended) 180%+

Substat Priority:

  1. CRIT Rate (Missed Crit on Burst = Restart Abyss)
  2. Energy Recharge (Until requirement met)
  3. CRIT DMG
  4. ATK%

Best Artifacts Comparison

Set Name Role Reasoning
4pc Pale Flame BiS Provides 50% Physical DMG and 18% ATK. Eula can maintain full uptime easily with her E > Q > Hold E combo.
2pc Pale Flame / 2pc Bloodstained Unconditional Provides constant 50% Physical DMG without stacking mechanics. Easier to farm/mix.
4pc Marechaussee Hunter With Furina If running Eula with Furina, this set grants 36% CRIT Rate, which is massive for consistency.

Weapon Rankings

Weapon Type Performance Notes
Song of Broken Pines Phys DMG S+ Signature. Highest Base ATK in the game. ATK Speed buff helps squeeze in an extra stack for the nuke.
Beacon of the Reed Sea CRIT Rate S+ Often performs equal to or better than Pines due to massive Crit Rate and ATK buffs (if hit). Easier to build around.
Serpent Spine (R5) CRIT Rate S Battle Pass king. Outperforms R1 Wolf's Gravestone if you maintain stacks (needs a shielder like Zhongli).
Tidal Shadow (R5) ATK% A (F2P) Fontaine Craftable. Massive ATK boost when healed. Works great with Mika/Bennett. Better than Snow-Tombed.

Constellation Value

Eula is perfectly fine at C0, but C6 is the biggest damage spike in the game.

  • C1: Tidal Illusion - (Damage) Consuming Grimheart stacks grants 30% Physical DMG Bonus for up to 18s. Basically permanent uptime.
  • C2: Lady of Seafoam - (QoL) Reduces Hold E cooldown to match Tap E. Makes maintaining Pale Flame stacks much easier.
  • C6: Noble Obligation - (The Nuke) Lightfall Sword starts with 5 stacks and has a 50% chance to gain an extra stack per hit. This allows you to reach maximum damage potential easily.

Verdict: C0 is standard. C6 turns her into a speedrun monster.

Top Team Compositions

1. Premium Physical

  • Main DPS: Eula
  • Battery/Sub-DPS: Raiden Shogun
  • Buffer: Furina
  • Healer/Buffer: Mika (C6 is huge)

Why it works: Raiden provides Superconduct and Energy. Furina gives massive DMG buff. Mika provides Healing (for Furina stacks) and Physical Crit DMG. The synergy is perfect.

2. Classic Eula

  • Main DPS: Eula
  • Battery: Rosaria (Crit Share) / Diona (Shield)
  • Electro: Fischl / Kuki Shinobu
  • Buffer: Bennett

Why it works: A more accessible team. Rosaria batteries Eula and shares Crit Rate. Bennett buffs ATK. Superconduct is maintained easily.

Rotations & Combos

The "Nuke" Combo:
Tap E > Q (Reset E) > N4 (4 Normal Attacks) > Hold E (Shred) > N4 > BOOM

Tip: Do not dash if possible. Dashing interrupts her attack string, causing you to lose stacks. Use her high interruption resistance to tank hits.

Frequently Asked Questions

Is Physical Damage dead?
It is niche. Eula is strong enough to clear content, but she struggles against enemies with elemental shields (Lectors/Heralds). She shines against high-HP bosses.

Why didn't my burst crit?
Welcome to Eula mains. Because her damage is concentrated in one hit, missing a crit feels awful. Always aim for at least 70% CRIT Rate.

Data Source: KQM Standards. Last Updated: December 2025