RSS

Blog posts of '2025' 'December'

Genshin Impact: Escoffier Guide

The Definitive Build & Analysis

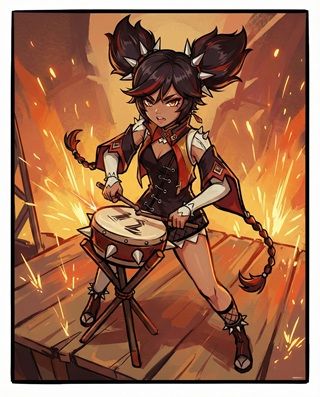
Escoffier Genshin Impact Character Art
Rarity (5-Star)
Element Cryo
Weapon Polearm
Best Role Sub-DPS / Team Healer
Stat Priority ATK > ER > CRIT
Tier S (Premium Support)

Escoffier is the former Head Chef of Hotel Debord and a master of precision gastronomy. She revolutionizes Cryo teams by offering ATK-scaled Teamwide Healing and consistent off-field damage through her "Cooking Mek," freeing up slots usually taken by healers or shielders.


Pros

  • Consolidates Sub-DPS, Healer, and RES Shred roles.
  • Turret (Skill) has 100% uptime (20s duration).
  • Shreds Hydro/Cryo RES without needing Swirl (Anti-VV).
  • Healing scales on ATK, increasing her personal damage.

Cons

  • High Energy Cost requires 200%+ ER in solo Cryo teams.
  • Single-target focus on Skill (Cooking Mek).
  • Passive restricts teams to Cryo/Hydro for max buffs.

Quick Guide (TL;DR)

If you don't have time for the math, here is the cheat sheet.

  • Best Artifact: 4pc Scroll of the Hero of Cinder City (Support/Buff).
  • Alt Artifact: 4pc Noblesse Oblige or 2pc ATK / 2pc ER.
  • Best Weapon: Calming Cookware (Signature) or Engulfing Lightning.
  • F2P Weapon: The Catch (R5) or Favonius Lance.
  • Main Stats: SANDS: ATK% or ER | GOBLET: Cryo DMG or ATK% | CIRCLET: CRIT or ATK%.
  • Talent Priority: Elemental Skill = Elemental Burst > Normal Attack.
  • Top Team: Escoffier + Wriothesley + Furina + Kazuha (Premium Freeze).
Pro Tip: Unlike other healers, Escoffier scales purely with ATK. Do not build HP or Healing Bonus unless necessary. High Base ATK weapons (like Skyward Spine) are exceptionally good on her.

Need Primogems for Escoffier?

Get Genesis Crystals at a discounted price with instant delivery.

Top Up Secure & Fast via GameCharge

Ascension & Talent Materials

Category Material Name Source
Ascension Lumidouce Bell Found in Fontaine (North of Court)
Boss Drop Artificed Spare Clockwork Component Coppelius (Icewind Suite)
Talent Books Teachings of Order Pale Forgotten Glory (Wed/Sat/Sun)

Talent Breakdown & Mechanics

Elemental Skill: Low-Temperature Cooking

  • Tap: Summons the "Cooking Mek" turret. Deals AoE Cryo DMG periodically to nearby enemies for 20s.
  • Hold: Repositions the Mek and targets a specific enemy, dealing increased damage.
  • Effect: The Mek follows the active character slightly (like Yae Miko's totems), ensuring consistent off-field Cryo application for perma-freeze.

Elemental Burst: Scoring Cuts

  • Cost: 80 Energy | Cooldown: 18s
  • The Heal: Instantly restores HP to the entire party based on Escoffier's ATK.
  • The Damage: Deals a large instance of AoE Cryo DMG. Excellent for clearing mobs or triggering a massive Melt nuke.

Passive: Inspiration-Immersed Seasoning

  • Res Shred: When the party contains at least 1 Hydro and 1 Cryo character, Escoffier shreds enemy Hydro and Cryo RES by 20% when her Mek hits. This effectively acts as a mini-VV set without needing Anemo.

Talent Priority Order:

  1. Elemental Skill (Level 10) - Primary damage source.
  2. Elemental Burst (Level 9) - For healing strength.
  3. Normal Attack (Level 1) - Ignore.

Stat Requirements & ER Thresholds

Escoffier needs significant ATK for both damage and healing, but do not neglect Energy Recharge.

Team Context Weapon ER Requirement
Solo Cryo (Support) Favonius Lance 210% - 230%
Double Cryo (w/ Wriothesley) Offensive Weapon 160% - 180%
Triple Cryo (Mono) Any 130% - 140%

Substat Priority:

  1. Energy Recharge (Until requirements met)
  2. ATK% (Scales DMG and Healing)
  3. CRIT Rate / DMG (For personal damage)
  4. Elemental Mastery (Only for Melt teams)

Best Artifacts Comparison

Set Name Role Reasoning
Scroll of the Hero of Cinder City BiS Support Assuming she counts as a Natlan character (mechanically), this provides massive party elemental DMG buffs.
4pc Noblesse Oblige General Buffer Standard 20% ATK buff. Reliable if Scroll mechanics don't apply or you lack the set.
4pc Golden Troupe Sub-DPS Maximizes her Turret (Skill) damage. Use this if you have enough healing and want her to deal significant damage off-field.

Weapon Rankings

Weapon Type Performance Notes
Engulfing Lightning ER% S+ Provides massive ER and converts it to ATK. Perfect for her ATK-scaling healing and high burst cost.
Skyward Spine ER% S High Base ATK (674) boosts her healing significantly while providing needed ER.
Favonius Lance ER% S (Support) Excellent for battery roles. Lower Base ATK means less healing/damage, but better team consistency.
The Catch ER% A (F2P) Decent ER and boosts Burst CRIT. Good if you want her to contribute more damage.

Constellation Value

Escoffier is feature-complete at C0, but C1 and C2 offer substantial damage increases.

  • C1: Pre-Dinner Dance - (Buff) When party is Hydro/Cryo, Skill/Burst use increases Party Cryo CRIT DMG by 60%. Huge for Freeze teams.
  • C2: Fresh, Fragrant Stew - (Damage) Cooking Mek generates "Cold Dish" stacks. Consuming stacks increases Party Cryo DMG by 240% of Escoffier's ATK. Adds massive coordinated burst damage.
  • C6: Tea Parties Bursting With Color - (Sub-DPS) Cooking Mek fires additional Cryo projectiles when the active character attacks. Transforms her into a Cryo Xingqiu/Yelan.

Verdict: C0 is excellent. C1 is the best stopping point for support.

Top Team Compositions

1. Premium Freeze

  • Main DPS: Wriothesley / Ayaka
  • Sub-DPS: Furina
  • Support: Escoffier
  • Anemo: Kazuha

Why it works: Escoffier consolidates the Healer + Cryo Resonance role perfectly. Her teamwide heal maxes Furina's Fanfare instantly. Her passive shreds Cryo RES, allowing Kazuha to focus on grouping or double-swirling.

2. Mono Cryo

  • Main DPS: Wriothesley
  • Sub-DPS: Shenhe
  • Support: Escoffier
  • Anemo: Kazuha / Jean

Why it works: In unfreezable content (Bosses), this team pumps out raw Cryo damage. Escoffier benefits massively from Shenhe's Quills because her turret hits frequently.

Rotations & Combos

Standard Support Rotation:
Furina E Q > Kazuha E Q > Escoffier Q (Heal/Buff) E (Turret) > Main DPS

Tip: Always use Burst *before* Skill if you have C1/C2 to ensure the buffs are active for the turret's duration.

Frequently Asked Questions

Is she better than Charlotte?
Yes. Escoffier offers RES Shred (Passive) and Crit buffs (C1) that Charlotte lacks. Her damage contribution is also significantly higher. However, Charlotte is 4-star and easier to obtain.

Why ATK% artifacts?
Unlike HP-scalers (Kokomi/Furina), Escoffier's healing and damage both scale with **ATK**. Building HP does nothing for her.

Data Source: Theorycrafting v6.x (Speculative). Last Updated: December 2025

Genshin Impact: Diona Guide

The Definitive Build & Analysis

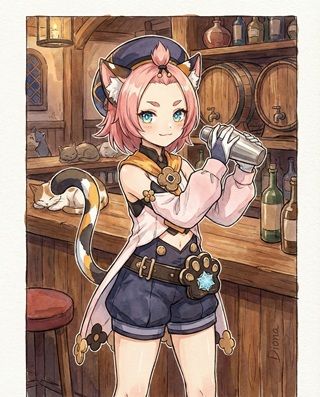
Diona Genshin Impact Character Art
Rarity (4-Star)
Element Cryo
Weapon Bow
Best Role Shielder / Healer / Battery
Stat Priority HP% > ER > Healing Bonus
Tier S (Role Compression)

Diona is the ultimate role consolidator. In one slot, she provides a Shield, Healing, Energy generation (Battery), and massive EM buffs (at C6). While her individual numbers aren't the highest, her ability to do everything at once makes her a staple in Freeze, Physical, and Dendro teams.


Pros

  • Consolidates Shield, Heal, and Battery roles.
  • Excellent Cryo Battery (especially w/ Sacrificial Bow).
  • C6 provides a massive 200 Elemental Mastery buff.
  • Shield increases Move Speed & decreases Stamina consumption.

Cons

  • Shield is weaker than Zhongli/Layla (short duration).
  • Healing ticks are relatively slow.
  • Low personal damage output.
  • Circle Impact (must stay in burst to heal/buff).

Quick Guide (TL;DR)

If you don't have time for the math, here is the cheat sheet.

  • Best Artifact: 4pc Noblesse Oblige (Buffer) or 4pc Maiden Beloved (Pure Healer).
  • Alt Artifact: 2pc Tenacity + 2pc Vourukasha (Max Shield Strength).
  • Best Weapon: Sacrificial Bow (Uncontested BiS).
  • Alt Weapon: Favonius Warbow (Team Battery).
  • F2P Weapon: Recurve Bow (3-Star HP% Stat Stick).
  • Main Stats: SANDS: HP% or ER | GOBLET: HP% | CIRCLET: HP% or Healing Bonus.
  • Talent Priority: Elemental Burst = Elemental Skill > Normal Attack (Ignore).
  • Top Team: Diona + Ayaka + Shenhe + Kazuha (Premium Freeze).
Pro Tip: Always use HOLD E. Tapping E creates a weaker shield with shorter duration. Holding E creates a shield with 75% bonus absorption and generates more energy particles.

Need Primogems for C6 Diona?

Get Genesis Crystals at a discounted price with instant delivery.

Top Up Secure & Fast via GameCharge

Ascension & Talent Materials

Category Material Name Source
Ascension Calla Lily Found near lakes in Mondstadt (Springvale)
Boss Drop Hoarfrost Core Cryo Regisvine (Mondstadt)
Talent Books Teachings of Freedom Forsaken Rift (Mon/Thu/Sun)

Talent Breakdown & Mechanics

Elemental Skill: Icy Paws

  • Tap: Fires 2 Paws. Shield lasts ~4.8s. (Don't use this).
  • Hold: Backflips and fires 5 Paws. Shield gains 75% DMG Absorption Bonus and lasts ~12s. Always use Hold to maximize shield uptime and energy generation (3-4 particles).
  • Utility: Characters protected by the shield gain 10% Movement Speed and consume 10% less Stamina. Excellent for Ayaka/Hu Tao.

Elemental Burst: Signature Mix

  • Cost: 80 Energy | Cooldown: 20s
  • Field: Throws a cocktail that creates a "Drunken Mist" field.
  • Effects: Deals continuous Cryo DMG to enemies and heals the active character within the AoE. The healing ticks are slow (every 2s) but potent.
  • Debuff: Decreases enemy ATK by 10% inside the field (Passive).

Passive: Cat's Tail Secret Menu

  • Shield Buff: As mentioned, shield grants 10% Move Speed and 10% Stamina Reduction. This is unique to Diona and very valuable for stamina-hungry carries.

Talent Priority Order:

  1. Elemental Skill (Level 9+) - For Shield Strength.
  2. Elemental Burst (Level 8) - For Healing.
  3. Normal Attack (Level 1) - Ignore.

Stat Requirements & ER Thresholds

Diona needs high ER to burst off-cooldown, but HP is prioritized for shield strength.

Team Context Weapon ER Requirement
Solo Cryo Sacrificial Bow 200% - 220%
Double Cryo (w/ Ayaka/Ganyu) Sacrificial Bow 160% - 180%
No ER Weapon Recurve Bow 240%+

Substat Priority:

  1. HP% (Shield/Heal)
  2. Energy Recharge (Until requirement met)
  3. CRIT Rate (Only if using Favonius Warbow)
  4. Flat HP

Best Artifacts Comparison

Set Name Role Reasoning
4pc Noblesse Oblige BiS Support Grants 20% ATK to the team. Since she bursts often in rotation, this is her best way to contribute offensive utility.
2pc Tenacity / 2pc Vourukasha Max Shield If you find her shield breaking too easily, stack 40% HP from these 2-piece sets.
4pc Instructor EM Buff Use only in Hu Tao/Yoimiya Vape teams to boost Team EM by 120. Sacrifice stats for buffs.

Weapon Rankings

Weapon Type Performance Notes
Sacrificial Bow (High Refine) ER% S+ Allows Hold E twice. Doubles energy generation and ensures shield is always up. Essential for Cryo Battery role.
Favonius Warbow ER% S Great general battery. Requires Crit Rate. Easier to get (free) than Sacrificial.
Recurve Bow HP% A (Shield) 3-Star weapon obtained from chests/NPC. Only bow with HP% secondary stat. Use if you want max shield thickness and have enough ER.
Elegy for the End ER% A (Whale) Buffs Team EM/ATK. Diona triggers it well with her Burst, but it's expensive.

Constellation Value

Diona is functional at C0, but C6 transforms her utility.

  • C1: A Lingering Flavor - (Energy) Regenerates 15 Energy for Diona after Burst ends. Drops ER requirement significantly.
  • C2: Shaken, Not Purred - (Shield) Increases Shield DMG Absorption by 15%. Also shields teammates in Co-op.
  • C6: Cat's Tail Closing Time - (Broken) Characters in Burst field get:
    • +30% Healing Bonus (if HP ≤ 50%)
    +200 Elemental Mastery (if HP > 50%).
    This 200 EM is huge for Melt/Vaporize/Dendro teams.

Verdict: C6 is the goal. It makes her a Kazuha-tier buffer for reaction damage.

Top Team Compositions

1. Morgana (Freeze)

  • Main DPS: Ganyu / Ayaka
  • Hydro: Mona / Kokomi
  • Anemo: Venti / Kazuha
  • Battery/Shield: Diona

Why it works: Diona generates particles to fund Ayaka/Ganyu's expensive bursts. She provides Cryo Resonance and safety without ruining freeze reactions.

2. Fridge / Dendro Support

  • Main DPS: Alhaitham / Cyno
  • Hydro: Xingqiu / Yelan
  • Dendro: Nahida
  • Sustain: Diona (C6)

Why it works: Diona's C6 provides 200 EM to the active character, boosting Hyperbloom/Aggravate damage significantly. Her Cryo application can enable "Fridge" mechanics (preserving Dendro aura).

Rotations & Combos

Support Rotation:
Diona Hold E > Diona Q > Swap to Cryo Carry (Funnel particles)

Tip: If using Sacrificial Bow, do: Hold E > Q > Hold E. This maximizes energy generation for your team.

Frequently Asked Questions

Is she better than Layla?
Layla has a stronger shield (100% uptime) and better Tenacity uptime. Diona offers healing, better energy generation, and the C6 EM buff. Choose Layla for raw defense, Diona for utility/healing.

Should I build HP or Healing Bonus?
Generally HP/HP/HP is preferred because Diona's shield is her main selling point. Her healing is "good enough" without a Healing Bonus circlet, but her shield needs all the help it can get.

Data Source: KQM Standards. Last Updated: December 2025

Genshin Impact: Citlali Guide

The Definitive Build & Analysis

Citlali Genshin Impact Character Art
Rarity (5-Star)
Element Cryo
Weapon Catalyst
Best Role Shielder / Reaction Buffer
Stat Priority EM > ER > HP% (Depending on Kit)
Tier S (Melt/Freeze Support)

Citlali is a powerful shaman of the Masters of the Night-Wind. As a Cryo Catalyst user, she provides robust shielding via the Nightsoul mechanic and consistent off-field Cryo application. She is a premier holder of the new Natlan support artifact set.


Pros

  • Strongest off-field Cryo application for Melt teams.
  • Nightsoul mechanic extends Shield duration automatically.
  • Excellent holder of "Scroll of Cinder City" for team buffs.
  • F2P Friendly (works with Craftable/Favonius weapons).

Cons

  • High Energy Cost (60-80) requires ER investment.
  • Shield strength depends on maintaining Nightsoul points.
  • Burst animation is long (vulnerable without shield).

Quick Guide (TL;DR)

If you don't have time for the math, here is the cheat sheet.

  • Best Artifact: 4pc Scroll of the Hero of Cinder City (Team Buff).
  • Alt Artifact: 4pc Tenacity of the Millelith (Shield Strength).
  • Best Weapon: Starcaller's Projection (Signature) or Thousand Floating Dreams.
  • F2P Weapon: Favonius Codex (Battery) or Ring of Yaxche (Craftable).
  • Support Weapon: Thrilling Tales of Dragon Slayers (ATK Buff).
  • Main Stats: SANDS: EM or ER | GOBLET: EM or Cryo | CIRCLET: EM or CRIT.
  • Talent Priority: Elemental Skill > Elemental Burst > Normal Attack.
  • Top Team: Citlali + Mavuika + Kinich + Xilonen (Natlan Synergy).
Pro Tip: Citlali's shield durability relies on her Nightsoul points. Ensure you maintain her Nightsoul state to keep the shield active and trigger the artifact set bonuses.

Need Primogems for Citlali?

Get Genesis Crystals at a discounted price with instant delivery.

Top Up Secure & Fast via GameCharge

Ascension & Talent Materials

Category Material Name Source
Ascension Night-Wind Bloom (Placeholder) Natlan Local Specialty (Night-Wind Region)
Boss Drop Everflame Seed (Placeholder) New Natlan World Boss
Talent Books Teachings of Conflict Natlan Talent Domain (Wed/Sat/Sun)

Talent Breakdown & Mechanics

Elemental Skill: Opaline Protection

  • Shield & Nightsoul: Creates a shield that absorbs Cryo DMG 250% more effectively. Enters the Nightsoul's Blessing state.
  • Off-Field: Summons "Spirit Skulls" that periodically deal Cryo DMG to nearby opponents based on Citlali's EM/HP (depending on final scaling).
  • Application: Excellent for maintaining Cryo aura for Melt carries or Freezing enemies.

Elemental Burst: Glacial Starfall

  • Cost: 60 Energy | Cooldown: 15s
  • The Nuke: Calls down a massive spirit totem that deals AoE Cryo DMG.
  • Buff: Regenerates Nightsoul points for all nearby Natlan party members, extending their own rotations.

Passive: Night-Wind's Grace

  • Nightsoul Burst: When a party member triggers a Nightsoul Burst, Citlali restores Energy and strengthens her shield.

Talent Priority Order:

  1. Elemental Skill (Level 10) - Maximizes Shield strength.
  2. Elemental Burst (Level 8) - For damage and utility.
  3. Normal Attack (Level 1) - Low priority.

Stat Requirements & ER Thresholds

Citlali acts as a support, so ER is vital to keep her Burst uptimes for team buffs.

Team Context Weapon ER Requirement
Solo Cryo (Support) Favonius Codex 220% - 240%
Double Cryo (w/ Wriothesley) Favonius Codex 160% - 170%
With Other Weapon Signature / TTDS 250%+

Substat Priority:

  1. Energy Recharge (Until requirements met)
  2. Elemental Mastery / HP% (Depending on scaling)
  3. CRIT Rate (For Favonius triggers)

Best Artifacts Comparison

Set Name Role Reasoning
Scroll of the Hero of Cinder City BiS Support Activating Nightsoul Burst refunds energy and buffs Party Elemental DMG. Essential for any Natlan support.
Tenacity of the Millelith Shield Bot Increases Shield Strength and Party ATK. Good if not running other Natlan characters.
4pc Noblesse Oblige General Buffer Classic 20% ATK buff. Use if Scroll set isn't available or team doesn't benefit from Elemental DMG.

Weapon Rankings

Weapon Type Performance Notes
Favonius Codex ER% S+ Generates white particles for the team. Essential for energy-hungry teams like Melt or Freeze.
Thrilling Tales (TTDS) HP% S (Buffing) Massive 48% ATK buff to your Main DPS. Best if you have enough ER from artifacts.
Prototype Amber HP% A (Energy) Refunds energy after burst. HP substat helps shield strength. Craftable option.
Oathsworn Eye ATK% A (Event) Increases ER after using Skill. Good middle ground between healing scaling (ATK) and energy.

Constellation Value

Citlali is functional at C0, but constellations improve her shielding and buffing.

  • C1: Starlight Barrier - (Shielding) Increases Shield Absorption by 20%. Great for comfort.
  • C2: Frostfall Omen - (Shred) Opponents hit by Elemental Skill have their Cryo RES decreased by 15%. Excellent for boosting team damage.
  • C6: Eternal Night-Watch - (Buff) While Shield is active, active character gains 15% Cryo DMG Bonus. Strong for Mono Cryo/Freeze.

Verdict: C0 is perfectly fine for most players. C2 is a good stopping point for vertical investment.

Top Team Compositions

1. Natlan Melt

  • Main DPS: Mavuika / Arlecchino
  • Support: Citlali (Shield/Cryo)
  • Sub-DPS: Xilonen / Emilie
  • Flex: Bennett / Kazuha

Why it works: Citlali provides a shield and applies Cryo for the Pyro carry to Melt. The Scroll artifact set buffs the Pyro carry's damage significantly.

2. Wriothesley Freeze/Burnmelt

  • Main DPS: Wriothesley
  • Support: Citlali
  • Hydro/Pyro: Furina / Thoma
  • Anemo: Kazuha

Why it works: Provides Cryo Resonance (Crit Rate) and shielding for Wriothesley, who is prone to interruption. With Furina, she enables Freeze; with Thoma, she enables Melt.

Rotations & Combos

Support Rotation:
Citlali E (Shield/Nightsoul) > Citlali Q (Buff/Burst) > Swap to Main DPS

Tip: Ensure you refresh her E before the shield expires to maintain the Scroll set buff uptime.

Frequently Asked Questions

Is she better than Layla/Diona?
For Natlan teams, absolutely. Her synergy with Nightsoul mechanics and the Scroll set makes her a superior buffer. For generic teams, she is comparable but offers more offensive utility.

Does she heal?
No, Citlali is primarily a Shielder. If you need a healer, consider bringing Bennett or Xilonen in the flex slot.

Data Source: Theorycrafting v6.x (Speculative). Last Updated: December 2025

Genshin Impact: Chongyun Guide

The Definitive Build & Analysis

Chongyun Genshin Impact Character Art
Rarity (4-Star)
Element Cryo
Weapon Claymore
Best Role Burst Nuke / Cryo Enabler
CV Priority CRIT > ATK% > EM (Melt) > ER
Tier A (National Team)

Chongyun is a versatile Cryo support and burst damage dealer. Famous for being an original member of the "National Team," he offers unique utility by infusing melee weapons with Cryo and reducing team cooldowns at C2, all while dropping massive Cryo nukes with his low-cost burst.


Quick Guide (TL;DR)

If you don't have time for the math, here is the cheat sheet.

  • Best Artifact: 4pc Noblesse Oblige (Support) or 4pc Emblem of Severed Fate (Burst DPS).
  • Alt Artifact: 2pc Blizzard Strayer + 2pc Noblesse (Melt Nuke).
  • Best Weapon: Wolf's Gravestone (Team Buff/DMG) or Serpent Spine.
  • F2P Weapon: Tidal Shadow (Craftable) or Mailed Flower (Event).
  • Support Weapon: Sacrificial Greatsword (Field Uptime & Battery).
  • Main Stats: SANDS: ATK% or EM | GOBLET: Cryo DMG | CIRCLET: CRIT.
  • Talent Priority: Elemental Burst > Elemental Skill > Normal Attack (Ignore).
  • Top Team: Chongyun + Xiangling + Xingqiu + Bennett (OG National).
Pro Tip: C2 is his secret weapon. Elemental Skills and Bursts cast inside his frost field have their Cooldown decreased by 15%. This smoothes out rotations for teams like National or Kaeya Freeze significantly.

Need Primogems for C6 Chongyun?

Get Genesis Crystals at a discounted price with instant delivery.

Top Up Secure & Fast via GameCharge

Talent Breakdown & Mechanics

Elemental Skill: Spirit Blade: Chonghua's Layered Frost

  • The Field: Deals Cryo DMG and creates a frost field. Sword, Claymore, and Polearm characters inside gain Cryo Infusion.
  • Infusion Priority: This infusion can be overridden by Bennett's C6 (Pyro). It overrides Keqing's Electro infusion.
  • Buffs: Increases Attack Speed by 8% (Ascension 1).
  • Debuffs: When the field disappears, it summons a spirit blade that hits nearby enemies and reduces their Cryo RES by 10% (Ascension 4).

Elemental Burst: Spirit Blade: Cloud-Parting Star

  • Cost: 40 Energy | Cooldown: 12s
  • The Nuke: Summons 3 giant spirit blades that crash down one by one.
  • Melt King: Because the blades fall slightly apart, they follow "Standard ICD" rules in a way that often allows you to Reverse Melt all 3 hits (or 4 at C6) if strong Pyro is present (Bennett Q + Xiangling). This leads to massive burst damage.

Passive: Steady Breathing

  • Utility: Increases Normal Attack Speed of characters in the field by 8%. Subtle but useful for claymore users like Diluc (for Melt weaving).

Talent Priority Order:

  1. Elemental Burst (Level 9) - Main damage source.
  2. Elemental Skill (Level 8) - decent initial damage.
  3. Normal Attack (Level 1) - Only if playing Main DPS (rare).

Stat Requirements & ER Thresholds

Chongyun has a very cheap burst (40 cost), so he rarely struggles with energy unless he is the solo Cryo unit.

Team Context ER Requirement
National Team (Double Pyro) 110% - 130%
Solo Cryo Support 130% - 150%
With Akoumaru (No ER weapon) 140% - 160%

Substat Priority:

  1. CRIT Rate / CRIT DMG (Target 60/120+)
  2. ATK%
  3. Elemental Mastery (Crucial for Melt Builds)
  4. Energy Recharge (Until requirement is met)

Best Artifacts Comparison

Set Name Role Reasoning
4pc Noblesse Oblige Support (BiS) Since Bennett usually runs Noblesse in National, check if it stacks. If Bennett has it, Chongyun should run 2pc/2pc. If solo support, this is BiS.
4pc Emblem of Severed Fate Burst DPS Excellent for maximizing his Burst damage, though he doesn't build excessive ER to scale it infinitely.
2pc Blizzard / 2pc Noblesse Melt Nuke The classic nuke setup. Reliable, unconditional damage for his burst.

Weapon Rankings

Weapon Type Performance Description
Wolf's Gravestone ATK% S+ Massive ATK buff for him and the team (Passive). Fits his support/nuke hybrid role perfectly.
Serpent Spine (R5) CRIT Rate S Best 4-star for pure personal damage. Makes building Crit easy.
Akoumaru ATK% A+ (Burst) Boosts Burst DMG based on team's total energy capacity. Great in National (Raiden/Xiangling have high cost bursts).
Tidal Shadow (R5) ATK% A (F2P) Fontaine Craftable. Massive ATK boost after being healed (easy in National with Bennett). Accessible to everyone.

Constellation Value

Chongyun is a functional unit at C0, but C2 and C6 are significant milestones.

  • C1: Ice Unleashed - (Niche) Final Normal Attack releases 3 ice blades. Only useful for Main DPS memes.
  • C2: Atmospheric Revolution - (The Reason You Play Him) Elemental Skills and Bursts cast within the Frost Field have their CD time decreased by 15%. This creates smoother, faster rotations for the whole team.
  • C6: Rally of Four Blades - (Nuke) Burst deals 15% more damage to enemies with lower HP % than Chongyun. Also adds 1 additional spirit blade (4 total). Massive damage spike for his burst.

Verdict: C2 is his best support constellation. C6 is his best damage constellation.

Top Team Compositions

1. OG National Team

  • Vape Trigger: Xiangling
  • Hydro App: Xingqiu
  • Buffer: Bennett
  • Enabler/Nuke: Chongyun

Why it works: Chongyun provides CD reduction (C2) and allows Xiangling to Melt occasionally. His burst is a quick nuke that fits perfectly into the rotation while waiting for cooldowns.

2. Reverse Melt Nuke

  • Main Nuke: Chongyun
  • Pyro App: Bennett (C6 preferred for infusion)
  • Buffer: Shenhe
  • Swirl: Kazuha

Why it works: Shenhe buffs Cryo damage massively. Bennett and Kazuha apply Pyro. Chongyun drops his triple/quadruple blade burst, melting every hit for 100k+ damage per blade.

Rotations & Combos

National Rotation:
Chongyun E > Bennett Q E > Xiangling Q E > Xingqiu Q E > Chongyun Q (Melt)

Tip: Always use Chongyun's E first so the rest of the team benefits from the C2 Cooldown Reduction when they cast their skills.

Frequently Asked Questions

Is he better than Rosaria?
They trade blows. Rosaria offers Crit Rate sharing and more consistent off-field Cryo. Chongyun offers CD Reduction and a bigger instant nuke. For National Team, Chongyun is often preferred for the cooldown utility.

Can I use him in Freeze teams?
He works well with Kaeya/Rosaria, but be careful with Xingqiu/Yelan. Because Chongyun uses a Claymore, his attacks trigger Shatter on frozen enemies, which removes the Freeze status and the Blizzard Strayer crit buff.

Does his infusion ruin Electro/Physical mains?
Yes. Never run Chongyun with Razor, Eula, or Keqing (Physical). His Cryo infusion overrides their Physical damage, ruining their DPS.

Data Source: KQM Standards. Last Updated: December 2025

Genshin Impact: Charlotte Guide

The Definitive Build & Analysis

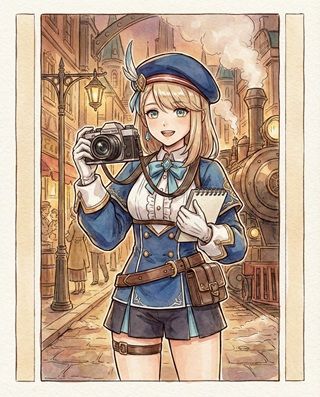
Charlotte Genshin Impact Character Art
Rarity (4-Star)
Element Cryo
Weapon Catalyst
Best Role Teamwide Healer / Cryo Support
CV Priority ER > ATK% > Healing Bonus > CRIT Rate
Tier A (With Furina) / B (General)

Charlotte is a dedicated journalist from The Steambird and an excellent Cryo Healer. Her kit features a unique "camera" mechanic to mark enemies and a powerful Elemental Burst that heals the entire party instantly, making her one of the best partners for Furina.


Quick Guide (TL;DR)

If you don't have time for the math, here is the cheat sheet.

  • Best Artifact: 4pc Noblesse Oblige (Buffing) or 4pc Songs of Days Past (Healing/Buff).
  • Alt Artifact: 4pc Tenacity of the Millelith (If using Hold Skill).
  • Best Weapon: Favonius Codex (BiS - Solves Energy).
  • Buffing Weapon: Thrilling Tales of Dragon Slayers (R5 - 48% ATK Buff).
  • Main Stats: SANDS: ER% | GOBLET: ATK% | CIRCLET: Healing Bonus or CRIT Rate.
  • Talent Priority: Elemental Burst > Elemental Skill > Normal Attack (Ignore).
  • Top Team: Charlotte + Furina + Neuvillette + Kazuha (Freeze/Hypercarry).
Pro Tip: Charlotte is extremely energy-hungry (80 Energy Cost). Always prioritize Energy Recharge (aim for 200%+) over Healing. If you can't Burst, you can't heal.

Need Primogems for C6 Charlotte?

Get Genesis Crystals at a discounted price with instant delivery.

Top Up Secure & Fast via GameCharge

Talent Breakdown & Mechanics

Elemental Skill: Framing: Freezing Point Composition

  • Tap: Deals damage and applies "Snappy Silhouette" to enemies in front.
  • Hold (Viewfinder): Enters viewfinder mode. You can pan the camera to mark up to 5 enemies. When released, it deals damage and applies "Focused Impression" (lasts longer, deals more damage).
  • Mechanic: The Hold version generates more energy (5 particles vs 3) and applies a longer-lasting Cryo DoT. Always use Hold Mode in combat for better energy generation.

Elemental Burst: Still Photo: Comprehensive Confirmation

  • Cost: 80 Energy | Cooldown: 20s
  • The Heal: Instantly restores a massive amount of HP to all party members based on Charlotte's ATK.
  • The Zone: Creates a "Newsflash Field" that deals Cryo DMG and heals the active character periodically for 4s.
  • Synergy: The instant teamwide heal instantly maxes out Furina's Fanfare stacks in many scenarios.

Passive: Diversified Investigation

  • Fontainians: For every Fontainian in the party (excluding herself), she gains a 5% Healing Bonus (up to 15%).
  • Non-Fontainians: For every non-Fontainian, she gains a 5% Cryo DMG Bonus.
  • Note: Since she is usually a healer, pairing her with Furina/Neuvillette activates the Healing Bonus naturally.

Talent Priority Order:

  1. Elemental Burst (Level 9) - Her healing source.
  2. Elemental Skill (Level 8) - Increases damage multiplier.
  3. Normal Attack (Level 1) - Completely useless unless playing meme DPS.

Stat Requirements & ER Thresholds

Charlotte has one of the highest ER requirements in the game due to her 80-cost burst and reliance on Hold Skill (longer cooldown).

Team Context Weapon ER Requirement
Solo Cryo Favonius Codex 220% - 240%
Solo Cryo TTDS (No ER) 260% - 280% (Very Hard)
Double Cryo (w/ Ayaka/Wrio) Favonius Codex 180% - 200%

Substat Priority:

  1. Energy Recharge (Aim for 220%+)
  2. CRIT Rate (Only if using Favonius Codex to trigger passive)
  3. ATK% (Increases Healing amount)
  4. Flat ATK

Best Artifacts Comparison

Set Name Role Reasoning
4pc Noblesse Oblige Buffer (BiS) Standard support choice. Gives 20% ATK to the team upon Burst. Great for ATK-scaling DPS like Wriothesley or Ayaka.
4pc Tenacity of the Millelith E-Skill Buffer Her "Framing" mark deals damage over time, triggering the 20% ATK buff. Requires consistent Hold Skill usage.
4pc Maiden / 2pc ER + 2pc ATK Pure Healer Use this if you are struggling to keep your team alive or meet ER requirements.

Weapon Rankings

Weapon Type Performance Description
Favonius Codex ER% S+ Absolute BiS. High ER stat + White Particles for the team. Solves her energy crisis perfectly. Build CRIT Rate.
Thrilling Tales (TTDS) HP% S (Buffing) Gives 48% ATK to the next character. Huge buff, but makes charging her Burst extremely difficult (needs ~260% ER).
Oathsworn Eye ATK% A (Event) Increases ER after using Skill. Good middle ground between healing scaling (ATK) and energy.
Prototype Amber HP% A (Energy) Refunds energy after burst. HP substat doesn't help her healing much (she scales on ATK), but the energy utility is solid.

Constellation Value

Charlotte gets significantly better energy economy and healing with constellations.

  • C1: A Need to Verify Facts - (Healing) After Burst heals, it applies a "Verification" mark that heals characters periodically for 6s. Adds sustained healing to her burst.
  • C4: A Responsibility to Oversee - (Energy) When Burst hits marked enemies, it restores energy to Charlotte and deals more damage. Critical for lowering ER needs.
  • C6: A Curiosity to Pursue Truth - (Follow-up) When the active character attacks a marked enemy, Monsieur Verite launches a coordinated attack that heals. Adds consistent off-field Cryo app and healing.

Verdict: C4 is the "comfort" constellation. C6 makes her a fantastic Cryo applicator.

Top Team Compositions

1. Furina Freeze (Wrio/Ayaka)

  • Main DPS: Wriothesley / Ayaka
  • Buffer/Sub-DPS: Furina
  • Healer: Charlotte
  • Anemo: Kazuha / Venti

Why it works: Charlotte's teamwide burst instantly stacks Furina's Fanfare. She provides Cryo resonance (Crit Rate) and holds TTDS or Noblesse to buff the Main DPS.

2. Neuvillette Hypercarry

  • Main DPS: Neuvillette
  • Buffer: Furina
  • Healer: Charlotte
  • Flex: Kazuha / Zhongli

Why it works: Neuvillette drains HP, Furina drains HP, Charlotte heals it all back. The freeze reaction (Charlotte + Furina) can help control mobs, allowing Neuvillette to blast them safely.

Rotations & Combos

Standard Support Rotation:
Furina E Q > Kazuha E Q > Charlotte Hold E (Mark) Q (Heal) > Main DPS Rotation

Tip: Always use Hold E over Tap E if possible. It generates more energy and the mark lasts longer (12s vs 6s), which is crucial for rotations.

Frequently Asked Questions

Is she better than Diona/Mika?
For **Furina teams**, yes, because she heals the whole team instantly. Diona/Mika only heal the active character (mostly). For shielding, Diona is better. For Phys DPS buffs, Mika is better.

Why ATK main stats? She's a healer?
Charlotte's healing scales off her **ATK**, not her HP. This makes her squishy, so be careful not to get hit while using her Hold E.

Data Source: KQM Standards. Last Updated: December 2025

Genshin Impact: Aloy Guide

The Definitive Build & Analysis

Aloy Genshin Impact Character Art
Rarity (5-Star Crossover)
Element Cryo
Weapon Bow
Best Role Burst Support / Niche DPS
CV Priority CRIT > ATK% > EM > ER
Tier C (Budget Ganyu)

Aloy is a crossover character from Horizon Zero Dawn. While often overshadowed by other Cryo units, she functions as a solid Burst Nuke thanks to her low energy cost (40) and high multipliers. She is unique in that she has zero constellations, meaning her C0 kit is her maximum potential.


Quick Guide (TL;DR)

If you don't have time for the math, here is the cheat sheet.

  • Best Artifact (Burst): 4pc Emblem of Severed Fate or 2pc Cryo / 2pc Noblesse.
  • Best Artifact (Main DPS): 4pc Blizzard Strayer (Freeze).
  • Best Weapon: Thundering Pulse or Polar Star (Stat Sticks).
  • F2P Weapon: Predator (PS Only) or Hamayumi (Craftable).
  • Support Weapon: Sacrificial Bow (Battery for Ayaka/Eula).
  • Main Stats: SANDS: ATK% | GOBLET: Cryo DMG | CIRCLET: CRIT.
  • Talent Priority: Elemental Burst > Elemental Skill > Normal Attack.
  • Top Team: Aloy + Xiangling + Bennett + Kazuha (Reverse Melt).
Pro Tip: Do not rely on her Cryo Infusion. Her skill has a 0.1s internal cooldown on gaining "Coil" stacks. This means if 4 bombs explode instantly via Kazuha, you only get 1 stack, not 4. It is very inconsistent to trigger "Rushing Ice" state.

Need Primogems for her Bow?

Get Genesis Crystals at a discounted price with instant delivery.

Top Up Secure & Fast via GameCharge

Talent Breakdown & Mechanics

Normal Attack: Rapid Fire

  • Rapid Shots: Standard 4-hit bow combo. Only useful if you trigger "Rushing Ice."
  • Rushing Ice: If Aloy gains 4 Coil stacks, her Normal Attacks are converted to Cryo DMG and buffed. This is her Main DPS state, but it is hard to trigger consistently.

Elemental Skill: Frozen Wilds

  • Freeze Bomb: Throws a Power Cell that deals Cryo DMG.
  • Chillwater Bomblets: Upon impact, the bomb splits into 6 bomblets.
  • Coil Stacks: When a bomblet hits an enemy, Aloy gains 1 Coil stack. CRITICAL: This has a 0.1s Internal Cooldown (ICD). Hitting an enemy with 3 bombs instantly only grants 1 stack. This is why Anemo groupers are recommended (pull bombs into enemies slowly).

Elemental Burst: Prophecies of Dawn

  • Cost: 40 Energy | Cooldown: 12s
  • The Nuke: Throws a Power Cell and detonates it.
  • Analysis: This deals a large instance of AoE Cryo DMG. Because the energy cost is so low, you can spam this off-cooldown. This is the primary reason to play Aloy.

Talent Priority Order:

  1. Elemental Burst (Level 9) - Her best source of damage.
  2. Elemental Skill (Level 8) - Buffs self and debuffs enemy ATK.
  3. Normal Attack (Level 1-6) - Only if you commit to Main DPS.

Stat Requirements & ER Thresholds

Aloy has a very cheap burst, making her easy to build as a sub-DPS.

Build Type Stat Priority ER Requirement
Burst Nuke (Melt) CRIT > EM > ATK 120% - 130%
Freeze Support ATK > CRIT DMG (if Blizzard) 100% - 120%

Substat Priority:

  1. CRIT DMG (Ascension is Cryo DMG, so you need Crit)
  2. CRIT Rate (Target 60%+, or 30% in Freeze)
  3. ATK%
  4. Elemental Mastery (Only for Melt teams)

Best Artifacts Comparison

Set Name Role Reasoning
2pc Cryo / 2pc Noblesse Burst Nuke (BiS) The most consistent setup. Maximizes her Burst damage without conditional requirements.
4pc Emblem of Severed Fate Burst Support Good if you have extra pieces, but Aloy doesn't build enough ER to fully utilize the 4pc bonus compared to Raiden/Xiangling.
4pc Blizzard Strayer Freeze DPS Essential if you are trying to play her as an on-field attacker in a Freeze team. Free 40% Crit Rate.

Weapon Rankings

Weapon Type Performance Description
Thundering Pulse CRIT DMG S+ Huge Stat Stick. Even if the passive isn't fully utilized for Nuke builds, the stats are unbeatable.
The Stringless EM S (Melt) Increases Burst/Skill DMG. Best 4-star option for Nuke builds.
Sacrificial Bow ER% A (Battery) Allows double E casts. Great for generating particles for another Cryo DPS (Ayaka).
Predator ATK% B (PS Only) Her signature weapon. It's okay, but the passive only works on PlayStation.

Constellation Status

⚠️ Unique Character Trait: No Constellations

Unlike every other character in Genshin Impact, Aloy has no constellations. Her "Stella Fortuna" is unobtainable.

This means Aloy is permanently capped at "C0" potential. While this makes her easy to "max out," it also means she lacks the vertical scaling (C1-C6) that other 5-star characters enjoy. Her kit is complete out of the box, but has a lower ceiling.

Top Team Compositions

1. Reverse Melt Nuke

  • Nuke: Aloy
  • Pyro: Xiangling / Klee
  • Buffer: Bennett
  • Swirl: Kazuha / Sucrose

Why it works: Bennett and Kazuha buff Aloy's ATK and Cryo DMG. Xiangling applies Pyro. Aloy casts her burst, triggering a massive Reverse Melt reaction (1.5x DMG) for a quick 100k+ damage.

2. Budget Freeze Support

  • Main DPS: Ayaka / Ganyu
  • Battery/Burst: Aloy (Sac Bow)
  • Hydro: Kokomi / Xingqiu
  • Anemo: Kazuha / Venti

Why it works: Aloy acts as a battery for Ayaka (generating 5 particles with E). Her passive also buffs the team's ATK by 8% when she uses her skill. She serves as a placeholder for Shenhe or Rosaria.

Rotations & Combos

Melt Nuke Rotation:
Bennett Q E > Kazuha E Q (Swirl Pyro) > Xiangling Q E > Aloy E Q

Note: Always cast E before Q on Aloy. The E applies Cryo, and the Q detonates it. Also, her A4 passive increases Cryo DMG Bonus over time while in the "Rushing Ice" state, but for Nuke builds, just E+Q is sufficient.

Frequently Asked Questions

Can I get Aloy now?
Currently, no. Aloy was a limited-time mail reward in Version 2.1/2.2. There is currently no way to obtain her if you missed that event.

Is she better than Diona/Rosaria?
Generally, no. Diona offers shielding/healing, and Rosaria offers more consistent Crit Rate sharing and off-field application. Aloy is purely damage/battery.

Data Source: KQM Standards. Last Updated: December 2025

Genshin Impact: Yoimiya Guide

The Definitive Build & Analysis

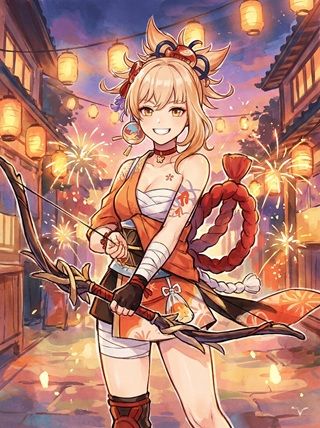
Yoimiya Genshin Impact Character Art
Rarity (5-Star)
Element Pyro
Weapon Bow
Best Role Normal Attack Main DPS
CV Priority CRIT > ATK% > EM
Tier A (Single Target Boss Killer)

Yoimiya is the Queen of the Summer Festival and a premiere single-target Pyro DPS. Known for her rapid-fire "machine gun" playstyle, she excels at taking down bosses (like the Thunder Manifestation) where auto-aim is king. She requires a shielder to ensure her attack string isn't interrupted.


Quick Guide (TL;DR)

If you don't have time for the math, here is the cheat sheet.

  • Best Artifact: 4pc Shimenawa's Reminiscence (Standard BiS).
  • Alt Artifact: 4pc Crimson Witch (Vape) or 4pc Echoes of an Offering (Low Ping Only).
  • Best Weapon: Thundering Pulse (Signature) or Rust (R5).
  • F2P Weapon: Slingshot (R5 - 3⭐ God Weapon) or Hamayumi.
  • Main Stats: SANDS: ATK% or EM | GOBLET: Pyro DMG | CIRCLET: CRIT.
  • Talent Priority: Normal Attack > Elemental Skill > Elemental Burst.
  • Top Team: Yoimiya + Yelan + Zhongli + Bennett.
Pro Tip: Do not interrupt your combo! Yoimiya's highest damage multipliers are on her 3rd and 5th shots. Dashing resets the combo string. Use a shield (Zhongli/Layla) so you can stand still and finish the N5 string.

Need Primogems for Thundering Pulse?

Get Genesis Crystals at a discounted price with instant delivery.

Top Up Secure & Fast via GameCharge

Talent Breakdown & Mechanics

Normal Attack: Firework Flare-Up

  • 5-Hit String: Yoimiya fires 5 shots (N1 to N5). The damage backloads heavily, with the 5th shot dealing the most damage.
  • ICD (Internal Cooldown): Yoimiya follows standard ICD. This means she Vaporizes on her 1st, 3rd, and 5th hits (N1, N3, N5). Interrupting the string ruins this vape pattern.

Elemental Skill: Niwabi Fire-Dance

  • Infusion: Converts Normal Attacks to Pyro DMG for 10s. Increases the DMG of Normal Attacks.
  • Particle Generation: She generates particles while hitting enemies during this stance.
  • Mechanic: While active, you cannot use Charged Attacks (Kindling Arrows). Just spam the Attack button.

Elemental Burst: Ryuukin Saxifrage

  • Cost: 60 Energy | Cooldown: 15s
  • Aurous Blaze: Marks an enemy. When *other* party members hit the mark, it explodes dealing AoE Pyro DMG.
  • Usage: If using 4pc Shimenawa, you generally do not use this burst as the artifact set drains your energy. If using Crimson Witch, cast this at the start of rotation.

Talent Priority Order:

  1. Normal Attack (Level 10) - This is the multiplier she uses.
  2. Elemental Skill (Level 9) - Buffs the NA multiplier.
  3. Elemental Burst (Level 1-6) - Often unused in optimal play.

Stat Requirements & ER Thresholds

Yoimiya's ER requirements are unique: she generally avoids ER if using Shimenawa's Reminiscence.

Build Type EM Goal (Vape) ER Requirement
Shimenawa (Standard) 100+ 0% (Do not build ER)
Crimson Witch (Bursting) 100+ 130% - 140%
Mono Pyro / Chevreuse 0 0%

Substat Priority:

  1. CRIT Rate / CRIT DMG (Target 75/150+ for consistency)
  2. Elemental Mastery (Vital for Vaporize teams)
  3. ATK%
  4. Energy Recharge (Avoid on Shimenawa)

Best Artifacts Comparison

Set Name Role Reasoning
4pc Shimenawa's Reminiscence General BiS Consumes 15 Energy to boost Normal Attack DMG by 50%. Perfectly aligns with her E-spam playstyle. Farming efficient (Momiji-Dyed Court).
4pc Crimson Witch of Flames Vaporize Competitive if you want to use her Burst. Slightly better for Reaction DMG but generally less ATK stats.
4pc Echoes of an Offering Low Ping RNG based. Only use if your ping is < 50ms, otherwise server lag causes the set effect to fail.

Weapon Rankings

Weapon Type Performance Description
Thundering Pulse CRIT DMG S+ Signature. Massive Crit DMG and Normal Attack buffs based on energy drain (works perfectly with Shimenawa).
Rust (R5) ATK% S The "4-Star Signature." At R5, it increases Normal Attack DMG by 80%. It outperforms most R1 5-star bows (like Skyward Harp/Amos).
Slingshot (R5) CRIT Rate A+ (F2P) 3-Star weapon. Passive gives 60% DMG bonus. If paired with Bennett/Yun Jin to fix the low Base ATK, it rivals Rust R3.
Aqua Simulacra CRIT DMG S Great stat stick (88% CD), but you must play close range to trigger the passive.

Constellation Value

Yoimiya is a complete unit at C0. Her constellations are steady but minor DPS increases.

  • C1: Agate Ryuukin - (Minor) Extends Burst duration and buffs ATK when an enemy marked by Burst is defeated. Weak if using Shimenawa.
  • C2: A Procession of Bonfires - (Good) When Yoimiya scores a CRIT with Pyro DMG, she gains 25% Pyro DMG Bonus. Always active since she hits fast.
  • C6: Naganohara Meteor Swarm - (Machine Gun) During Skill, normal attacks have a 50% chance to fire an extra arrow dealing 60% DMG. Massive damage increase and very fun.

Verdict: Stop at C0 or go for C2. Only whales need C6.

Top Team Compositions

1. Vaporize Hypercarry

  • Main DPS: Yoimiya
  • Hydro: Yelan / Xingqiu
  • Shield: Zhongli / Layla
  • Buffer: Bennett / Yun Jin

Why it works: The classic team. Yelan provides Hydro application and a ramping DMG buff. Zhongli ensures Yoimiya doesn't get interrupted so she can hit her N5 vape. Yun Jin (C6) is a strong alternative to Bennett for Attack Speed.

2. Chevreuse Overload

  • Main DPS: Yoimiya
  • Support: Chevreuse (C6 preferred)
  • Electro: Fischl (C6)
  • Electro: Beidou / Yae Miko

Why it works: Yoimiya is ranged, so the "knockback" from Overload doesn't hurt her DPS like it does for Hu Tao. Chevreuse provides massive RES shred and buffs without needing complex swirl setups.

Rotations & Combos

Standard Rotation:
Zhongli Hold E > Yelan E Q > Bennett E Q > Yoimiya E -> Spam Normal Attack

Combo Rule:
Spam standard attacks until the infusion ends (approx 3 full N5 strings). Do not Burst if using Shimenawa until after your E duration ends, or don't burst at all.

Frequently Asked Questions

Is Rust R5 really better than Skyward Harp?
Yes. The 80% Normal Attack DMG bonus from Rust R5 is so massive for Yoimiya that it generally beats low-refinement 5-star stat sticks unless your CRIT ratio is terrible.

Yun Jin vs. Bennett?
Bennett is generally better for AoE healing/buffing, but Yun Jin (especially C6) provides ATK Speed which Yoimiya loves. Using both together creates a hyper-carry monster.

Data Source: KQM Standards. Last Updated: December 2025

Genshin Impact. Yanfei Guide

The Definitive Build & Analysis

Yanfei Genshin Impact Character Art
Rarity (4-Star)
Element Pyro
Weapon Catalyst
Best Role Main DPS / Shield Support (C4)
CV Priority CRIT > ATK% > EM > ER
Tier A (DPS) / S (Tankfei)

Yanfei is Liyue's top legal adviser and a consistent Pyro Main DPS. She relies on her Scarlet Seals to reduce stamina consumption and deal massive Charged Attack damage. At Constellation 4, she unlocks a powerful shield, enabling the popular "Tankfei" support playstyle.


Quick Guide (TL;DR)

If you don't have time for the math, here is the cheat sheet.

  • Best Artifact (DPS): 4pc Crimson Witch (Vaporize) or 4pc Wanderer's Troupe (Charge Atk).
  • Best Artifact (Tankfei): 2pc Tenacity + 2pc Vourukasha (Max HP).
  • Best Weapon: Lost Prayer (5⭐) or The Widsith (4⭐ - The 6-Star Weapon).
  • F2P Weapon: Flowing Purity (Craftable) or Mappa Mare.
  • Main Stats (DPS): SANDS: ATK% or EM | GOBLET: Pyro DMG | CIRCLET: CRIT.
  • Talent Priority: Normal Attack > Elemental Burst > Elemental Skill.
  • Top Team: Yanfei + Xingqiu + Yelan + Bennett.
Pro Tip: Stamina Management is key. Never use a Charged Attack unless you have 3 (or 4 at C6) Scarlet Seals. This reduces the stamina cost to near zero and maximizes damage.

Need Primogems for C6 Yanfei?

Get Genesis Crystals at a discounted price with instant delivery.

Top Up Secure & Fast via GameCharge

Talent Breakdown & Mechanics

Normal Attack: Seal of Approval

  • Scarlet Seals: Normal attacks grant Scarlet Seals (Max 3, Max 4 at C6).
  • The Mechanic: Each seal decreases Stamina consumption by 15% (or 25% at high talent) and increases Charged Attack DMG.
  • Charged Attack: Consumes all seals to deal massive AoE Pyro DMG. The area and damage scale with the number of seals consumed.

Elemental Skill: Signed Edict

  • Instant Max Stacks: Deals AoE Pyro DMG and instantly grants maximum Scarlet Seals.
  • Rotation: Use this, then immediately Charged Attack. Do not use Normal Attacks after Skill.

Elemental Burst: Done Deal

  • Cost: 80 Energy | Cooldown: 20s
  • Brilliance: Grants max Scarlet Seals immediately and enters "Brilliance" state.
  • Buff: Periodically grants Scarlet Seals over time and increases Charged Attack DMG. At C4, this creates a shield based on 45% of her Max HP.

Talent Priority Order:

  1. Normal Attack (Level 9+) - The source of her Charged Attack damage.
  2. Elemental Burst (Level 8) - For the DMG bonus and C4 Shield.
  3. Elemental Skill (Level 6) - Least important for DPS.

Stat Requirements & ER Thresholds

Yanfei is energy-hungry (80 Cost Burst). Her requirements change drastically if you play her as DPS or Shield Support.

Role Stat Priority ER Requirement
Main DPS CRIT > ATK > EM 120% - 140%
Tankfei (C4 Shield) HP% > ER 200% - 250%

Substat Priority (DPS):

  1. CRIT Rate / CRIT DMG (Target 70/140+)
  2. Elemental Mastery (100+ for Vaporize)
  3. ATK%
  4. Energy Recharge

Best Artifacts Comparison

Set Name Role Reasoning
4pc Crimson Witch of Flames Vaporize DPS Standard BiS for reaction damage. Increases Overload/Vape damage significantly.
4pc Wanderer's Troupe Charge DPS Grants 35% Charged Attack DMG and 80 EM. Easier to farm via Strongbox. Very competitive with CW.
4pc Marechaussee Hunter Furina Team Only use with Furina. The 36% Crit Rate allows you to stack massive Crit DMG.
2pc Tenacity / 2pc Vourukasha Tankfei Maximize HP% for the strongest possible shield.

Weapon Rankings

Weapon Type Performance Description
Lost Prayer to the Sacred Winds CRIT Rate S+ Consistent stats. Movement speed helps with kiting. Yanfei stays on field long enough to gain stacks.
The Widsith (R5) CRIT DMG S (RNG) The "6-Star Weapon." If you roll the Elemental DMG or EM buff, it beats most 5-stars for 10s.
Sacrificial Jade CRIT Rate A (BP) New Battle Pass weapon. Gives massive Crit Rate and EM/HP buffs.
Prototype Amber (R5) HP% S (Tankfei) BiS for Shield Support. Heals the team and refunds energy, solving her ER issues.

Constellation Value

Yanfei needs C1 to feel smooth. C4 unlocks a new playstyle entirely.

  • C1: The Law Knows No Kindness - (Essential) Each Scarlet Seal reduces Stamina consumption by an additional 10% and increases resistance to interruption. Without this, she runs out of stamina instantly.
  • C4: Supreme Amnesty - (Tankfei Unlock) Using Burst creates a shield that absorbs damage equal to 45% of Max HP for 15s. This is one of the strongest shields in the game (Pyde element).
  • C6: Citation for Everyone - (DPS Peak) Increases Max Scarlet Seals by 1. This means Charged Attacks consume 0 Stamina and deal even more damage.

Verdict: C1 is mandatory for DPS. C4 is mandatory for Support.

Top Team Compositions

1. Classic Vaporize

  • Main DPS: Yanfei
  • Hydro: Xingqiu / Yelan
  • Buffer: Bennett
  • Flex: Kazuha / Sucrose / Zhongli

Why it works: Yanfei's long range allows her to drive Xingqiu's rain swords from a safe distance. Her normal attacks apply Hydro, and her big Charged Attacks vaporize it for 1.5x damage.

2. Tankfei Support (Hu Tao Team)

  • Main DPS: Hu Tao
  • Hydro: Xingqiu / Yelan
  • Anemo: Kazuha / Sucrose
  • Shield: Yanfei (C4 + Prototype Amber)

Why it works: Yanfei provides a shield and applies Pyro so Kazuha can Swirl it (shredding Pyro RES). This setup allows Hu Tao to deal massive damage while staying protected, without needing Bennett (who might heal her too much).

Rotations & Combos

The "N3C" Combo:
Normal x3 > Charged Attack. (Best for C0-C5 stamina management).

The "N2C" Combo:
Normal x2 > Charged Attack. (Higher DPS but consumes more stamina).

Burst Usage:
Q > Charged Attack > E > Charged Attack > Normal Combos.

Frequently Asked Questions

Is she better than Klee/Diluc?
She feels much smoother to play than Klee due to auto-targeting and range. Her damage ceiling is lower than Hu Tao/Lyney but comparable to Diluc. Her value skyrockets at C4 as a shielder.

Does she need a shielder?
At C0, absolutely. She is very squishy and gets interrupted easily during Charged Attacks. At C4, she is the shielder.

Data Source: KQM Standards. Last Updated: December 2025

Genshin Impact. Xinyan Guide

The Definitive Build & Analysis

Xinyan Genshin Impact Character Art
Rarity (4-Star)
Element Pyro
Weapon Claymore
Best Role Physical Burst DPS / Shield Support
CV Priority CRIT DMG > ATK > DEF > ER
Tier B (Niche Physical Support)

Xinyan is a unique character who suffers from "Split Scaling": she needs DEF for her Shield but ATK for her Damage. However, at C2, she guarantees a Critical Hit on her Burst, allowing for a specialized "Nuke" playstyle that ignores Crit Rate entirely.


Quick Guide (TL;DR)

If you don't have time for the math, here is the cheat sheet.

  • Best Artifact (DPS): 2pc Pale Flame + 2pc Bloodstained Chivalry.
  • Best Artifact (Support): 4pc Tenacity of the Millelith.
  • Best Weapon: Redhorn Stonethresher (BiS for C6) or Wolf's Gravestone.
  • F2P Weapon: Snow-Tombed Starsilver (DPS) or Whiteblind (Shield).
  • Main Stats (DPS): SANDS: ATK% | GOBLET: Phys DMG | CIRCLET: CRIT DMG.
  • Talent Priority: Elemental Burst > Normal Attack > Elemental Skill.
  • Top Team: Xinyan + Eula + Rosaria + Bennett (Physical Nuke).
Pro Tip: If you have C2 Xinyan, you do NOT need Crit Rate for her Burst build. Her C2 grants 100% Crit Rate to the Physical portion of her burst. Stack purely CRIT DMG.

Need Primogems for C6 Xinyan?

Get Genesis Crystals at a discounted price with instant delivery.

Top Up Secure & Fast via GameCharge

Talent Breakdown & Mechanics

Elemental Skill: Sweeping Fervor

  • Shield Mechanism: Deals Pyro DMG and creates a shield based on DEF.
  • Shield Levels: Hitting 0/1 enemies = Lvl 1/2 Shield. Hitting 2+ enemies = Lvl 3 Shield (Rave). The Lvl 3 Shield pulses Pyro DMG continuously.
  • Ascension 2 Passive: Reduces the requirement to: Hitting 1 enemy = Lvl 2; Hitting 2+ = Lvl 3. (Still buggy/hard to hit).

Elemental Burst: Riff Revolution

  • Cost: 60 Energy | Cooldown: 15s
  • Physical Nuke: Deals one massive instance of Physical DMG (not Pyro). Then deals small instances of Pyro DMG.
  • C2 Synergy: At C2, this skill's Physical DMG has 100% Crit Rate. This allows you to build 300% Crit DMG without needing any Crit Rate on artifacts.

Passive: ...Now That's Rock 'N' Roll!

  • Physical Buff: Characters shielded by Sweeping Fervor gain a 15% Physical DMG Bonus. This makes her a solid support for Eula, Razor, or Freminet.

Talent Priority Order:

  1. Elemental Burst (Level 9) - For the Nuke.
  2. Normal Attack (Level 8) - If C6 Spin-to-Win.
  3. Elemental Skill (Level 1/6) - Scale only if building Shield Support.

Stat Requirements & ER Thresholds

You must choose ONE path. Do not try to build hybrid (Split Scaling will ruin you).

Build Path Stat Priority ER Requirement
Physical Burst (C2+) CRIT DMG > ATK > ER 130% - 150%
Shield Support (C0-C6) DEF% > ER 200%+
Spin-to-Win (C6) DEF% > CRIT > ATK 120%

Substat Priority (Burst DPS):

  1. CRIT DMG (Go all in. Ignore Crit Rate.)
  2. ATK% (Burst scales on ATK)
  3. Energy Recharge
  4. Flat ATK

Best Artifacts Comparison

Set Name Role Reasoning
2pc Bloodstained / 2pc Pale Flame Burst DPS Provides a flat +50% Physical DMG Bonus. Best for maximizing the Burst nuke.
4pc Tenacity of the Millelith Shield Support Her Lvl 3 Shield pulses, keeping the 20% ATK buff active for the team. Requires getting the Lvl 3 shield consistently (C2 helps).
4pc Emblem of Severed Fate Hybrid Good for Burst damage if you struggle with ER, but 2pc/2pc Phys is usually stronger for pure damage.

Weapon Rankings

Weapon Type Performance Description
Redhorn Stonethresher CRIT DMG S+ (C6) With C6 (DEF to ATK conversion), this weapon is insane. Massive Crit DMG stat stick.
Wolf's Gravestone ATK% S Best for Support/Burst hybrid. Buffs team ATK significantly.
Whiteblind (R5) DEF% S (C6/Shield) Craftable. Best for Shield Support and C6 Spin DPS. Useless for C0-C5 Burst DPS.
Snow-Tombed Starsilver Phys DMG A (F2P) Dragonspine freebie. Solid for Physical Burst DPS builds.

Constellation Value

Xinyan changes dramatically at C2 and C6.

  • C2: Impromptu Opening - (The Fix) Burst Physical DMG has 100% Crit Rate. A Lvl 3 Shield is automatically formed when casting Burst. This allows you to ignore Crit Rate stats entirely and focus on Crit DMG.
  • C4: Wildfire Rhythm - (Support) Skill swing reduces enemy Physical RES by 15%. Excellent for supporting Eula.
  • C6: Rockin' in a Flaming World - (Spin-to-Win) Decreases Stamina Consumption of Charged Attacks by 30%. Converts 50% of DEF to ATK during Charged Attacks. Enables the "Spinner" playstyle.

Verdict: C2 is mandatory for her Burst playstyle. C4 is key for support.

Top Team Compositions

1. Eula Support

  • Main DPS: Eula
  • Support: Xinyan (C4 + Tenacity)
  • Electro: Raiden / Fischl
  • Battery: Rosaria / Diona

Why it works: Xinyan provides Pyro for Superconduct/Melt (rarely), Shielding, 15% Phys DMG Bonus (Passive), and 15% Phys RES Shred (C4). She consolidates multiple buffs.

2. Physical Nuke (Quickswap)

  • Burst DPS: Xinyan (C2)
  • Buffer: Bennett
  • Sub-DPS: Rosaria (C6 shreds Phys)
  • Electro: Lisa (A4 shreds DEF) / Raiden

Why it works: Bennett buffs ATK. Lisa/Rosaria apply Superconduct and shred resistance. Xinyan steps in, presses Q for a guaranteed crit nuke (50k-100k+), and swaps out.

Rotations & Combos

Support Rotation:
Electro App > Cryo App > Xinyan E (Shred) > Main DPS Burst

Burst Nuke (C2):
Bennett Q > Rosaria Q > Lisa Q > Xinyan Q

Frequently Asked Questions

Why is her shield so weak?
Her shield scales on DEF, but to deal damage, she needs ATK/Crit. This "Split Scaling" means you usually have to choose: strong shield and no damage, or good damage and paper shield.

Is she better than Zhongli/Thoma?
No. She is a niche pick for Physical teams specifically. Thoma is better for Burgeon/Pyro setups, and Zhongli is the universal shield god.

Data Source: KQM Standards. Last Updated: December 2025

Genshin Impact. Xiangling Guide

The Definitive Build & Analysis

Xiangling Genshin Impact Character Art
Rarity (4-Star)
Element Pyro
Weapon Polearm
Best Role Off-Field Vaporize DPS
CV Priority ER > EM > CRIT > ATK%
Tier SS (The "Polearm Archon")

Xiangling is arguably the strongest 4-star character in the game. Her Elemental Burst, Pyronado, has no internal cooldown (ICD) on applying Pyro, meaning every single hit can Vaporize. Combined with snapshotting, she deals damage comparable to C0 5-star characters from off-field.


Quick Guide (TL;DR)

If you don't have time for the math, here is the cheat sheet.

  • Best Artifact: 4pc Emblem of Severed Fate (Uncontested BiS).
  • Alt Artifact: 4pc Crimson Witch or 2pc/2pc (Placeholder only).
  • Best Weapon: Engulfing Lightning (5⭐) or Staff of the Scarlet Sands.
  • F2P Weapon: "The Catch" (R5 Fishing Weapon - Rivals 5-stars).
  • Main Stats: SANDS: ER% or EM | GOBLET: Pyro DMG | CIRCLET: CRIT Rate/DMG.
  • Talent Priority: Elemental Burst > Elemental Skill > Normal Attack (Ignore).
  • Top Team: Xiangling + Bennett + Xingqiu + Raiden (Rational).
Pro Tip: Xiangling's Pyronado snapshots stats on cast. You MUST stand in Bennett's circle before pressing Q. The buff will then persist for the entire duration of the Pyronado, even if Bennett's circle expires.

Need Primogems for C4 Xiangling?

Get Genesis Crystals at a discounted price with instant delivery.

Top Up Secure & Fast via GameCharge

Talent Breakdown & Mechanics

Elemental Skill: Guoba Attack

  • Function: Summons Guoba (Bear). He breathes fire 4 times.
  • Particle Generation: Guoba does not generate particles on cast. He generates 1 particle every time he hits an enemy. This makes funneling energy tricky.
  • Chili Pepper: After Guoba disappears, he leaves a chili pepper. Picking it up boosts ATK by 10% for 10s.

Elemental Burst: Pyronado

  • Cost: 80 Energy | Cooldown: 20s | Duration: 10s (14s at C4)
  • No ICD: Every single hit of the spinning spear applies Pyro. This is extremely rare and allows her to Vaporize every hit if enough Hydro is present.
  • Snapshot: The damage is calculated based on her stats *at the moment of casting*. Buffs applied after casting (like TTDS or Freedom Sworn) will not affect the active Pyronado.

Talent Priority Order:

  1. Elemental Burst (Level 10 / Crown) - 90% of her damage.
  2. Elemental Skill (Level 6+) - Decent damage but unreliable aim.
  3. Normal Attack (Level 1) - Ignore.

Stat Requirements & ER Thresholds

Xiangling is tied to Bennett because she needs his battery capability. Without him, her ER needs are impossible.

Team Context ER Requirement (With The Catch) ER Requirement (No ER Weapon)
Raiden National (Rational) 160% - 180% 200%
International (Childe) 200% - 220% 240%+
Ganyu Melt (Solo Pyro) 250%+ Unplayable

Substat Priority:

  1. Energy Recharge (Until requirement met - DO NOT ignore this)
  2. CRIT Rate / CRIT DMG (Target 60/120 ratio minimum)
  3. Elemental Mastery (100-300 EM is ideal for Vape)
  4. ATK% (Lower priority due to Bennett buff)

Best Artifacts Comparison

Set Name Recommendation Reasoning
4pc Emblem of Severed Fate Best in Slot Converts her massive ER needs into Burst Damage. Perfectly designed for her kit.
4pc Crimson Witch Good Alternative Strong for Vaporize, but provides no ER help. Harder to farm.
4pc Gilded Dreams Stat Stick Good if you have high ER substats, but generally Emblem is superior.

Weapon Rankings

Weapon Type Performance Description
Engulfing Lightning ER% S+ Raiden's signature. Solves ER issues and converts excess ER to ATK. Perfect synergy with Emblem set.
The Catch (R5) ER% S (F2P God) Free from fishing. Gives ER, Crit Rate, and Burst DMG. Beats almost every other 5-star (Skyward/Homa) in many scenarios.
Staff of the Scarlet Sands CRIT Rate S Very strong if you stack EM, but makes building ER very difficult.
Dragon's Bane EM A High damage potential for Vape, but zero ER help. Only use if you have insane ER artifacts or Raiden.

Constellation Value

Xiangling is free (Abyss 3-3), but her constellations (especially C4) are massive upgrades.

  • C1: Crispy Outside, Tender Inside - (Good) Guoba reduces enemy Pyro RES by 15%. Good damage boost if Guoba actually hits.
  • C3: Deepfry - (Damage) +3 Levels to Pyronado. Significant DPS increase.
  • C4: Slowbake - (Game Changer) Increases Pyronado duration by 40% (from 10s to 14s). This allows it to outlast Bennett's buff and sync perfectly with Childe/Xingqiu rotations. Essential.
  • C6: Condensed Pyronado - (Mixed) 15% Pyro DMG bonus. Note: Pyronado does NOT snapshot this C6 buff because the buff applies *after* the burst cast. Only Guoba/Other chars benefit.

Verdict: C4 is the goal. Everything else is icing.

Top Team Compositions

1. Raiden National (Rational)

  • Driver: Raiden Shogun
  • Sub-DPS: Xiangling
  • Hydro: Xingqiu / Yelan
  • Buffer: Bennett

Why it works: The most popular team in Abyss history. Raiden recharges Xiangling's expensive burst while buffing her Burst DMG. Xiangling and Xingqiu trigger Vaporize/Overload relentlessly.

2. Childe International

  • On-Field DPS: Tartaglia (Childe)
  • Off-Field DPS: Xiangling
  • Grouper: Kazuha
  • Buffer: Bennett

Why it works: Childe applies Hydro so fast (Riptide) that Xiangling can vaporize every single hit of her Pyronado. Kazuha double swirls Hydro/Pyro for massive shreds.

Rotations & Combos

Standard Funneling Rotation:
Bennett Q > Bennett E > Swap to Xiangling (Catch particles) > Xiangling Q E

Tip: Never cast Pyronado (Q) unless you are standing inside Bennett's Inspiration Field. If you cast it outside, it will deal significantly less damage for the full duration.

Frequently Asked Questions

Is "The Catch" better than 5-star weapons?
It is better than most 5-star weapons (Skyward Spine, Jade Spear) because the passive fits her perfectly. Only Engulfing Lightning and sometimes Staff of Scarlet Sands beat it.

Can I run her without Bennett?
It is not recommended. Without Bennett, you lose the massive ATK buff (which she snapshots) and the particle generation she desperately needs. Her damage drops precipitously without him.

Data Source: KQM Standards. Last Updated: December 2025