RSS

Blog posts of '2025' 'December'

Emilie Guide: The Forensic Perfumer

Emilie, The Forensic Perfumer

Emilie Genshin Impact Character Art
Rarity (Limited)
Element Dendro
Weapon Polearm
Role Off-field Burning Sub-DPS
Priority ATK > CRIT > Dendro DMG
Tier T0 (Burning/Burn-Melt)

Emilie is a famous perfume designer from Fontaine who uses her chemistry to weaponize the Burning reaction. Unlike other Dendro supports who scale on EM, Emilie is a raw damage powerhouse who scales on ATK and requires Burning to maintain the potency of her "Lumidouce Case."


Pros

  • Exceptional off-field Dendro DMG (even better than Nahida in Burning).
  • Extremely long skill uptime (near 100%).
  • Reduces self-burning damage by 85% for the team.
  • Does not mess up reactions (perfect for Burn-Melt).
  • Easy to build (ATK/Crit scaling, no EM needed).

Cons

  • Damage drops significantly if enemies aren't Burning.
  • Single-target focused (Skill fires projectiles).
  • Burst does not refresh Skill cooldown, only level/duration.
  • Visuals can be subtle, hard to track Case level.

Quick Guide (TL;DR)

The Goal: Keep enemies Burning to maintain her Skill at Level 2 for maximum damage.

  • Best Artifact: 4pc Unfinished Reverie (Tailor-made for her).
  • Alt Artifact: 4pc Deepwood Memories (If solo Dendro support).
  • Best Weapon: Lumidouce Elegy (Signature).
  • Alt Weapon: Calamity Queller or Staff of Homa.
  • F2P Weapon: Missive Windspear (Event) or Deathmatch (BP).
  • Main Stats: ATK% / Dendro DMG / CRIT.
  • Talent Priority: Elemental Skill > Elemental Burst > Normal Attack.
Pro Tip: Level 2 Management: When you cast her Skill, it starts at Level 1. It only upgrades to Level 2 (firing two puffs instead of one) after it collects "Scents" from nearby Burning enemies. Keep that Pyro aura active!

Pulling for Emilie?

Get Genesis Crystals at a discounted price with instant delivery to bring her home.

Top Up Secure & Fast via GameCharge

Ascension & Talent Materials

Category Material Name Source
Ascension Lakelight Lily Fontaine (Erinnyes Forest)
Boss Drop Fragment of a Golden Melody Statue of Marble and Brass (Golem Captain)
Talents Teachings of Order Pale Forgotten Glory (Wed/Sat)
Mob Drop Artificed Dynamic Gear Clockwork Meka

Talent Mechanics

Elemental Skill: Fragrance Extraction

  • Lumidouce Case (Level 1): Creates a turret that fires "Puffs" of Dendro DMG.
  • Level Up: If nearby enemies are Burning, the Case collects scents. After 2 scents, it upgrades to Level 2.
  • Level 2: Fires 2 Puffs per shot and deals significantly increased damage. This is where her DPS comes from.
  • Passive: While the Case is active, all party members take 85% less damage from Burning.

Elemental Burst: Aromatic Explication

  • Level 3 Case: Stows the current Case and creates a Level 3 Case for 2.8s.
  • Mechanic: The Level 3 Case does not attack; instead, it continuously rains down scented dew (Dendro DMG) rapidly.
  • Reset: After the duration ends, it redeploys a Level 1 Case (or resets the duration of the previous one).

Important Passives

  • A4: Rectification: Emilie deals increased DMG to Burning enemies based on her ATK. For every 100 ATK, DMG increases by 15%, maxing out at 3000 ATK.

Constellation Value

Constellation Value Effect
C1: Light Fragrance Leaching Great Increases Skill (Level 2) DMG by 20%. Also, when party members trigger Burning, it generates an extra scent stack. Makes maintaining Level 2 much easier.
C2: Lakelight Top Note Core Upgrade When Skill/Burst hits enemies, their Dendro RES is decreased by 30%. This is massive for her personal damage and the team's Dendro damage.
C4: Lumidouce Heart Note Nuke Extends Burst duration by 2s and decreases the interval between dew drops. Significant burst DPS increase.
C6: Marcotte Sillage On-Field Using Skill or Burst grants Emilie 5s of Dendro Infusion, allowing her to be played as an on-field main DPS.

Verdict: C0 is perfectly functional. C1 is a nice QoL for rotation smoothness. C2 is the stopping point for high damage.

Stat Requirements

Stat Goal
ATK 2400 - 3000 (Target 3000 for max passive)
Energy Recharge 120-140% (Burst is nice but not strictly mandatory every rotation)
Crit Rate/DMG 70/140+ (She is a traditional scaler)

Artifact Main Stats:

  1. Sands: ATK%
  2. Goblet: Dendro DMG Bonus
  3. Circlet: CRIT Rate / CRIT DMG

Artifacts Comparison

Set Use Case Reasoning
4pc Unfinished Reverie Best in Slot Provides up to 50% DMG Bonus just for having Burning enemies nearby. Emilie triggers this effortlessly off-field. Far superior to Deepwood for personal DMG.
4pc Deepwood Memories Support Use this if Emilie is the only Dendro character in a team where you care about Dendro damage (e.g., Kinich teams). She loses personal damage but buffs the carry.
4pc Golden Troupe Alternative Strong skill DMG bonus, but Reverie is usually better because Troupe doesn't buff her Burst or A1 passive damage as effectively.

Weapon Rankings

Weapon Rank Notes
Lumidouce Elegy S+ Signature. Massive ATK, Crit Rate, and DMG bonus. Also restores energy. Tailor-made for her mechanics.
Calamity Queller S Huge ATK stat stick. Works great since she scales purely on ATK.
Staff of Homa S- Good Crit DMG stat stick, but the HP passive isn't fully utilized.
Missive Windspear A+ Event Weapon. High ATK and gives more ATK/EM after a reaction. Her best F2P option.
Deathmatch A Battle Pass option. Good Crit Rate and ATK buff (especially single target).

Teams

Burn-Melt (The Cryo Savior)

  • Wriothesley / Ganyu (Main DPS)
  • Emilie (Burning Sustain)
  • Xiangling / Dehya (Pyro App)
  • Bennett (Heal / Buff)

Emilie is a game-changer for Melt teams. She applies Dendro slowly enough not to steal Melts, but consistently enough to keep the Burning aura alive for Ganyu/Wrio to reverse melt off of.

Burning Carry

  • Arlecchino / Lyney / Kinich (Main DPS)
  • Emilie (Sub-DPS)
  • Bennett (Buffer)
  • Zhongli / Kazuha (Flex)

Rotation

Standard Loop:
Emilie E > Bennett Q E > Pyro/Cryo DPS Rotation > Emilie Q (Optional/Reset)

Note: Emilie's E lasts 22 seconds! You rarely need to swap back to her until your main DPS is completely done. Use Q to refresh the duration if the box is about to expire, or to nuke.

FAQ

Does she need EM?
No. Unlike Nahida, Emilie does not scale off EM. She scales purely off ATK. The burning reaction itself does negligible damage compared to her raw talent damage.

Can I use her in Hyperbloom?
Not recommended. Her kit strictly requires Burning enemies to deal high damage. In Hyperbloom, the Hydro will extinguish the burning, causing her skill to downgrade to Level 1.

Deepwood or Reverie?
If Emilie is the main source of damage (e.g., Burn-Melt), use Reverie. If she is supporting a Dendro carry like Kinich, use Deepwood to shred RES for him.

Data Source: KQM Standards. Last Updated: December 2025

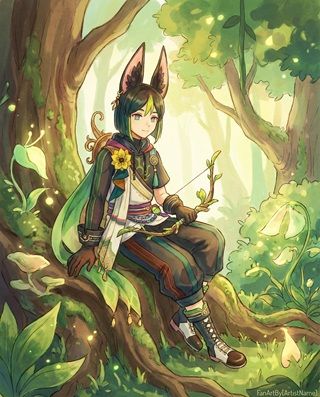
Tighnari Guide: The Forest Watcher

Tighnari, The Forest Watcher

Tighnari Genshin Impact Character Art
Rarity (Standard)
Element Dendro
Weapon Bow
Role Quickswap Spread DPS
Priority CRIT > EM > ATK%
Tier T0 (Single Target)

Tighnari is the Chief Officer of the Forest Rangers in the Avidya Forest. As the first standard banner Dendro 5-star, he is surprisingly powerful. He specializes in Quickswap Spread damage, firing homing Clusterbloom Arrows that track enemies, making him excellent for mobile players.


Pros

  • High single-target Burst damage via Spread.
  • Auto-targeting arrows make aiming optional.
  • Low energy cost (40) and short cooldowns.
  • Very F2P friendly (3-Star weapon is meta).
  • Artifact strongbox makes him easy to build (Wanderer's).

Cons

  • Purely single-target focus; struggles in AoE.
  • Charged attacks can be interrupted (needs shielder).
  • Standard banner RNG means you can't guarantee him.

Quick Guide (TL;DR)

The Goal: Trigger Spread reactions on his 3 rapid-fire Charged Attacks and Burst.

  • Best Artifact: 4pc Wanderer's Troupe (Highest CA damage).
  • Alt Artifact: 4pc Gilded Dreams (Competitive with Wanderer's).
  • Best Weapon: Hunter's Path (Signature, limited).
  • F2P God Weapon: Slingshot (3-Star, R5 beats many 4-stars).
  • Alt Weapon: The First Great Magic or Aqua Simulacra.
  • Main Stats: EM (or ATK) / Dendro DMG / CRIT.
  • Talent Priority: Normal Attack > Elemental Burst > Elemental Skill.
Pro Tip: The E-Shot Combo: Tighnari's Skill (E) reduces the charge time of his next 3 shots to virtually zero. ALWAYS cast E before you start shooting. Never manual charge shot without his E buff.

Lost 50/50 to Tighnari?

Get Genesis Crystals at a discounted price with instant delivery to build him fast.

Top Up Secure & Fast via GameCharge

Ascension & Talent Materials

Category Material Name Source
Ascension Nilotpala Lotus Sumeru Rivers (Night time only)
Boss Drop Majestic Hooked Beak Jadeplume Terrorshroom
Talents Teachings of Admonition Steeple of Ignorance (Mon/Thu)
Mob Drop Fungal Spores Fungi (Do NOT use Electro/Pyro on them)

Talent Mechanics

Normal Attack: Khanda Barrier-Buster

  • Wreath Arrow: His Level 2 Charged Shot hits an enemy and spawns 4 homing Clusterbloom Arrows.
  • Spread Trigger: Both the main arrow and the Clusterbloom arrows have separate ICDs, allowing for multiple Spread reactions per shot.

Elemental Skill: Vijnana-Phala Mine

  • Taunt: Creates a field that taunts enemies (very useful since he is squishy).
  • Suffusion Effect: Reduces the charging time of the next 3 Wreath Arrows by 2.4s. This makes them instant.
  • Usage: Cast this, then immediately fire 3 Charged Shots.

Elemental Burst: Fashioner's Tanglevine Shaft

  • Homing Missiles: Fires 6 Tanglevine Shafts that track enemies. On hit, they create a secondary wave of arrows.
  • Frontload Damage: Does massive damage in a very short animation window (40 Energy cost).

Important Passives

  • A4: Scholarly Blade: Tighnari's Charged Attack and Burst DMG is increased by 0.06% for every point of Elemental Mastery (Max 60% DMG bonus at 1000 EM).

Constellation Value

Constellation Value Effect
C1: Beginnings Determined at the Roots Good Increases Charged Attack CRIT Rate by 15%. Makes building his artifacts much easier.
C2: Origins Known From the Stem Great When Skill (E) is active, gain 20% Dendro DMG Bonus. Almost 100% uptime during his rotation.
C4: Wither Glimpsed in the Leaves Support Burst usage grants 60 EM to the team (120 EM if a reaction occurs). Good for Yae Miko/Fischl.
C6: Karma Adjudged from the Leaden Fruit Game Changer Reduces Charged Attack time significantly (even without E) and creates an extra Clusterbloom arrow. Massive DPS increase.

Verdict: Since he is a Standard banner character, you will likely get constellations over time. C1 and C2 are excellent early stopping points.

Stat Requirements

Stat Goal
Elemental Mastery 300 - 600 (Ideally use EM Sands)
Energy Recharge 100-115% (Burst is cheap, E generates lots of particles)
Crit Rate 70%+ (Crucial for Slingshot passive and spread)

Artifact Main Stats:

  1. Sands: Elemental Mastery (Priority) or ATK%
  2. Goblet: Dendro DMG Bonus
  3. Circlet: CRIT Rate / CRIT DMG

Artifacts Comparison

Set Use Case Reasoning
4pc Wanderer's Troupe Best General Offers 80 EM and 35% Charged Attack DMG. Since you can farm this passively via bosses and Strongbox, most players have great pieces.
4pc Gilded Dreams Competitive Provides massive EM buffs. Comparable to Wanderer's Troupe if substats are equal.
4pc Deepwood Memories Solo Dendro Tighnari loses personal damage wearing this. Ideally, a support (Zhongli/Nahida) holds Deepwood so Tighnari can run WT/Gilded.

Weapon Rankings

Weapon Rank Notes
Hunter's Path S+ Signature. Massive 44% CRIT Rate and buffs Charged Attacks based on EM. Perfect synergy.
The First Great Magic S High Crit DMG and CA buffs. Very strong stat stick.
Slingshot (R5) S- The F2P God. A 3-star bow. Because Tighnari plays close-range (Spread), the passive is always active. Beats almost every 4-star weapon.
Aqua Simulacra S- Great for close range, huge Crit DMG.
Prototype Crescent A F2P Craftable. Good if you can hit weak spots, but Slingshot is usually easier.

Teams

Fox & Bird (Spread Premium)

  • Tighnari (Main DPS)
  • Yae Miko (Sub-DPS / Spread Trigger)
  • Nahida (Deepwood Holder / EM Buff)
  • Zhongli (Shield / Shred)

The synergy between Yae's random turret targeting and Tighnari's homing arrows makes this team incredibly easy to play.

F2P Spread

  • Tighnari
  • Fischl (Battery / Sub-DPS)
  • Collei / Dendro MC (Deepwood Holder)
  • Kuki Shinobu (Healer / Electro App)

Rotation

Quickswap Loop (12s):
Support Setup > Tighnari E > Tighnari Q > Tighnari 3x Aimed Shots > Swap

Note: Always cast Skill (E) first. You can use Burst (Q) before firing the 3 shots to catch particles, or after. The key is firing the 3 shots while the E buff is active.

FAQ

Is Slingshot actually good?
Yes. The passive requires you to be close to enemies, but Tighnari's Spread playstyle is close-range anyway. At R5, the 60% DMG bonus and 31% Crit Rate is massive.

Can I play him in Bloom/Hyperbloom?
Technically yes, but he applies Dendro too fast and in short bursts, which isn't ideal for Bloom generation compared to Nahida/Alhaitham. He shines in Spread.

Attack Sands or EM Sands?
EM Sands is generally better for reaction damage (Spread), but ATK% is viable if the substats are significantly better. Aim for at least 300 EM total.

Data Source: KQM Standards. Last Updated: December 2025

Baizhu Guide: Beyond Mortality

Baizhu Guide: Beyond Mortality

Baizhu Genshin Impact Character Art
Rarity (Limited)
Element Dendro
Weapon Catalyst
Role Healer / Shielder / Buffer
Priority HP > ER > CRIT (Favonius)
Tier T0 (Premium Support)

Baizhu is the mysterious owner of Bubu Pharmacy. Accompanied by his white snake Changsheng, he serves as the premier defensive option for Dendro teams. He consolidates shielding, massive team-wide healing, and reaction damage buffing into one elegant package.


Pros

  • Incredible team-wide healing on Elemental Skill (One-tap full heal).
  • Provides stagger resistance via refreshing shields.
  • Buffs all Dendro reactions (Aggravate, Spread, Bloom, etc.).
  • Role consolidation (Heal + Shield + Buff + Dendro app).
  • Extremely easy to build (HP% stacker).

Cons

  • Shield is paper-thin (meant for stagger resist, not tanking).
  • Energy hungry (needs ~180-200% ER).
  • Poor AoE Dendro application compared to Nahida.
  • Single-target oriented application on Burst.

Quick Guide (TL;DR)

The Goal: Reach 50,000 HP to max out his A4 Passive buff, then focus on ER.

  • Best Artifact: 4pc Deepwood Memories (If no one else has it).
  • Alt Artifact: 4pc Ocean-Hued Clam (Healing/DMG) or Song of Days Past.
  • Best Weapon: Jadefall's Splendor (Signature).
  • F2P God Weapon: Prototype Amber (Craftable, R5 is almost equal to Sig).
  • Alt Weapon: Thrilling Tales of Dragon Slayers (For ATK scaling DPS).
  • Main Stats: HP% / HP% / HP% (Use ER Sands if struggle with energy).
  • Talent Priority: Elemental Burst > Elemental Skill > Normal Attack (Ignorable).
Pro Tip: The Shield Mechanic: Don't expect his shield to hold like Zhongli's. It breaks instantly on hit, heals you, and then regenerates. This constant breaking/refreshing cycle provides excellent interruption resistance against heavy hits.

Saving for Baizhu's Rerun?

Get Genesis Crystals at a discounted price with instant delivery.

Top Up Secure & Fast via GameCharge

Ascension & Talent Materials

Category Material Name Source
Ascension Violetgrass Liyue Cliffs (painful to farm, use shop/seeds!)
Boss Drop Evergloom Ring Iniquitous Baptist
Talents Teachings of Gold Taishan Mansion (Wed/Sat)
Mob Drop Fungal Spores Fungi (Do NOT use Electro/Pyro on them)

Talent Mechanics

Elemental Skill: Universal Diagnosis

  • Gossamer Sprite: Sends out a spirit that attacks nearby enemies 3 times.
  • Return Heal: After attacking or if no enemies are nearby, it returns and heals the entire party massively based on Baizhu's Max HP.
  • Usage: Great "Panic Button" for instant team-wide healing.

Elemental Burst: Holistic Revivification

  • Seamless Shield: Creates a "Seamless Shield" every 2.5s.
  • Break & Heal: When the shield breaks OR refreshes, it heals the active character and fires a Spiritvein causing Dendro DMG.
  • Application: This applies Dendro periodically, perfect for maintaining Quickens or generating Blooms in single-target.

Important Passives

  • A1: Five Fortunes Forever: Baizhu gains different buffs based on active character HP (Healing bonus if <50%, Dendro DMG if >50%).
  • A4: All Things Are of the Earth: Characters healed by the Seamless Shield gain a reaction bonus (Burning/Bloom/Hyperbloom/Burgeon +100%, Aggravate/Spread +40%) for 6s. This scales up to 50,000 HP.

Constellation Value

Constellation Value Effect
C1: Even the Slightest Groan Good Adds +1 charge to Elemental Skill. Helps significantly with Energy Recharge requirements and burst healing.
C2: Incisive Insight Great QoL When active character hits an enemy, Baizhu launches a sprite (healing + dmg) from off-field. Massive QoL, extra Dendro app, and incidental healing.
C4: Ancient Art of Perception Okay Using Burst grants 80 EM to the team. Solid but not game-changing.
C6: Elimination of Malicious Qi Strong Increases Burst damage based on HP and generates shields when Skill hits. Turns him into a shield-bot DPS hybrid.

Verdict: Baizhu is fantastic at C0. C1 and C2 offer great comfort improvements but are not necessary.

Stat Requirements

Stat Goal
Max HP 50,000 (Hard Cap for passive)
Energy Recharge 180-200% (Solo Dendro) / 160% (Double Dendro)
Crit Rate Ignore (unless using Favonius Codex)

Artifact Main Stats:

  1. Sands: ER% (Recommended) or HP% (if ER met)
  2. Goblet: HP%
  3. Circlet: HP% (or Healing Bonus)

Artifacts Comparison

Set Use Case Reasoning
4pc Deepwood Memories Best Support If Baizhu is the only Dendro (or paired with Alhaitham/Tighnari), he MUST hold this to shred 30% Dendro RES. His Burst hits consistently enough to maintain uptime.
4pc Ocean-Hued Clam Healer/Dps If another character has Deepwood, Clam turns his massive overheating into 27k-30k physical damage bubbles every 3.5s.
4pc Song of Days Past Buffer Good alternative for buffing hypercarries like Cyno or Neuvillette, though often Clam or Deepwood provides more team utility.
2pc HP / 2pc ER Transitional Easiest to build to hit the 50k HP and 200% ER thresholds.

Weapon Rankings

Weapon Rank Notes
Jadefall's Splendor S Signature. Grants HP, Energy, and DMG. However, it is only marginally better than Prototype Amber.
Prototype Amber (R5) S The F2P God. Craftable. Gives HP% and regenerates 18 Energy per burst + heals the team. Essentially turns him into a perpetual motion machine.
Thrilling Tales (R5) A 3-Star weapon. Use this if supporting ATK-scaling carries (like Cyno or Raiden). Requires strict rotation (Switch Baizhu -> DPS).
Favonius Codex A- Good for team energy, but requires building CRIT Rate, which makes reaching 50k HP harder.

Teams

Cyno Quickbloom (The Best Friend)

  • Cyno (Main DPS)
  • Baizhu (Shield/Heal/Dendro)
  • Furina (Hydro App + DMG Buff)
  • Nahida (EM Buff + Battery)

Why? Baizhu's shield resists the interruption that usually plagues Cyno, and his multi-wave healing counters Furina's drain.

Nilou Bloom Premium

  • Nilou (Core Creator)
  • Baizhu (On-field Driver/Healer)
  • Nahida (Off-field Dendro)
  • Xingqiu / Yelan (Hydro App)

Neuvillette Hypercarry

  • Neuvillette (Hydro DPS)
  • Baizhu (Healer/Stack Generator)
  • Furina (Buffer)
  • Kazuha (VV Shred)

Rotation

Standard Support:
Baizhu E (Catch particles) > Baizhu Q > Swap to DPS

Note: Because his Burst cost is high (80) and cooldown is 20s, always ensure you catch his Skill particles before swapping, or he will struggle to loop.

FAQ

Is Yaoyao better?
Yaoyao is a fantastic 4-star alternative, but Baizhu offers stagger resistance (shields) and a reaction damage buff that she lacks. He is generally a comfort upgrade.

Is Jadefall worth pulling?
Honestly? No. Prototype Amber is so incredibly good on him that Jadefall is considered one of the lowest value signature weapons unless you just want the aesthetic.

How much HP is too much?
Stop at 50,000. The passive caps exactly there. Any HP above that is wasted stats; pivot to ER or damage.

Data Source: KQM Standards. Last Updated: December 2025

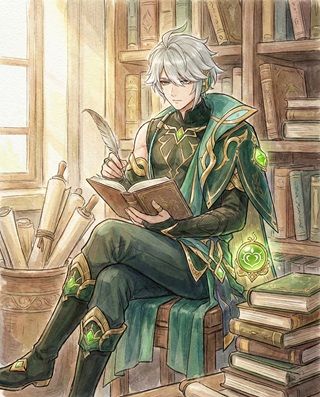
Alhaitham Guide: The Feeble Scholar

Alhaitham Guide: The Feeble Scholar

Alhaitham Genshin Impact Character Art
Rarity (Limited)
Element Dendro
Weapon Sword
Role On-Field Main DPS
Priority CRIT > EM > ATK%
Tier T0 (Top Tier DPS)

Alhaitham is the Scribe of the Akademiya. Often jokingly called "Dendro Keqing," he is a high-skill, high-reward DPS who manages "Chisel-Light Mirrors" to deal massive Spread and Dendro damage. He is currently one of the strongest on-field damage dealers in the game.


Pros

  • Exceptional damage ceiling in Spread & Quickbloom.
  • Flexible field time (can swap out if needed).
  • Very F2P friendly (Iron Sting / HoD are great).
  • Scales extremely well with Elemental Mastery.
  • Fun, rhythmic combo playstyle.

Cons

  • High skill floor; messing up rotation kills DPS.
  • Requires strict Energy Recharge management.
  • Prone to interruption (Shields recommended).
  • Long cooldowns if you mismanage mirrors.

Quick Guide (TL;DR)

The Goal: Maintain 3 Mirrors for as long as possible to trigger the Sword Rain attacks.

  • Best Artifact: 4pc Gilded Dreams (Highest personal damage).
  • Alt Artifact: 4pc Deepwood Memories (Only if no teammate has it).
  • Best Weapon: Light of Foliar Incision (Signature).
  • Alt Weapon: Primordial Jade Cutter or Mistsplitter.
  • F2P Weapon: Harbinger of Dawn (R5, needs shield) or Iron Sting.
  • Main Stats: EM / Dendro DMG / CRIT.
  • Talent Priority: Elemental Skill > Normal Attack > Elemental Burst.
Pro Tip: The Burst Reset: Always start your rotation with his Burst (Q) while having 0 mirrors. This generates 3 mirrors immediately, giving you full infusion uptime. Never Q when you already have 3 mirrors unless finishing a fight.

Saving for Alhaitham's Rerun?

Get Genesis Crystals at a discounted price with instant delivery.

Top Up Secure & Fast via GameCharge

Ascension & Talent Materials

Category Material Name Source
Ascension Sand Grease Pupa Desert of Hadramaveth
Boss Drop Pseudo-Stamens Setekh Wenut
Talents Teachings of Ingenuity Steeple of Ignorance (Tue/Fri)
Mob Drop Red Satin Eremites

Talent Mechanics

Elemental Skill: Universality: An Elaboration on Form

  • Rush Attack: Dashes forward dealing Dendro DMG.
  • Mirror Generation: Generates 1 Mirror. If you have 0 Mirrors, generates 2 instead.
  • Chisel-Light Mirrors: Converts attacks to Dendro (cannot be overridden). Trigger Projection Attacks every 1.6s based on number of mirrors (1, 2, or 3).
  • Goal: Always maintain 3 mirrors for the massive Sword Rain projection.

Elemental Burst: Particular Field: Fetters of Phenomena

  • Mechanic: Deals multiple instances of AoE Dendro DMG.
  • Refunding: If you consume 0 mirrors to cast Q, you get 3 mirrors back after 2s. This is his standard opener.
  • Finisher: If you consume 3 mirrors to cast Q, it deals max damage but gives 0 mirrors back. Only use this to end a rotation.

Important Passives

  • A1: Four-Causal Correction: Charged/Plunging attacks generate 1 Mirror (12s CD). Crucial for extending uptime.
  • A4: Mysteries Laid Bare: Increases Burst and Projection DMG by 0.1% for every point of EM. Caps at 1000 EM. This makes EM extremely valuable.

Constellation Value

Constellation Value Effect
C1: Intuition Low Reduces Skill CD when projection attacks hit. Helps with flexibility but doesn't change standard rotation much.
C2: Debate Good Generating mirrors boosts EM by 50 (max 4 stacks). A solid stat stick constellation (~200 EM).
C4: Elucidation Okay Buffs team EM or Alhaitham Dendro DMG based on mirrors consumed/generated by Burst.
C6: Structuration Strong Grants 10% CRIT Rate and 70% CRIT DMG if you generate mirrors while at max capacity. Massive burst potential.

Verdict: Alhaitham is a "Complete at C0" character. His constellations are steady increases but none are mechanically mandatory.

Stat Requirements

Stat Goal
Elemental Mastery 300 - 500 (Base)
Energy Recharge 130-140% (Double Dendro) / 160%+ (Solo)
CRIT Rate 70%+ (Consistent hits for Spread)

Artifact Main Stats:

  1. Sands: Elemental Mastery (Priority) / ATK%
  2. Goblet: Dendro DMG Bonus
  3. Circlet: CRIT Rate / CRIT DMG

Artifacts Comparison

Set Use Case Reasoning
4pc Gilded Dreams Best in Slot Provides massive EM and ATK buffs. Since Alhaitham wants EM for both damage and scaling, this is his highest ceiling set.
4pc Deepwood Memories Solo Dendro If Alhaitham is the only Dendro unit and no one else can hold this set, he MUST run it. The 30% RES shred is non-negotiable.
2pc EM / 2pc Deepwood Reliable Excellent transitional option. Often easier to get good substats than a full 4pc set.

Weapon Rankings

Weapon Rank Notes
Light of Foliar Incision S+ Signature. Huge CRIT DMG and increases Skill/Normal attack damage based on EM.
Primordial Jade Cutter S Massive CRIT Rate stat stick. Makes building artifacts very easy.
Harbinger of Dawn (R5) A+ The F2P Secret. If you have a shielder (Zhongli), this 3-star weapon rivals 5-stars due to free CRIT stats. Useless if you take damage (Furina/Bloom drain).
Iron Sting / Toukabou A Solid craftable/event options. EM main stat is exactly what he wants.

Teams

Quickbloom (Highest Ceiling)

  • Alhaitham (Main DPS)
  • Furina / Yelan (Hydro App & Buffs)
  • Kuki Shinobu / Raiden (Hyperbloom Trigger)
  • Nahida / Baizhu (Deepwood Holder & Battery)

Spread Carry

  • Alhaitham
  • Yae Miko / Fischl (Off-field Electro)
  • Nahida (EM Buff)
  • Zhongli (Shield/Shred)

Rotation & Combo

The Split-Uptime Combo:
Goal: Maintain 3 mirrors for ~12 seconds.

  1. Start: Alhaitham Burst (Q). (Wait 2s for mirrors to form)
  2. Attack: Normal Attacks for 4s (2 Rain Procs).
  3. Refresh 1: Use Skill (E) or Hold E (Plunge) to refresh to 3 mirrors.
  4. Attack: Normal Attacks for 4s.
  5. Refresh 2: Use Charged Attack to refresh to 3 mirrors (A1 Passive).
  6. Finish: Normal Attacks until mirrors expire.

Emergency Recovery: If you don't have Burst, Hold E -> Plunge gives you 3 mirrors instantly to start a shorter rotation.

FAQ

Can I play him without Nahida?
Yes. Yaoyao, Baizhu, or Dendro Traveler work as batteries. You just need more ER on Alhaitham (160%+).

ATK or EM Sands?
EM is almost always better. Only use ATK if the substats are significantly better (e.g., 40 CV vs garbage EM sands).

Why did my infusion end early?
You likely swapped off. Alhaitham loses all mirrors if he leaves the field. Commit to the rotation!

Data Source: KQM Standards. Last Updated: December 2025

Nahida Guide: The Dendro Archon

Nahida, The Dendro Archon

Nahida Genshin Impact Character Art
Rarity (Archon)
Element Dendro
Weapon Catalyst
Role Off-field Support / DPS
Priority EM > CRIT > ER
Tier SS (Meta Defining)

Nahida (Lesser Lord Kusanali) is the Dendro Archon and the absolute cornerstone of Dendro reactions. Her ability to apply 1.5U Dendro off-field, link enemies together, and provide massive Elemental Mastery buffs makes her one of the strongest units in the game.


Pros

  • Best off-field Dendro application in the game.
  • Links enemies (Tri-Karma), so damage on one hits all.
  • Massive EM buff to the active character (up to 250 EM).
  • Extremely flexible (Bloom, Hyperbloom, Spread, Burgeon).
  • Easy to build (EM Main stats).

Cons

  • Child model runs slower than taller characters.
  • Skill application can be interrupted if hit while aiming.
  • Squishy and offers no defensive utility.
  • Multi-wave content requires swapping back to re-apply Skill.

Quick Guide (TL;DR)

The Goal: Reach ~1000 EM (total with buffs) to max out her A4 passive.

  • Best Artifact: 4pc Deepwood Memories (Essential for Dendro DMG).
  • Alt Artifact: 4pc Gilded Dreams (Only if someone else has Deepwood).
  • Best Weapon: A Thousand Floating Dreams (Signature).
  • Alt Weapon: Sacrificial Fragments or Kagura's Verity.
  • F2P Weapon: Magic Guide (3-Star weapon, incredibly strong).
  • Main Stats: EM / EM / EM (or Crit Circlet if EM > 1000).
  • Talent Priority: Elemental Skill > Elemental Burst > Normal Attack.
Pro Tip: Hold E Scan: You don't need to center the camera on enemies. Simply sweep your mouse/camera across the screen while holding E. Any enemy "marked" by the viewfinder will be linked, even if they are far apart.

Pulling for C2 Nahida?

Get Genesis Crystals at a discounted price with instant delivery.

Top Up Secure & Fast via GameCharge

Ascension & Talent Materials

Category Material Name Source
Ascension Kalpalata Lotus Sumeru Cliffs
Boss Drop Quelled Creeper Dendro Hypostasis
Talents Teachings of Ingenuity Steeple of Ignorance (Tue/Fri)
Mob Drop Fungal Spores Fungi (Do NOT use Electro/Pyro on them)

Talent Mechanics

Elemental Skill: All Schemes to Know

  • Tri-Karma Purification: Marks up to 8 enemies. When a reaction is triggered on ONE marked enemy, ALL marked enemies take Dendro DMG based on Nahida's ATK and EM.
  • ICD: 1.5 Units of Dendro. This "strong" Dendro application is why she sustains Bloom cores so easily.
  • Tri-Karma Trigger: Triggers every 2.5s normally. This interval can be reduced by her Burst (if Electro is in party).

Elemental Burst: Illusory Heart

  • Shrine of Maya: Creates a massive dome. It does not deal damage itself; it strictly buffs Nahida's Skill based on party elements:
  • Pyro (1/2 chars): Increases Tri-Karma DMG by ~20% / ~30%.
  • Electro (1/2 chars): Decreases proc interval to ~2.1s / ~1.9s.
  • Hydro (1/2 chars): Increases Burst duration by ~4s / ~6s.

Important Passives

  • A1: Compassion Illuminated: The active character inside the Burst gains EM equal to 25% of the highest EM party member (Max 250 EM). This usually uses Nahida's EM.
  • A4: Awakening Elucidated: For every point of Nahida's EM above 200, she gains 0.1% Bonus DMG and 0.03% CRIT Rate for her Skill. (Capped at 80% DMG and 24% CRIT at 1000 EM).

Constellation Value

Constellation Value Effect
C1: Seeds of Skandha Good Burst calculation adds +1 count to Pyro/Electro/Hydro types. Useful for maxing buffs with flexible teams.
C2: The Root of All Fullness GAME BREAKING Bloom/Hyperbloom/Burgeon: Can now CRIT (20% Rate / 100% DMG).
Quicken/Aggravate/Spread: Shreds enemy DEF by 30%.
This is arguably the strongest C2 in Genshin Impact.
C4: Stem of Manifest Inference Okay Increases Nahida's EM by 100-160 based on enemies marked. Makes hitting 1000 EM easier.
C6: The Fruit of Reason's Culmination Nuke Turning Nahida into an on-field DPS. Normal attacks after Burst trigger massive Tri-Karma Karmic Oblivion procs.

Stat Requirements

Stat Goal
Elemental Mastery 800 - 1000 (Soft cap at 1000 for A4 Passive)
Energy Recharge 120% (On-field) / 140%+ (Off-field)
CRIT Rate 30-40% (A4 Passive adds +24% CRIT Rate to Skill)

Artifact Main Stats:

  1. Sands: Elemental Mastery
  2. Goblet: Elemental Mastery OR Dendro DMG (if EM > 900)
  3. Circlet: Elemental Mastery OR CRIT (if EM > 900)

Artifacts Comparison

Set Use Case Reasoning
4pc Deepwood Memories Best in Slot Dendro damage relies heavily on RES Shred. Deepwood provides a 30% Dendro RES shred that works off-field. Since Nahida marks all enemies, she keeps this debuff active permanently.
4pc Gilded Dreams Personal DMG Use this ONLY if another character in the party (like Zhongli, Kuki, or Kokomi) is already wearing 4pc Deepwood. Gilded gives higher personal numbers but lower team damage if Deepwood is missing.
2pc EM / 2pc Deepwood Transitional Better substats can beat set bonuses, but try to force 4pc Deepwood eventually.

Weapon Rankings

Weapon Rank Notes
A Thousand Floating Dreams S+ Signature. High EM (265) and buffs team mastery. Simplest to build.
Kagura's Verity S High CRIT DMG. Beats Signature in raw personal damage if you have enough EM from artifacts, but harder to build.
Sacrificial Fragments S- High EM (221). The passive reset is useful in multi-wave content to re-apply the mark without waiting for CD.
Magic Guide (R5) A+ The F2P King. A 3-star weapon that beats most 4-stars. High EM (187) and DMG bonus against Hydro/Electro affected enemies.
The Widsith A (RNG) Can be S tier or B tier depending on the random song. Inconsistent but high ceiling.

Teams

Hyperbloom (The Meta)

  • Nahida (Deepwood)
  • Xingqiu / Yelan (Hydro App)
  • Kuki Shinobu / Raiden (Full EM Electro trigger)
  • Flex (Zhongli, Alhaitham, etc.)

Nilou Bloom

  • Nahida (On-field Driver)
  • Nilou (HP stacker)
  • Kokomi / Barbara (Healer)
  • Dendro Traveler / Collei

Rotation & Combo

Standard Opener:
Nahida Hold E (Scan) > Nahida Q > Swap to Supports

Detailed Flow (Hyperbloom):

  1. Nahida: Hold E to mark everyone > Burst (Q).
  2. Hydro (Xingqiu/Yelan): Use Skill and Burst to start generating Hydro aura.
  3. Electro (Kuki/Raiden): Activate off-field Electro skill.
  4. Driver: Normal Attack to trigger Xingqiu/Yelan rainswords, creating cores that Kuki detonates.

Note on Waves: Unlike other supports, Nahida's mark disappears when an enemy dies. If a new wave spawns, you MUST swap back to Nahida and Hold E again, or your reaction damage will plummet.

FAQ

Is C2 worth it?
Yes. It allows Burning/Bloom/Hyperbloom/Burgeon to Crit (fixed 20% rate / 100% dmg) and shreds 30% DEF for Quicken. It is one of the strongest constellations in the game.

Magic Guide vs Mappa Mare?
Magic Guide is generally better due to higher EM substat and passive uptime in Hydro/Electro teams, despite being 3-star.

How much EM is too much?
Aim for 1000 EM (after buffs). Going beyond 1000 gives diminishing returns as the A4 passive caps there. At that point, prioritize CRIT or Dendro DMG%.

Data Source: KQM Standards. Last Updated: December 2025

Genshin Impact: Dendro & Misc Character Guide

Iansan Guide: The Definitive Build & Analysis

Iansan, The Blazing Comet

Iansan Genshin Impact Character Art
Rarity (4-Star)
Element Electro
Weapon Polearm
Best Role On-Field Burst DPS
Stat Priority CRIT > ATK% > EM
Tier A (Strong 4-Star Carry)

Iansan is a spirited warrior from Natlan, known for her incredible agility and explosive Electro power. As a Polearm user, she specializes in a high-mobility playstyle, utilizing the Nightsoul mechanic to dash through enemies and deliver rapid Electro strikes. Her kit emphasizes speed, positioning, and reaction-based damage.


Pros

  • High Mobility: Elemental Skill allows for rapid repositioning and dodging.
  • Explosive Burst: Massive Electro application during her Burst window.
  • Nightsoul Mechanics: Gains buffs and special movement options in Natlan.
  • Versatile Teams: Works well in Aggravate, Electro-Charged, and Overload.
  • Engaging Gameplay: Fast-paced combat style rewarding skilled play.

Cons

  • Stamina Management: Heavy reliance on Charged Attacks and dashes can deplete stamina.
  • Vulnerable to Interruptions: Needs a shielder or careful dodging during combos.
  • Burst Reliance: Damage drops significantly when Burst is on cooldown.
  • Short Range: Requires close proximity to enemies for maximum damage.

Quick Guide (TL;DR)

Iansan is an on-field carry who uses her speed to dominate the battlefield.

  • Best Artifact: 4pc Obsidian Codex (If in Nightsoul state) or 4pc Thundering Fury (Aggravate).
  • Alt Artifact: 4pc Gilded Dreams or 2pc TF / 2pc ATK.
  • Best Weapon: Staff of the Scarlet Sands (5-Star BiS).
  • Best F2P Weapon: The Catch (R5) or Missive Windspear (Event).
  • Alt Weapon: Primordial Jade Winged-Spear or Deathmatch (BP).
  • Main Stats: SANDS: ATK% or EM | GOBLET: Electro DMG | CIRCLET: CRIT.
  • Talent Priority: Elemental Burst > Normal Attack > Elemental Skill.
  • Top Team: Iansan + Nahida + Fischl + Zhongli (Aggravate).
Pro Tip: Dash Canceling: Iansan's Charged Attack animation can be cancelled early with a dash or jump. Mastering this rhythm significantly increases her DPS and mobility, keeping her safe while dealing damage.

Pulling for Iansan?

Get Genesis Crystals to secure her on the latest banner.

Top Up Secure & Fast via GameCharge

Ascension & Talent Materials

Category Material Name Source
Ascension Quenepa Berry Natlan (Forests)
Boss Drop Gold-Inscribed Secret Source Core Secret Source Constructor (Natlan)
Talent Books Teachings of Contention Natlan Domain (Mon/Thu/Sun)
Common Mob Saurian Claw Saurians (Natlan)
Weekly Boss Lightless Mass All-Devouring Narwhal (Trounce Domain)

Talent Breakdown & Mechanics

Normal Attack: Swift Strike

  • Mechanic: Performs up to 5 rapid polearm strikes.
  • Charged Attack: Consumes stamina to lunge forward, dealing damage to opponents along the way. Can be used for mobility.

Elemental Skill: Spark Rush

  • Mechanic: Iansan dashes forward, dealing Electro DMG to enemies in her path.
  • Nightsoul State: Enters the Nightsoul's Blessing state, enhancing her agility and converting her Normal Attacks to Electro DMG.
  • Cooldown: Short cooldown allows for frequent use and repositioning.

Elemental Burst: Thunderclap Blitz

  • Mechanic: Unleashes a massive burst of lightning, dealing AoE Electro DMG.
  • Effect: Grants a buff that increases Attack Speed and Electro DMG Bonus for a duration. During this time, she gains resistance to interruption.
  • Cost: 60 Energy. Moderate cost, manageable with decent ER or a battery.

Passive: Kinetic Charge

  • Momentum: Moving a certain distance or dashing builds up "Momentum" stacks.
  • Discharge: Dealing damage with a Charged Attack consumes stacks to deal increased damage and restore stamina. Encourages a mobile playstyle.

Talent Priority Order:

  1. Elemental Burst (Level 9+) - Primary source of burst damage and buffs.
  2. Normal Attack (Level 8+) - Important for on-field DPS during infusion.
  3. Elemental Skill (Level 6+) - Mobility and initial damage.

Stat Requirements & ER Thresholds

Iansan needs sufficient ER to keep her Burst up for her DPS windows, but ATK and CRIT are her main damage scalers.

Role Team Type ER Requirement
Main DPS Double Electro (Fischl) 120% - 130%
Main DPS Solo Electro 140% - 160%

Substat Priority:

  1. CRIT Rate / CRIT DMG (Target 1:2 ratio)
  2. ATK% (Base damage scaling)
  3. Elemental Mastery (For Aggravate/Reaction damage)
  4. Energy Recharge (Until burst is consistent)

Best Artifacts Comparison

Set Name Role Reasoning
4pc Obsidian Codex BiS Natlan Tailor-made for Natlan characters with Nightsoul mechanics. Provides massive CRIT Rate when consuming Nightsoul points.
4pc Thundering Fury Aggravate DPS Excellent for Aggravate teams. Reduces Skill CD, allowing for more dashes and mobility.
4pc Gladiator's Finale Generalist Boosts Normal Attack DMG. A solid unconditional option if you have good substats.

Weapon Rankings

Weapon Type Performance Notes
Staff of the Scarlet Sands CRIT Rate S+ Huge CRIT Rate stat stick. Passive converts EM to ATK, which is perfect for reaction-based builds.
Primordial Jade Winged-Spear CRIT Rate S High Base ATK and ATK buff on hits. Very consistent for an on-field carry.
The Catch (R5) ER% A+ (F2P) Boosts Burst DMG and Crit Rate. Great if you rely heavily on your Burst for damage.
Missive Windspear ATK% A (Event) Provides ATK and EM buffs after triggering reactions. Solid F2P option for Aggravate.

Constellation Value

Iansan is a solid carry at C0, but C1 and C2 offer nice improvements to her fluidity and damage.

  • C1: Momentum Shift - (Speed) Increases Movement Speed and Attack Speed after using Elemental Skill. Makes gameplay smoother.
  • C2: Static Surge - (Energy) Restores Energy when hitting enemies with Electro attacks during Burst. Reduces ER needs.
  • C6: Thunderlord's Wrath - (Big Burst) Increases the duration of Burst state and adds powerful lightning strikes to Normal Attacks. Significant DPS increase.

Top Team Compositions

1. Aggravate Carry

  • Main DPS: Iansan
  • Sub-DPS: Fischl / Yae Miko
  • Dendro: Nahida / Baizhu
  • Anemo/Shield: Kazuha / Zhongli

Why it works: Classic Aggravate setup. Iansan drives reactions with her fast Electro application. Fischl provides battery and off-field damage. Nahida keeps Quicken aura up.

2. Electro-Charged Taser

  • Main DPS: Iansan
  • Hydro: Xingqiu / Yelan / Furina
  • Sub-DPS: Fischl / Beidou
  • Anemo: Kazuha / Jean

Why it works: Iansan's fast attacks trigger Hydro supports' coordinated attacks. The constant Electro-Charged reactions deal steady DoT damage to groups.

Rotations & Combos

Standard Burst Rotation:
Supports Setup > Iansan E > Iansan Q > Normal Attack Combo x3 > Charged Attack (Cancel)

Tip: Weave in dashes or jumps to cancel the end lag of her Charged Attacks for higher DPS output and better positioning.

Frequently Asked Questions

Is Iansan better than Cyno?
It depends. Cyno has longer field time requirements, while Iansan offers more burst-oriented damage and mobility. Iansan feels snappier for overworld and quick swap teams.

Do I need her signature weapon?
Not strictly. "The Catch" is a fantastic F2P alternative that provides ER and Crit Rate for her Burst. However, her signature weapon provides a significant damage boost.

Data Source: KQM Standards. Last Updated: December 2025

Ororon Guide: The Definitive Build & Analysis

Ororon, Shadow of the Night-Wind

Ororon Genshin Impact Character Art
Rarity (4-Star)
Element Electro
Weapon Bow
Best Role Off-Field Sub-DPS / Support
Stat Priority ATK% > Electro DMG > CRIT
Tier A (Electro-Charged Specialist)

Ororon, the mysterious "Shadow of the Night-Wind," is a versatile Electro character from Natlan. He excels as an off-field Sub-DPS, utilizing the unique Nightsoul mechanic to synergize heavily with Electro and Hydro teammates. His kit is designed to bridge the gap between pure damage and reaction utility, making him a staple in Taser and Natlan-specific teams.


Pros

  • Nightsoul Synergy: Gains points when teammates deal Elemental DMG, triggering coordinated attacks.
  • Off-Field Presence: Skill and Burst both operate while he is off-field.
  • Natlan Utility: Can utilize the powerful "Scroll of the Hero" artifact set to buff team Elemental DMG.
  • Exploration: Passive increases gliding speed and enhances Phlogiston mechanics in Natlan.
  • Strong synergy with Hydro units (Electro-Charged).

Cons

  • Specific Teams: Heavily incentivized to play with Electro/Hydro or Nightsoul characters.
  • Energy Needs: High Burst cost requires careful energy management or double Electro.
  • Complex Mechanics: Requires understanding of Nightsoul Points for optimal damage.
  • Damage ceiling is lower outside of Electro-Charged scenarios.

Quick Guide (TL;DR)

Ororon wants to be off-field, triggering his Nightsoul mechanic via teammate attacks.

  • Best Artifact (Support): 4pc Scroll of the Hero of Cinder City (Team Buffing).
  • Best Artifact (Damage): 4pc Golden Troupe (Skill DMG) or 4pc Obsidian Codex (If main DPS, rare).
  • Best Weapon: Elegy for the End (5-Star Support).
  • Best F2P Weapon: Fading Twilight or Chain Breaker (Natlan Craftable).
  • Alt Weapon: The Stringless (Personal DMG) or Favonius Warbow (Energy).
  • Main Stats: SANDS: ATK% or ER% | GOBLET: Electro DMG | CIRCLET: CRIT.
  • Talent Priority: Elemental Skill > Elemental Burst > Normal Attack.
  • Top Team: Ororon + Neuvillette/Mualani + Kazuha + Fischl (Taser/Nightsoul).
Pro Tip: Nightsoul Burst: Ororon accumulates "Nightsoul Points" when his team deals Hydro or Electro damage. When these points max out, he automatically triggers a coordinated Electro attack from off-field. Pair him with fast attackers!

Pulling for Ororon Constellations?

Get Genesis Crystals to secure him on the latest banner.

Top Up Secure & Fast via GameCharge

Ascension & Talent Materials

Category Material Name Source
Ascension Glowing Hornshroom Natlan (Wilderness)
Boss Drop Mark of the Binding Blessing Holochurl Chief (Natlan)
Talent Books Teachings of Kindling Natlan Domain (Tue/Fri/Sun)
Common Mob Juvenile Fang Saurians (Natlan)
Weekly Boss Silken Feather The Knave (Trounce Domain)

Talent Breakdown & Mechanics

Elemental Skill: Night-Wind's Piece

  • Mechanic: Throws a Spirit Eye that bounces between opponents, dealing Nightsoul-aligned Electro DMG.
  • Nightsoul Transmission: Allows Ororon to participate in Nightsoul Bursts even when off-field.
  • Cooldown: 15s (fairly long, so ER is important).

Elemental Burst: Dark Night's Echo

  • Mechanic: Summons a Supersonic Spirit Eye that creates a field.
  • Effect: The field deals periodic AoE Electro DMG to enemies within it. It rotates and taunts nearby enemies slightly.
  • Duration: Provides sustained off-field Electro application, perfect for reactions.

Passive: Synesthesia

  • The Core Mechanic: When a nearby party member triggers a Nightsoul Burst, Ororon gains 40 Nightsoul Points.
  • Reaction Synergy: When party members deal Electro or Hydro DMG, Ororon gains 5 Nightsoul Points (CD 0.3s).
  • Hypersense Effect: When Ororon hits 80 Nightsoul Points, he consumes them to trigger the "Hypersense" state, dealing AoE Electro DMG and buffing his own next attack.

Talent Priority Order:

  1. Elemental Skill (Level 9) - Primary damage source via Nightsoul procs.
  2. Elemental Burst (Level 8+) - Sustained AoE application.
  3. Normal Attack (Level 1) - Low priority.

Stat Requirements & ER Thresholds

Ororon needs Energy to maintain his Burst uptime, but his primary utility comes from his passive Nightsoul generation.

Role Team Type ER Requirement
Support/Sub-DPS Double Electro 160% - 180%
Support/Sub-DPS Solo Electro 200% +

Substat Priority:

  1. Energy Recharge (Until burst is comfortable)
  2. ATK% (Skill/Burst Scaling)
  3. CRIT Rate / CRIT DMG (For personal damage)
  4. Elemental Mastery (Bonus for Electro-Charged)

Best Artifacts Comparison

Set Name Role Reasoning
4pc Scroll of the Hero of Cinder City BiS Support Since Ororon triggers Nightsoul Burst mechanics, he can easily activate this set to provide massive Elemental DMG Bonus to his team (e.g., Hydro/Electro).
4pc Golden Troupe Sub-DPS Increases off-field Elemental Skill DMG by 70%. Great if you want Ororon to deal meaningful personal damage.
4pc Noblesse Oblige General Buffer Standard 20% ATK buff. Use if no one else holds it, but Scroll of the Hero is usually superior in Natlan teams.

Weapon Rankings

Weapon Type Performance Notes
Elegy for the End ER% S+ (Support) Massive team buffs (EM and ATK%). Solves his ER issues. Perfect for Reaction teams.
The Stringless EM S (DPS) Boosts Skill and Burst DMG significantly. EM secondary stat helps with Electro-Charged damage.
Favonius Warbow ER% A (Utility) Generates white particles for the whole team. Use if your main DPS needs energy.
Chain Breaker ATK% A (Craftable) Natlan craftable. Passive boosts ATK based on Natlan party members or different element types. Good synergy.

Constellation Value

Ororon functions well at C0 for support, but C6 transforms him into a buffer.

  • C1: Forest Rangers' Patrol - (Speed) Increases movement speed during exploration. Nice QoL.
  • C2: Honey-Wine Torrent - (Electro DMG) After using Burst, gains 12% Electro DMG Bonus for 10s. Increases personal DPS.
  • C6: Eulogy of the Night - (The Big Buff) When triggering the "Hypersense" effect (80 Nightsoul Points), increases the active character's ATK by 10% (stacks up to 3 times). Great team buff.

Top Team Compositions

1. Natlan Electro-Charged

  • Main DPS: Neuvillette / Mualani / Childe
  • Sub-DPS: Ororon
  • Buffer: Kazuha / Xilonen
  • Flex: Fischl / Zhongli

Why it works: Hydro DPS triggers Ororon's passive (Hydro damage generation). Ororon gains Nightsoul points and fires back with Electro. Kazuha swirls both. The Scroll artifact set on Ororon buffs the Hydro carry significantly.

2. Overload Support

  • Main DPS: Clorinde / Raiden / Arlecchino
  • Support: Ororon
  • Pyro: Chevreuse (Essential)
  • Sub-DPS: Fischl / Xiangling

Why it works: Ororon provides steady off-field Electro to maintain the Overload aura for Chevreuse's resistance shred. He can hold support artifacts to further buff the main carry.

Rotations & Combos

Standard Support Rotation:
Ororon E > Ororon Q > Swap to Main DPS/Driver

Tip: Ensure you are using Ororon's Skill/Burst before your main DPS starts their rotation so that the "Scroll of the Hero" artifact buff is active when the big damage hits.

Frequently Asked Questions

Is Ororon better than Fischl?
For pure single-target damage: No, Fischl usually wins. However, Ororon provides better AoE, team buffing capabilities (Scroll set), and specialized synergy with Natlan/Hydro mechanics that Fischl lacks.

Do I need to level his Normal Attacks?
No. He is strictly an off-field character. Save your resources for his Skill and Burst.

Data Source: KQM Standards. Last Updated: December 2025

Sethos Guide: The Definitive Build & Analysis

Sethos, the Wisdom of the Temple

Sethos Genshin Impact Character Art
Rarity (4-Star)
Element Electro
Weapon Bow
Best Role Aggravate Main DPS
Stat Priority EM > CRIT > ATK%
Tier A (High F2P Value)

Sethos is the heir to the Temple of Silence in Sumeru. He is a unique Electro DPS who scales heavily with Elemental Mastery. His kit offers two distinct playstyles: consuming Energy to fire instant, piercing Charged Shots (similar to Tighnari), or using his Burst to enter a stance of rapid-fire Normal Attacks (similar to Cyno/Yoimiya).


Pros

  • F2P King: The 3-star weapon "Slingshot" is extremely competitive (often BiS).
  • Dual Playstyle: Can play as a Burst DPS or a Charged Shot DPS depending on energy.
  • High Scaling: Passive boosts damage based on Elemental Mastery (700%).
  • Piercing Shots: His enhanced Charged Attacks pierce through enemies (AoE potential).
  • Strong Aggravate synergy with Fischl and Nahida.

Cons

  • Energy Paradox: Charged Attacks consume energy, while Burst needs energy. Managing this is tricky.
  • Interruption: Very susceptible to knockback during Charged Shot aiming (needs a shield).
  • Single Target: Burst mode is mostly single-target focused.
  • Requires high character level (90) for reaction damage.

Quick Guide (TL;DR)

Sethos wants lots of Elemental Mastery and Critical stats. Do not neglect leveling him to 90.

  • Best Artifact: 4pc Wanderer's Troupe (Charged Shot) or 4pc Gilded Dreams (General/Burst).
  • Best Weapon: Hunter's Path (5-Star BiS).
  • Best F2P Weapon: Slingshot (R5). This 3-star weapon is better than almost every 4-star option.
  • Alt Weapon: Cloudforged (Event) or Scion of the Blazing Sun (BP).
  • Main Stats: SANDS: EM | GOBLET: Electro DMG | CIRCLET: CRIT Rate/DMG.
  • Talent Priority: Normal Attack > Elemental Burst > Elemental Skill.
  • Top Team: Sethos + Fischl + Nahida + Zhongli/Kazuha (Aggravate).
Pro Tip: The Energy Trade-off: Sethos has a unique mechanic. If you have energy, holding Aim Shot consumes 20 Energy to charge instantly. If you use Burst, you get "free" attacks but can't use the instant charge shot. Generally, the Charged Shot playstyle offers higher front-loaded damage and is more flexible.

Pulling for Hunter's Path?

Get Genesis Crystals to secure his best weapon on the Chronicled Banner.

Top Up Secure & Fast via GameCharge

Ascension & Talent Materials

Category Material Name Source
Ascension Trishiraite Sumeru (Gavireh Lajavard)
Boss Drop Cloudseam Scale Solitary Suanni (Chenyu Vale)
Talent Books Teachings of Praxis Steeple of Ignorance (Wed/Sat/Sun)
Common Mob Faded Red Satin Eremites (Sumeru)
Weekly Boss Daka's Bell Scaramouche (Joururi Workshop)

Talent Breakdown & Mechanics

Normal Attack: Royal Reed Archery

  • Shadowpiercing Shot (Level 2 Charge): Unlike standard bows, Sethos cannot move while aiming this. It pierces enemies.
  • Energy Consumption (A1 Passive): If Sethos has energy, aiming only takes 0.3s but consumes 20 Energy. This is his primary damage source in his "Charged Shot" playstyle.

Elemental Skill: Ancient Rite: The Thundering Sands

  • Mechanic: Deals AoE Electro DMG and retreats backward.
  • Energy Regen: If this triggers a reaction (Aggravate/Electro-Charged, etc.), Sethos restores 12 Energy. This is crucial for "reloading" his ammo for Charged Shots.
  • Cooldown: 8s.

Elemental Burst: Secret Rite: Twilight Shadowpiercer

  • Mechanic: Enters the "Twilight Meditation" state for 8s.
  • Effect: Normal Attacks are converted to Dusk-Stalking Arrows. These pierce enemies and deal damage based on EM. They are considered Charged Attack DMG.
  • No Energy Consumption: While in Burst, Sethos does not consume energy for attacks, but he cannot use the instant-aim mechanic.

A4 Passive: Sand King's Boon

  • The Scaling: Sethos gains a damage increase to his Shadowpiercing Shots (Aim) based on 700% of his Elemental Mastery. His Dusk-Stalking Arrows (Burst) gain an increase of 700% EM as well. This makes EM his most important stat.

Talent Priority Order:

  1. Normal Attack (Level 9+) - Scales both Aimed Shot and Burst DMG.
  2. Elemental Burst (Level 8+) - Additional multiplier.
  3. Elemental Skill (Level 6) - Utility only.

Stat Requirements & ER Thresholds

Sethos's ER needs depend on his playstyle. In Burst mode, he needs ER to cast. In Aimed Shot mode, he needs Energy generation (Fischl) but not necessarily ER% stat.

Playstyle Teammates ER Requirement
Charged Shot (Recommended) With Fischl 110% - 120% (Focus on Skill use)
Burst DPS With Fischl 130% - 140%
Solo Electro No Battery 160%+ (Not Recommended)

Substat Priority:

  1. Elemental Mastery (Target 300-500+)
  2. CRIT Rate / CRIT DMG
  3. Energy Recharge (To comfort)
  4. ATK% (Lower value than EM due to A4 passive)

Best Artifacts Comparison

Set Name Role Reasoning
4pc Wanderer's Troupe BiS Charged Shot Provides 80 EM and 35% Charged Attack DMG. Since both his Aimed Shots AND Burst attacks count as CA DMG, this set is universally good for him.
4pc Gilded Dreams Generalist Provides massive EM (up to 230). Excellent for reaction damage, though Wanderer's usually edges it out due to the CA multiplier.
4pc Marechaussee Hunter With Furina Only viable if playing with Furina. The 36% Crit Rate is massive, but Sethos has no innate HP drain mechanism.

Weapon Rankings

Weapon Type Performance Notes
Hunter's Path CRIT Rate S+ Tighnari's signature. Boosts Charged Attack DMG based on EM. Perfect synergy with Sethos's kit.
Slingshot (R5) CRIT Rate S The F2P God weapon. 31% Crit Rate and 60% DMG Bonus (passive). Sethos benefits immensely from the passive since he fights at mid-range. Beats most 4-stars.
Cloudforged EM A+ (Event) High EM stat stick. Passive gives even more EM. Very solid if you lack Crit rate options.
Scion of the Blazing Sun CRIT Rate A (BP) Battle Pass bow. Good Crit Rate and CA damage boost.

Constellation Value

Sethos is fully functional at C0, especially with Slingshot. C6 is a massive quality of life and damage upgrade.

  • C1: Sealed Shrine's Spiritsong - (Crit Rate) Increases CRIT Rate of Shadowpiercing Shot by 15%. Makes building him much easier.
  • C2: Papyrus Scripture of Silent Secrets - (Electro DMG) Gains up to 30% Electro DMG Bonus by consuming energy or healing. Very easy to maintain uptime.
  • C6: Pneuma-Ousous Accord - (Refund) Shadowpiercing Shot returns the energy consumed. This allows for rapid-fire Charge Shots without needing to use Skill to reload. Also spawns a phantom strike.

Top Team Compositions

1. Aggravate (Standard)

  • Main DPS: Sethos
  • Sub-DPS: Fischl (Essential Battery/Damage)
  • Dendro: Nahida / Kirara / Baizhu
  • Anemo: Kazuha / Sucrose

Why it works: Fischl generates the particles Sethos needs to spam Charged Shots. Nahida provides EM share. Sethos triggers Aggravate on every pierce shot. A shielder like Kirara/Zhongli is recommended over Kazuha if you struggle with interruption.

2. Quickbloom

  • Driver: Sethos
  • Hydro: Furina / Xingqiu
  • Dendro: Nahida / Baizhu
  • Healer: Baizhu / Yaoyao

Why it works: Sethos builds high EM, making his Hyperblooms hit hard. His piercing shots can hit seeds. Furina provides DMG bonus which Sethos lacks.

Rotations & Combos

Charged Shot Style (C0):
Supports Setup > Sethos Aimed Shot x2 (Consumes 40 Energy) > Sethos E (Restores Energy) > Sethos Aimed Shot x1

Burst Style:
Supports Setup > Sethos E > Sethos Q > Normal Attack Spam (8s)

Frequently Asked Questions

Is Slingshot really that good?
Yes. The 60% DMG Bonus passive applies to his Charged Shots (if you are close enough) and his Normal Attacks. Since he scales on EM, the low Base ATK of the 3-star weapon doesn't hurt him much.

Should I play Burst or Charged Attack?
Charged Attack style generally deals higher damage per second (frontloaded) and allows for flexible field time. Burst style is easier to play but locks you into an 8s rotation. Use Charged Shots if you have C6 or good energy management.

Data Source: KQM Standards. Last Updated: December 2025

Dori Guide: The Definitive Build & Analysis

Dori, Treasure of Dream Garden

Dori Genshin Impact Character Art
Rarity (4-Star)
Element Electro
Weapon Claymore
Best Role Battery / Healer
Stat Priority ER > HP > Healing Bonus
Tier B (Niche Support)

Dori is the elusive Lord Sangemah Bay, a merchant who can procure anything for the right price. She functions as a unique Battery/Healer Hybrid. Her kit revolves around her Jinni, which tethers to the active character, providing continuous healing, energy regeneration, and constant Electro application, making her a quirky but effective option for certain teams.


Pros

  • Universal Battery: Restores flat Energy to the active character (ignores ER).
  • Consolidated Role: Provides both Healing and Energy in one slot.
  • Self-Cleanse: Applies Electro to the active character, cleansing debuffs (but watch out for Pyro).
  • Hyperbloom Trigger: Her burst tether hits enemies, triggering seeds reliably (requires C6 or positioning).
  • At C6, she gains Electro Infusion, enabling a fun on-field driver playstyle.

Cons

  • High Energy Cost: 80 Energy Burst requires massive ER investment on Dori herself.
  • Circle Impact: You are tethered to the Jinni, limiting movement.
  • Self-Overload: Applying Electro to yourself can get you Overloaded/knocked back by Pyro enemies.
  • Damage is negligible without C6 or aggressive Hyperbloom builds.

Quick Guide (TL;DR)

Dori is best used to battery energy-hungry carries like Eula or Itto while keeping them alive.

  • Best Artifact: 4pc Noblesse Oblige (Support) or 4pc Gilded Dreams (Hyperbloom).
  • Best Weapon: Sacrificial Greatsword (Solves ER issues).
  • Alt Weapon: Favonius Greatsword (Team Battery).
  • F2P Weapon: Katsuragikiri Nagamasa (Craftable Inazuma Claymore).
  • Main Stats: SANDS: ER% | GOBLET: HP% (Healer) or EM (Reaction) | CIRCLET: Healing Bonus or CRIT (Favonius).
  • Talent Priority: Elemental Burst > Elemental Skill > Normal Attack (Ignore unless C6).
  • Top Team: Eula + Dori + Rosaria + Zhongli (Superconduct Battery).
Pro Tip: The Tether: The connector beam between the Jinni (Lamp) and your character deals damage to enemies it passes through. Position yourself so the enemy is between you and the lamp to apply Electro constantly.

Need Dori Cons?

Get Genesis Crystals to wish on her next banner securely.

Top Up Secure & Fast via GameCharge

Ascension & Talent Materials

Category Material Name Source
Ascension Kalpalata Lotus Sumeru (Cliffsides)
Boss Drop Thunderclap Fruitcore Electro Regisvine (Sumeru)
Talent Books Teachings of Ingenuity Steeple of Ignorance (Tue/Fri/Sun)
Common Mob Faded Red Satin Eremites (Sumeru)
Weekly Boss Bloodjade Branch Azhdaha (Liyue)

Talent Breakdown & Mechanics

Elemental Skill: Spirit-Warding Lamp: Troubleshooter Cannon

  • Mechanic: Fires a Troubleshooter Shot at enemies. Upon hit, it creates 2 secondary After-Sales Service Rounds that track nearby opponents.
  • Utility: Generates particles. Important for self-energy but primarily just damage.
  • Cooldown: 9s.

Elemental Burst: Alcazarzaray's Exactitude

  • The Jinni: Summons a Jinni that connects to the active character via a tether.
  • Healing: Continuously restores HP to the active character based on Dori's Max HP.
  • Energy: Continuously restores flat Energy to the active character (approx. 2.5 Energy per tick at Talent Lv 10).
  • Electro App: The tether deals Electro DMG to enemies it touches (0.4s interval). It also applies Electro to the character, cleansing other elements.

A4 Passive: Compound Interest

  • Energy Refund: When the Troubleshooter Shots hit opponents, Dori restores 5 Energy for every 100% ER she has (Max 15 Energy). This drastically lowers her own ER requirements if you build ER.

Talent Priority Order:

  1. Elemental Burst (Level 9+) - Maximizes Healing and Energy generation.
  2. Elemental Skill (Level 6+) - Decent damage, not critical for support.
  3. Normal Attack (Level 1) - Irrelevant unless C6 Driver.

Stat Requirements & ER Thresholds

Dori is extremely energy hungry (80 Cost). However, her A4 passive refunds energy, making ER% her most valuable stat for both utility and self-sustain.

Team Context Weapon ER Requirement
Solo Electro Sacrificial / Favonius 200% - 230%
Double Electro Any 180% - 200%
C4 Unlock Any Requirements drop by ~20%

Substat Priority:

  1. Energy Recharge (Aim for 200%+)
  2. HP% (Increases Healing)
  3. Elemental Mastery (Only for Hyperbloom/Reaction builds)
  4. CRIT Rate (Only if using Favonius Greatsword)

Best Artifacts Comparison

Set Name Role Reasoning
4pc Noblesse Oblige Best Support Standard support set. Buffs team ATK by 20%. Since Dori usually supports ATK-scaling carries (Eula/Itto/Xiao), this is ideal.
4pc Gilded Dreams Hyperbloom If using Dori as the Hyperbloom trigger (C6 preferred), this maximizes her EM and reaction damage.
4pc The Exile (4-Star) Pure Battery Increases team energy regeneration even further. Excellent budget option if healing isn't an issue.

Weapon Rankings

Weapon Type Performance Notes
Sacrificial Greatsword ER% S+ Double E means double energy particles for Dori, essentially cutting her ER needs drastically. Very comfortable.
Favonius Greatsword ER% S Better for team energy, but requires building CRIT Rate on artifacts.
Katsuragikiri Nagamasa ER% A+ (Craftable) Passive refunds energy after skill use. Great F2P option that matches her aesthetics perfectly.
The Bell HP% B Provides massive HP for healing, but zero ER utility. Only use if you have tons of ER substats.

Constellation Value

Dori's C4 makes her an elite support, and C6 changes her gameplay style.

  • C4: Discretionary Supplement - (The Support Peak) The active character connected to the Jinni gains buffs: < 50% HP = +50% Healing Bonus; < 50% Energy = +30% ER. This is incredibly strong for energy-hungry carries.
  • C6: Sprinkling Weight - (Infusion) After using Skill, Dori gains Electro Infusion for 3s. Hits heal the entire party. This allows her to drive Hyperbloom/Aggravate teams on-field.

Top Team Compositions

1. Physical/Hypercarry Support

  • Main DPS: Eula / Itto / Xiao
  • Battery/Healer: Dori
  • Sub-DPS: Rosaria / Albedo / Faruzan
  • Flex: Zhongli / Bennett

Why it works: Dori consolidates healing and energy generation (C4 is key here). She provides Electro for Eula's Superconduct or just raw energy for Itto/Xiao who struggle to fill their bursts.

2. Dori Hyperbloom (C6 Recommended)

  • Driver: Dori (Full EM + C6)
  • Hydro: Xingqiu / Yelan
  • Dendro: Nahida / Dendro MC
  • Flex: Zhongli / Fischl

Why it works: At C6, Dori infuses her attacks with Electro. She attacks fast, triggering Xingqiu's rain swords to make cores, then detonate them with her infused attacks. Her tether also hits cores automatically.

Rotations & Combos

Standard Support Rotation:
Dori E > Dori Q > Swap to Main DPS immediately

Tip: If using Sacrificial Greatsword, do E > E > Q to pre-funnel energy particles into Dori herself to ensure her burst is ready for next rotation, or swap to your carry to feed them the particles if Dori is full.

Frequently Asked Questions

Is Dori better than Kuki Shinobu?
Generally, No. Kuki heals on skill (100% uptime) and triggers Hyperbloom easier. Dori is better specifically when your carry needs massive Energy restoration (e.g., Eula) or if you need the self-Electro application to cleanse debuffs.

Why is my Dori pushing me around?
Dori applies Electro to you. If you are affected by Pyro (e.g., Bennett's circle or enemy attack), this triggers Overload on your character, which knocks you back. Be careful using Dori + Bennett together.

Data Source: KQM Standards. Last Updated: December 2025