RSS

Blog posts of '2025' 'December'

Thoma Guide: The Definitive Build & Analysis


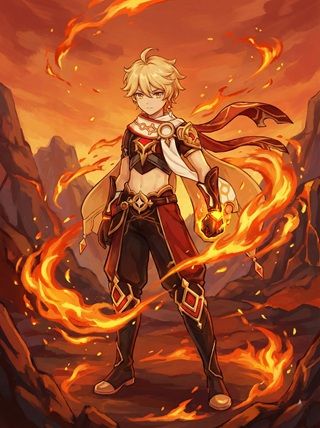
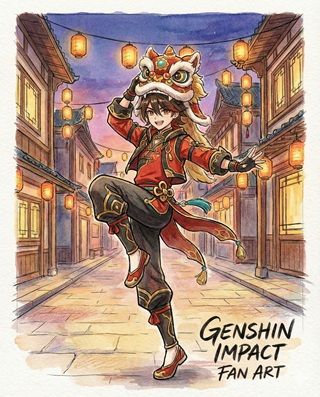
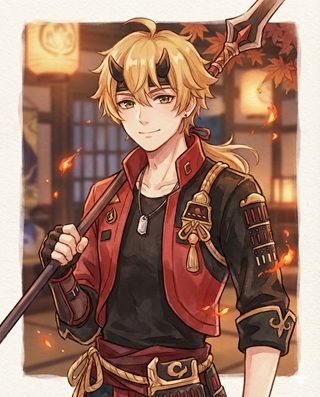
Thoma Genshin Impact Character Art
Rarity (4-Star)
Element Pyro
Weapon Polearm
Best Role Burgeon Trigger / Shielder
Stat Priority EM (Burgeon) / HP (Shield) / ER
Tier A (Burgeon) / B (Shield)

Thoma is the Housekeeper of the Kamisato Clan and the undisputed king of Burgeon. His slow Pyro application (standard ICD) is a blessing in disguise, as it prevents him from accidentally causing Burning, allowing him to detonate Dendro Cores safely and consistently.


Quick Guide (TL;DR)

If you don't have time for the math, here is the cheat sheet.

  • Best Artifact: 4pc Flower of Paradise Lost (Burgeon) or 4pc Noblesse Oblige (Shield Support).
  • Best Weapon: Kitain Cross Spear (Burgeon BiS - Craftable) or Favonius Lance (Shield/Battery).
  • F2P Weapon: The Catch or Black Tassel (Shield Stat Stick).
  • Main Stats (Burgeon): SANDS: ER% or EM | GOBLET: EM | CIRCLET: EM.
  • Main Stats (Shield): SANDS: ER% | GOBLET: HP% | CIRCLET: HP%.
  • Talent Priority: Elemental Burst > Elemental Skill > Normal Attack (Ignore).
  • Top Team: Thoma + Nahida + Xingqiu + Baizhu (Burgeon).
Pro Tip: Thoma's shield STACKS. You must perform Normal Attacks with your active character after casting his Burst to refresh the shield duration and increase its thickness.

Need Primogems for C4 Thoma?

Get Genesis Crystals at a discounted price with instant delivery.

Top Up Secure & Fast via GameCharge

Talent Breakdown & Mechanics

Elemental Skill: Blazing Blessing

  • Function: Kicks forward dealing Pyro DMG and generates a shield.
  • Particle Generation: Generates 3-4 Particles.
  • Self-Cleanse: Applies Pyro to Thoma briefly, which can cleanse debuffs but won't apply to the active character on swap.

Elemental Burst: Crimson Ooyoroi

  • Scorching Ooyoroi: The core of his kit. When the active character performs a Normal Attack, Thoma triggers a "Fiery Collapse" (Pyro AoE).
  • Shield Stacking: Each Fiery Collapse creates a small shield. These shields stack with the existing shield, refreshing the duration and adding to the HP absorption (up to a cap).
  • Burgeon Enabler: The Fiery Collapse happens every 1s. This ICD (Internal Cooldown) means he only applies Pyro every 3 hits (or 2.5s). This is PERFECT for Burgeon because it triggers the seeds without applying enough Pyro to trigger Burning.

Passive: Imbricated Armor

  • Shield Strength: When the active character obtains or refreshes a Blazing Barrier, their Shield Strength increases by 5% for 6s (Max 5 stacks). This encourages the "Stacking" playstyle.

Talent Priority Order:

  1. Elemental Burst (Level 9+) - Increases damage and shield stacking.
  2. Elemental Skill (Level 8) - Increases base shield absorption.
  3. Normal Attack (Level 1) - Useless.

Stat Requirements & ER Thresholds

Thoma is famously energy-hungry (80 Cost Burst). If he doesn't Burst, he does nothing. C4 helps significantly.

Constellation With Kitain/Favonius Without Battery Weapon
C0 - C3 180% - 200% 220% - 240%
C4+ (15 Energy Refund) 160% - 180% 200%

Substat Priority (Burgeon):

  1. Energy Recharge (Top Priority until Burst is consistent)
  2. Elemental Mastery (As much as possible)
  3. HP% (Survivability)

Substat Priority (Shield Bot):

  1. Energy Recharge
  2. HP% (Shield Strength)
  3. CRIT Rate (Only for Favonius Lance)

Best Artifacts Comparison

Set Name Role Reasoning
4pc Flower of Paradise Lost Burgeon (BiS) Increases Bloom/Burgeon DMG by up to 80%. The strongest set for damage.
4pc Gilded Dreams Burgeon Excellent alternative. Gives massive EM (up to 150) based on team comp. Easier to farm.
4pc Noblesse / 2pc HP+HP Shield Support Standard support setup. Use Noblesse to buff ATK for Hu Tao/Xiao, or 2pc/2pc for max shield thickness.

Weapon Rankings

Weapon Type Performance Description
Kitain Cross Spear (R5) EM / Energy S+ (Burgeon) Craftable Inazuma spear. Gives EM substat AND regenerates 15 Energy passively. Perfect synergy.
Favonius Lance ER% S (Support) Best for Shield Bot builds. Solves his energy issues and batteries the team. Requires Crit Rate circlet.
Dragon's Bane EM A Highest EM stat stick, but offers no Energy Help. Only use if you have C4 or godly ER artifacts.
Black Tassel HP% A (Shield Only) 3-Star HP stick. Use this if you only care about Shield Strength and have enough ER from artifacts.

Constellation Value

Thoma feels incomplete at C0 due to energy issues. C4 fixes him.

  • C1: A Comrade's Duty - (QoL) When a character protected by his shield is hit, Skill/Burst CD is decreased by 3s. Nice, but doesn't fix energy.
  • C2: A Subordinate's Skills - (Uptime) Burst duration increased by 3s. This gives him 100% Shield Uptime potential.
  • C4: Long-Term Planning - (The Fix) Restores 15 Energy after using Burst. This drastically lowers his ER requirement (from ~220% to ~170%).
  • C6: Burning Heart - (Buffer) When obtaining/refreshing shield, Normal/Charged/Plunge DMG is increased by 15% for 6s. Great for Hu Tao/Xiao/Wanderer.

Verdict: C4 is the target. C6 is a nice bonus for support builds.

Top Team Compositions

1. Thoma Burgeon

  • Trigger: Thoma (Full EM)
  • Dendro: Nahida / Alhaitham
  • Hydro: Xingqiu / Yelan
  • Flex: Baizhu / Fischl / Kokomi

Why it works: Thoma provides a shield to protect the active character from Burgeon self-damage. His Pyro application is slow enough to avoid Burning, but fast enough to pop seeds efficiently.

2. Hu Tao VV Vape

  • Main DPS: Hu Tao
  • Hydro: Xingqiu / Yelan
  • Anemo: Kazuha / Sucrose
  • Shield/Pyro: Thoma

Why it works: Thoma applies Pyro first so Kazuha can Swirl it (reducing Pyro RES). Then Thoma's shield protects Hu Tao. C6 Thoma buffs her Charged Attack damage.

Rotations & Combos

Burgeon Rotation:
Nahida E Q > Xingqiu Q E E > Thoma E Q > Driver Normal Attacks

Tip: Always E before Q on Thoma to catch particles during the burst animation.

Frequently Asked Questions

Is Thoma shield strong?
At max stacks, it is the second strongest shield in the game (after Zhongli). However, it starts weak and requires you to Normal Attack to build strength.

Does he steal vapes from Hu Tao?
Generally, no. His ICD prevents him from applying Pyro fast enough to overtake Xingqiu/Yelan's Hydro application. He is safe to use.

Data Source: KQM Standards. Last Updated: December 2025

Genshin Impact. Pyro Traveler Guide: The Definitive Build & Analysis


Pyro Traveler Genshin Impact Character Art
Rarity (5-Star Protagonist)
Element Pyro
Weapon Sword
Best Role Off-Field Support / Burgeon Trigger
CV Priority ER > EM > CRIT > ATK%
Tier B (Niche) / A (With C6)

The Pyro Traveler finally gains the power of Natlan. While not as dominant as the Dendro Traveler, this kit offers a unique F2P-friendly way to access the Nightsoul mechanic, making them a solid holder for the new Natlan support artifacts if you lack Mavuika.


Quick Guide (TL;DR)

If you don't have time for the math, here is the cheat sheet.

  • Best Artifact: 4pc Scroll of the Hero of Cinder City (Support).
  • Alt Artifact: 4pc Deepwood Memories (If supporting Dendro/Burgeon).
  • Best Weapon: Freedom-Sworn (Team Buffs).
  • F2P Weapon: Favonius Sword (Battery) or Sapwood Blade (Dendro Teams).
  • Main Stats: SANDS: ER% | GOBLET: Pyro DMG or EM | CIRCLET: CRIT Rate.
  • Talent Priority: Elemental Burst > Elemental Skill > Normal Attack.
  • Top Team: Traveler + Kinich + Emilie + Thoma (Burning Support).
Pro Tip: The Pyro Traveler's primary value in Version 6.x is their ability to trigger the Nightsoul Burst mechanic for free, allowing them to activate the "Scroll of Cinder City" artifact set for the team.

Need Primogems for Natlan Characters?

Get Genesis Crystals at a discounted price with instant delivery.

Top Up Secure & Fast via GameCharge

Talent Breakdown & Mechanics

Elemental Skill: Flame-Wreathed Sword

  • Tap: Performs a quick Pyro slash that generates 3 particles.
  • Hold: Enters a brief aiming mode (similar to Mika) to launch a "Spiritfire Torch" that deals AoE Pyro DMG.
  • Nightsoul Mechanic: Hitting an enemy with the Skill grants the Traveler 10 Nightsoul Points. This acts as the trigger for Natlan weapon passives and artifact sets.

Elemental Burst: Divinity's Call

  • Cost: 80 Energy | Cooldown: 20s
  • Effect: Places a "Sacred Flame" totem on the field.
  • Pulse: The totem pulses Pyro DMG every 1.5s for 12s.
  • Interaction: If the active character attacks an opponent, the totem performs a coordinated attack (max once every 2s). This is decent for Burgeon or maintaining Burning aura.

Passive: Embers of the Past

  • Utility: After triggering a Nightsoul Burst (team mechanic), the Traveler recovers 6 Energy. This helps alleviate their high burst cost.

Talent Priority Order:

  1. Elemental Burst (Level 9) - The main source of application.
  2. Elemental Skill (Level 8) - For particle generation.
  3. Normal Attack (Level 1) - Completely useless.

Stat Requirements & ER Thresholds

Like all Traveler variants, the Pyro MC suffers from high energy costs (80). You generally need an ER Sands.

Team Context ER Requirement
Solo Pyro (Support) 220% - 250%
With Favonius Sword 200% - 220%
Double Pyro (w/ Bennett) 180% - 200%

Substat Priority:

  1. Energy Recharge (Until Burst is comfortable)
  2. CRIT Rate (To trigger Favonius)
  3. Elemental Mastery (If playing Burgeon)
  4. ATK% (Last priority)

Best Artifacts Comparison

Set Name Role Reasoning
4pc Scroll of the Hero of Cinder City Support (BiS) Traveler can trigger the Nightsoul requirement via Skill. Provides massive Elemental DMG buffs to the team.
4pc Noblesse Oblige General Support Classic 20% ATK buff. Good if you haven't farmed Natlan artifacts yet.
4pc Deepwood Memories Dendro Teams If you are using Traveler in a Burning/Burgeon team (e.g., with Kinich), they can hold this to shred Dendro RES.

Weapon Rankings

Weapon Type Performance Description
Freedom-Sworn EM / Support S+ Premium support sword. Buffs team DMG and ATK. Great for reaction teams.
Favonius Sword ER% S (Universal) Solves their energy issues completely. Highly recommended for smooth rotations.
Sapwood Blade ER% A (Dendro) Craftable. Good for Burgeon/Burning teams as it drops a leaf that buffs EM.
Sacrificial Sword ER% A Allows double casting Skill for more particles, but extends rotation time.

Constellation Value

Traveler constellations are free (from Statues of the Seven), so you will eventually get C6.

  • C1: Fuel for the Fire - (QoL) Skill hits generate 2 extra Energy particles. Essential for lowering ER needs.
  • C4: Scorching Radius - (Damage) Increases the AoE range of the Burst totem by 50%. Makes it much better for groups.
  • C6: Eternal Flame - (Support) While the Burst is active, all party members gain 12% Pyro DMG Bonus. If they trigger a Pyro reaction, this increases to 24%.

Verdict: C6 makes them a viable alternative to Xiangling in Mono Pyro teams, though with less personal damage.

Top Team Compositions

1. Natlan Burning/Burgeon

  • Main DPS: Kinich (Dendro)
  • Sub-DPS: Emilie
  • Pyro Support: Pyro Traveler
  • Sustain: Thoma / Bennett

Why it works: The Traveler provides just enough Pyro to maintain the Burning aura for Kinich and Emilie without stealing too many reactions. Holding "Deepwood Memories" here frees up the other supports.

2. Budget Mono Pyro

  • Main DPS: Lyney / Klee
  • Support: Pyro Traveler (C6)
  • Buffer: Bennett
  • Anemo: Kazuha / Sucrose

Why it works: If you don't have Xiangling built (or she is on the other team), C6 Traveler provides a decent Pyro DMG buff and batteries the Main DPS with Favonius Sword.

Rotations & Combos

Support Rotation:
Traveler E (Trigger Nightsoul/Set) > Traveler Q > Swap to DPS

Note: Always ensure you catch the particles from E before swapping if your ER is borderline.

Frequently Asked Questions

Is Pyro Traveler good?
They are "Average." They are not as game-breaking as Dendro MC, but significantly better than Hydro MC. They serve as a functional placeholder for Mavuika or Xiangling in Natlan teams.

Should I build them?
If you are F2P and need a generic Pyro support for the new Natlan artifact set, yes. If you already have C6 Xiangling and Bennett built, Pyro MC is lower priority.

Data Source: Theorycrafting v6.x (Speculative). Last Updated: December 2025

Genshin Impact: Mavuika Guide

The Definitive Build & Analysis

Mavuika Genshin Impact Character Art
Rarity (5-Star Archon)
Element Pyro
Weapon Claymore
Best Role Off-Field Sub-DPS / Buffer
CV Priority ATK% > CRIT > ER > EM
Tier SS+ (Game Changer)

Mavuika is the Pyro Archon and the God of War. She finally liberates the meta from "Circle Impact" (Bennett) by providing massive ATK buffs and consistent off-field Pyro application that follows the active character. Her unique Nightsoul mechanics allow her to dominate both exploration and combat.


Quick Guide (TL;DR)

If you don't have time for the math, here is the cheat sheet.

  • Best Artifact: 4pc Scroll of the Hero of Cinder City (Support).
  • Alt Artifact: 4pc Obsidian Codex (Main DPS / High Investment).
  • Best Weapon: Sun-Scorched Greatsword (Signature).
  • F2P Weapon: Earth Shaker (Craftable) or Favonius Greatsword (Utility).
  • Main Stats: SANDS: ATK% or ER | GOBLET: Pyro DMG | CIRCLET: CRIT Rate/DMG.
  • Talent Priority: Elemental Skill > Elemental Burst > Normal Attack.
  • Top Team: Mavuika + Mualani + Xilonen + Emilie (Natlan Core).
Pro Tip: Mavuika is the premier holder of the "Cinder City" artifact set. Simply triggering a reaction with her restores energy to the team and grants massive Elemental DMG bonuses.

Need Primogems for the Pyro Archon?

Get Genesis Crystals at a discounted price with instant delivery.

Top Up Secure & Fast via GameCharge

Talent Breakdown & Mechanics

Elemental Skill: Shadow of the War-God

  • Function: Enters the "Nightsoul's Blessing" state. She mounts her motorbike (or summons her construct), dealing AoE Pyro DMG.
  • Off-Field: She leaves behind a "Scorched Earth" effect that applies Pyro periodically to enemies. Unlike Guoba or Jellyfish, this follows the active character or targets the nearest enemy regardless of distance.
  • Nightsoul: Consumes Nightsoul points to maintain the state. Natlan characters can trigger "Nightsoul Burst" to refresh her duration.

Elemental Burst: Incandescent Resurrection

  • Cost: 70 Energy | Cooldown: 18s
  • The Nuke: Deals massive AoE Pyro DMG.
  • The Buff: Grants the "War Banner" effect to the team. Increases ATK% and Interruption Resistance for all party members based on Mavuika's Base ATK. This buff is mobile (no circle).

Passive: Ancient Name of the Flame

  • Exploration: While in Nightsoul state (on bike/mount), Mavuika can traverse lava and climb vertical surfaces without consuming Stamina (uses Nightsoul points).

Talent Priority Order:

  1. Elemental Skill (Level 10) - Primary source of off-field damage.
  2. Elemental Burst (Level 10) - Source of the team buffs.
  3. Normal Attack (Level 1) - Ignore unless C6.

Stat Requirements & ER Thresholds

Mavuika is energy-hungry if played solo Pyro, but efficient in Natlan teams.

Team Context ER Requirement
Solo Pyro (No other Natlan chars) 200% - 220%
With Xilonen/Kachina (Nightsoul Burst) 160% - 180%
Double Pyro (e.g., Arlecchino) 140% - 160%

Substat Priority:

  1. Energy Recharge (Until requirement met)
  2. CRIT Rate / CRIT DMG (For Favonius or personal DMG)
  3. ATK% (Scales her buff)
  4. Elemental Mastery (If triggering reactions)

Best Artifacts Comparison

Set Name Role Reasoning
Scroll of the Hero of Cinder City Support (BiS) Grants energy to team when triggering Nightsoul Burst. After reaction, buffs Party Elemental DMG by 12% (40% if in Nightsoul state). Mandatory for support.
Obsidian Codex Personal DPS If you run her on-field or want pure damage, this gives 15% DMG and 40% CRIT Rate while in Nightsoul state.
4pc Noblesse Oblige Legacy Support Use only if you haven't farmed the new Natlan domain. Weaker than Scroll.

Weapon Rankings

Weapon Type Performance Description
Sun-Scorched Greatsword ATK / ER S+ Signature. Regenerates energy when Nightsoul Burst triggers. Massive Base ATK for buff scaling.
Favonius Greatsword ER% S (Support) The practical choice. Ensures Mavuika and her team have their bursts ready every rotation.
Earth Shaker ATK% A (F2P) Natlan Craftable. Increases Skill DMG when triggering Pyro reactions. Solid for personal damage.
Wolf's Gravestone ATK% A+ Huge ATK stick. Good for buffing, but harder to balance ER.

Constellation Value

Like most Archons, C2 is the "Broken" stopping point.

  • C1: "The Flame Undying" - (QoL) Increases Nightsoul Points duration/limit. Also provides 20% Energy Recharge to the team. Makes building her trivial.
  • C2: "Ashes of Victory" - (Meta Defining) While in Nightsoul state, enemies' DEF is decreased by 30%. This is a massive universal damage increase for any team.
  • C6: "War Eternal" - (Main DPS) Infuses Normal Attacks with Pyro permanently and massively buffs their damage scaling. Turns her into a better Diluc/Hu Tao.

Verdict: C0 replaces Xiangling/Bennett in many teams. C2 is the best constellation in Natlan.

Top Team Compositions

1. Natlan Vaporize

  • Main DPS: Mualani / Neuvillette
  • Support: Mavuika
  • Support: Xilonen (Geo)
  • Sub-DPS: Emilie / Furina

Why it works: Mualani needs consistent off-field Pyro to Vape her shark bites. Mavuika provides this mobile Pyro app better than Xiangling, while Xilonen shreds RES.

2. New Overload

  • Main DPS: Clorinde / Raiden Shogun
  • Support: Mavuika
  • Support: Chevreuse
  • Sub-DPS: Fischl / Yae Miko

Why it works: Mavuika replaces Bennett/Xiangling here. She frees you from "Circle Impact," allowing Clorinde to dash around freely while maintaining the Overload buffs.

Rotations & Combos

Support Rotation:
Mavuika E (Activates Nightsoul/Pyro App) > Mavuika Q (Buff Team) > Main DPS Rotation

Nightsoul Management:
Ensure you trigger a reaction (Vape/Overload) shortly after swapping to Mavuika to trigger the "Scroll of Cinder City" artifact set buff.

Frequently Asked Questions

Does she replace Bennett?
Yes and No. She provides better off-field damage and mobility, but her ATK buff might be slightly lower than C5 Bennett + Aquila Favonia. However, she frees up Bennett for your second team.

Is she better than Xiangling?
Yes. She doesn't need to be funneled particles constantly (better energy economy) and her Pyro application tracks enemies rather than rotating around you, making her better for ranged DPS like Neuvillette.

Data Source: Beta/Theorycrafting v6.x. Last Updated: December 2025

Genshin Impact: Lyney Guide

The Definitive Build & Analysis

Lyney Genshin Impact Character Art
Rarity (5-Star)
Element Pyro
Weapon Bow
Best Role Charged Attack DPS (Mono Pyro)
CV Priority CRIT > ATK% > ER > EM
Tier S (Single Target Specialist)

Lyney is Fontaine's premier magician and a Pyro Charged Attack specialist. His kit revolves around consuming his own HP to stack "Prop Surplus" and unleashing devastating damage with his Prop Arrows. He is designed specifically to thrive in Mono Pyro teams.


Quick Guide (TL;DR)

If you don't have time for the math, here is the cheat sheet.

  • Best Artifact: 4pc Marechaussee Hunter (BiS by far).
  • Alt Artifact: 4pc Lavawalker (If you lack MH pieces).
  • Best Weapon: The First Great Magic (Signature) or Aqua Simulacra.
  • F2P Weapon: Song of Stillness (Craftable) or Prototype Crescent.
  • Main Stats: SANDS: ATK% | GOBLET: Pyro DMG | CIRCLET: CRIT DMG.
  • Talent Priority: Normal Attack > Elemental Skill > Elemental Burst.
  • Top Team: Lyney + Bennett + Xiangling + Kazuha/Zhongli.
Pro Tip: Lyney's Passive 2 grants up to 100% Increased DMG based on the number of Pyro teammates. Do NOT run him in Vaporize/Melt teams; stick to Triple Pyro + Anemo/Geo.

Need Primogems for Lyney's Magic Show?

Get Genesis Crystals at a discounted price with instant delivery.

Top Up Secure & Fast via GameCharge

Talent Breakdown & Mechanics

Normal Attack: Card Force Translocation

  • Prop Arrow (Level 2 Charge): Fires a special arrow that summons a Grin-Malkin Hat. If Lyney has >60% HP, he consumes 20% HP to gain 1 "Prop Surplus" stack.
  • Grin-Malkin Hat: Taunts enemies. When destroyed or duration ends, it fires a Pyrotechnic Strike (homing missile) at an enemy.

Elemental Skill: Bewildering Lights

  • The Nuke: Consumes all "Prop Surplus" stacks (Max 5) to deal massive AoE Pyro DMG.
  • The Heal: Restores Lyney's HP based on the number of stacks consumed. This self-sustain is crucial for his rotation.
  • Usage: Use this at the END of your rotation to cash out your stacks for big damage and healing.

Elemental Burst: Wondrous Trick: Miracle Parade

  • Cost: 60 Energy | Cooldown: 15s
  • Mechanic: Lyney turns into a Grin-Malkin Cat (can move quickly). When he cancels it (press skill) or duration ends, he deals AoE Pyro DMG, summons a Hat, and gains 1 Prop Surplus stack.
  • Rotation: Use this to start your combo or reposition quickly.

Talent Priority Order:

  1. Normal Attack (Level 10) - Most of his DMG comes from Charged Shots & Hats.
  2. Elemental Skill (Level 9) - Strong finisher.
  3. Elemental Burst (Level 8) - Utility and burst damage.

Stat Requirements & ER Thresholds

Lyney generates decent particles, and in a Triple Pyro team, his ER needs are very low.

Team Context ER Requirement
Triple Pyro (Standard) 100% - 110%
Double Pyro 130% - 140%
Solo Pyro (Not Recommended) 160%+

Substat Priority:

  1. CRIT DMG (Ascension & MH set give tons of Rate)
  2. CRIT Rate (Cap at 64% due to MH set passive)
  3. ATK%
  4. Energy Recharge

Best Artifacts Comparison

Set Name Role Reasoning
4pc Marechaussee Hunter General BiS Lyney constantly drains and heals HP. This set gives a "free" 36% CRIT Rate. Unbeatable.
4pc Lavawalker Mono Pyro Since enemies will always have Pyro aura, the 35% DMG bonus is consistent.
4pc Vermillion Hereafter Niche Viable since he loses HP after burst, but Marechaussee is simply better.

Weapon Rankings

Weapon Type Performance Description
The First Great Magic CRIT DMG S+ Signature. Provides ATK based on Pyro party members (perfect synergy) and Charged Attack DMG.
Aqua Simulacra CRIT DMG S Universal BiS for bows. High Crit DMG. You need to be close to enemies, which Lyney usually is.
Prototype Crescent (R5) ATK% A (F2P) Craftable. If you hit weak spots, the ATK buff is massive.
Song of Stillness (R5) ATK% A (F2P) Fontaine Craftable. Increases DMG when healed. Works perfectly with Bennett + Lyney's self-heal.

Constellation Value

Lyney is a complete unit at C0, but his constellations provide vertical investment.

  • C1: Whimsical Wonders - (QoL) Can have 2 Grin-Malkin Hats at once. Additionally, Prop Arrows summon 2 hats and grant 1 extra stack. Speeds up his rotation significantly.
  • C2: Locquacious Cajun - (Damage) Every 2s on field, gains 20% CRIT DMG (Max 60%). Huge stat stick.
  • C6: Guarded Smile - (Nuke) Prop Arrows fire a "Pyrotechnic Strike: Reprised" that deals 80% of a normal Pyrotechnic Strike's damage. Effectively doubles his output.

Verdict: C0 is excellent. C1 makes him smoother to play.

Top Team Compositions

1. Premium Mono Pyro

  • Main DPS: Lyney
  • Buffer/Healer: Bennett
  • Off-Field DPS: Xiangling / Dehya
  • Grouper/Shred: Kazuha

Why it works: Maximizes Lyney's A4 Passive (100% DMG bonus for 3 Pyro). Kazuha shreds Pyro RES. Bennett buffs ATK. Xiangling deals damage while Lyney charges shots. (Note: Without a shield, Lyney is vulnerable; replace Xiangling with Dehya/Zhongli for comfort).

2. Shielded Mono Pyro

  • Main DPS: Lyney
  • Buffer: Bennett
  • Sub-DPS: Xiangling
  • Shield: Zhongli / Layla (rarely)

Why it works: Charged Attack archers are easily interrupted. Zhongli provides the strongest shield and shreds all RES by 20%, compensating for the lack of Kazuha (mostly).

Rotations & Combos

Standard Rotation:
Bennett Q E > Kazuha Hold E Q > Xiangling Q E > Lyney 3x CA -> Q -> E

Explanation: Always use Lyney's Elemental Skill (E) at the **end** of his field time to consume the maximum stacks (5) for the biggest heal and damage nuke.

Frequently Asked Questions

Can I Vape with Lyney?
You can, but it's suboptimal. His Passive 2 grants a massive damage bonus only if the enemy is affected by Pyro and you have Pyro teammates. Vaporize removes the Pyro aura, killing his passive bonus.

Is he hard to play?
He requires aim (Charged Shots) and is very squishy. Without a shielder like Zhongli or Dehya, getting interrupted mid-charge is frustrating. If you can handle aiming and dodging, his damage is top-tier.

Data Source: KQM Standards. Last Updated: December 2025

Genshin Impact: Klee Guide

The Definitive Build & Analysis

Klee Genshin Impact Character Art
Rarity (5-Star)
Element Pyro
Weapon Catalyst
Best Role On-Field Pyro Driver
CV Priority CRIT > ATK% > EM > ER
Tier A (Mono Pyro Specialist)

Klee is the Spark Knight who specializes in heavy AoE Pyro damage. While she has a reputation for being clunky, mastering her animation cancels turns her into a relentless "Machine Gun" of explosions. She excels in Mono Pyro teams where her raw damage and staggering capabilities shine.


Quick Guide (TL;DR)

If you don't have time for the math, here is the cheat sheet.

  • Best Artifact: 4pc Crimson Witch of Flames (General) or 2pc ATK / 2pc Pyro.
  • Alt Artifact: 4pc Lavawalker (Mono Pyro) or 4pc Marechaussee Hunter (Furina).
  • Best Weapon: Lost Prayer to the Sacred Winds (Movement Speed helps kiting).
  • F2P Weapon: Dodoco Tales (Best Event Weapon) or The Widsith (RNG God).
  • Main Stats: SANDS: ATK% | GOBLET: Pyro DMG | CIRCLET: CRIT Rate/DMG.
  • Talent Priority: Normal Attack > Elemental Skill > Elemental Burst.
  • Top Team: Klee + Xiangling + Bennett + Kazuha (Mono Pyro).
Pro Tip: Klee's Normal Attacks can be animation canceled by holding forward while tapping attack. This technique (Machine Gun Klee) significantly increases her attack speed.

Need Primogems for Klee Rerun?

Get Genesis Crystals at a discounted price with instant delivery.

Top Up Secure & Fast via GameCharge

Talent Breakdown & Mechanics

Normal Attack: Kaboom!

  • Explosive Flowers: Klee's normal attacks deal AoE Pyro DMG.
  • Pounding Surprise (Passive): Normal attacks have a 50% chance to grant an Explosive Spark. This Spark makes her next Charged Attack cost 0 Stamina and deal 50% increased damage.
  • Usage: Never use a Charged Attack without a Spark. The stamina cost is too high.

Elemental Skill: Jumpy Dumpty

  • The Bomb: Klee throws a bomb that bounces 3 times.
  • The Mines: After the 3rd bounce, it splits into 8 small mines. These mines explode on enemy contact.
  • Synergy: Kazuha and Sucrose can suck these mines up and group them onto enemies for massive burst damage. (Venti cannot pull them).

Elemental Burst: Sparks 'n' Splash

  • Cost: 60 Energy | Cooldown: 15s
  • Mechanic: Summons sparks that auto-attack enemies.
  • The Limitation: The burst ends immediately if Klee leaves the field. You must commit to keeping her on-field for the full duration.
  • Battery: When Klee crits during her burst, she regenerates 2 Energy for the entire party. This makes her an excellent battery for Mono Pyro teams.

Talent Priority Order:

  1. Normal Attack (Level 10) - Primary damage source.
  2. Elemental Skill (Level 9) - Significant nuke damage.
  3. Elemental Burst (Level 8+) - Sustained DPS.

Stat Requirements & ER Thresholds

Klee gains energy when she crits, so in Mono Pyro teams, her ER requirements are quite low.

Team Context ER Requirement
Mono Pyro (3 Pyro Units) 100% - 115%
Vaporize (Solo Pyro) 130% - 140%
Burgeon Driver Max EM Focus

Substat Priority:

  1. CRIT Rate / CRIT DMG (Target 70/160+)
  2. ATK%
  3. Elemental Mastery (Only for Vape/Burgeon)
  4. Energy Recharge (Low priority in Mono Pyro)

Best Artifacts Comparison

Set Name Role Reasoning
4pc Crimson Witch of Flames General / Vape Standard BiS. Klee can stack the 2-piece effect (up to 2 stacks) and benefits from reaction damage.
4pc Lavawalker Mono Pyro Often overlooked, but gives a massive 35% DMG bonus against enemies affected by Pyro. Best for Mono Pyro teams.
2pc ATK / 2pc Pyro Flexible Easiest to farm. Very competitive if substats are better than 4pc sets.

Weapon Rankings

Weapon Type Performance Description
Lost Prayer to the Sacred Winds CRIT Rate S Signature-ish. High Base ATK and Crit Rate. The 10% movement speed is huge for her clunky dodging.
Kagura's Verity CRIT DMG S Excellent stat stick. Klee can stack the passive with her two skill charges.
The Widsith CRIT DMG A+ (R5) At R5, this beats 5-star weapons if you get the right buff. The 10s uptime aligns with her burst duration.
Dodoco Tales ATK% A (F2P) Event exclusive. Perfectly matches her playstyle (Normal hits buff Charged hits). Aesthetically perfect.

Constellation Value

Klee's C2 makes her one of the few sources of DEF Shred in the game.

  • C1: Chained Reactions - (RNG) Abilities have a chance to trigger extra damage. Often steals Vaporize reactions, making it a DPS loss in Vape teams, but good in Mono Pyro.
  • C2: Explosive Frags - (Top Tier) Mines reduce enemy DEF by 23%. This is a rare multiplier that buffs the entire team's damage significantly. Makes Klee a viable support.
  • C4: Sparkly Explosion - (Nuke) If you swap Klee out during her burst, she deals 555% AoE Pyro DMG. Great for speedruns.

Verdict: C0 is fine. C2 is her best constellation for team utility.

Top Team Compositions

1. Mono Pyro (The Standard)

  • Driver: Klee
  • Sub-DPS: Xiangling
  • Buffer: Bennett
  • Grouper: Kazuha

Why it works: Klee applies too much Pyro to Vaporize consistently. Instead, we embrace it. Kazuha swirls Pyro (buffing Klee and Xiangling), Bennett buffs everyone, and Klee batteries Xiangling while driving damage.

2. Kleerina (Forward Vape)

  • Main DPS: Klee
  • Hydro: Furina
  • Healer: Baizhu / Bennett
  • Anemo: Kazuha / Xianyun

Why it works: Furina's Hydro application is slow enough that Klee often overtakes it, but Furina's buff is massive. Klee's constant attacks stack Fanfare well if you have a team healer.

Rotations & Combos

Machine Gun Klee (Normal Attack Cancel):
Hold Forward (W) > Tap Attack > Wait for arm swing > Tap Attack.
Result: Klee stutters forward, throwing bombs extremely fast.

Jump Cancel (Charged Attack):
N1 (Normal) > Charged Attack > Jump immediately after the laser appears.

Standard Combo (Stamina Safe):
N2C (Normal x2 -> Charged) or N1C (Normal -> Charged) to fish for Sparks.

Frequently Asked Questions

Why is Klee considered clunky?
Her range is short, her Charged Attacks consume stamina and knock small enemies away (making you chase them), and her animations are long unless you cancel them manually.

Is she better than Hu Tao/Yoimiya?
For pure single-target boss killing? No. But Klee shines in heavy AoE situations and provides more team energy generation than almost any other Pyro DPS.

Data Source: KQM Standards. Last Updated: December 2025

Genshin Impact. Hu Tao Guide: The Definitive Build & Analysis

Hu Tao Guide: The Definitive Build & Analysis

Hu Tao Genshin Impact Character Art
Rarity (5-Star)
Element Pyro
Weapon Polearm
Best Role On-Field Vaporize DPS
CV Priority CRIT > EM > HP% > ATK%
Tier S+ (Single Target Queen)

Hu Tao is the premier single-target DPS in Genshin Impact. She dominates the meta with her unique HP-to-ATK conversion mechanic and ability to vaporize her Charged Attacks continuously. She rewards skilled play (animation canceling) with some of the highest damage ceilings in the game.


Quick Guide (TL;DR)

If you don't have time for the math, here is the cheat sheet.

  • Best Artifact: 4pc Crimson Witch of Flames (Reaction) or 4pc Shimenawa's Reminiscence (Raw CA Dmg).
  • Alt Artifact: 4pc Marechaussee Hunter (Only with Furina).
  • Best Weapon: Staff of Homa (Signature) or Staff of the Scarlet Sands.
  • F2P Weapon: Dragon's Bane (High Refinement) or Ballad of the Fjords (BP).
  • Main Stats: SANDS: HP% or EM | GOBLET: Pyro DMG | CIRCLET: CRIT Rate/DMG.
  • Talent Priority: Normal Attack = Elemental Skill > Elemental Burst.
  • Top Team: Hu Tao + Yelan + Xingqiu + Zhongli (Double Hydro).
Pro Tip: Animation Canceling is mandatory. At C0, use Jump Cancels (N1CJ) to save stamina. At C1, use Dash Cancels (N1CD) for faster attacks and i-frames.

Need Primogems for Staff of Homa?

Get Genesis Crystals at a discounted price with instant delivery.

Top Up Secure & Fast via GameCharge

Talent Breakdown & Mechanics

Elemental Skill: Guide to Afterlife

  • Paramita Papilio State: Consumes 30% of current HP to infuse attacks with Pyro.
  • ATK Conversion: Converts Max HP into ATK. This cap is based on 400% of Base ATK, so you want high HP stats but a weapon with decent Base ATK.
  • Blood Blossom: Charged attacks apply a DoT flower. It deals tiny damage but applies Pyro every 4s.

Normal Attack: Secret Spear of Wangsheng

  • Charged Attack (CA): The bread and butter. Hu Tao's CA has no Internal Cooldown (ICD), meaning every single CA can trigger Vaporize.
  • Animation Cancel: The CA animation sends her flying forward. To maximize DPS, you must jump (C0) or dash (C1) immediately after the damage number appears to stop the forward momentum and start the next attack instantly.

Passive: Sanguine Rouge

  • Low HP Boost: When Hu Tao's HP is 50% or lower, she gains a 33% Pyro DMG Bonus.
  • Management: This is why you generally run shielders (Zhongli) instead of healers (Bennett/Kokomi) with her. You want to stay at low HP safely.

Talent Priority Order:

  1. Normal Attack (Level 10) - Increases CA multiplier.
  2. Elemental Skill (Level 9+) - Increases HP-to-ATK ratio.
  3. Elemental Burst (Level 6-8) - Good nuke, but less critical.

Stat Requirements & ER Thresholds

Hu Tao creates very few energy particles. However, her burst is optional in many rotations (especially Shimenawa builds).

Build Type EM Goal ER Requirement
Burst Every Rotation (CW) 100 - 200+ 110% - 130%
No Burst (Shimenawa) 100 - 200+ 0% (Base)

Substat Priority:

  1. Elemental Mastery (Until ~200-300 EM, often better than Crit initially)
  2. CRIT Rate / CRIT DMG (Target 70/200+)
  3. HP% (Always better than ATK%)
  4. ATK% (Least valuable)

Best Artifacts Comparison

Set Name Playstyle Reasoning
4pc Crimson Witch of Flames Balanced Classic BiS. Boosts Vaporize damage and Burst damage. Flexible and consistent.
4pc Shimenawa's Reminiscence Charged Attack Offers highest CA damage numbers but consumes energy, preventing Burst usage (and self-healing). Risky but high DPS.
4pc Marechaussee Hunter Furina Teams Best if running with Furina. The 36% Crit Rate is massive, allowing you to stack absurd Crit DMG.

Weapon Rankings

Weapon Type Performance Description
Staff of Homa CRIT DMG S+ Signature. HP Passive and massive Crit DMG. The perfect weapon for her.
Staff of Scarlet Sands CRIT Rate S Cyno's weapon. Very strong if you build high EM (EM Sands).
Dragon's Bane (R5) EM A+ (4-Star King) At R5, this beats many 5-star weapons (like Jade Spear). The passive DMG bonus and EM stat are perfect for Vape.
Ballad of the Fjords CRIT Rate A (BP) Battle Pass weapon. Solid stats and easy passive in varied teams.

Constellation Value

Hu Tao has one of the most impactful C1s in the game.

  • C1: Crimson Bouquet - (Game Changer) Charged Attacks consume no Stamina. This allows you to Dash Cancel (faster than Jump Cancel) and perform ~10-12 CAs per rotation instead of 8-9. Massive DPS and QoL increase.
  • C3: Lingering Carmine - (Damage) +3 Levels to Skill. Since her ATK conversion comes from Skill, this is a significant damage boost.
  • C6: Butterfly's Embrace - (Speedrun/Meme) When dropping below 25% HP, triggers 100% Crit Rate and 200% RES. Allows for "Crit Fish" builds with 300%+ Crit DMG.

Verdict: C1 is highly recommended. Stopping there is efficient.

Top Team Compositions

1. Double Hydro (The Standard)

  • Main DPS: Hu Tao
  • Sub-DPS: Yelan
  • Sub-DPS: Xingqiu
  • Shield: Zhongli / Layla / Thoma

Why it works: Hydro Resonance gives +25% HP (buffing Hu Tao, Yelan, and Zhongli). Yelan and Xingqiu apply so much Hydro that Hu Tao never fails to Vaporize.

2. Funerational (VV Vape)

  • Main DPS: Hu Tao
  • Sub-DPS: Yelan / Xingqiu
  • Swirl/Buff: Kazuha / Sucrose
  • Pyro App: Bennett / Amber / Thoma

Why it works: Higher ceiling but harder to play. You must apply Pyro with a second character first, Swirl it with Kazuha, then switch to Hu Tao. If you mess up the rotation, you lose damage.

3. Plunge Tao (Xianyun)

  • Main DPS: Hu Tao
  • Support: Xianyun
  • Hydro: Furina
  • Hydro: Yelan

Why it works: Hu Tao has decent plunge multipliers. Xianyun heals the team (for Furina stacks) and enables plunge. This solves Hu Tao's stamina issues at C0.

Rotations & Combos

Standard C0 Combo (N2CJ):
Normal Attack x2 > Charged Attack > Jump > Repeat.

Standard C1 Combo (N2CD):
Normal Attack x2 > Charged Attack > Dash > Repeat.

Macro Rotation (Double Hydro):
Xingqiu Q E E > Yelan E Q > Zhongli Hold E > Hu Tao E -> Combos -> Q (Optional)

Frequently Asked Questions

Should I pull C1 or Homa?
Generally, C1 provides a bigger gameplay improvement and fun factor. Homa is a bigger number increase but you can clear content fine with Dragon's Bane. C1 changes how you play.

Can I use Bennett with Hu Tao?
Yes, but it's tricky. Bennett heals past 50%, removing her Pyro DMG bonus. However, Bennett's ATK buff is usually larger than the loss of her passive, so it's still a net gain—just less comfortable.

Data Source: KQM Standards. Last Updated: December 2025

Genshin Impact. Gaming Guide: The Definitive Build & Analysis

Gaming Guide: The Definitive Build & Analysis

Gaming Genshin Impact Character Art
Rarity (4-Star)
Element Pyro
Weapon Claymore
Best Role Plunge Main DPS
CV Priority CRIT > EM > ATK% > ER
Tier S (At C6) / A (At C0)

Gaming (pronounced "Ga-ming") is often called a "Hidden 5-Star." He is a Pyro Plunge DPS who uses his elemental skill to leap into the air and crash down with a special "Charmed Cloudstrider" attack. With his ability to consume and heal his own HP, he synergizes perfectly with Furina.


Quick Guide (TL;DR)

If you don't have time for the math, here is the cheat sheet.

  • Best Artifact: 4pc Marechaussee Hunter (With Furina) or 4pc Crimson Witch.
  • Best Weapon: Serpent Spine (BP) or Verdict (5⭐).
  • F2P Weapon: Tidal Shadow (Fontaine Craftable) or Mailed Flower (Event).
  • Main Stats: SANDS: EM or ATK% | GOBLET: Pyro DMG | CIRCLET: CRIT Rate/DMG.
  • Talent Priority: Elemental Skill > Elemental Burst > Normal Attack.
  • Top Team: Gaming + Xianyun + Furina + Bennett (FFXX).
Pro Tip: Gaming's damage comes from his Elemental Skill (the plunge is considered Plunge DMG but scales off Skill Talent). Leveling his Normal Attack talent is optional unless you run him with C6 Bennett.

Need Primogems for C6 Gaming?

Get Genesis Crystals at a discounted price with instant delivery.

Top Up Secure & Fast via GameCharge

Talent Breakdown & Mechanics

Elemental Skill: Bestial Ascent

  • Function: Gaming dashes forward and leaps into the air.
  • Charmed Cloudstrider: While airborne from this skill, use a Plunge Attack to perform a special Pyro Plunge.
  • HP Mechanic: Consumes 15% HP on cast. Heals 10% HP if the Plunge hits. This constant fluctuation stacks Furina's Fanfare points rapidly.

Elemental Burst: Suanni's Gilded Dance

  • Function: Enters "Wushou Stance." Applies Pyro to self (cleanses), recovers 30% HP, and summons his companion, Man Chai.
  • Man Chai: This little lion smashes the target then rolls back to Gaming. When it touches him, it resets his Elemental Skill Cooldown.
  • The Loop: Skill > Plunge > Man Chai Returns > Skill Reset > Skill > Plunge.

Normal Attack: Stellar Rend

  • Usage: Only used if you are playing with Xianyun (Cloud Retainer) to fill gaps with regular plunges, or with C6 Bennett for infusion. Generally lower priority than Skill.

Talent Priority Order:

  1. Elemental Skill (Level 9+) - The source of his "Special Plunge" damage.
  2. Elemental Burst (Level 8) - Required for the reset loop.
  3. Normal Attack (Level 6) - Only if using regular plunges via Xianyun.

Stat Requirements & ER Thresholds

Gaming needs his Burst to reset his Skill. Without it, he does one jump and stands there uselessly. Energy Recharge is vital.

Team Context ER Requirement (C0-C3) ER Requirement (C4+)
Solo Pyro 180% - 200% 140% - 150%
Double Pyro (w/ Bennett) 160% - 170% 120% - 130%
Triple Pyro (w/ Xianyun) 130% - 140% 110% - 120%

Substat Priority:

  1. CRIT Rate / DMG (Target 64% Rate if using MH set)
  2. Elemental Mastery (100-200 for Vaporize)
  3. Energy Recharge (Until requirements met)
  4. ATK%

Best Artifacts Comparison

Set Name Team Reasoning
4pc Marechaussee Hunter (MH) With Furina Best in Slot. Gaming triggers the 36% CRIT Rate passive instantly by himself.
4pc Crimson Witch Vape / Melt Classic choice. Maximizes reaction damage. Better than MH if you don't use Furina.
4pc Gilded Dreams Reaction Solid option for high EM stats, but usually weaker than CW or MH.

Weapon Rankings

Weapon Type Performance Description
Serpent Spine (R5) CRIT Rate S+ (BP) At R5, this rivals 5-star weapons. Requires Bennett to offset low base ATK.
Verdict / Redhorn CRIT Rate/DMG S Premium 5-star stat sticks. Verdict offers high ATK, Redhorn offers high CRIT DMG.
Rain Slasher (R5) EM A+ (Vape) Amazing for Vaporize teams if the enemy maintains Hydro aura.
Tidal Shadow (R5) ATK% A (F2P) Fontaine craftable. Passive triggers easily with Furina/Healers, giving massive ATK%.

Constellation Value

Gaming is functional at C0, but C6 makes him a monster.

  • C1: Bringer of Blessing - (Energy) Man Chai heals 15% HP and restores energy. Helps lower ER needs.
  • C4: Soar Across Mountains - (Energy) Landing a Plunge restores 2 Energy. This significantly drops his ER requirements (see table above).
  • C6: To Tame All Beasts - (The Nuke) Skill Plunge CRIT Rate +20%, CRIT DMG +40%, and Attack Radius increased. This turns him into a 5-star equivalent DPS.

Verdict: Aim for C6 during Lantern Rite selectors or banners.

Top Team Compositions

1. FFXX (Premium Plunge)

  • Main DPS: Gaming
  • Enabler: Xianyun (Cloud Retainer)
  • Buffer: Furina
  • Support: Bennett (C6)

Why it works: The highest ceiling team. Xianyun buffs Plunge DMG, Furina buffs DMG% and applies Hydro, Bennett buffs ATK. Gaming's HP mechanics stack Furina's fanfare instantly.

2. Melt Plunge

  • Main DPS: Gaming
  • Cryo: Rosaria / Ganyu / Kaeya
  • Anemo: Sucrose / Kazuha / Xianyun
  • Healer: Bennett / Diona

Why it works: Gaming applies Pyro somewhat slowly, allowing him to trigger Melt (2.0x Multiplier) consistently on Frozen or Cryo-aura enemies.

Rotations & Combos

Standard Loop:
Supports Setup > Gaming E (Plunge) > Gaming Q > E (Plunge) > Wait for Man Chai > E (Plunge)... repeat x5.

Tip: After landing a plunge, dash towards Man Chai (the pet) to reset your cooldown faster. Don't just stand there!

Frequently Asked Questions

Is Gaming better than Diluc?
At C6, yes, Gaming generally outputs higher damage ceilings than C0 Diluc, especially in Furina/Xianyun teams. At C0, they are comparable, but Gaming feels clunkier without ER.

Do I need Xianyun?
Xianyun is his best support, but he works fine with Bennett/Kazuha/Xingqiu. However, Xianyun turns him into a top-tier unit.

Data Source: KQM Standards. Last Updated: December 2025

Genshin Impact. Diluc Guide: The Definitive Build & Analysis

Diluc Guide: The Definitive Build & Analysis

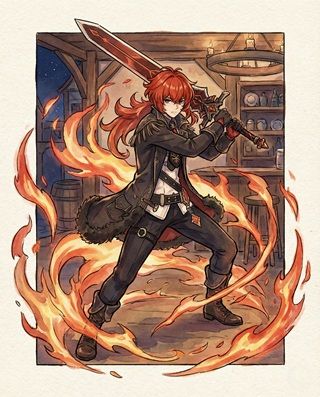
Diluc Genshin Impact Character Art
Rarity (5-Star Standard)
Element Pyro
Weapon Claymore
Best Role Vaporize / Plunge DPS
CV Priority CRIT > EM (Vape) > ATK% > ER
Tier A (With Xianyun) / B (Classic)

Diluc, the uncrowned king of Mondstadt, has seen a massive resurgence thanks to Xianyun (Cloud Retainer). While his classic "weaving" playstyle is solid, his new "Plunge" playstyle boasts some of the highest scaling in the game, allowing him to compete with top-tier meta units.


Quick Guide (TL;DR)

If you don't have time for the math, here is the cheat sheet.

  • Best Artifact: 4pc Crimson Witch of Flames (Vaporize/Melt).
  • Alt Artifact: 4pc Marechaussee Hunter (Only if played with Furina).
  • Best Weapon: Redhorn Stonethresher (With Bennett) or Wolf's Gravestone (General).
  • F2P Weapon: Mailed Flower (Event) or Rainslasher (Vaporize).
  • Main Stats: SANDS: EM or ATK% | GOBLET: Pyro DMG | CIRCLET: CRIT Rate/DMG.
  • Talent Priority: Normal Attack (Plunge) = Skill > Elemental Burst.
  • Top Team: Diluc + Xianyun + Furina + Bennett (Plunge Vape).
Pro Tip: If using **Xianyun**, do not weave Normal Attacks between skills. Just spam Plunge Attacks. Diluc has the highest Plunge Multiplier of any Claymore user.

Need Primogems for Standard Banner?

Get Genesis Crystals at a discounted price with instant delivery.

Top Up Secure & Fast via GameCharge

Talent Breakdown & Mechanics

Normal Attack: Tempered Sword

  • Usage: Primary source of damage when infused with Pyro.
  • Plunge: Diluc has exceptionally high Plunge scaling. With Xianyun (Cloud Retainer), spamming Plunge attacks becomes his highest DPS combo.

Elemental Skill: Searing Onslaught

  • Function: A three-part slash dealing Pyro DMG.
  • Weaving: In classic teams, you should "weave" normal attacks between the slashes (e.g., NA > Skill > NA > Skill) to maximize damage and cancel animations.
  • Note: You can wait a few seconds between casts without the cooldown resetting, allowing for flexibility.

Elemental Burst: Dawn

  • Cost: 40 Energy | Cooldown: 12s
  • Analysis: Launches a Phoenix that pushes enemies back.
  • The Core: Upon casting, Diluc's weapon becomes Infused with Pyro for 8s (extends to 12s with A4 passive). This infusion cannot be overridden by Bennett C6 (which is also Pyro) but enables him to be a Main DPS.

Talent Priority Order:

  1. Normal Attack (Level 9+) - Priority for Plunge/Normal attacks.
  2. Elemental Skill (Level 9) - Priority for weaving.
  3. Elemental Burst (Level 8) - Lowest priority, mostly for infusion.

Stat Requirements & ER Thresholds

Diluc has a very cheap burst (40 cost), so he needs almost zero ER in most teams.

Role EM Goal (Vape) ER Requirement
Classic Vaporize 100 - 200 100% - 110%
Plunge (Xianyun) 150 - 300 100% (Base)

Substat Priority:

  1. CRIT Rate / DMG (Target 70/160+)
  2. Elemental Mastery (Crucial for amplifying reaction damage)
  3. ATK% (Less valuable if using Bennett)
  4. Energy Recharge

Best Artifacts Comparison

Set Name Role Reasoning
4pc Crimson Witch of Flames Best in Slot Designed for him. Diluc can trigger the 3-stack effect easily with his 3 Skill casts, maximizing Pyro DMG.
4pc Marechaussee Hunter Furina Teams Grants 36% CRIT Rate. Only works if Furina is on the team to drain HP.
4pc Gilded Dreams Stat Stick Good EM and ATK stats if you don't have a good Crimson Witch set.

Weapon Rankings

Weapon Type Performance Description
Redhorn Stonethresher CRIT DMG S+ Actually stronger than WGS in Bennett teams. Massive CRIT stick.
Wolf's Gravestone ATK% S His signature. High ATK is great, but suffers from diminishing returns if Bennett/Noblesse are used.
Serpent Spine (R5) CRIT Rate S (BP) At R5, this beats R1 Wolf's Gravestone. Requires a shielder or careful play to maintain stacks.
Rainslasher (R5) EM A+ (Vape) Surprising powerhouse for Vaporize. Use this over Prototype Archaic always.

Constellation Value

Diluc's constellations are decent, but not game-breaking until C6.

  • C1: Conviction - (Ok) Deals 15% more DMG to enemies with >50% HP. Good for opening strikes.
  • C2: Searing Ember - (Strong) Taking DMG increases ATK and ATK SPD. Great if playing without a shield (or with Furina drain).
  • C6: Flaming Sword, Nemesis of Dark - (Combo Changer) Skill casting doesn't reset Normal Attack combo string. Increases ATK SPD and DMG of the next 2 attacks. Makes his "weave" gameplay extremely fluid.

Verdict: C0 is fine. He gets steady upgrades over time as you lose 50/50s.

Top Team Compositions

1. Plunge Diluc (The Meta)

  • Main DPS: Diluc
  • Enabler: Xianyun (Cloud Retainer)
  • Buffer: Furina
  • Support: Bennett (C6 preferred)

Why it works: Xianyun allows Diluc to jump high. Plunge attacks have no ICD (Internal Cooldown), meaning every single plunge triggers Vaporize. This is his highest damage ceiling.

2. Classic Vaporize

  • Main DPS: Diluc
  • Hydro: Xingqiu / Yelan
  • Buffer: Bennett
  • Swirl: Kazuha / Sucrose

Why it works: The standard rotation. Xingqiu applies Hydro, Diluc weaves NAs and Skills to vaporize hits. Reliable and easy to play.

Rotations & Combos

Plunge Rotation (Xianyun):
Furina E Q > Xianyun E Q > Bennett E Q > Diluc Q -> Plunge Spam

Classic Weave (C0):
Diluc Q > N2 E (Normal x2 -> Skill) > N2 E > N2 E

Frequently Asked Questions

Is Diluc still good?
Yes! While he was power-crept by Hu Tao for years, the release of Xianyun and Furina has brought him back to the top meta as a premier Plunge DPS.

Wolf's Gravestone or Serpent Spine?
If you run Bennett (which you should), R5 Serpent Spine generally deals more damage due to the CRIT and DMG% stats. WGS gives too much ATK which suffers diminishing returns.

Data Source: KQM Standards. Last Updated: December 2025

Genshin Impact. Dehya Guide: The Definitive Build & Analysis

Dehya Guide: The Definitive Build & Analysis

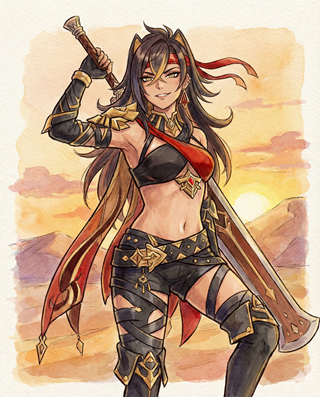
Dehya Genshin Impact Character Art
Rarity (5-Star Standard)
Element Pyro
Weapon Claymore
Best Role Interruption Resistance Support / Burgeon
Stat Priority HP > EM (Burgeon) > CRIT (C6 DPS)
Tier B (Niche) / A (Neuvillette/Lyney Teams)

Dehya is a mercenary "Bodyguard" who introduces unique mechanics: Damage Mitigation and Interruption Resistance. While she is not a top-tier DPS at C0, she is invaluable for characters who need to stand still and attack (Neuvillette, Lyney, Mualani) without getting knocked back.


Quick Guide (TL;DR)

If you don't have time for the math, here is the cheat sheet.

  • Best Artifact: 4pc Tenacity of the Millelith (Support) or 4pc Vourukasha's Glow (DPS/C1+).
  • Best Weapon: Beacon of the Reed Sea (Signature) or Favonius Greatsword (Support).
  • F2P Weapon: The Bell (High HP Stat Stick - finally useful!).
  • Main Stats: SANDS: HP% | GOBLET: HP% or Pyro | CIRCLET: HP% or CRIT.
  • Talent Priority: Elemental Skill (Crown) > Elemental Burst > Normal Attack.
  • Top Team: Dehya + Neuvillette + Kazuha + Fischl.
Pro Tip: Dehya's "Gold-Forged Form" (Infinite Poise) only lasts for 9 seconds after casting her skill. Rotate quickly to make the most of it with your Main DPS.

Need Primogems for Standard Banner?

Get Genesis Crystals at a discounted price with instant delivery.

Top Up Secure & Fast via GameCharge

Talent Breakdown & Mechanics

Elemental Skill: Molten Inferno

  • Field of Fire: Creates a "Fiery Sanctum" that deals coordinated Pyro DMG every 2.5s. It applies Pyro slowly (good for Burning, bad for Vaporize).
  • Redmane's Blood: When active characters take damage, a portion is mitigated and transferred to Dehya (Redmane's Blood). She takes this damage over 10s.
  • Gold-Forged Form (Passive 1): Upon casting E, all party members gain massive Interruption Resistance for 9s. This is her most valuable support utility.

Elemental Burst: Leonine Bite

  • The Punching: Dehya enters a state where she punches automatically (you can mash attack to speed it up).
  • Usage: At C0, this is often a DPS loss compared to just using your Main DPS. Use it only if you need to tank damage or kill time while waiting for cooldowns.
  • Note: This counts as "Burst Damage," so it does not trigger Xingqiu or Yelan's rain swords.

Passive: Self-Healing

  • Survival: When Dehya drops below 40% HP, she instantly heals 20% HP and regenerates more over time. This makes her incredibly tanky even without a healer.

Talent Priority Order:

  1. Elemental Skill (Level 9+) - Increases Mitigation %.
  2. Elemental Burst (Level 6-8) - Optional at C0.
  3. Normal Attack (Level 1) - Ignore.

Stat Requirements & ER Thresholds

Dehya scales with both ATK and HP (C1 makes HP significantly better). For support, prioritize HP to survive the damage she absorbs.

Role Target HP ER Requirement
Pure Support (Tenacity) 50,000+ N/A (Don't Burst)
Burst DPS (Emblem) 30,000+ 180% - 200%
Burgeon Trigger Max EM N/A

Substat Priority:

  1. HP% (Survivability & C1 DMG)
  2. CRIT Rate / DMG (Only for C1+ DPS builds)
  3. Elemental Mastery (Only for Burgeon)
  4. Energy Recharge (If bursting)

Best Artifacts Comparison

Set Name Role Reasoning
4pc Tenacity of the Millelith Support Her skill hits automatically off-field, keeping the 20% ATK buff active permanently. Best choice for Neuvillette/Lyney teams.
4pc Vourukasha's Glow Personal DPS Designed for her. Increases Skill and Burst DMG when she takes damage (which she does constantly via Redmane's Blood).
4pc Flower of Paradise Lost Burgeon Maximizes Burgeon reaction damage. 4pc Gilded Dreams is a close second.

Weapon Rankings

Weapon Type Performance Description
Beacon of the Reed Sea CRIT / HP S+ Signature. Provides CRIT Rate and HP% when taking damage. Hard to get as it is no longer on limited banners.
The Bell HP% S (Support) Usually a meme weapon, but perfect for Support Dehya due to massive HP stat. Passive shield is a bonus.
Favonius Greatsword ER% A (Utility) Use this if your team needs energy particles (e.g. Mono Pyro teams).
Mailed Flower EM S (Burgeon) Event weapon. Massive EM stat stick for Burgeon triggers.

Constellation Value

Dehya is a standard banner character, so you may get constellations randomly.

  • C1: The Flame Incandescent - (Core Fix) Increases Dehya's Max HP by 20% and significantly boosts her Skill/Burst damage scaling based on HP. Makes DPS builds viable.
  • C2: The Sand-Blades Glittering - (Comfort) Increases the duration of her Skill's field by 6s. Great for 100% uptime on Burgeon/Tenacity.
  • C6: The Burning Claws Cleaving - (DPS Spike) Increases Burst CRIT Rate by 10% and CRIT DMG by 15% per punch. Turns her into a respectable Burst DPS.

Verdict: C0 is fine for support. C1 is required if you want her to deal personal damage.

Top Team Compositions

1. Neuvillette / Lyney Bodyguard

  • Main DPS: Neuvillette / Lyney / Mualani
  • Support: Dehya (Tenacity)
  • Buffer: Kazuha / Furina
  • Flex: Baizhu / Zhongli / Fischl

Why it works: Neuvillette and Lyney are easily interrupted. Dehya provides "Infinite Poise" for 9s, allowing them to complete their combos. She also applies enough Pyro for Lyney's passive or Neuvillette's Vaporize.

2. AFK Burgeon

  • Dendro: Nahida
  • Hydro: Xingqiu / Yelan
  • Trigger: Dehya (Full EM)
  • Flex: Kokomi / Yaoyao

Why it works: Dehya's skill hits slowly (2.5s), which is actually perfect for Burgeon because it prevents "Burning" the enemies too fast, ensuring seeds are created and detonated consistently. It also requires no energy.

Rotations & Combos

Support Rotation:
Dehya E E (Place Field) > Main DPS Rotations > Finish before 9s Poise expires.

Burst Rotation (C1+):
Bennett Q E > Kazuha E Q > Xiangling Q E > Dehya Q (Mash Attack)

Frequently Asked Questions

Is Dehya bad?
She was considered weak on release because her numbers are low for a standard DPS. However, as a Utility Support (TotM holder, Interruption Resistance), she is excellent and irreplaceable in certain Neuvillette/Mualani teams.

Does she die off-field?
Redmane's Blood can kill her if she takes too much damage, but her A4 passive heals her automatically when she gets low. In 99% of cases, she is immortal.

Data Source: KQM Standards. Last Updated: December 2025

Genshin Impact. Chevreuse Guide: The Definitive Build & Analysis

Chevreuse Guide: The Definitive Build & Analysis

Chevreuse Genshin Impact Character Art
Rarity (4-Star)
Element Pyro
Weapon Polearm
Best Role Overload Support / Healer
Stat Priority HP (to 40k) > Healing Bonus > ER
Tier S (In Overload) / F (Otherwise)

Chevreuse is the "Nilou of Overload." She transforms the Overload reaction from a nuisance into a deadly tool. By replacing the need for an Anemo unit (Kazuha/VV), she shreds enemy resistances simply by triggering reactions, while also providing healing and ATK buffs.


Quick Guide (TL;DR)

If you don't have time for the math, here is the cheat sheet.

  • Best Artifact: 4pc Noblesse Oblige (Buffer) or 4pc Song of Days Past (Healer).
  • Best Weapon: Rightful Reward (Craftable/F2P) or Favonius Lance (Battery).
  • F2P Weapon: Black Tassel (3⭐ - Maximum HP stat stick).
  • Main Stats: SANDS: HP% | GOBLET: HP% | CIRCLET: HP% or Healing Bonus.
  • Talent Priority: Elemental Skill > Elemental Burst > Normal Attack (Ignore).
  • Top Team: Chevreuse + Raiden Shogun + Sara + Bennett (Raiden Hypercarry Overload).
Critical Restriction: Chevreuse's resistance shred ONLY works if your party consists exclusively of Pyro and Electro characters. Bringing one Anemo, Geo, Cryo, Dendro, or Hydro unit disables her main passive entirely.

Need Primogems for C6 Chevreuse?

Get Genesis Crystals at a discounted price with instant delivery.

Top Up Secure & Fast via GameCharge

Talent Breakdown & Mechanics

Passive 1: Vanguard's Coordinated Tactics

  • The "Anti-VV" Effect: If your team is ONLY Pyro and Electro, triggering Overload reduces the enemy's Pyro AND Electro RES by 40% for 6s.
  • Why it's good: It frees up Kazuha/Sucrose for your other team in Abyss and is easier to execute (no swirling needed).

Elemental Skill: Short-Range Rapid Interdiction Fire

  • Tap: Quick damage. Don't use this.
  • Hold (Targeted Shot): If a party member triggers Overload, Chevreuse gains an "Overcharged Ball." Holding E fires this ball, dealing higher damage and—crucially—activating her ATK buff (Passive 2).
  • Healing: After firing, she heals the active character continuously for 12s.

Passive 2: Vertical Force Coordination

  • The Buff: After firing an "Overcharged Ball" (Hold E), all Pyro and Electro party members gain ATK based on Chevreuse's Max HP.
  • Scaling: 1% ATK for every 1,000 HP. Maxes out at 40% ATK (requires 40,000 HP).

Talent Priority Order:

  1. Elemental Skill (Level 9+) - Increases Healing.
  2. Elemental Burst (Level 6) - Just for extra damage.
  3. Normal Attack (Level 1) - Ignore.

Stat Requirements & ER Thresholds

Your primary goal is hitting 40,000 HP. Everything else is secondary.

Build Type Target HP Target ER
Max Buffer (Recommended) 40,000+ 120% - 140%
Sub-DPS (Hybrid) 30,000 150%+

Substat Priority:

  1. HP% (Until 40k)
  2. Flat HP
  3. Energy Recharge
  4. CRIT Rate (Only if using Favonius Lance)

Best Artifacts Comparison

Set Name Recommendation Reasoning
4pc Noblesse Oblige Best for Team DMG If no one else has it (e.g. Bennett isn't on the team), use this for the 20% ATK buff. Stacks with her passive.
4pc Song of Days Past Best for Personal Healing Converts her healing into a flat damage buff. Great if Bennett is already holding Noblesse.
2pc HP / 2pc HP Easiest to Build Mix sets like Vourukasha's Glow and Tenacity to hit the 40k HP cap easily.

Weapon Rankings

Weapon Type Performance Description
Rightful Reward HP% / Craftable S+ (F2P BiS) Craftable Fontaine polearm. Gives HP and refunds Energy when healed. Perfect synergy.
Black Tassel HP% / 3-Star S The "Slime Killer." Highest HP stat stick for Polearms. Use this if you struggle to reach 40k HP.
Favonius Lance ER% / Gacha A (Utility) Good for generating particles for energy-hungry teammates (like Xiangling), but makes hitting 40k HP harder.

Constellation Value

Chevreuse is complete at C0, but C6 transforms her into a top-tier buffer comparable to Kazuha.

  • C1: Stable Front Line's Resolve - (Comfort) Triggers 6 Energy for the active character when they trigger Overload. Great for rotation smoothness.
  • C4: Secret Method... - (Niche) Allows you to Hold E twice. Mostly for DPS Chevreuse memes.
  • C6: Pursuit of Ending Evil - (Broken) After 12s of healing from her Skill, she grants up to 60% Pyro DMG Bonus and 60% Electro DMG Bonus to the team. This rivals Kazuha's buffing capabilities.

Verdict: C0 is perfectly functional. Aim for C6 over time for massive damage spikes.

Top Team Compositions

1. Raiden Hyper-Overload

  • Main DPS: Raiden Shogun
  • Sub-DPS: Yae Miko / Fischl
  • Buffer: Bennett / Sara
  • Support: Chevreuse

Why it works: Chevreuse shreds Electro RES for Raiden/Yae and Pyro RES for Bennett/Xiangling. Unlike Kazuha, she doesn't need to be on-field to swirl both elements.

2. Yoimiya/Arlecchino Overload

  • Main DPS: Yoimiya / Arlecchino
  • Electro App: Fischl (C6 is best) / Beidou
  • Utility: Thoma / Dehya
  • Support: Chevreuse

Why it works: Overload knocks small enemies back, which usually hurts melee DPS. However, Yoimiya (ranged) and Arlecchino (huge lunge range) don't care about knockback, making them perfect partners.

Rotations & Combos

The "Overcharged" Rotation:
Raiden E > Bennett E Q (Triggers Overload) > Chevreuse HOLD E (Fires ball) > Chevreuse Q > DPS Rotation

Tip: Always trigger an Overload reaction before swapping to Chevreuse. She needs that reaction to spawn the "Overcharged Ball" for her Hold E.

Frequently Asked Questions

Is she better than Kazuha?
In Overload Teams, yes. She shreds both elements instantly without complex double-swirling setups and frees Kazuha for your second team. In non-Overload teams, she is useless.

Does she work with Clorinde?
Yes! Clorinde loves Overload teams and benefits greatly from the RES shred and ATK buff Chevreuse provides.

Data Source: KQM Standards. Last Updated: December 2025